To Create Field in Google Data Studio
- Connect your data source.
- Create a chart.
- In the metric section, click on “CREATE FIELD“.
- Give the field a name.
- Specify the custom formula (e.g., Subscribers/10).
- Select the data type (default is Number).
- Set the comparison calculation (default is None).
- Define the running calculation (default is None).
- Click “Apply” to save changes.
- Choose a default aggregation function for the field (e.g., Sum).
Hello everyone. Today, we are going to learn how to create fields in Google Data Studio. What are custom fields? and why do we need them? In previous articles, we have already seen some sample datasets and seen dimensions and metrics, metrics are nothing but the column names in your data. Now, think about this data on a Google Sheets file, can we add columns? Yes, we surely can.
Now think of this data on a pivot table. Remember calculated fields? We don’t need to add helping columns originally to perform extra calculations. We can directly adjust extra calculations for columns in a calculated field. Similarly, when we connect a Google Sheets data source or any other data source to Google Data Studio, the columns are fixed, we can not directly make changes to the data source whether it’s a sample data source or any originally existing.
Here custom fields come onto the table. Yes, we can not change or add the data columns, but we can create custom fields in the metrics and perform calculations to show on charts without making any changes to the original data.
Why Use Fields in Google Data Studio?
As we have already learned about Google Sheets, and we have seen calculated fields inside pivot tables. You can think of custom fields just like the calculated fields. Yet, there is another benefit of custom fields. The purpose of calculated fields is to avoid extra columns to the original data set and create a calculated field only in the pivot table, but there is no obligation to use the calculated field, it’s up to a user whether you want to add a calculated field or helping columns.
But, here in Data Studio after you have connected the data source if the data source is coming from a platform like Google Analytics or Google AdWords, then you can not originally add a helping column to it, yes it can be done but can be very tricky and tedious for beginners, so instead without changing the original data, we can easily create custom fields to avoid consumption of time and effort.
That’s why creating custom fields are important and helpful, and therefore we need to learn how to create fields in Google Data Studio.
How to Create Fields in Google Data Studio?
Here, we will see two possible use cases to create different types of custom fields in Google Data Studio. First, we will connect a custom Google Sheets file with Data Studio, and we will see how to create fields to this sheet’s file without adding any column to the original data.
Secondly, we will connect a Sample data source from the available Google Platforms, such as Google Analytics for which we don’t have direct access to add columns, still, we can add custom fields in sample files without changing them originally.
Create Field in Google Data Studio – Custom Google Sheet as Data Source
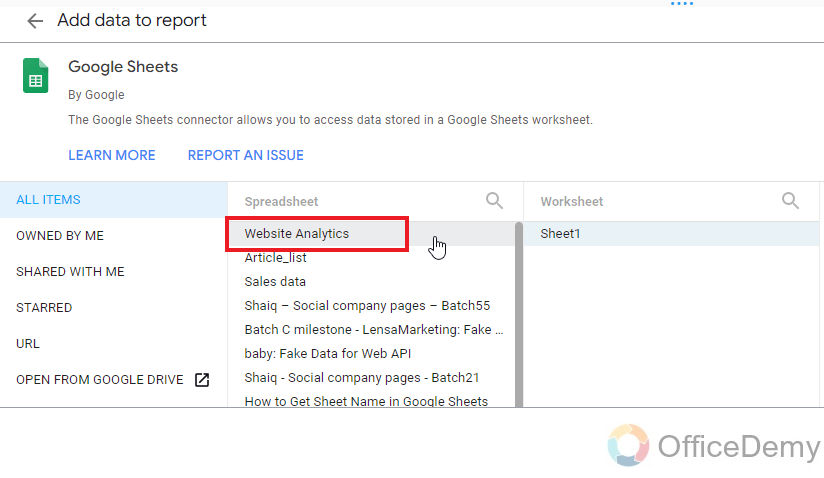
In this section, we will learn how to create fields in Google Data Studio using a custom google sheet as a data source. So, I have some dummy website analytics in a google sheets file, I have a column “Subscribers”, and a column “Revenue“, and the revenue has some random values, now I can use a logic (Subscriber/10) to get the values for Revenue column. (This is just an imaginary condition to calculate revenue)
Let’s see below a practical example.
Step 1
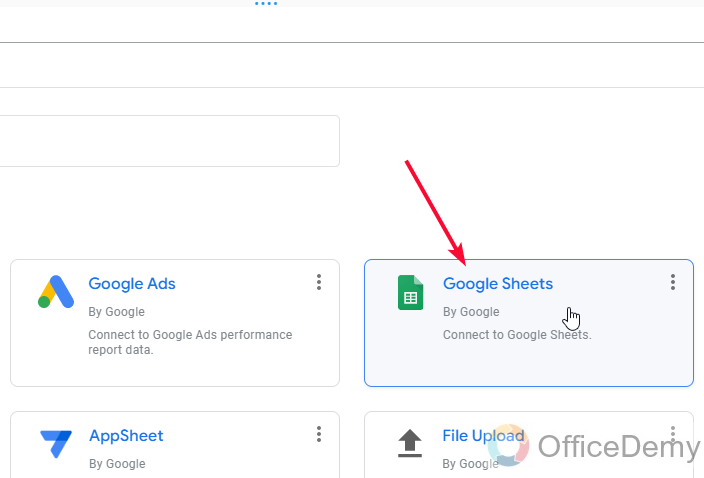
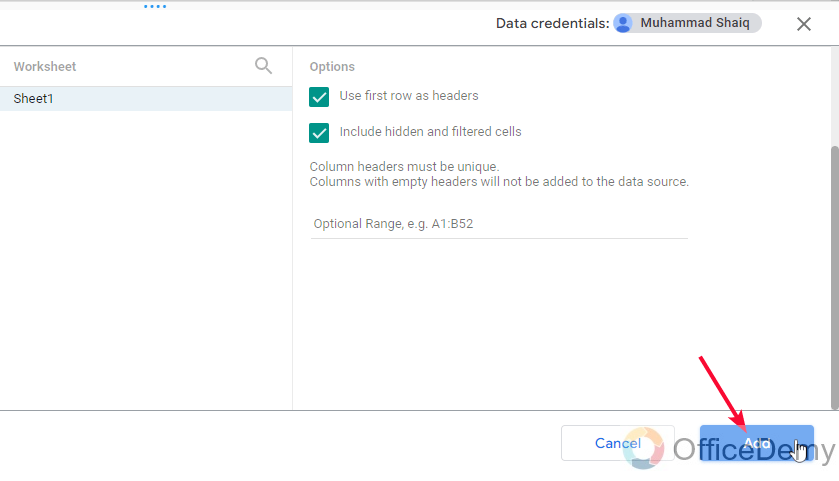
Connect a data source (Example: Google Sheets)
Step 2
Create any chart (Example: Scorecard)
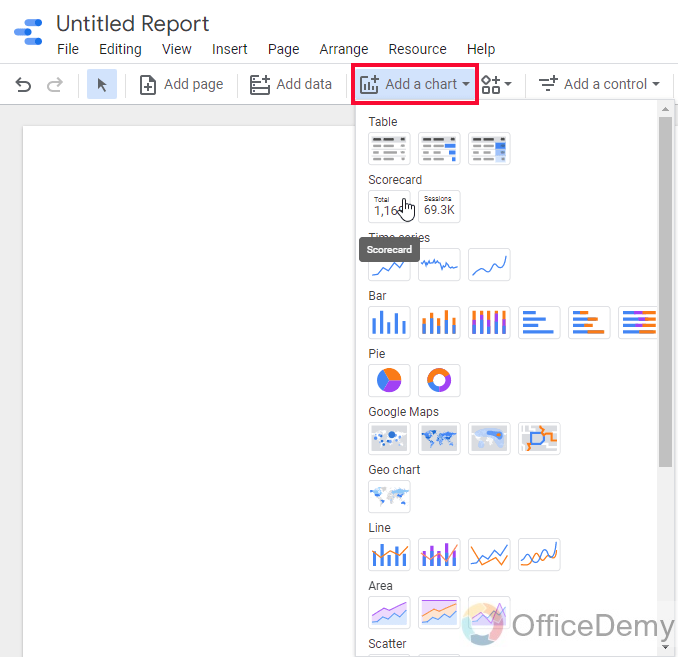
Step 3
In the metric section, you have all your column names
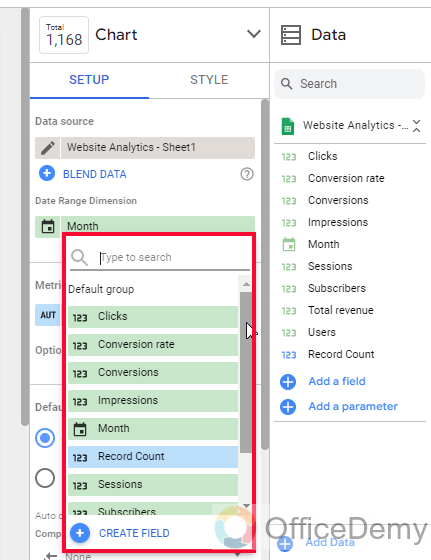
Step 4
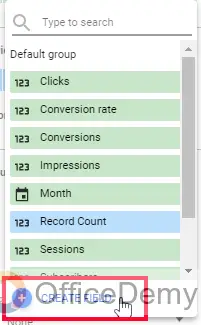
Below you have the “CREATE FIELD” button, click on it to create a custom field
Step 5
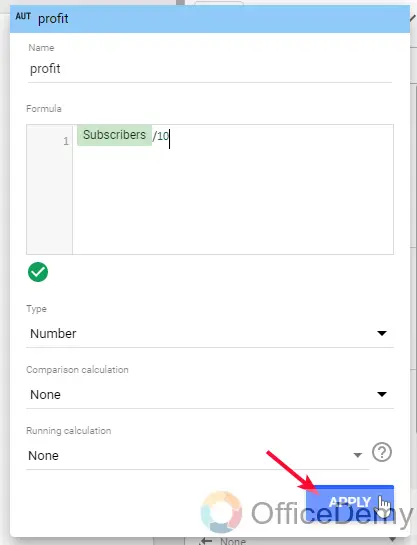
Give a name to the field.
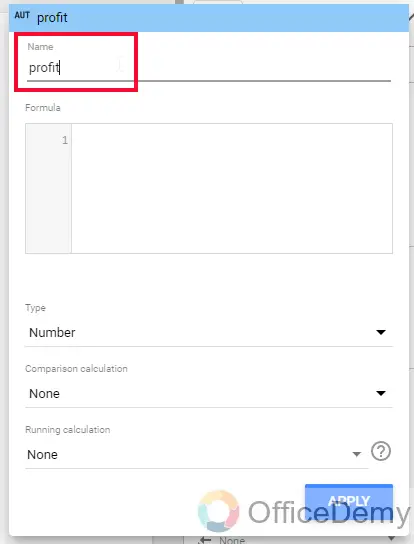
Step 6
Now below, you need to specify the custom formula (like Google Sheets custom formulas e.g., Subscribers/10)
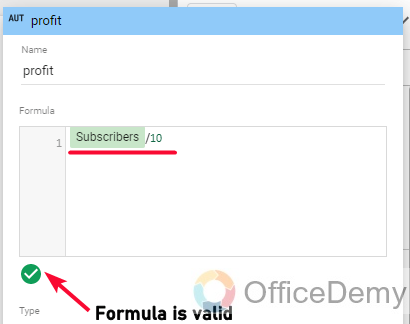
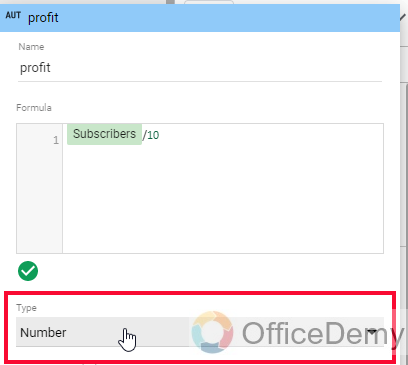
Step 7
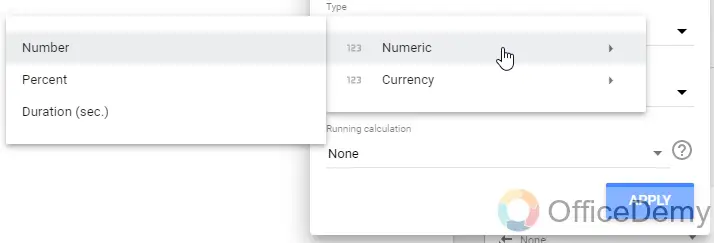
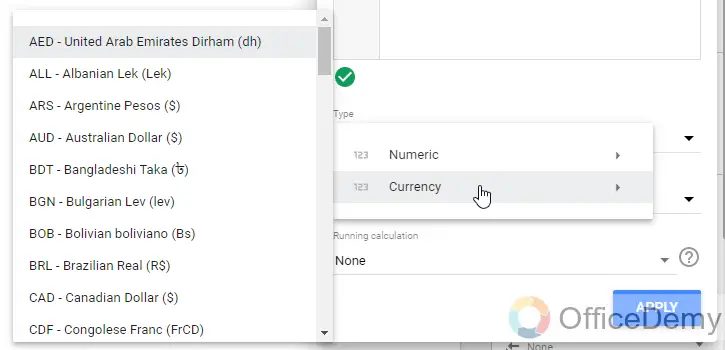
Below you can specify the data type of this field (Default Type = Number)
 \
\
Step 8
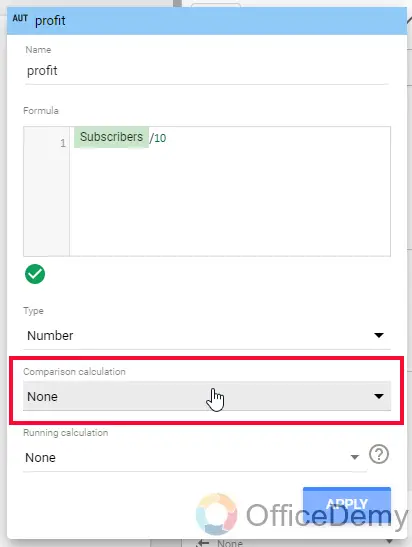
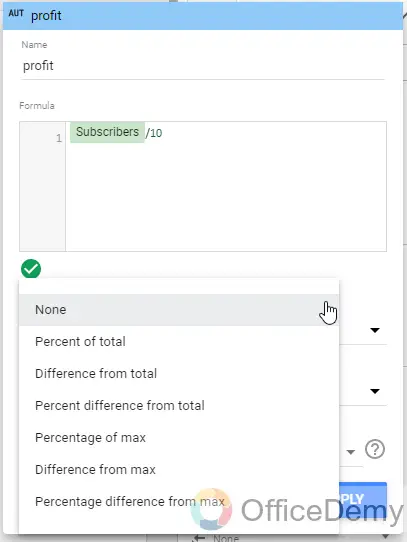
Below you can select the comparison calculation (Default value = None)
Step 9
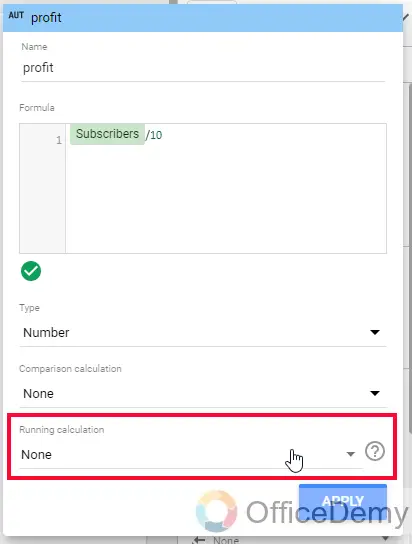
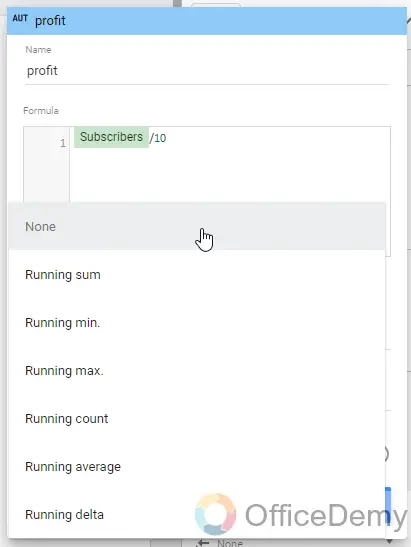
Further below, you can select the running calculation (Default value = None)
Step 10
Once you’re done, click on Apply
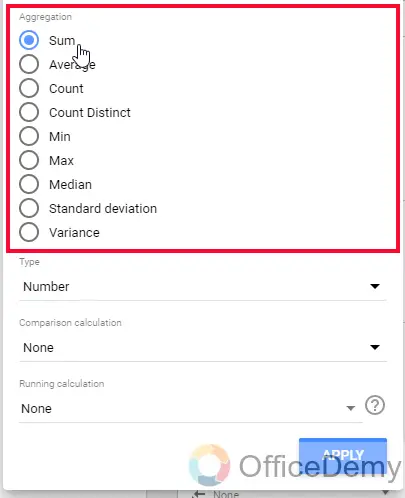
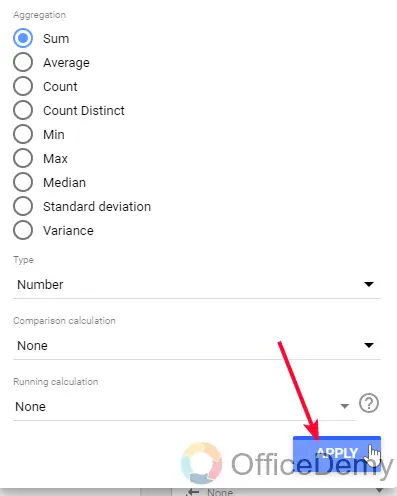
Step 11
Select a default aggregation function for this field (that can also be changed later), and then click on the apply button to save this field.
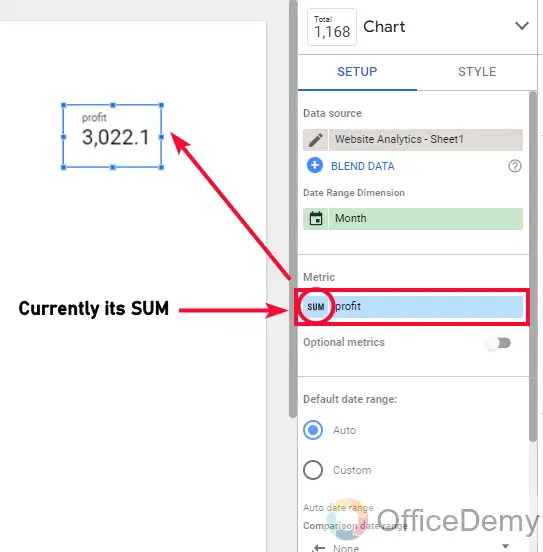
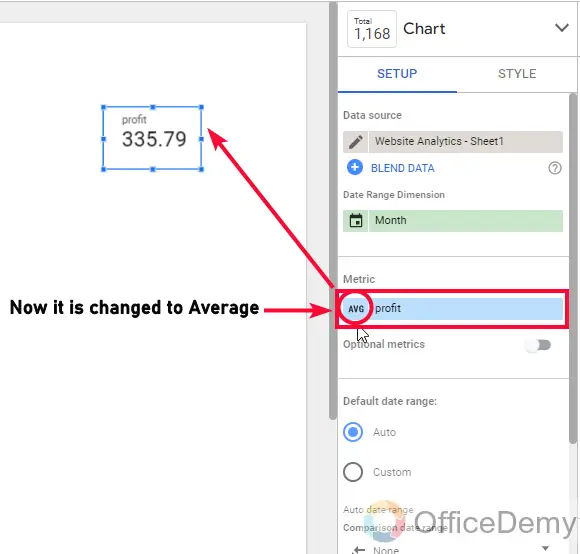
This method will automatically show the sum of the column profit, you can change it to any aggregate function for visualization, such as if you want to see the average value of the profit column you can use the aggregation function Average, and similarly MIN, MAX, and so on.
Now, this was the Google sheets file, that is owned by us, so we can make changes in the original file as well, but what if we are using a Google Application and directly fetching data from the Platform such as Google Analytics?
No problem, custom fields are temporary, temporary means non-mutable, they do not make any change in the original data, they exist in the context of Data Studio, and not reflect in the original data source.
Create Field in Google Data Studio – Google Analytics Sample Data
Since the data is not owned by us, we can still create custom fields for it, and this is what we will see in this example.
In this section, we will see how to create fields in Google Data Studio using a sample Google Analytics data source. We need to have some logic in our mind before we create a custom field because we need to know already existing column names (metrics) to make a custom formula using them together, or with a direct numeric value.
Examples
- (user/conversions)
- (sessions + new_visitors)
These sorts of formulas we create to create meaningful formulas for customs fields.
In the Google Analytics sample data, we have the conversion rate = sessions/conversions. But I want to calculate the conversion rate for B2B businesses the conversion rate is calculated here from sessions, but in B2B, it’s calculated as users/conversions. So, in such scenarios, we can have only 1 metric in our original data set (that currently is sessions/conversions in this sample data) and still we can show both using a custom field in the metric inside Data Studio. There can be so many use cases of this, you can do any sort of calculations inside custom fields.
So, let’s see the above-discussed example.
I assume you have already connected the Sample data source, if you don’t know how to connect I will recommend reading this article How to Connect Data Sources in Google Data Studio
So, we will start after the connection.
Step 1
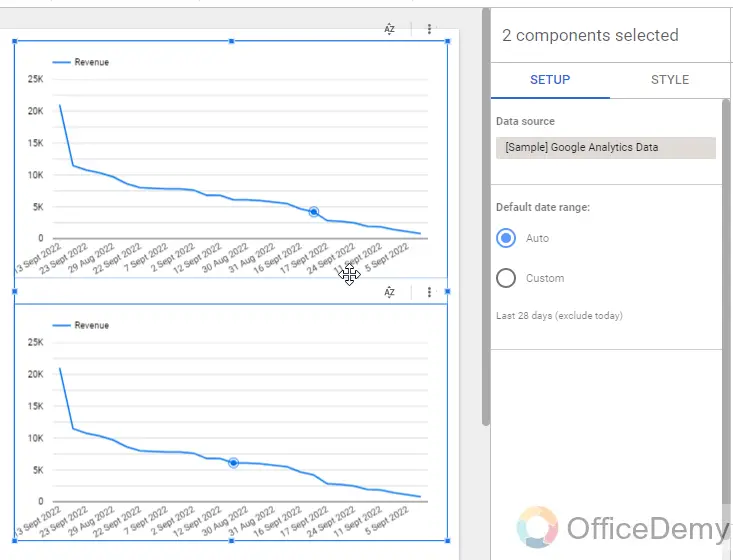
Create a chart
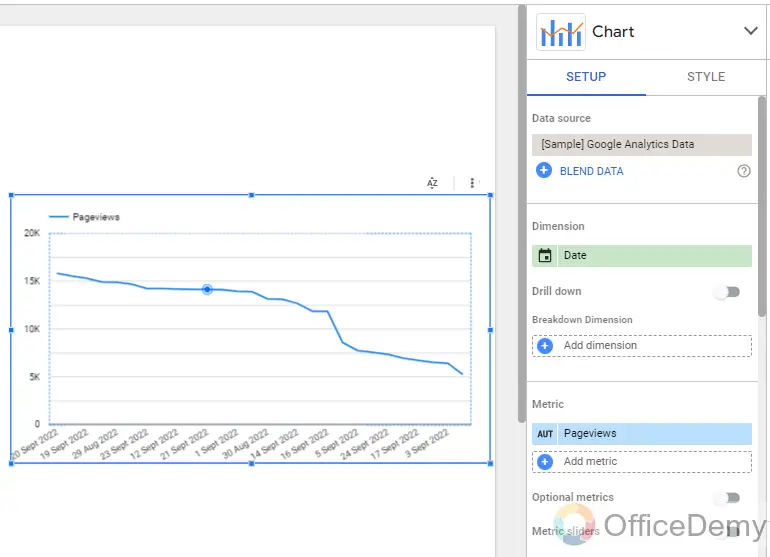
Step 2
Now visualize your revenue in this chart (with the existing metric)
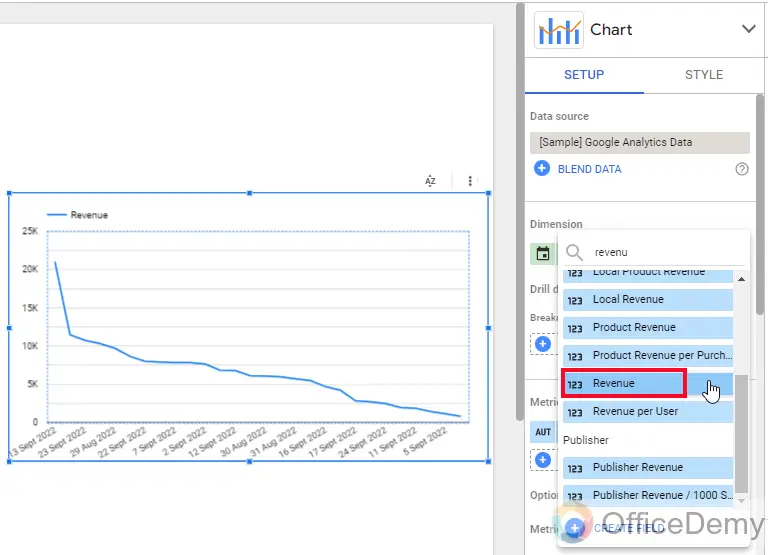
Step 3
Copy the chart and paste it below, and now create a new field for revenue by users (in this field, we will use a different formula to calculate revenue)
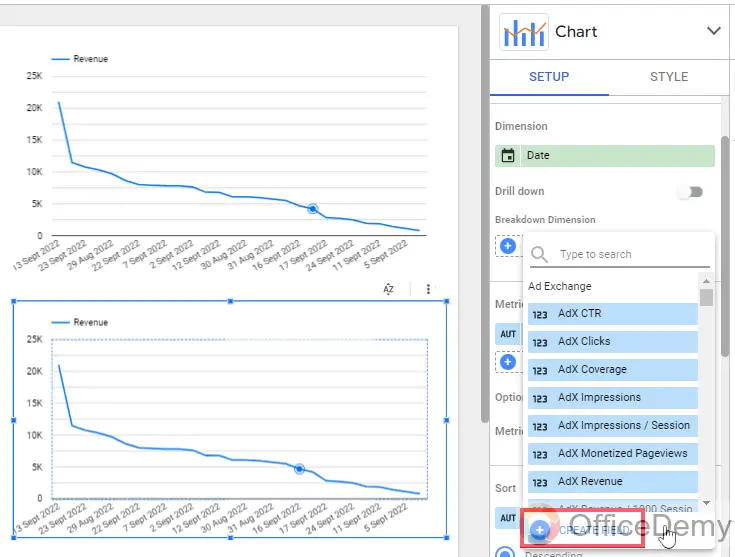
Step 4
The simple logic for this formula is below
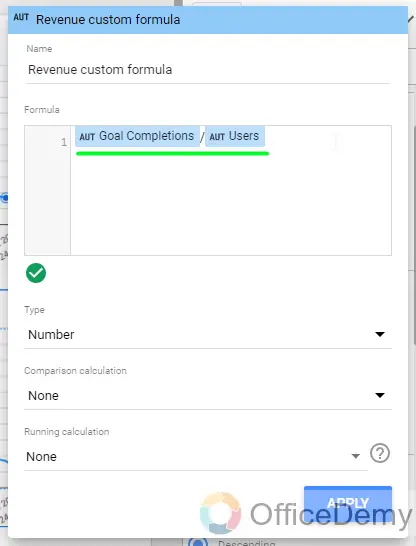
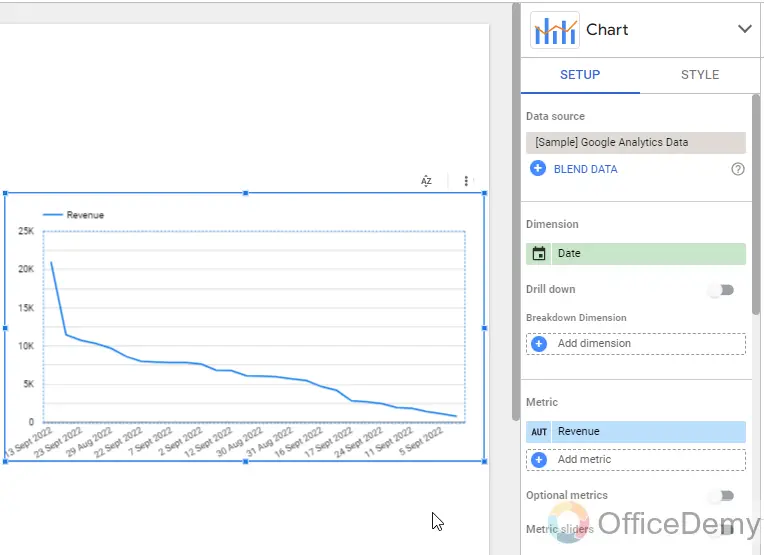
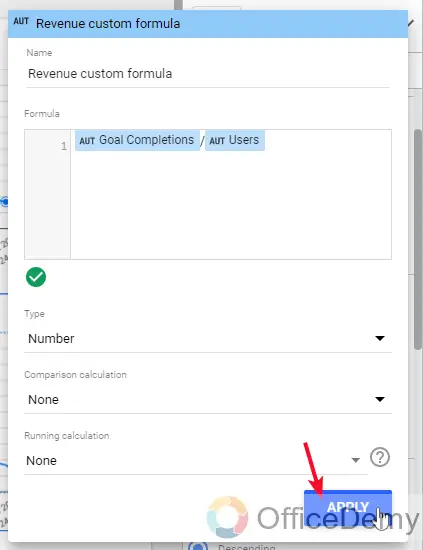
Step 5
Click on apply to save changes
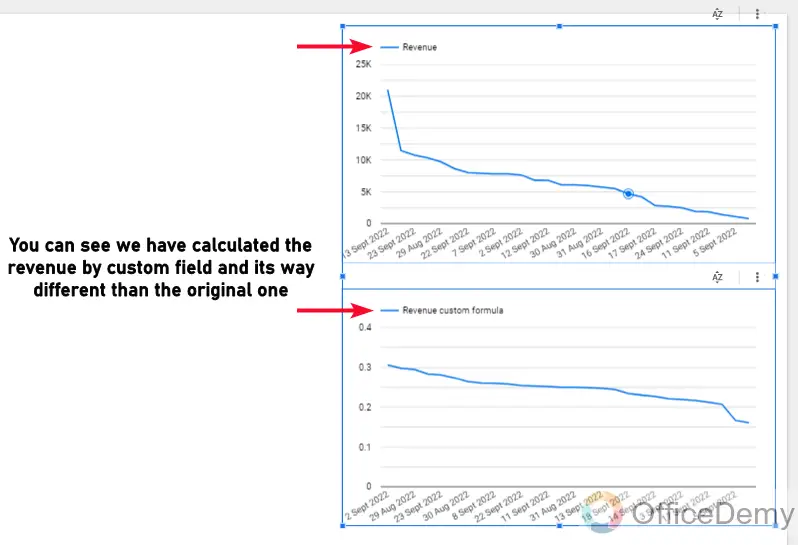
Now you can see both of the revenues one for B2B and the second for B2C, now you can think of so many use cases similar to these that can be very useful when working with sample or owned data. Custom fields are allowed to create in any kind of data.
Important Notes
- Custom fields can also be created on the original data, and not as a metric.
- We have learned to add a custom field as a metric to use it only inside Data Studio
- Custom fields cannot be used to “Add a field” in the Data section
- You can use as many fields as you need
- The default aggregation can also be set for these fields, you can have all the functions such as Sum, Average, Count, Count Distinct, Min, Max, Median, Standard Deviation, and Variance.
- The custom fields can be edited always after creation.
- Aggregation can be set to none from Resource > Manage added data sources
Frequently Asked Questions
How to edit a field in Google Data Studio?
When you have created a custom field, if it’s red, then there is some kind of error in it, and it cannot be used, or if it’s greenish or blue, then it’s ok, and It can be used, on the life of your metric name, you can see a small function icon (this function icon will only appear if its a custom field and not an original field), click on it will take you to the function body and here you make changes and then don’t forget to click on Apply button to save changes.
How to delete a field in Google Data Studio?
Go to field editing (as I told you in the previous FAQ), now here you can remove everything (function name, function body), and then click anywhere on the canvas (apply button will automatically be disabled after you remove the function body and name), the next time you will come to your metric section you will not see the custom field, this is how they can be removed, there is no direct delete button for it. But this method works for me, and it’s simple.
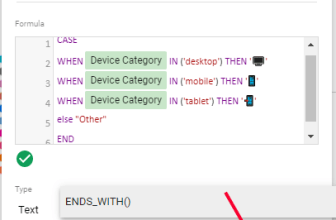
What Are the Best and Most Useful Functions for Creating Calculated Fields in Google Data Studio?
Google Data Studio offers a range of functions for creating calculated fields that can enhance data analysis. From simple arithmetic operations to complex transformations, data studio calculated fields allow users to manipulate the data according to their requirements. Some useful functions include math functions like SUM, AVERAGE, and COUNT, as well as logical functions like IF, AND, and OR. With these functions, users can derive valuable insights from their data and make informed decisions.
Real-time changes in my sheets file are not reflected in Data Studio instantly, why is it?
Google Data Studio may take a few minutes for getting the updates for any changes in the original data source. It also depends on data sources; some data sources can take upto 15 minutes. This is why we need to have some patience when updating the data, a good practice is to finalize your sheets file first, and then connect and set up on Data Studio. Only for the sake of practicing, you can remove the file and create a new file to reconnect the data source to have real-time changes updated.
Conclusion
This was how to create fields in Google Data Studio, we learned how to avoid helping columns and use fields to directly write custom formulas and use them as a column. I hope you find this article helpful, keep in mind, it is a beginner guide on creating fields, we will see some more advanced use cases in the Future. Thank you for your time. Keep learning with Office Demy.