
To Add Borders in Google Sheets
- Open Google Sheets.
- Select cells.
- In the toolbar, find the “Borders” icon.
- Click the icon and choose the border style.
OR
- Add borders to cells.
- Change border color from the “Border color” dropdown.
- Select a style from the “Border style” dropdown.
In this article, we will learn how to add borders in Google Sheets. Google Sheets never disappoints us by giving countless useful features and giving us full control over the features and tools. Today’s session is about borders. Borders as we all know are very essential in data formatting and data customization.
Mostly, when we use Google Sheets Excel, or any spreadsheet software, we have gridlines that show us the background layout of the sheet, but they are only for our help, they are not part of our sheet, and that’s why when we print a Google Sheets file with gridlines, it will not print the background gridlines because they are only designed for the guide and helping purpose. But borders are something different, borders are colored lines around a cell that covers cell(s) to improve the design of the overall content on a sheet. A border can be set to any side of the cell or cells, and it can be customized by any means, we can change its colors.
Importance of using Borders in Google Sheets
Setting up a good appearance of the spreadsheet cells can be helpful to emphasize the data and represent an easier version of your data to be understood by your end users or viewers.
Borders help to emphasize the importance of data, and also, they are essential for designing aesthetics for our data or report. Border adds more beautification and improves the clarity of the cells, separate them from the other cells, and makes an overall good version to see and understand.
You can use borders and print them so that the printed version of the documents is clearer on the paper, you can also use the colored border to highlight different segments of a document, such as a red border for problematic data, a green for best data, another color to show progressive data and so on. Borders can also be used for specific data such as only for headers, only for bars, or only for the totals. There can be so many purposes and reasons to use a border. So, therefore, we need to learn how to add borders in Google Sheets.
How to Add Borders in Google Sheets?
This section is set up for starting the implementation of the borders and finishing them in a way that you don’t have any unanswered questions or confusion at the end. In this section, we will learn how to add borders in Google Sheets from start, and we will see all the decoration and customization features of the border that come built-in in Google Sheets. We will also see how to change border sizes, and so on. Note that some features are similar to excel but some are very different so don’t compare these two software, both are good on their own. So, let’s get started with borders in Google Sheets.
How to Add Borders in Google Sheets – Simple Borders
In this section, we will learn the simplest form of a border, and the simple purpose of using a border in Google Sheets, a border can be added directly from the toolbar. So, let’s see the implementation with the help of an example Google Sheets file with some dummy data.
Step 1
Open a Google Sheets file, or launch a new Sheet with a blank template

Step 2
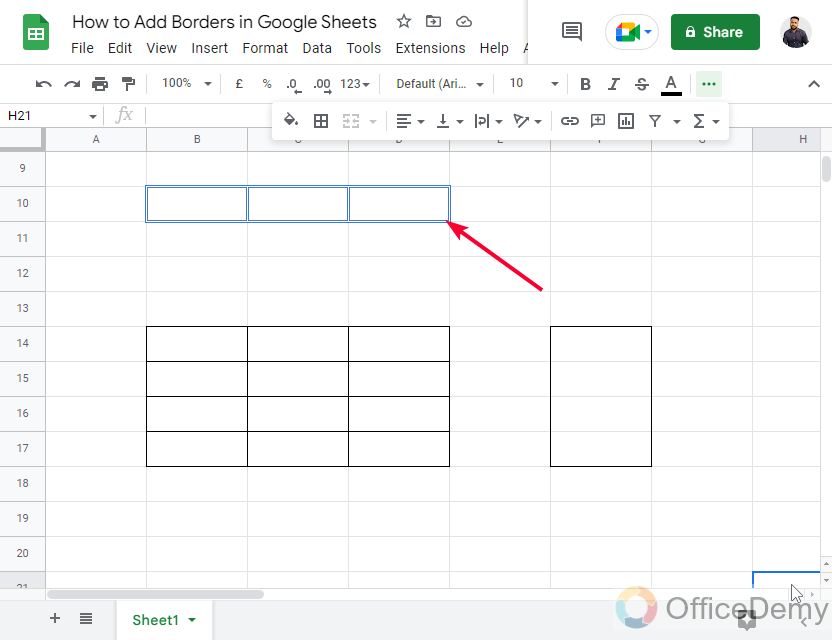
Now, you need to think about where you want to add borders, the selection of the cells is very important here.
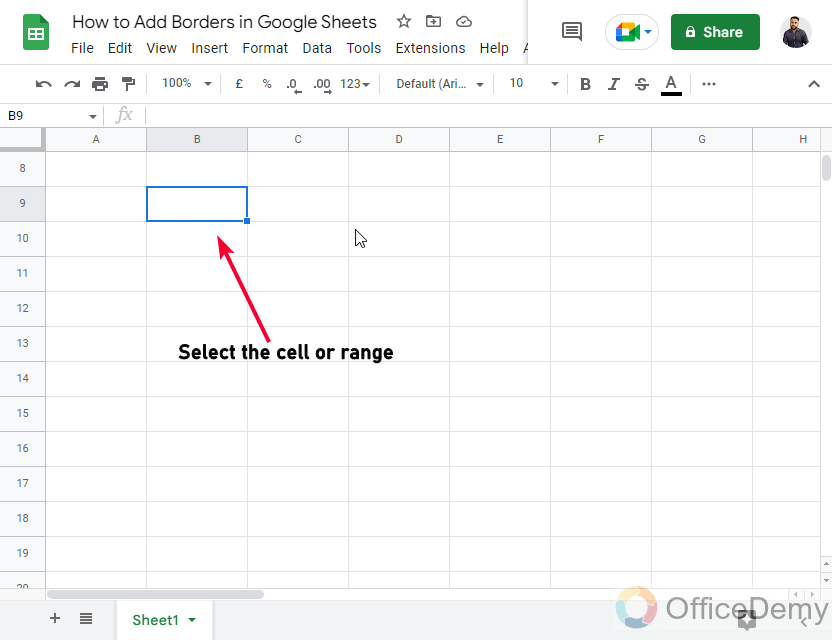
Tip: Everything is relative when adding a border, if you have selected a cell A2, and you use a right border on it then obviously, and understandably you are also adding a left border to cell B2.
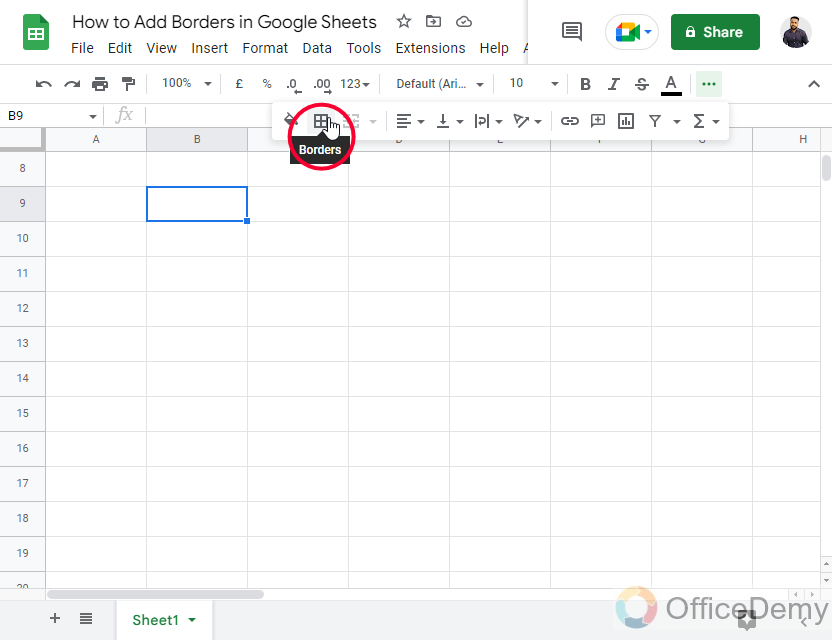
Step 3
Now, in the toolbar, you have a border icon, mouse over it and a Border pop-up will appear confirming that this icon represents the borders.
Step 4
Click on it, and you will have the border menu expanded
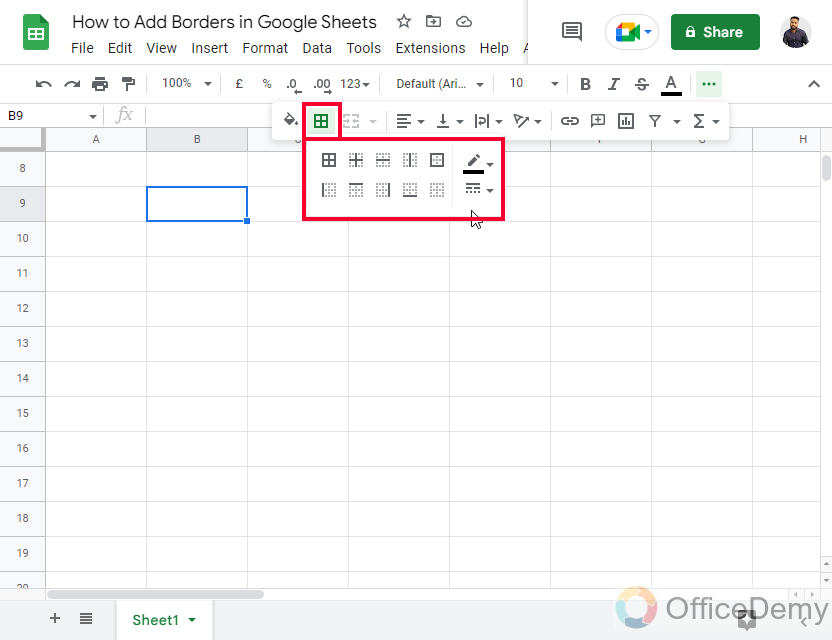
Step 5
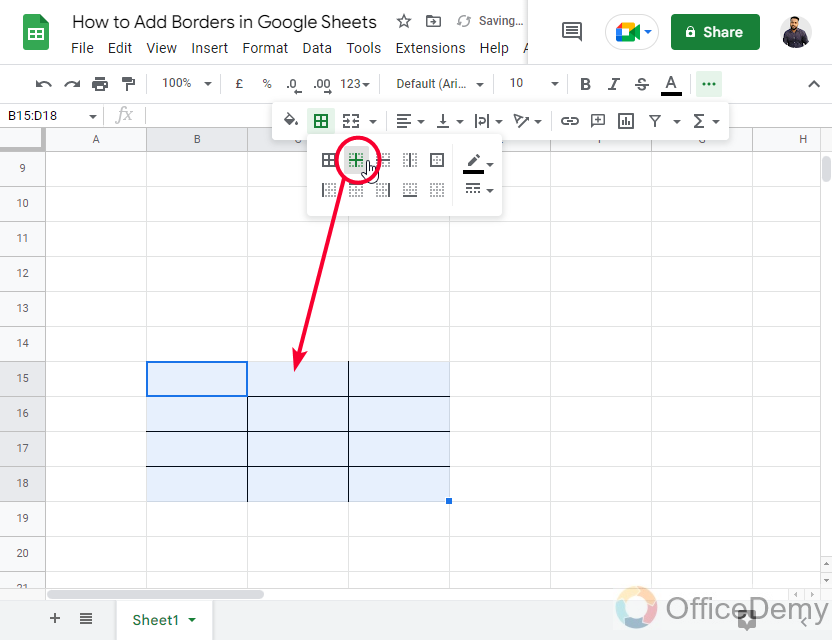
Now you can see the options here in this border menu, there are 10 items (types of borders) you can to add your selected cells.
Here you have
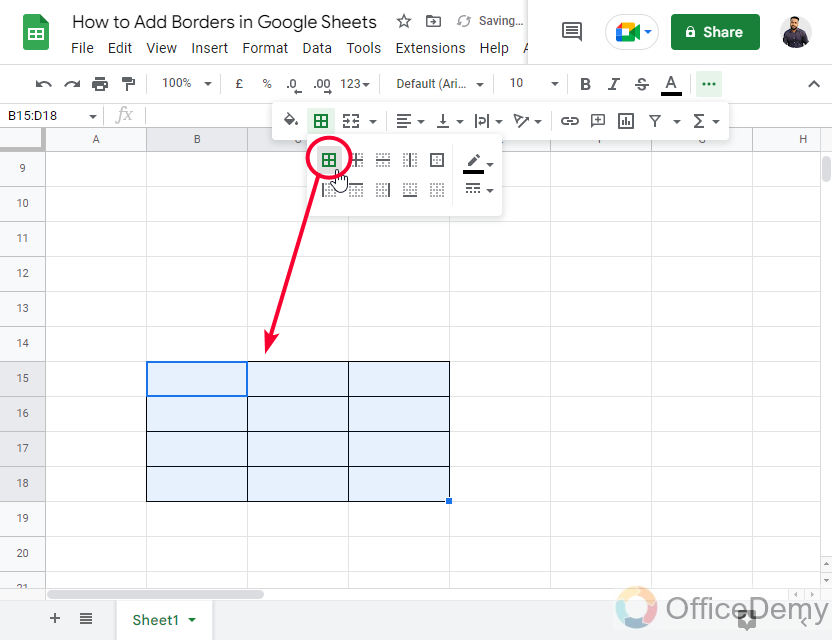
All borders
Adds all outer and inner borders on the select cell or range
Inner borders
Adds only inner borders to the selected call or range
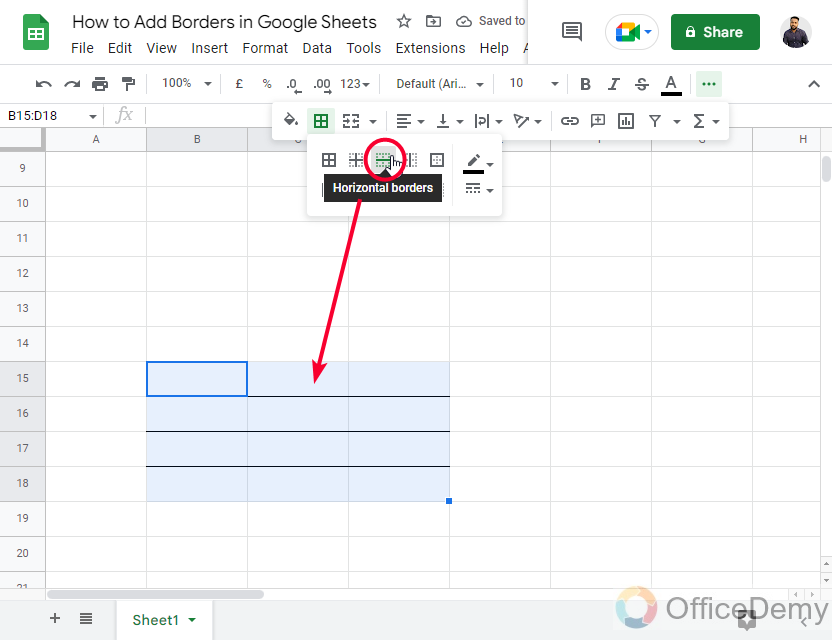
Horizontal borders
Adds only horizontal borders
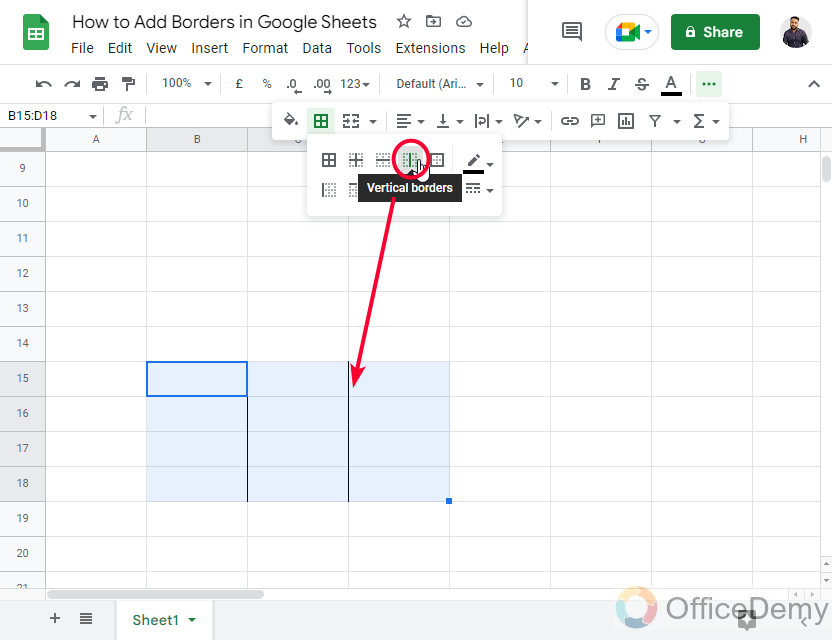
Vertical borders
Adds only vertical borders
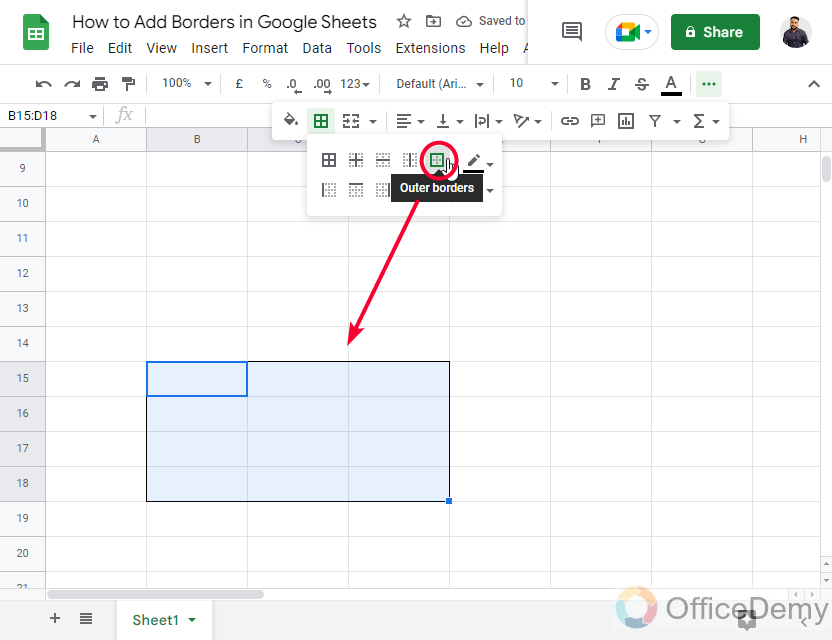
Outer borders
Adds only outer borders (border box)
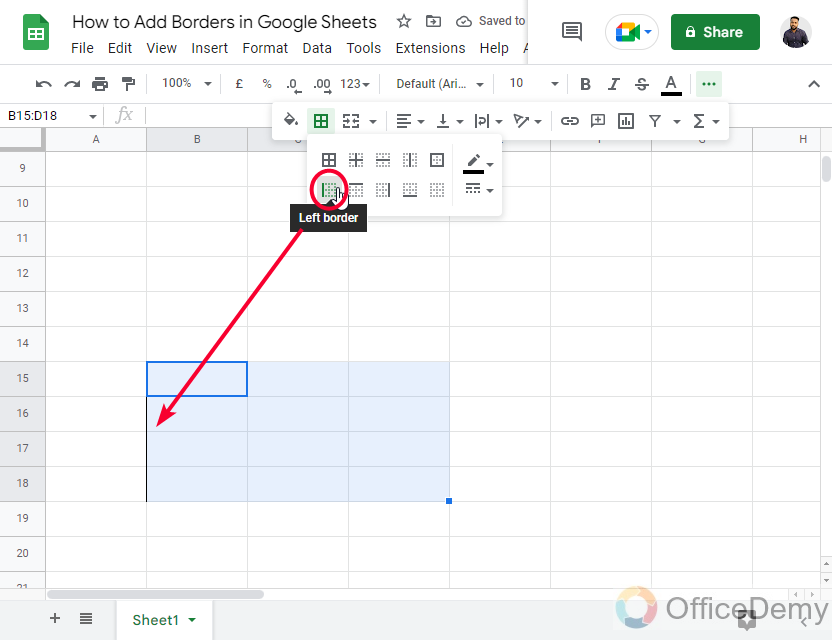
Left border
Adds only the left border
Top border
Adds a border on the top only

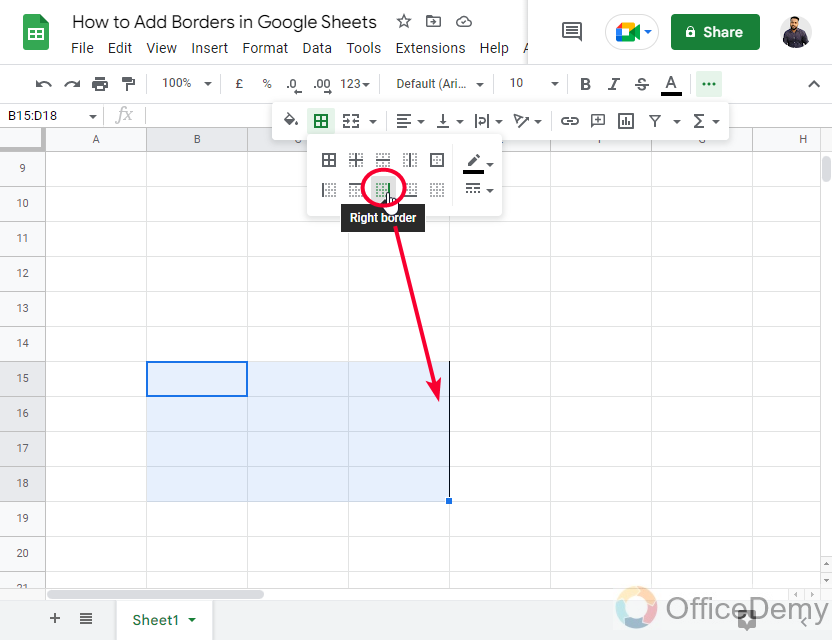
Right border
Adds a border on the right side
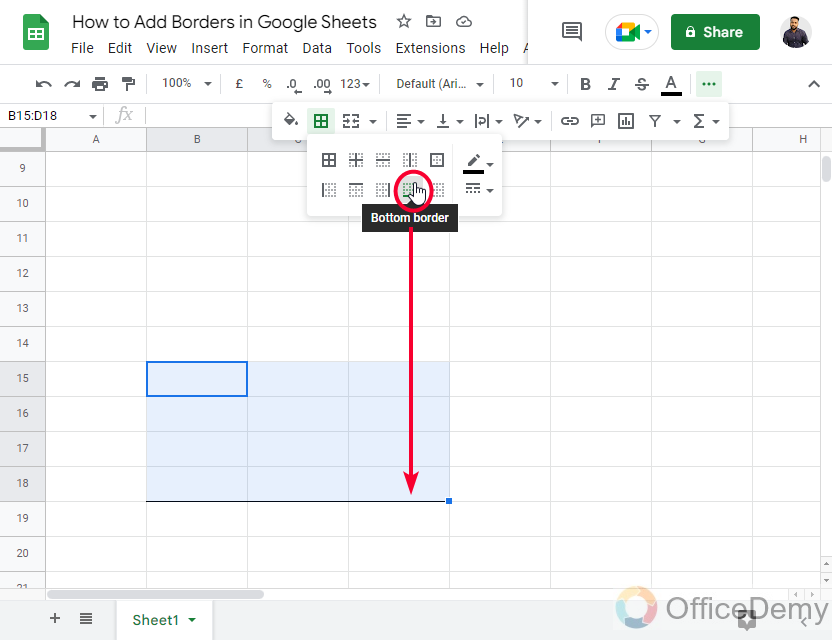
Bottom border
Adds a bottom border only
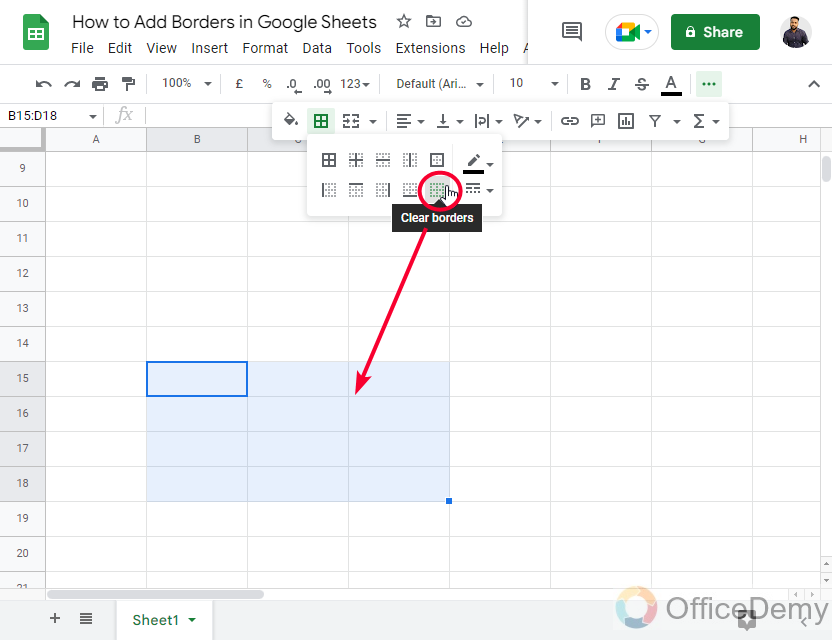
Clear borders
Clears/remove all the borders for the selected cell or range
Click on any type of border and it will be added to your selected cell or range
So, these are the types of the border we get built-in in Google Sheets, these all can be applied to a single cell or a cell range, and also on the entire sheet if selected.
How to Add Borders in Google Sheets – Borders Customization
So, we have seen how to add borders in Google Sheets very easily from the toolbar, now we will learn how to add borders in Google sheets and then customize them. Yeah, we all love customization, because simple borders don’t look so cool, do they? Here, we will learn to control border colors, their density, their size, their style, and so on. So, let’s get started with this customization section.
We have two customization features dedicated to borders. One is Border color, and the other is border Style.
In colors, we can control the colors of the border, and in style, we can control the style means as line type.
Here is a thing, we can change the border color and style from the dedicated buttons, and then form next time all the borders we will add will have those settings saved.
If you have applied borders, and now you changed the color and border style, so they will not be affected by the previously added borders.
Step 1
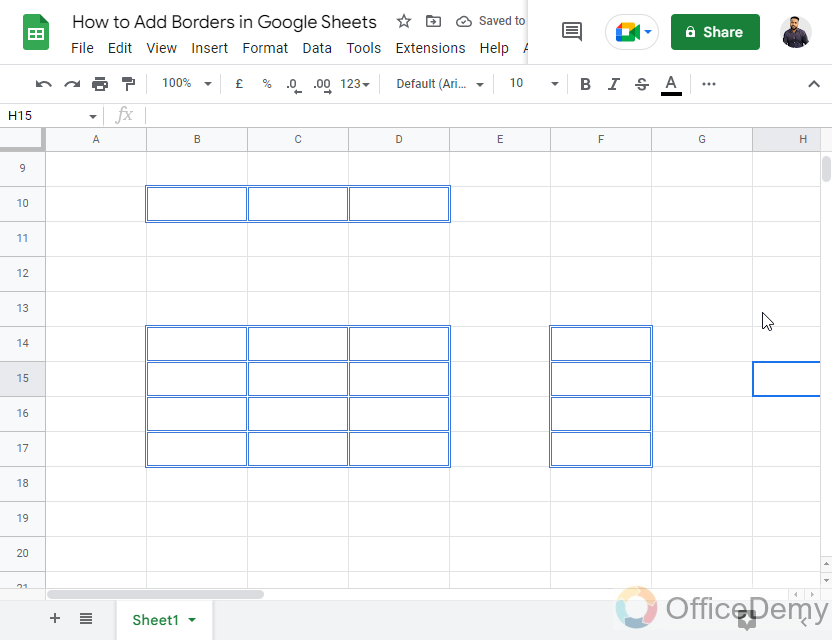
First, let’s add some borders to our sheet
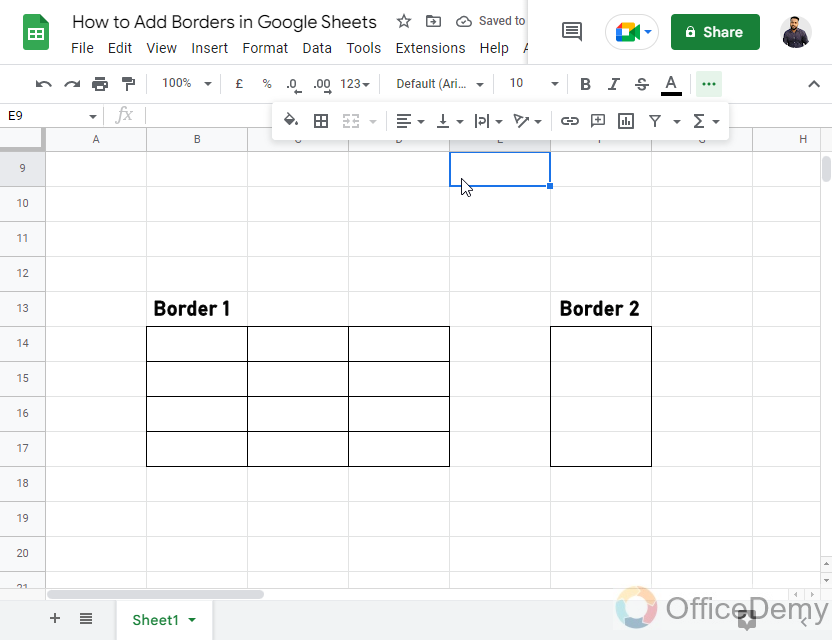
Step 2
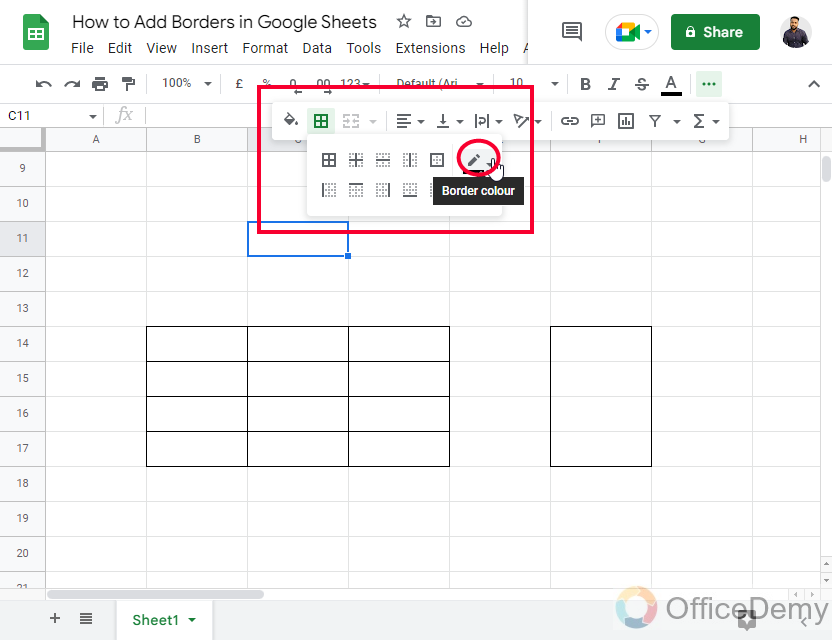
Now let’s first change the color of the borders, for this, click on the border > border color dropdown
Step 3
Pick a color, or click on the custom button to create a custom color.
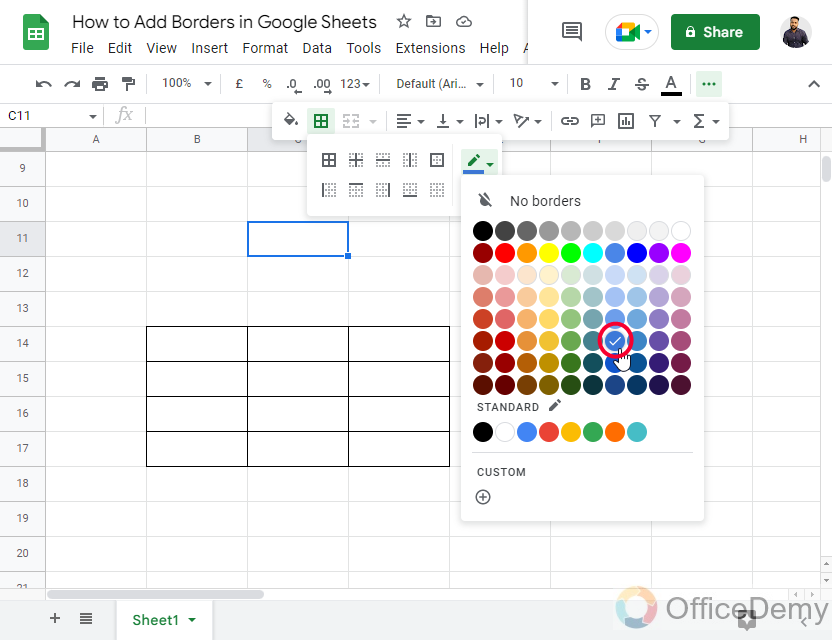
Note: There are no gradients available for the border colors.
Now our new color has been set, it will be shown when we will add a border, now let’s move to the next feature and see the border style
Step 4
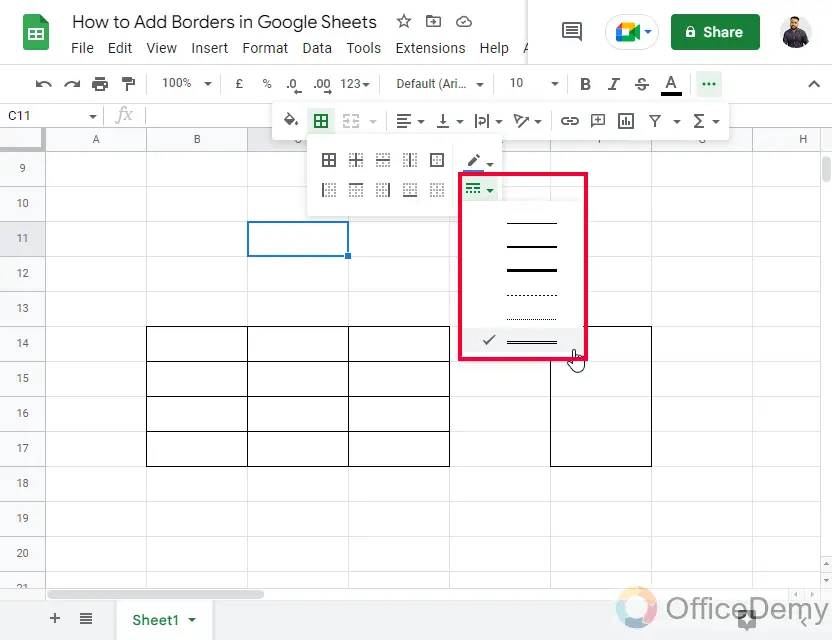
Click on the border-style dropdown
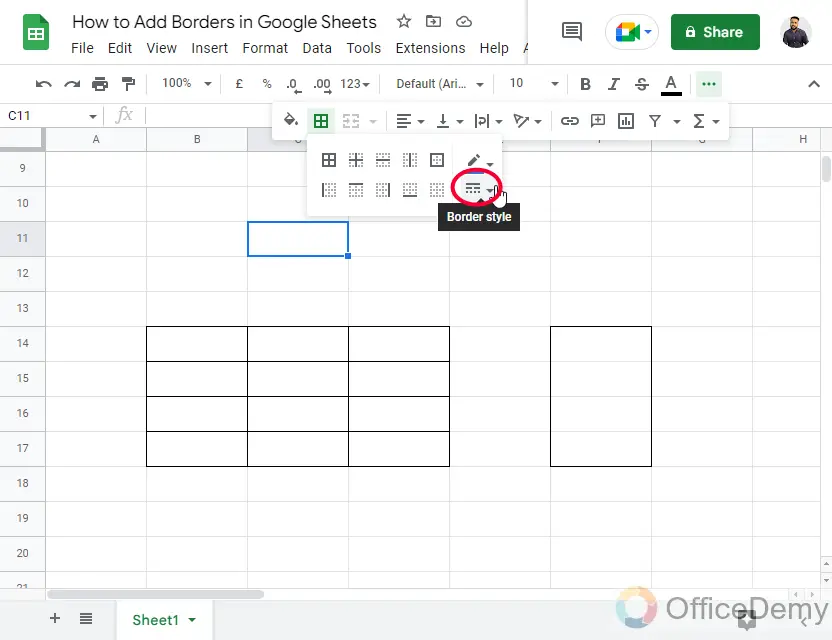
Step 5
Pick a line type from here for your borders
Step 6
Now, since we have set both features, let’s try it out by applying a border to some cells
Step 7
Here, you can see the applied border looks like this, the line type is different and the color is also other than black, so this way we can make beautiful custom borders, and improve the design aesthetics of our reports and databases in Google Sheets.
I hope you find this article helpful.
Useful Notes
- Borders can be customized for some parts of the sheet and not for others
- You can have multiple types of borders in a single frame of your sheets file
- Borders can be hidden by changing the border color to white
- Borders can
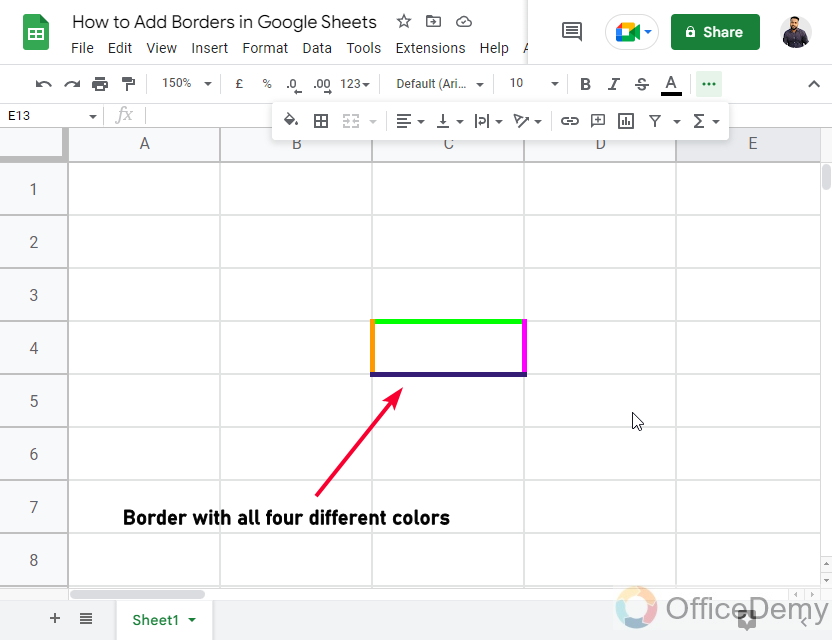
- Even a single cell can have four different borders below
Frequently Asked Questions
How to add two colored borders to a cell in Google Sheets?
Simply select your cell, and go to borders, before applying any border, first go to the color dropdown and pick a color for any side, now select any border such as right, left, top, or bottom. Your selected color border has been added to the side you have selected, now again go to the color dropdown and pick another color for the other sides of the border, now again select the rest side of the border from the given borders. This way you can add a two-colored border to your cell. Note: Cover two sides of the border in a single iteration, because the border has four sides and we want a cell to be of two colors.
Can Adding Borders in Google Sheets Affect the Visibility of Gridlines?
Adding borders in Google Sheets does not have any effect on the visibility of gridlines. Hiding gridlines in google sheets is a separate setting that can be adjusted independently. Gridlines can be easily shown or hidden in the View menu, allowing for a cleaner or more structured appearance of your spreadsheet while borders can be applied to specific cells or ranges to visually highlight or separate data.
How to add a different style border to the sides of a table in Google Sheets?
It’s very simple if you understand the borders in Google Sheets. Simply select the outer range of your table in sheets, let’s say your table is in the range from A1:C10, select this range, and go to the border, firstly before applying any border, go to the border style dropdown and pick a border style for one side, now click on the border style and this style will be applied to the selected side, now do this again for the second style, and apply on the second side, do it again for the third and fourth sides, and now you can see your table has all four different styles of borders.
How to add borders to the entire Sheet in Google Sheets?
To add borders to your entire sheet just open your sheet and press Ctrl + A, and it will select your entire sheet, now go to the border, and click on all borders, if you want to use some customization, then you can set the color and style before applying borders, and then select all borders, and this way your entire sheet will get the custom borders.
Can I Use the Same Methods to Make a Cell Color Gradient in Google Sheets as Adding Borders?
Customizing cell colors in google sheets is a versatile feature that allows you to add visual appeal to your data. When it comes to creating a cell color gradient, however, the process differs from adding borders. While borders can be applied to individual cells, achieving a gradient effect requires applying conditional formatting rules based on specific values or data ranges. Overall, with a little creativity and exploration, you can effectively use different methods to enhance cell colors in Google Sheets.
What is the difference between borders and gridlines?
There is a major difference between borders and gridlines which is the purpose. Gridlines are only designed to show the layout and help user to work on the track, and the purpose of the borders is to add emphasis on the content and make the content or report look more precise and clearer, and easy to understand for the readers or viewers.
Conclusion
Wrapping up how to add borders in Google Sheets, we learned what are borders, and why they are very important and Google Sheets. I hope you find this tutorial helpful and that you have learned something new from it. I will see you soon with another useful guide, till then keep learning with Office Demy.


