
To Add Grammarly to Microsoft Word
- Download Grammarly for Word.
- Open Word.
- Click the Grammarly tab.
- Log in with your Grammarly account.
- Start Correcting.
- The add-in will check your document for grammar and spelling errors and provide suggestions for corrections.
Hello fellows. Today, we will learn how to add Grammarly to Microsoft Word. Effective communication is essential in today’s world, whether for academic or professional purposes. One of the primary tools for written communication is Microsoft Word, but it doesn’t always catch all the grammatical and spelling errors that can undermine the quality of your writing. That’s where Grammarly comes in. Grammarly is a popular writing assistant tool that can help you identify and correct grammar, spelling, and punctuation errors.
In this article, we will guide you through the process of adding Grammarly to Microsoft Word so you can improve the quality of your writing and communicate more effectively.
Importance of using Grammarly in Microsoft Word
As I said, Effective written communication is critical in almost every aspect of life, from academic assignments to professional emails and reports. Poor grammar, punctuation, and spelling can significantly affect the quality of your writing and, in turn, your credibility and success. Microsoft Word is a widely used word-processing tool that has many built-in features to help you write better. However, it does not always catch all the errors in your writing. That’s where Grammarly comes in handy. By learning how to add Grammarly to Microsoft Word, you can take advantage of the powerful features of Grammarly to improve your writing, eliminate errors, and enhance your overall communication.
Learning how to add Grammarly to Microsoft Word not only improves the quality of your writing but also helps you become a more efficient and productive writer. Grammarly can identify and correct errors that you may not have caught, saving you time and effort in the editing process. By using Grammarly, you can also expand your vocabulary, enhance your writing style, and learn from your mistakes. The feedback and suggestions provided by Grammarly can help you avoid making the same mistakes in the future and ultimately improve your writing skills. Learning how to add Grammarly to Microsoft Word is an investment in your future, as it can help you communicate more effectively and achieve your personal and professional goals.
How to Add Grammarly to Microsoft Word?
We have a simple and free add-in available by Grammarly that can be added to Microsoft Word and Outlook. So, we will use the add-in, and in this guide, we will teach you to start to end Grammarly with Microsoft Word.
Add Grammarly to Microsoft Word – Download the Setup
In this section, we will learn how to add Grammarly to Microsoft Word, and we will learn where and how to get a setup of Grammarly for desktop applications such as Outlook and Word. So, let’s begin.
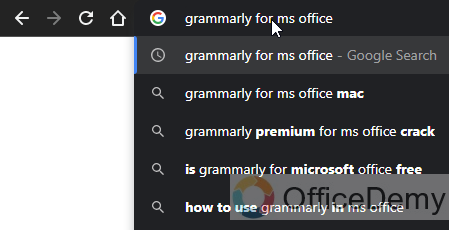
Step 1
Open your browser and search “Grammarly for MS Office”
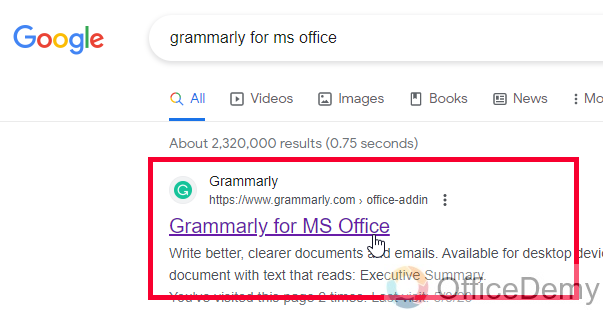
Step 2
Open the first link, here is the direct link to the download page
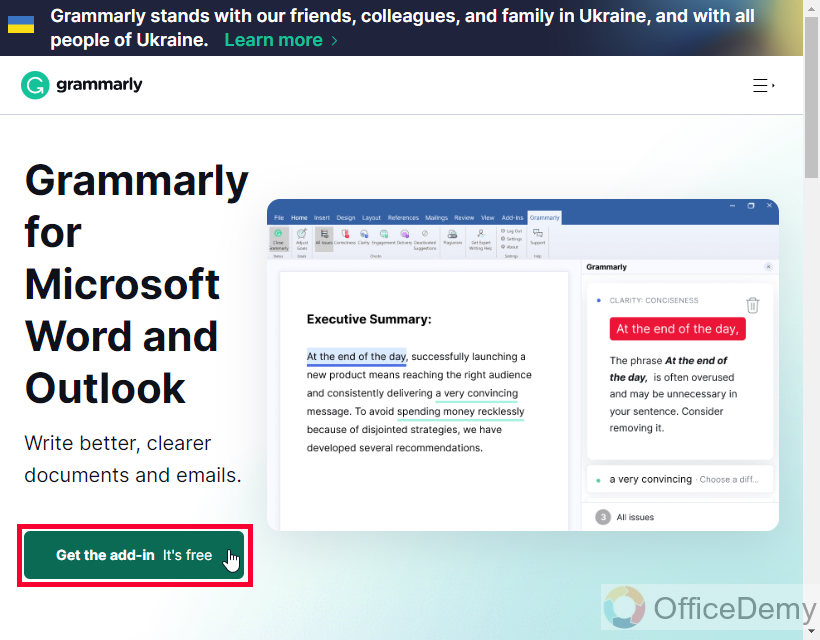
Step 3
Click on the “Get the Add-in its free” button
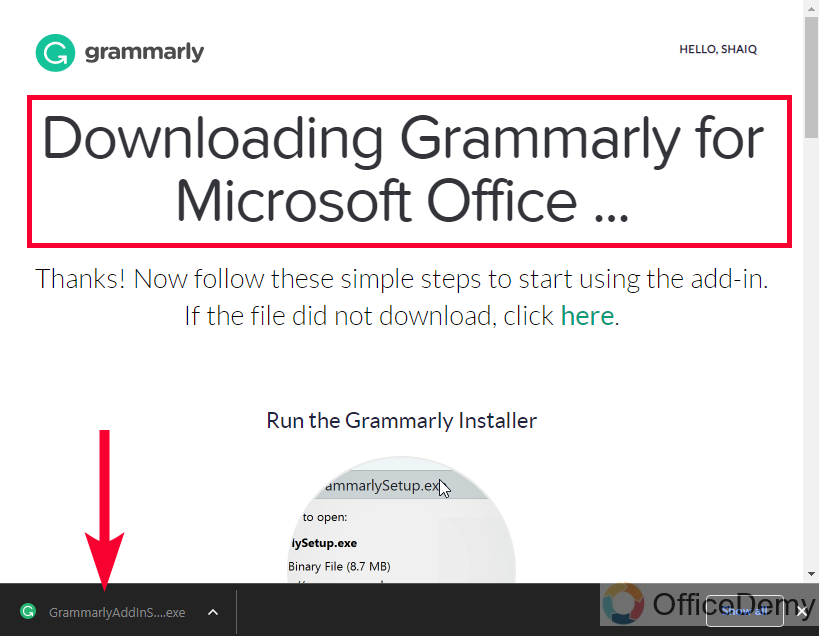
Step 4
The Grammarly add-in will be downloaded to your PC automatically
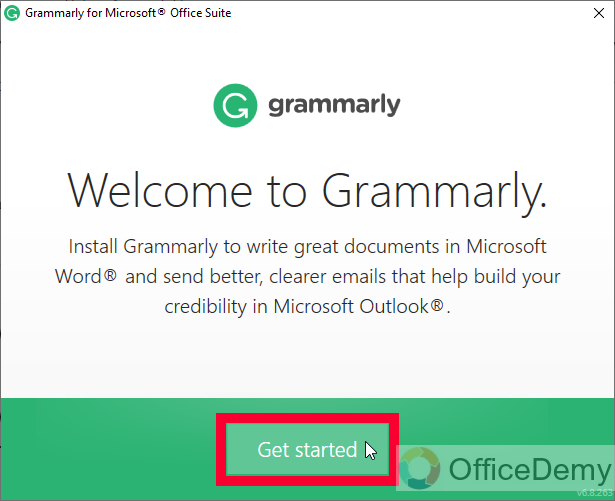
Step 5
Open the Grammarly Setup on your PC, and run the setup, click on the Get Started button.
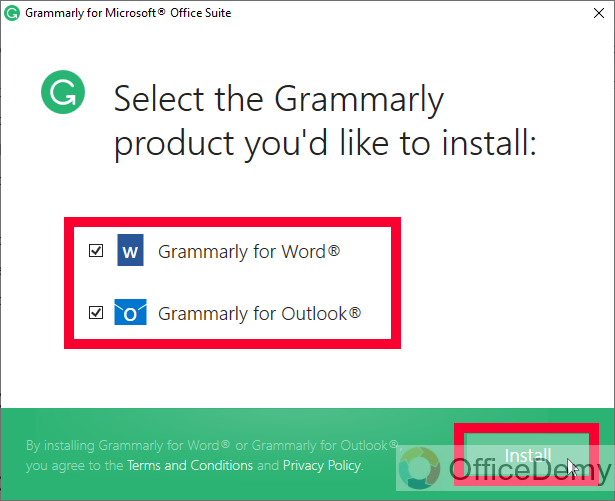
Step 6
Keep both options, Word, and Outlook checked if you want to get Grammarly for both apps, and click on the Install button below.
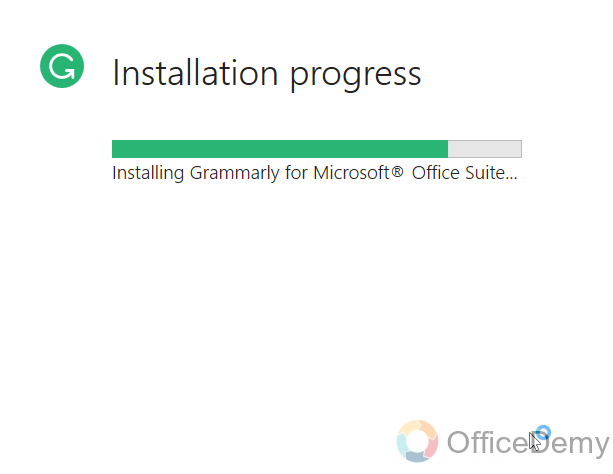
Step 7
The setup will start the installation
Step 8
It will be finished in a few seconds, now click on the Finish button

Now, let’s go to Microsoft Word and see how to log in and set up Grammarly there.
Add Grammarly to Microsoft Word – Login with Google Account
In this section, we will learn how to add Grammarly to Microsoft Word and how to log in with the app after the installation process, so let’s see the below steps.
Step 1
Open your Microsoft Word Document
Step 2
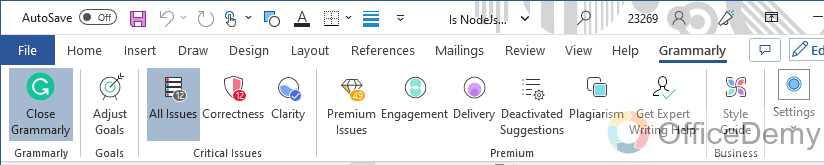
You will see a brand new tab in your main Ribbon named “Grammarly”
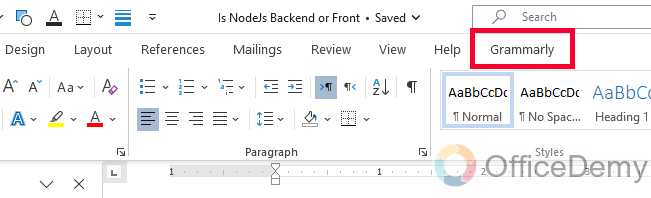
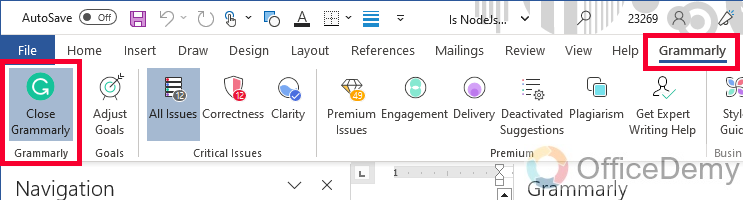
Step 3
Click on the Grammarly tab, and then click on “Open Grammarly”
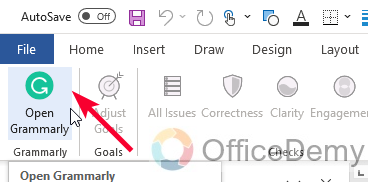
Step 4
A sidebar will open, and it will ask you to log in with Grammarly. Click on the Login button
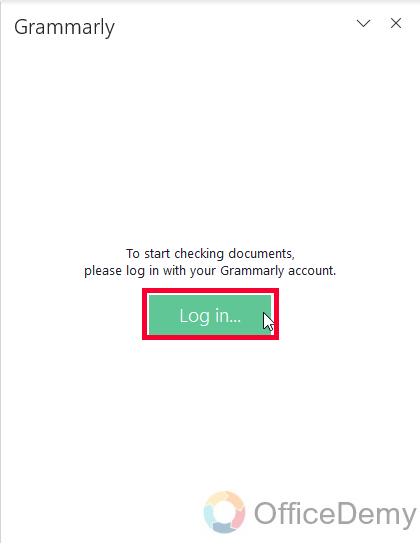
Step 5
It will take you to the web and will ask you to log in. Choose your account, and click “Continue to Grammarly”
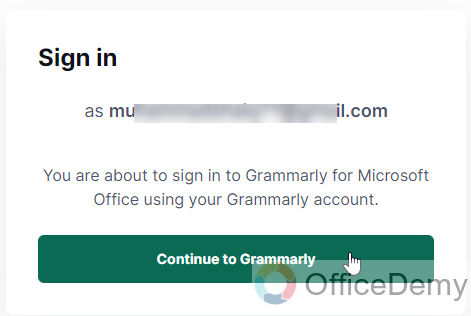
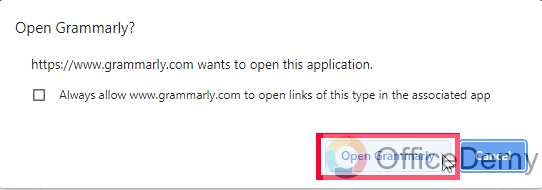
Step 6
It will ask you to open the App with your account, click on Open Grammarly to continue
Step 7
As you click on it, your Grammarly add-in will be ready in your Microsoft Word file, open the Word file, here you can see a big menu of Grammarly to correct your documents like a pro.
So now, the Grammarly add-in is installed, and we have done with the login setup, now it’s time to make corrections in the document.
Add Grammarly to Microsoft Word – Correct your Documents
Finally, in this section, we are learning how to add Grammarly to Microsoft Word, and we will specifically learn to correct our documents within Microsoft Word using Grammarly add-in for free.
Step 1
To start checking your documents, click on the Grammarly Tab > Open Grammarly
Step 2
It will open a sidebar for you, with all the errors in your document.
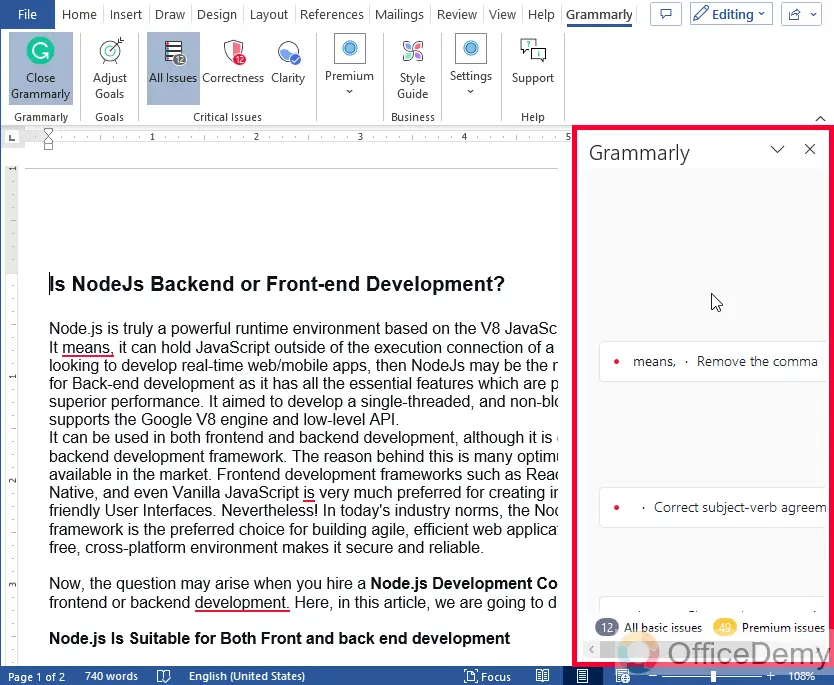
Step 3
Click on any error from the sidebar, and Grammarly will show you instant suggestions to correct the word.
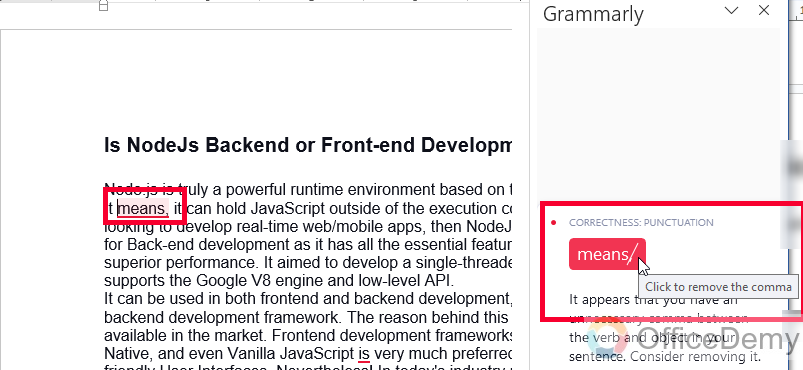
This is how you are going to check your entire document and accept the suggestions from Grammarly. The suggestions are mostly correct, but if you think there is an incorrect suggestion by Grammarly, you can ignore it or add it to the dictionary for future ignores.
Useful Notes
- To get Grammarly Premium you will have to buy one of their plans
- You need a stable internet connection to use the Grammarly add-in with Microsoft Word.
- In Google Docs, you don’t need to use Grammarly Add-on, if you use Google Docs the Grammarly Chrome extension will cover your Google Documents directly without any add-ons.
Frequently Asked Questions
What is Grammarly and why add it to Microsoft Word?
Grammarly is a writing tool that helps you improve your writing by checking for grammar, spelling, and punctuation errors, and suggesting better phrasing. Adding it to Microsoft Word can help you catch mistakes before you send off a document or publish it online.
How do I add Grammarly to Microsoft Word?
To add Grammarly to Microsoft Word, you first need to download and install the Grammarly add-in for Word. You can do this by opening Word, clicking on the “Insert” tab, selecting “Get Add-ins” from the “Add-ins” group, and searching for Grammarly in the Microsoft Store. Once you find the Grammarly add-in, click “Add” to install it.
Does Grammarly work with all versions of Microsoft Word?
Grammarly works with Microsoft Word 2016 or later Windows and with Microsoft Word 2016 or later Mac. If you have an earlier version of Word, or if you’re using a different word processor, you may not be able to use Grammarly.
Is Grammarly free to use with Microsoft Word?
Grammarly offers both free and premium versions of its software. The free version includes basic grammar and spelling checks, while the premium version includes more advanced features like a plagiarism checker and writing suggestions for different styles and tones. You can use either version with Microsoft Word, but the premium version requires a subscription.
Conclusion
So that’s all from how to add Grammarly to Microsoft Word, I broke this guide into three main parts so everyone even beginners can understand what’s happening in each step and method. I hope you will find this guide helpful and now you will not have any problem adding Grammarly to your Microsoft Word and Outlook. I will see you next time. Thanks, and keep learning with Office Demy.
