
To Add and Remove Columns in Google Docs
Add Columns:
- Open an existing document or create a new one.
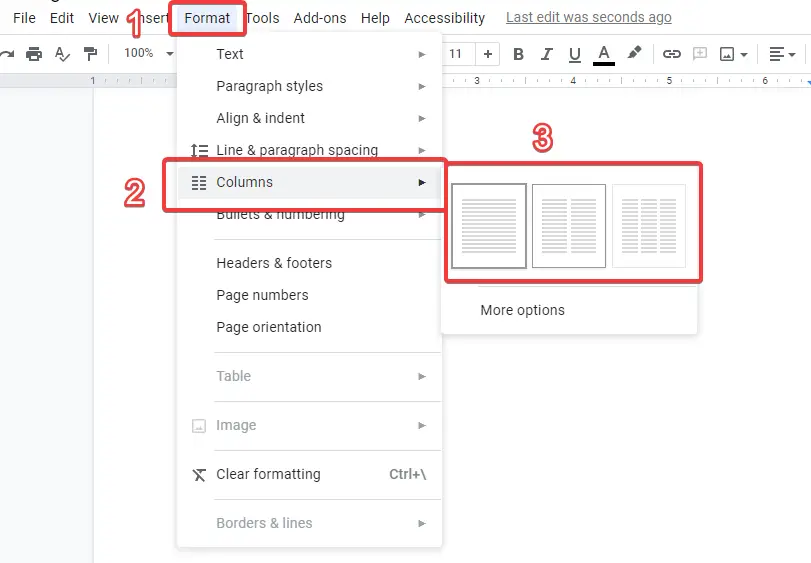
- Click “Format” in the toolbar.
- Navigate to “Columns“.
- Choose the number of columns you want (two or three).
Remove Columns:
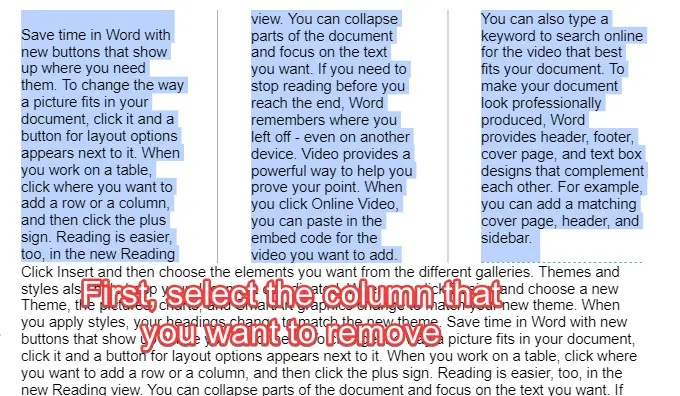
- Open the document.
- Select the text within the column you want to remove.
- Click “Format,” go to “Columns,” and choose the “1 column” option.
- The text will return to its original format without columns.
In this article, you will learn how to add columns in Google Docs.
Google Docs is a free, online, and web-based word processor offered by Google. It has many advantages such as smooth real-time collaboration, the ability to see the history of changes in the document, auto-saving, and the ability to work from anywhere. Whether you are using Google Docs to write a book, a research paper, or your resume, you probably know that the formatting of the document is as important as the content itself.
One of the useful features that google docs offers is columns. You can divide the text into two or three columns to have a better structure. In this article, you will find a step-by-step guide on how to add columns in google docs. But before we learn how to add and remove columns, let’s see what columns are and how they can be useful.
Why You Should Add Columns in Google Docs
Google docs offers you the ability to add columns to the document; you can divide it into one, two, or three columns, and this can be useful in many ways:
- If you are writing a document such as a newsletter or a brochure, then it’s expected of you to write in columns to save space.
- Columns help make the readability of the document better. Also, it helps you to write clearly and concisely
How to Add Columns in Google Docs
Adding columns in google docs is quite simple, here is how to do it:
Step 1:
Create a new document or open the document that you want to put into a column.
Step 2:
Click Format in the toolbar and go to Columns, then click on the column icon that you want (there are two options, two columns and three columns)
Step 3:
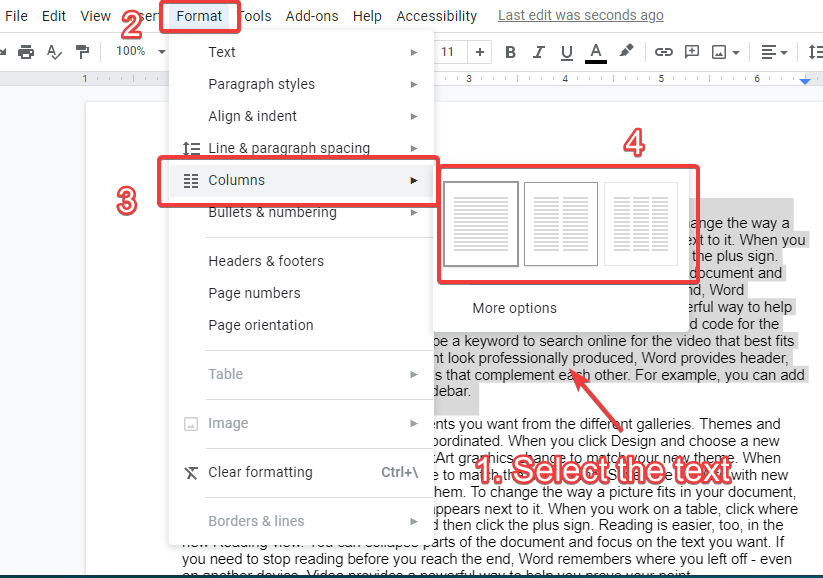
If you want to add a column to an existing document, select the text that you want to turn into a column and follow the same procedure.
Step 4:
If you want to edit the columns, go to Format>Columns>More options.
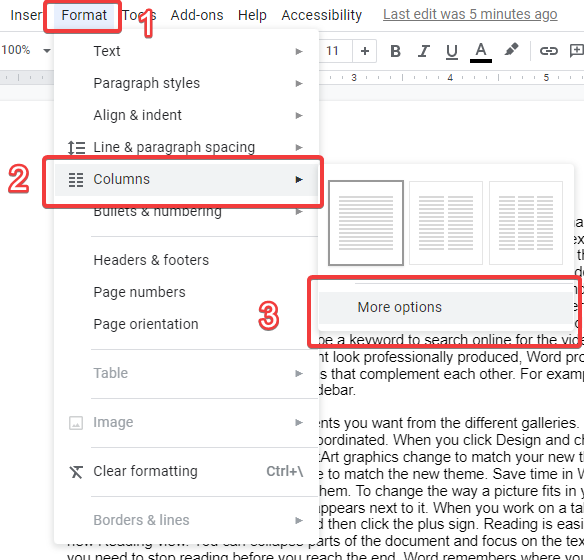
Step 5:
After that, a window will appear from which you can adjust the spacing, add a line between columns, and choose the number of columns.

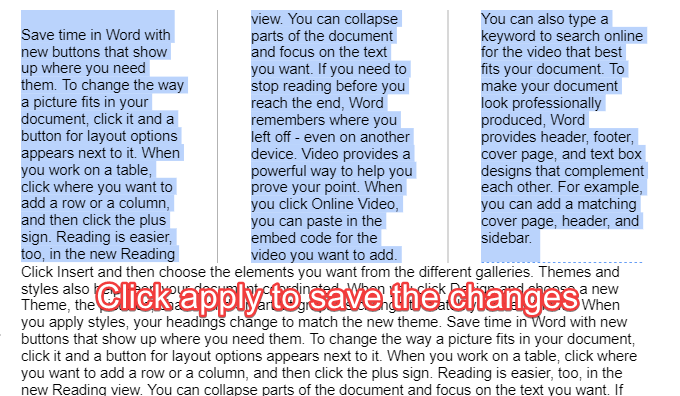
Step 6:
Click Apply to save the changes
How to Remove Columns in Google Docs
Removing a column in google docs is quite simple, here is how to do it:
You can also read a separate article to learn in details about removing columns here:
How to Delete a Column in Google Docs
Step 1:
Open the document and select the column that you want to remove
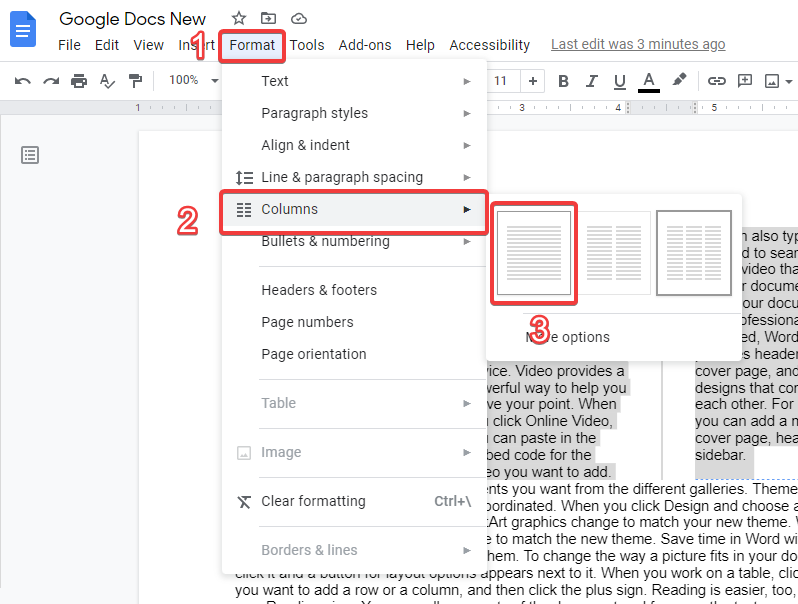
Step 2:
Click Format in the toolbar and go to Columns and click the 1 column icon
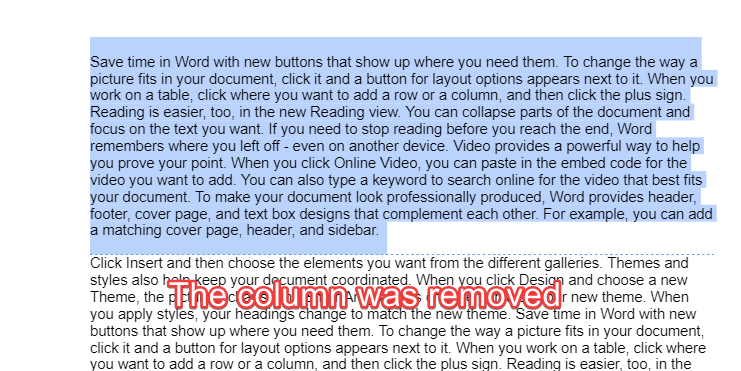
Step 3:
The text will return to its original shape before adding the column
Notes
Now that you’ve learned how to add columns in google docs, there are some tips that you should consider when adding columns:
- Adding a column before adding the text will apply the column to the whole document. So if you want to apply columns to a specific part of the document, you need to write the text first.
- If you want to divide the text between the columns(i.e. You want each specific part of the text to be in a specific column of the two/three columns), then you have to add a column break. Here is how to do it:
- Place the mouse cursor where you want the next column to start
- In the toolbar, click Insert and then go to Break and click Column break
- The text after the cursor will be at the beginning of the next column
Conclusion
In Conclusion, one of the most useful features of google docs is the ability to put text into columns. Columns help make our text clear and concise. Also, it improves readability. In addition, you are expected to use them if you are writing a newspaper or a brochure. This is why it’s important to learn how to add columns in google docs. It is a very simple process, all you have to do is select the text that you want to add to columns and click Format>Columns and then choose what sort of columns di you want. On the other hand, you can remove a column by clicking Format>Columns>one-column icon. Also, you can add a column break to decide where to place the text in the columns. Finally, you should notice that if you add columns to a blank page, the columns will be applied to the entire project.


