
To Make a Hanging Indent on Microsoft Word
- Select the text for the hanging indent.
- Go to the “Home” tab.
- In the “Paragraph” section, click the corner arrow.
- In the dialog, find “Special” and choose “Hanging” from the drop-down.
- Set the desired indentation size in the “By” field.
- Click “OK” to apply and check formatting.
Web Version:
- Open or create a Word document in your browser.
- Select the text for the hanging indent.
- Access the “Layout” tab.
- Click the three dots menu and choose “Paragraph“.
- In the dialog, select “Hanging” under “Special“.
- Specify the indentation size in the “By” field.
- Click “OK” to apply and verify formatting.
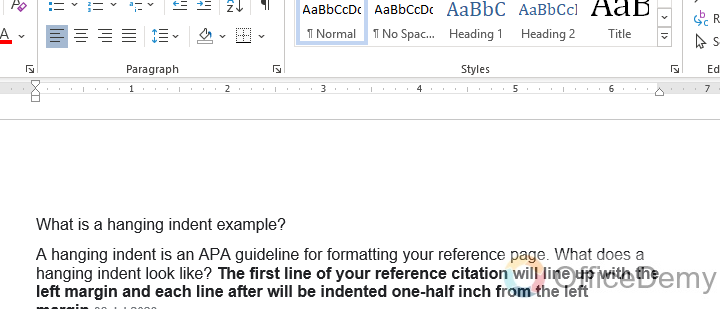
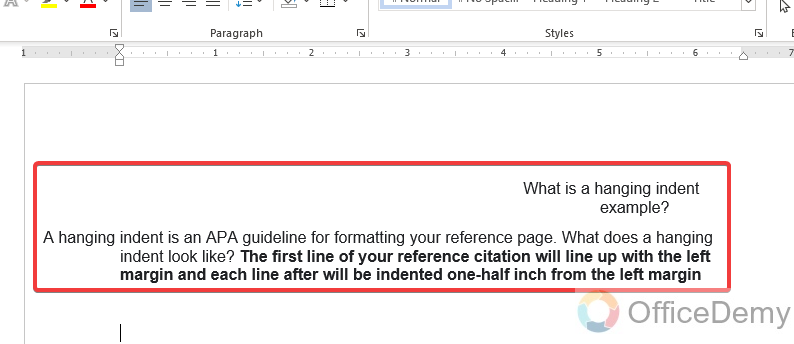
To format citations, references, and other types of lists, academic and professional writers frequently use a hanging indent. The first line of a paragraph is flush with the left margin and the subsequent lines are indented in a hanging indent.
Hy, and welcome to our latest MS word series of tutorials. Today, we will learn how to do a hanging indent on Microsoft word. A hanging indent can be produced by modifying the paragraph indentation settings in Microsoft Word. Users can do this by trying to drag the bottom marker on the ruler at the top of the screen or by using the Paragraph dialogue box. To meet the needs of a particular document or writing style, the hanging indent’s size can be changed.
Reference lists, bibliographies, works cited pages, lists of bullet points, and lists of numbered items all frequently use hanging indents. The hanging indent helps the reader quickly understand where each new object or paragraph begins while making the text easier to read.
Importance of using Hanging Indent on Microsoft Word
Learning how to do a hanging indent on Microsoft word can be helpful for several reasons. To format citations, references, and other types of lists in academic and professional writing, hanging indents are frequently used. Understanding how to insert a hanging indent makes sure that your work is properly formatted and presented well. In many cases, academic or professional style manuals like APA or MLA specify the formatting specifications for hanging indents. You can make sure that your work follows these rules and fulfills the expectations of your audience by learning how to insert a hanging indent in Microsoft Word. It can pick some time to manually format a hanging indent, especially if you need to do it repetitively throughout the document. You can quickly and easily add hanging indents throughout your document by learning how to do a hanging indent on Microsoft word. This is going to save users time. Hanging indents and other appropriate formatting techniques can enhance communication in your writing. You can make it easier for your readers to find important information and comprehend your ideas by using a consistent and understandable format.
So, learning how to do a hanging indent in Microsoft word is a key skill for anyone who uses Microsoft word in daily life and wants to generate professional, excellent, and polished documents.
How to do a Hanging Indent on Microsoft Word?
Making a hanging indent is one of Microsoft Word’s most useful features. A hanging indent is a kind of paragraph formatting in which the first line of a paragraph is flush left, and all subsequent lines are indented. Lists, bibliographies, and other types of text that call for a consistent indentation style can all benefit from using this formatting style. A detailed method for creating a hanging indent in Word Documents in the desktop version or browser version is provided below.
How to do a Hanging Indent on Word – Using Desktop Version
We are going to learn the step-by-step procedure for how to do a hanging indent in the desktop version. So, Let’s start and learn each step in detail.
Step 1
Start a fresh document in Word Documents or open an already existing one that you want to arrange with a hanging indent
Step 2
Select the text you would want to format with a hanging indent. It could contain one or many paragraphs.
Step 3
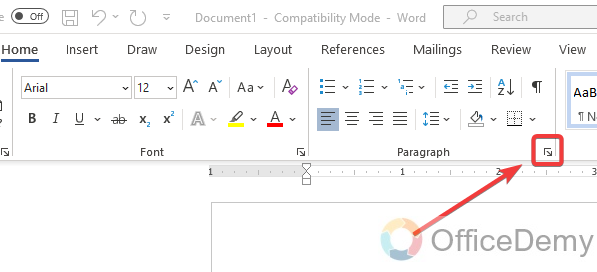
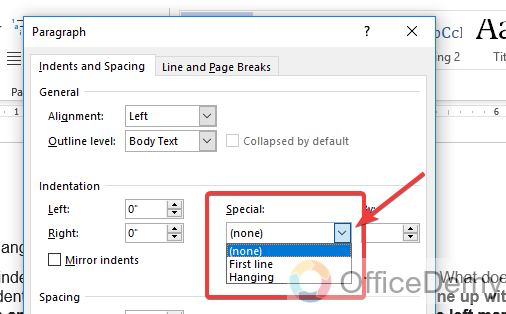
In the Home, tab Click on the little arrow in the corner of the paragraph section
Step 4
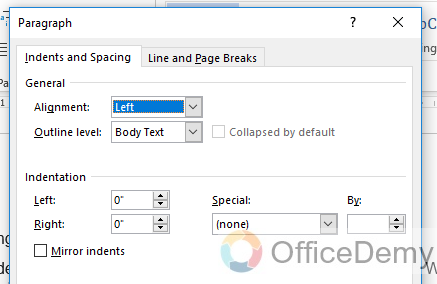
After clicking on the arrow, a new dialogue box will open, In this dialogue box we can adjust the formatting of the text
Step 5
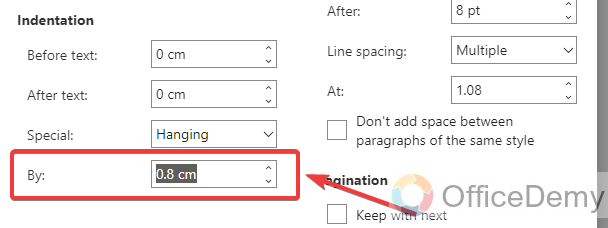
Now set the indentation in the indentation section. Click on the Special drop-down ribbon
Step 6
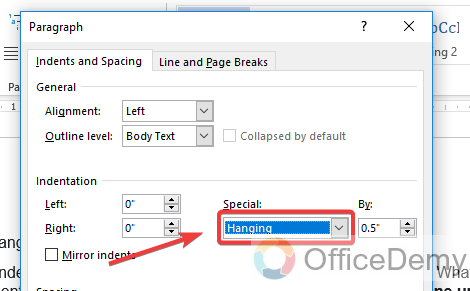
Select Hanging from the Special drop-down ribbon
Step 7
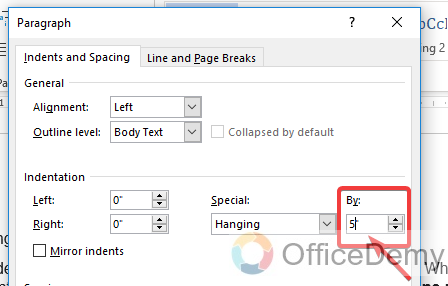
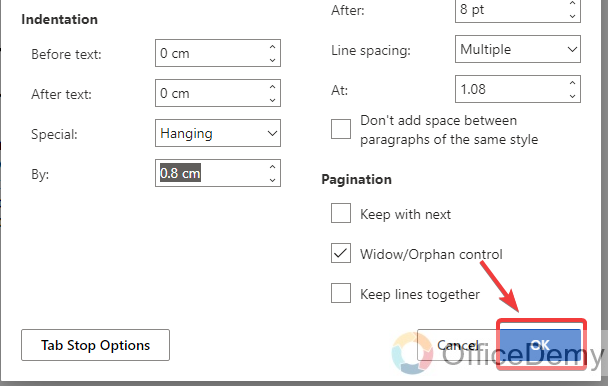
Now, choose the size of the indentation you want to use in your document from the By field
Step 8
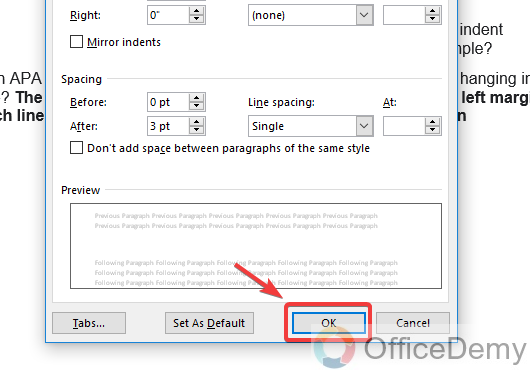
Click OK to apply the changes to your selected text
Step 9
To ensure that the hanging indent is applied properly, check your text’s formatting one last time. To do this, either preview the document online or print it out and examine the printed version.
This is how we can apply hanging indent in the MS word desktop app.
How to do a Hanging Indent on Word – Using Browser Version
Now, we are going to learn the step-by-step procedure for how to do a hanging indent in the browser version. So, Let’s start and learn each step in detail for the browser version
Step 1
Start a fresh document in Word Documents or open an already existing one that you want to arrange with a hanging indent
Step 2
Select the text you would want to format with a hanging indent. It could contain one or many paragraphs.
Step 3
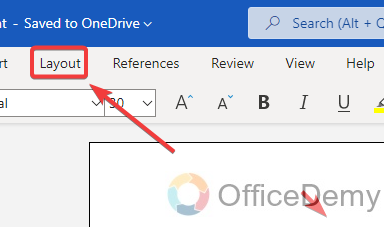
In the main menu go to the layout tab
Step 4
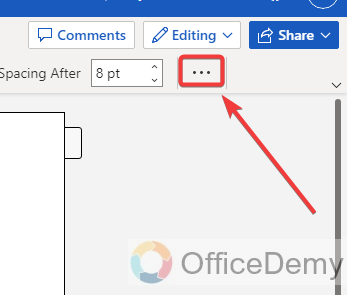
Select 3 dots menu in the corner of the layout tab
Step 5
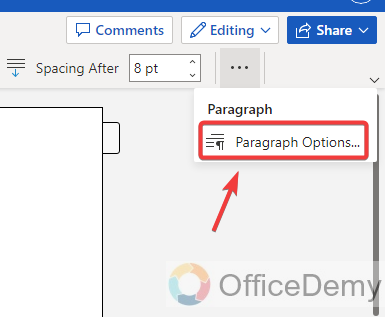
Click & open the paragraph option
Step 6
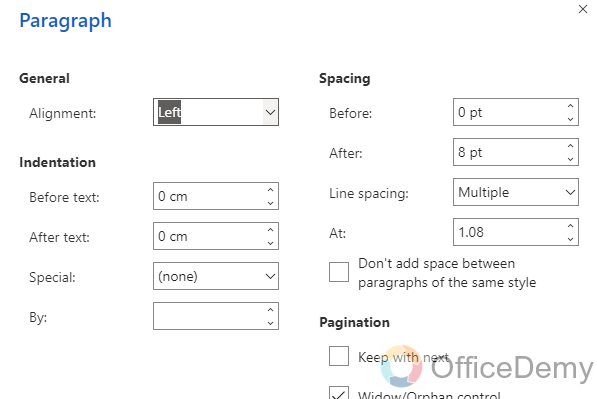
After clicking on the paragraph option, a new dialogue box will open, In this dialogue box, we can adjust the formatting of the text
Step 7
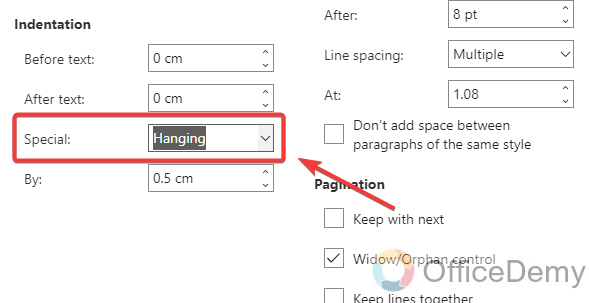
Select Hanging from the Special drop-down ribbon in the indentation section
Step 8
Now, choose the size of the indentation you want to use in your document from the By field
Step 9
Click OK to apply the changes to your selected text
To ensure that the hanging indent is applied properly, check your text’s formatting one last time. To do this, either preview the document online or print it out and examine the printed version.
Frequently Asked Questions
Can I use a hanging indent in my word document for all types of text?
Yes, hanging indent can be used for any kind of text in your word document.
Is a hanging indent possible in Microsoft Word for Mac?
Yes, by using the same procedures as in the Windows version of Microsoft Word, you can create a hanging indent in Word for Mac.
What makes a hanging indent desirable?
To format citations, references, and other types of lists in academic and professional writing, hanging indents are frequently used. Understanding how to insert a hanging indent makes sure that your work is properly formatted and presented well. In many cases, academic or professional style manuals like APA or MLA specify the formatting specifications for hanging indents.
What can I do to make sure my hanging indent is the same all across my document?
You can create a style that includes the formatting for hanging indents and apply it to the relevant sections of your document to guarantee that your hanging indent is consistent all around. This can help you save time and guarantee a consistent, polished appearance for your document.
Conclusion
So, that’s all from today’s guide covers both the desktop and browser versions of how to create a hanging indent in Microsoft word. We sincerely hope that the tutorial above helped guide you on how to create a hanging indent in Microsoft word. It is simple to create a hanging indent in Microsoft Word. Anyone who uses Microsoft Word regularly and wants to create polished documents should be able to set up a hanging indent in Microsoft word. I sincerely hope you found this article to be both educational and worthwhile to read. I will be back soon with another useful guide. Keep learning with Office Demy. Thank you!


