
To Edit Master Slide in Google Slides
- Open Google Slides.
- Click “Slide” in the menu.
- Select “Edit theme,” formerly “Edit master“.
- A new window opens for editing the master slide.
- To change the theme color, use the “Background” option.
- Choose a color or image, then click “Done“.
Google Slides is a web-based program that keeps updating time after time and keeps making changes in its features for better improvement to facilitate its users. Similarly, people are looking for the “Edit master” feature in Google Slides but they are not able to find it. So don’t worry today our topic is on how to edit master Slides in Google Slides. We will tell actually where this option is in Google Slides and how it works. A while ago there was an update in Google Slides due to which Google authorities changed the function name “Edit master” to “Edit theme” and it is placed in Google Slides the same as the “Edit master” option used to be. The master editor in Google Slides allows you to quickly modify the Slides and slide layouts in your presentation. From there, you can edit the master slide, which will affect every slide in the presentation.
You can also modify individual slide layouts, which will change any Slides using those layouts. A key part of creating an effective presentation is to ensure the look and feel are professional and consistent which exactly provides you with the master edit in Google Slides. With the help of using the edit master feature of Google Slides, you can modify backgrounds, rearrange placeholders, customize text formatting and create unique slide layouts efficiently on every slide. In Google Slides, master editing is an easy way to make sure that your presentations have a set style that stays true to your brand.
So, if you are using Google Slides to create your presentation then you should know about the master edit feature of Google Slides. Here is a deep discussion on How to edit the master Slides in Google Slides, so let’s move toward the next section.
Importance of Editing Master slide in Google Slides
Nowadays competition has been tough enough, everybody wants his given task on time or before the time so if you are making any project presentation for your client and you lack time duration then it is only possible by getting to grips with the Google Slides Master edit can speed up your content creation, providing a strong jumping off point for all your future presentations. Google Slides master edit controls the style of every slide in your presentation. It allows you to set custom elements that can’t be edited or moved in normal view. With the help of edit master, you can add backgrounds or logos, and make choices about fonts and theme colors that will apply to every content slide in your deck instead of adding individually on every slide.
Master editing helps you to give your presentation a consistent look and feel. Several layout formatting options lock certain elements so they can’t be easily edited. Master edits not only allow you to unlock these formatting options but also enable you to format the data consistently on every slide with a few clicks. The best advantage of master edit is that changes can be made to the “master” of the entire presentation so that every slide used will have these changes made to them. This saves time rather than having to edit each slide to make changes to its theme and layout individually. This is why we need to learn how to edit master in Google Slides.
How to Edit Master slide in Google Slides?
As we discussed, “Edit master” in Google Slides is the special feature that allows you to edit special. There is not a single procedure of an edit master slide in Google Slides. Edit master includes in it many formatting options in Google Slides and can apply them to the entire presentation. For example, if you want to insert a logo of your organization in your entire presentation you can do it by using Master edit. Similarly, if you want to change the theme color of the entire presentation you can also do it at once with the help of a master edit. If some layouts, shapes, and figures are not editable and locked you can edit them with the help of master edit. So, in this section, I will describe to you some usage of the edit master feature in Google Slides so you can understand the logic of this feature. Let’s look at how Google Slides edits master Slides to streamline your presentation creation process.
How to Edit Master slide in Google Slides – By Editing the Theme
Step 1
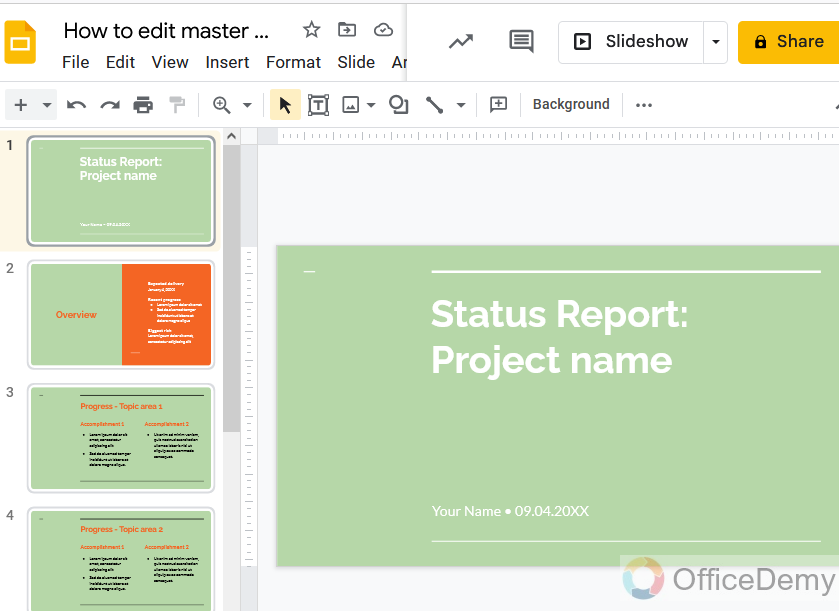
Let’s suppose this is your sample presentation containing different types of headings, texts, shapes, and figures. So here we will use the edit master option.
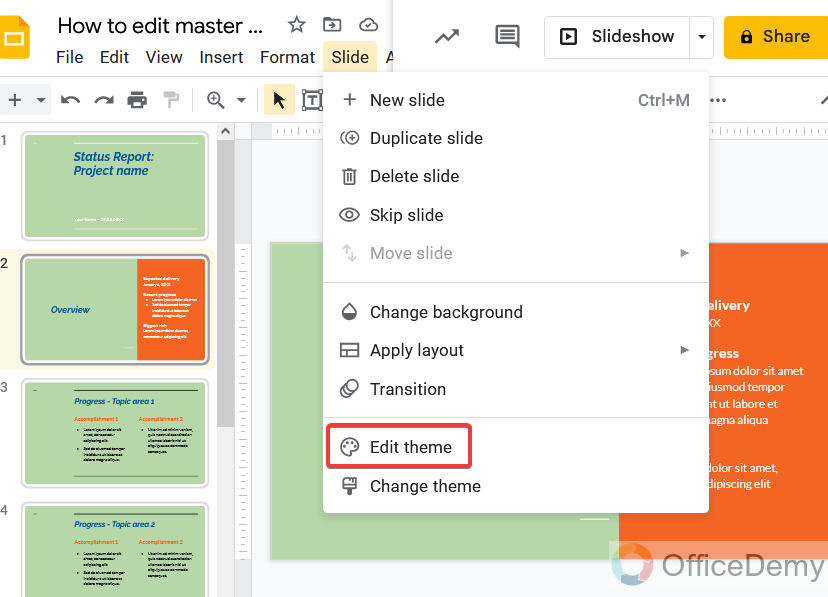
Step 2
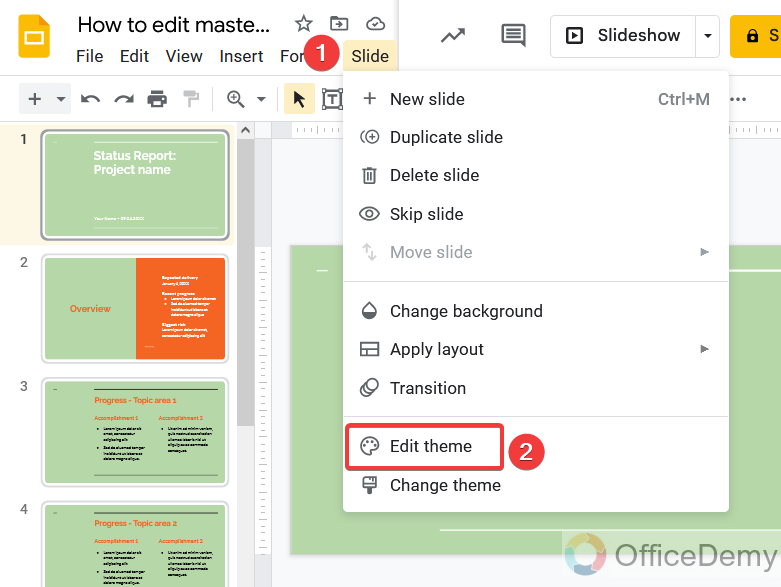
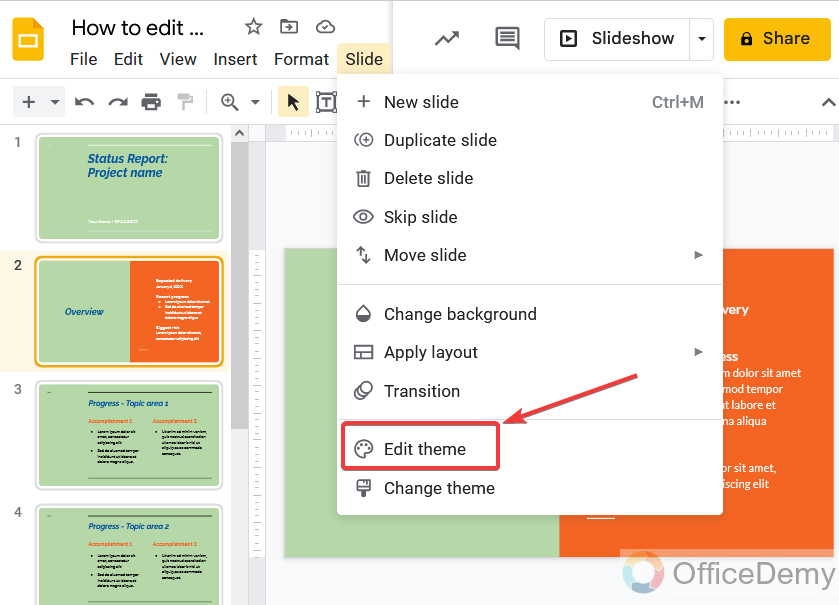
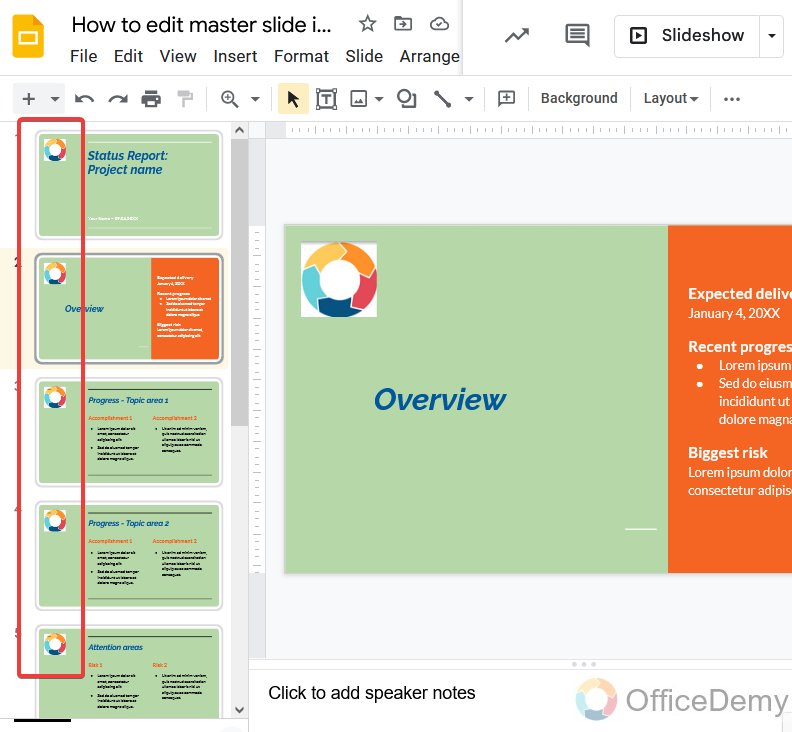
To open the edit master window go into the “Slide” tab from the menu bar of Google slide.

Step 3
A drop-down menu will open where you will find the “Edit theme” option click it to open
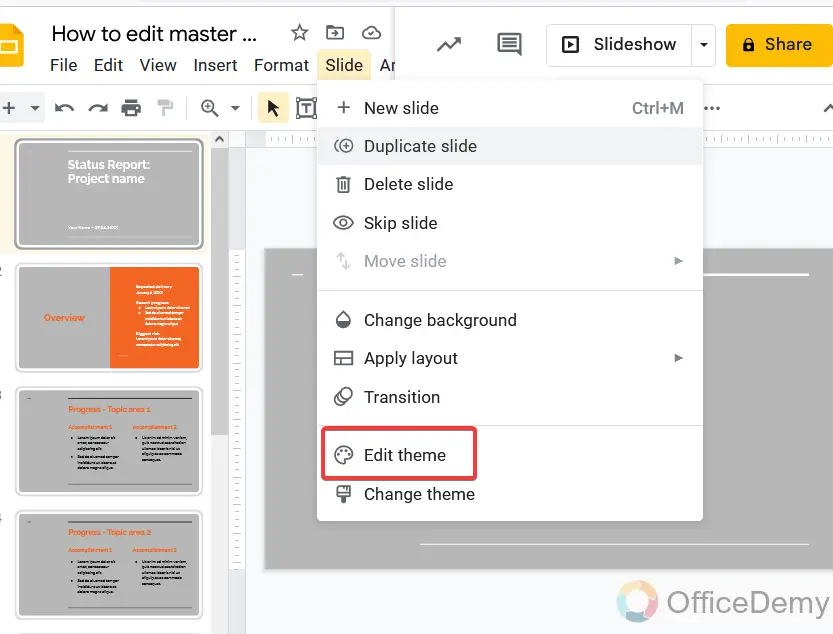
Note: As we discussed, the “Edit master” option has been replaced by the “Edit theme” option within an update.
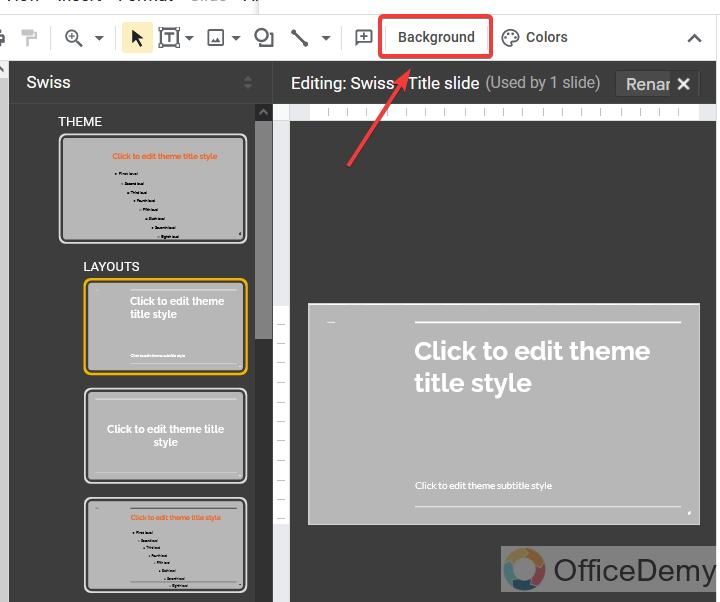
Step 4
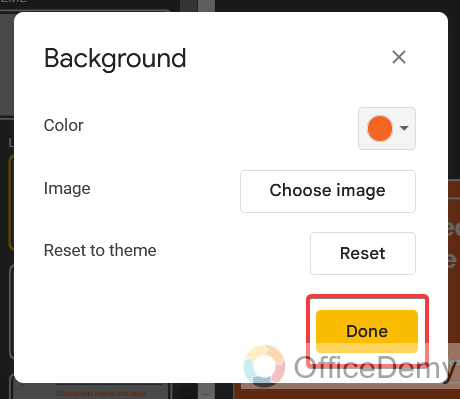
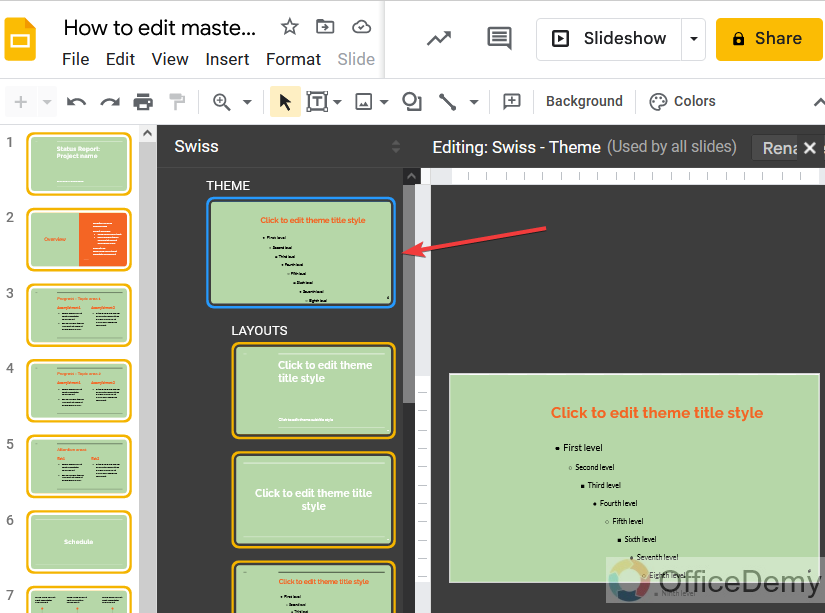
Here you can see that your entire presentation is opened in a different window which is the edit master window where you can edit something special to your presentation. As here we have to change the theme color, look at the toolbar there is an option “background”. Click it to open.
Step 5
A new pop-up window will open where you can see the color icon, click on it and select your desired color.
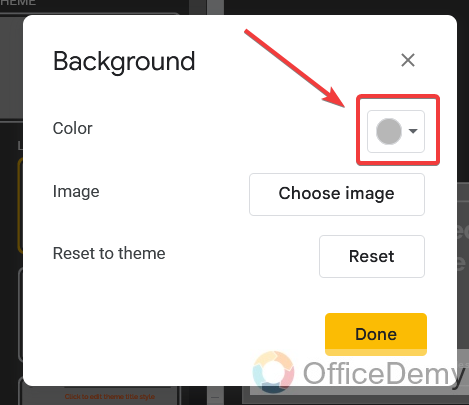
Note: As you can see in the window there is a “Choose image” option through which you can use an image as a background for your presentation.
Step 6
You’re almost done. Just click the “Done” button to change the color of the entire theme.
Step 7
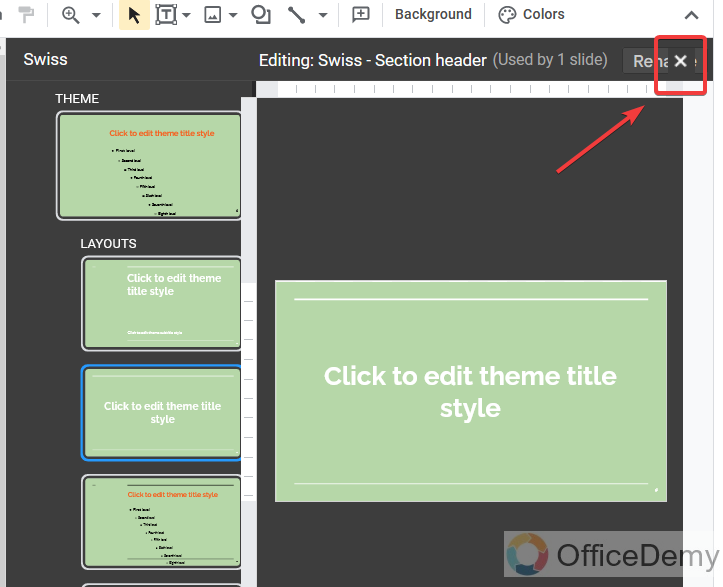
Now just close the edit master window to see the result.
Step 8
As you can see the theme color of the entire presentation has been changed with the help of a few clicks.
How to Edit Master slide in Google Slides – Format text by master edit
Step 1
First, we will open the edit master window by the following track.
Step 2
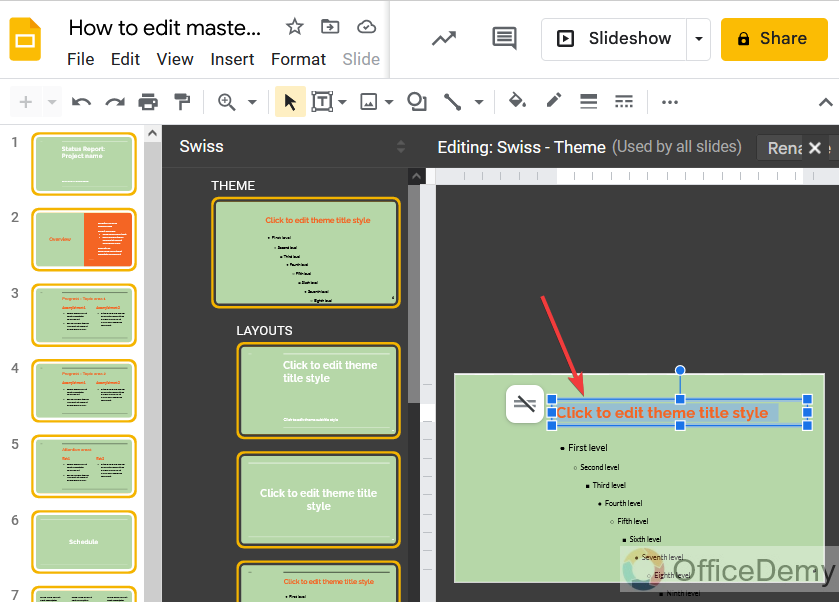
If you want to change the text formatting in all Slides, so first select the theme layer in the edit master window as shown below.
Step 3
As you can see there is a tree of heading types, but here we are selecting the title text to format.
Note: It will format all the titles present in your presentation.
Step 4
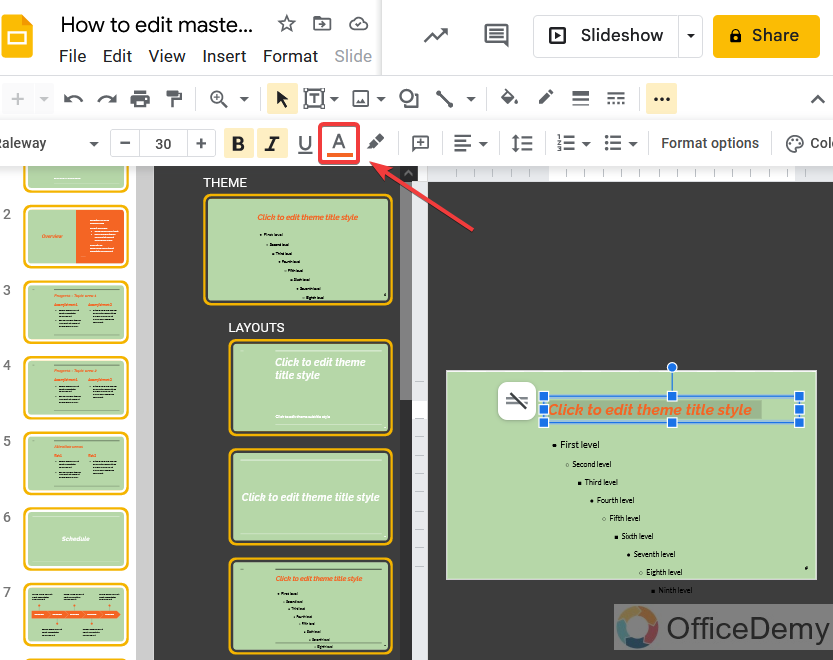
Let’s do the “italic” title text by clicking on the italic icon present in the toolbar of the Google slide as shown in the figure.
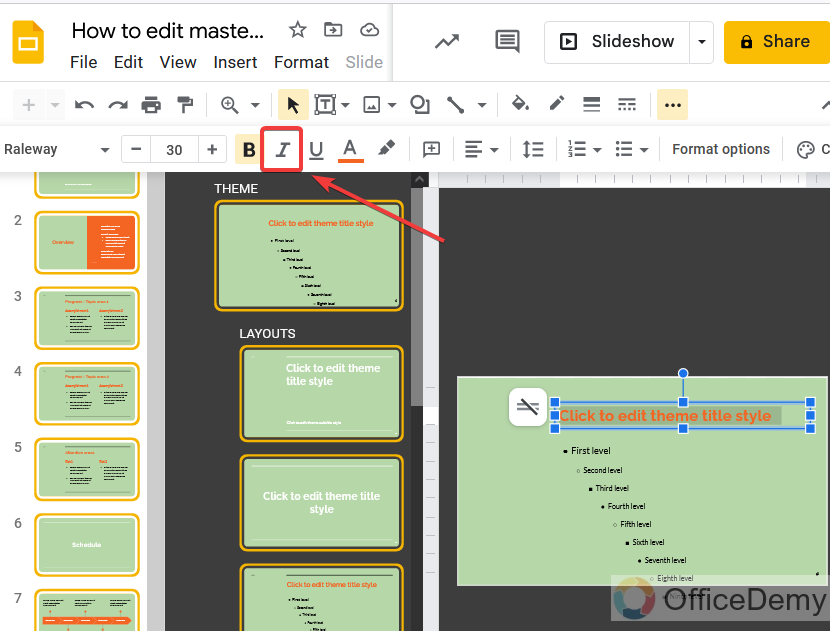
Note: You are not restricted, although you can format your text by any kind of formatting like bold, underline, font style, etc.
Step 5
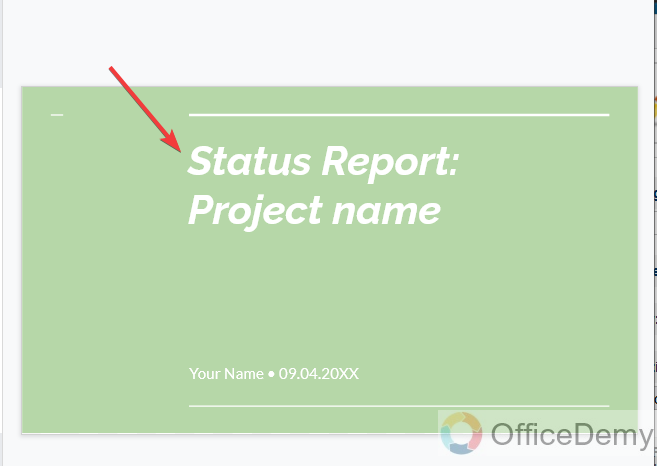
The result is in front of you, you can check all the Slides the title text will be in italics on all Slides.
Step 6
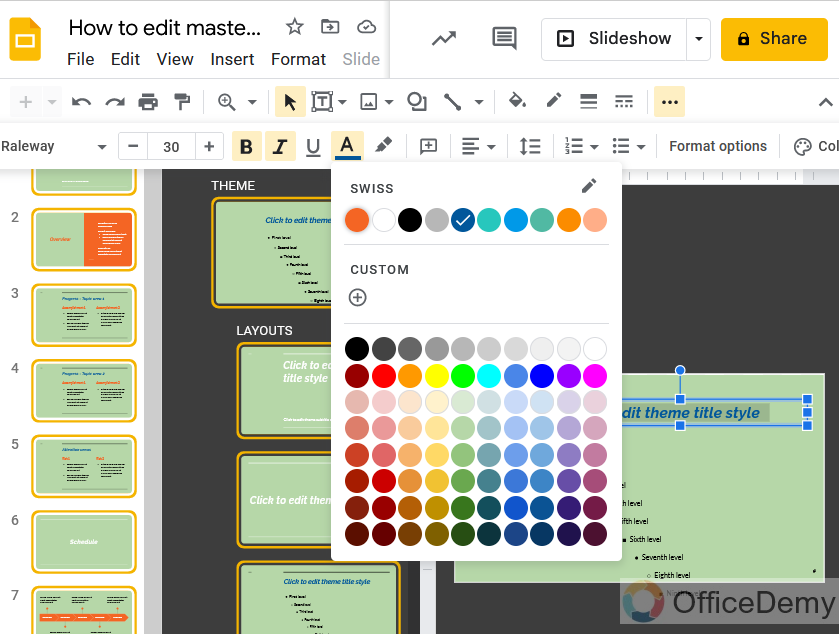
Similarly, you can also change the color of any text in the entire presentation with just one click. First, select the heading type as I select here title text again. Then look at the toolbar of the Google slide and you will find a text color icon. Click on it to open.
Step 7
Now it’s time to select the color for your text.
Step 8
Is it amazing to see? The color of the title text in all Slides has been changed with just one click.
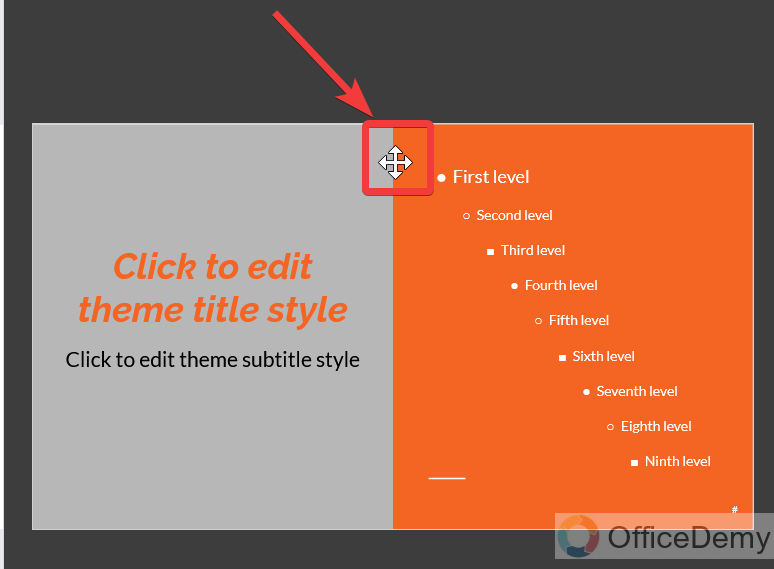
How to Edit Master slide in Google Slides – Format locked layout options in master edit
Step 1
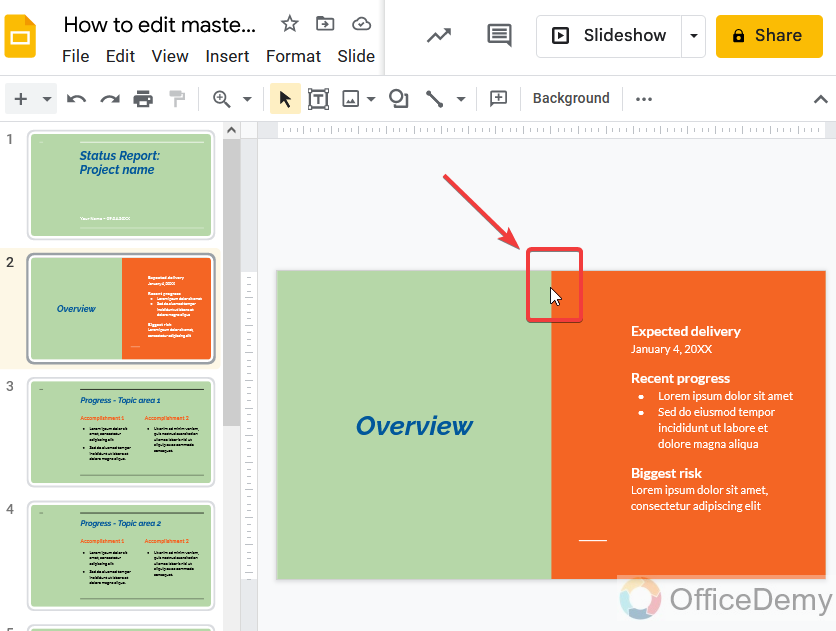
As you can see our slide is split into two parts of different colors which are unable to edit.
Step 2
To access the locked options first go into the edit master window. You can find it in the slide tab of the menu bar.
Step 3
Did you notice? There was a different cursor before the master edit, but now in the master window, there is a different cursor by which you can format the unlocked option. Click on the split half to format it.
Step 4
As you can see the blue guideline along the split half for adjusting its size or length.
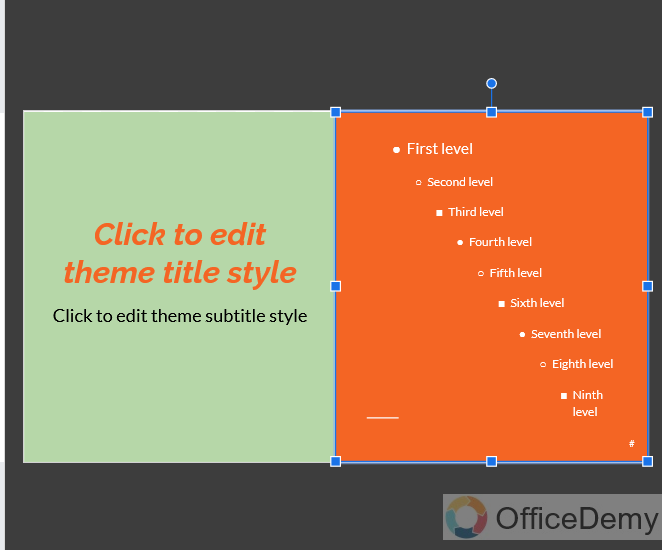
Step 5
You can see how easily I’m able to move this split half by dragging the cursor on the blue guideline, which I was unable to do before.
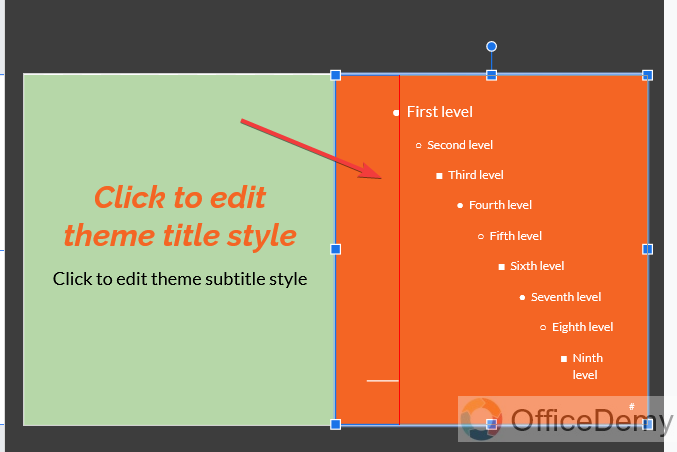
Step 6
As you can see the slide which was split in half, now the volume of the second color has decreased.
How to Edit Master slide in Google Slides – Insert logo/image by master edit
Step 1
If you want to add a logo of your organization in all Slides for reference, then it is only possible with the help of the master edit option in Google Slides which you can find easily as shown in the following picture.
Step 2
Once you open the edit master window there is an image icon to upload pictures. Click on it and then go into the image.
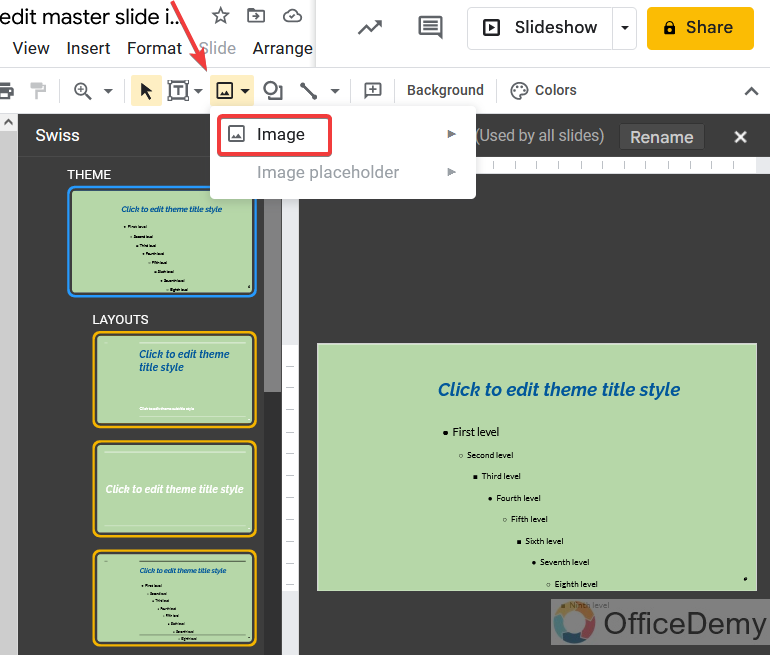
Note: If you want to add images to all Slides then don’t forget to select the theme layer.
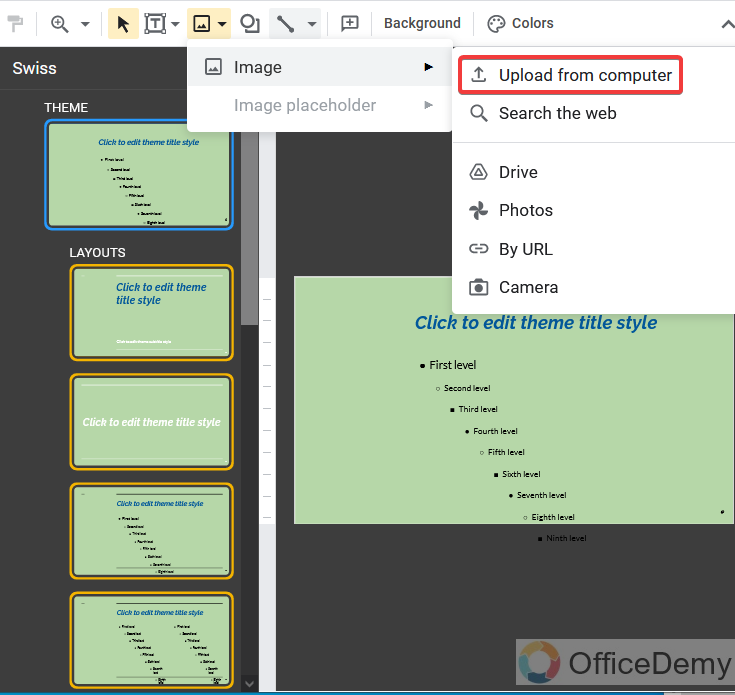
Step 3
Click on “upload from computer” to add an image to the Slides.
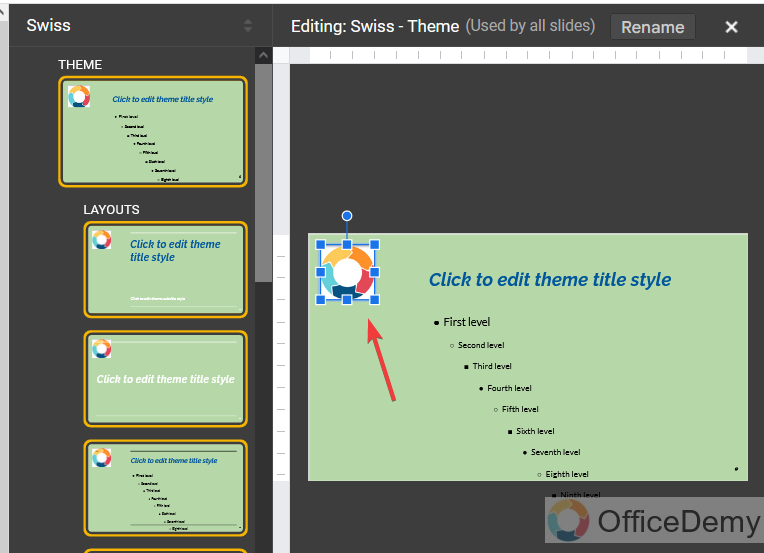
Step 4
Your logo/picture will be inserted and adjusted where you want.
Step 5
Look at the thumbnail view of the Slides and you will see your logo in all the Slides as we want.
Similarly, you can use any picture on every slide as a reference or watermark.
Conclusion
It was all about how to edit master slide in Google Slides. Did you see it in the above example? How constantly and efficiently we have edited our presentation with just a few clicks with the help of the edit master option. It can cost a lot of time if we put certain tasks individually on every slide. So, to work professionally and efficiently the above tutorial on how to edit master slide in Google slide can save you a lot of time and can be very helpful, so don’t waste your time reading the above article on how to edit a master slide in Google slide and take advantage of this powerful feature of Google slide.


