
To Insert a Text Box in Google Docs
- Click “Insert” “Drawing” > “New“.
- Select the “Text box” option.
- Create a box by dragging it within the art bot area.
- A box with a blinking cursor is ready.
- Enter your text, and then click “Save and close“.
Today’s article is about how to insert a text box in google docs. A textbox is a drawn box that can be of any orientation and size and contains some text. It is called a text box because it contains text and can be placed anywhere on the page without disturbing the other text, or breaking the flow of the text. A text box can be used for adding sticky notes on the top of the page just like your company logo, or a static text comment that you want your readers to read on every page. Text boxes are useful to add a piece of text on any odd position where our cursor is not functional. Let’s say if you want to write a text outside of the normal cursor range then you will use a text box. Adding a text that can’t is edited directly like other text can be placed inside a text box. so, let’s see in detail about text box in google docs.
The text box can be drawn of any size and can be adjusted according to the size of the text inside it, they can be easily moved and positioned anywhere in the document without breaking the flow of the original text of the content. Text inside text box can have the same functionalities as text but inside a container that differentiates it from normal texts. The text box can be stretched horizontally and vertically but instead of increasing font size it will pixelate the text and the text become very weird and unreadable. So don’t stretch your text boxes unnecessarily.
If you are interested to learn about how to delete or remove a text box in Google Docs, please read the following article.
How to Delete a Text Box in Google Docs (2 Methods)
Why do we need to insert a text box in google docs?
The text box is above the main content of our document, they function as an image and also pixelate when dragged unnecessarily. The text box allows you to use exclusive text features on them without disturbing the other content on the page. They are sticky and can be placed anywhere on the page, there are some preset features such as alignment, a text box can be aligned left, right, or center directly with a preset option. Five text wrapping options can be used to wrap the text in different styles. In size and rotation, we can increase the size of the text box proportionally with the font size, remember when extending the textbox using mouse drag then it will not increase the font size, instead, it will pixelate the text. You can also check on the lock aspect ratio to increase the textbox size proportionally. There are lot more options but, in this guide, we will see how to insert a text box in google docs.
- To add a sticky text with all text features.
- To add a text box that can be placed anywhere on the page without a cursor.
- To add a text that is not editable directly on the page.
How to Insert a Text Box in Google Docs
Step 1
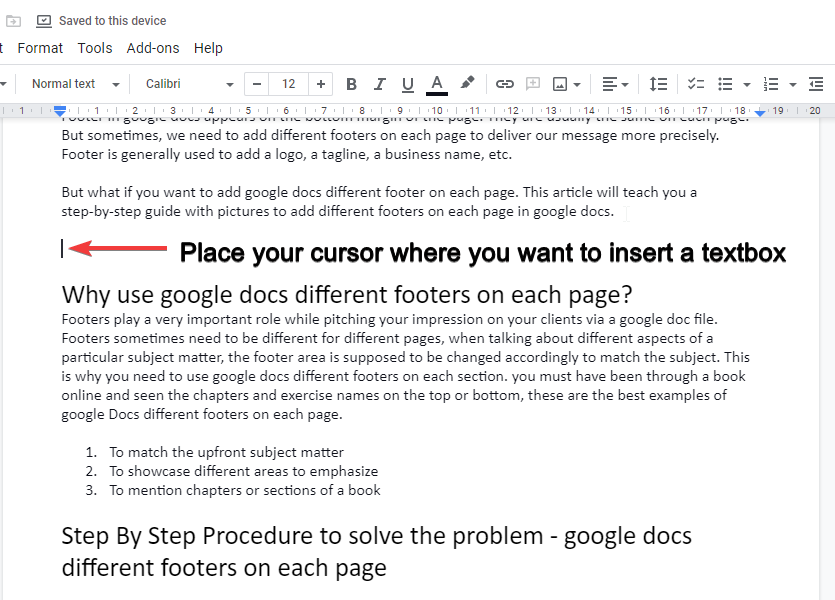
Open your document and place your cursor where you want to add a textbox.
Step 2
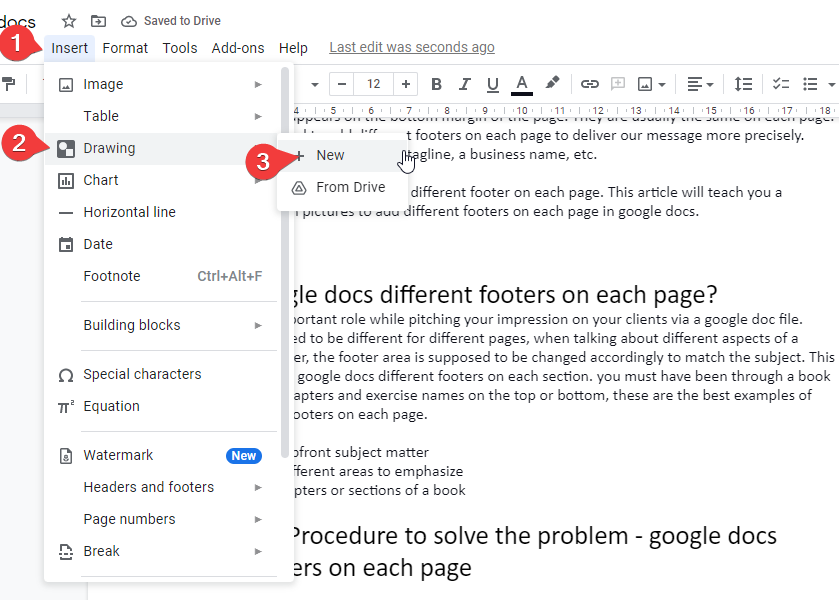
Go to insert in the top menu and then click on drawing > click on new.
Step 3
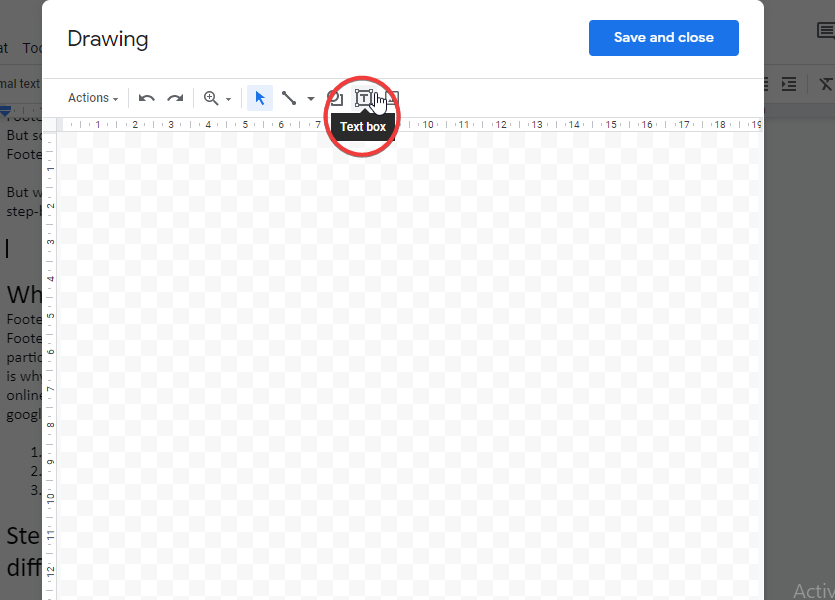
A drawing art bot will open with a top menu on it. Click on the text box option and drag in the art bot area to create a box.
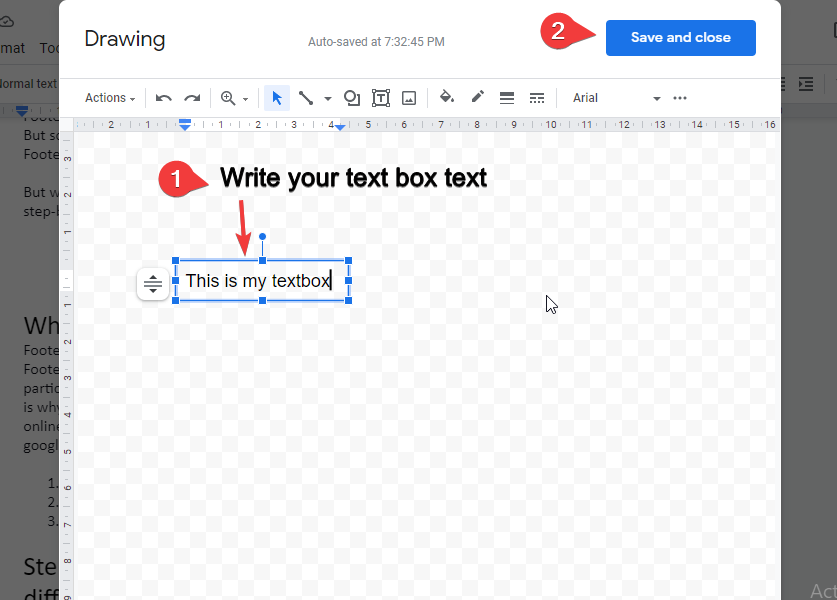
Step 4
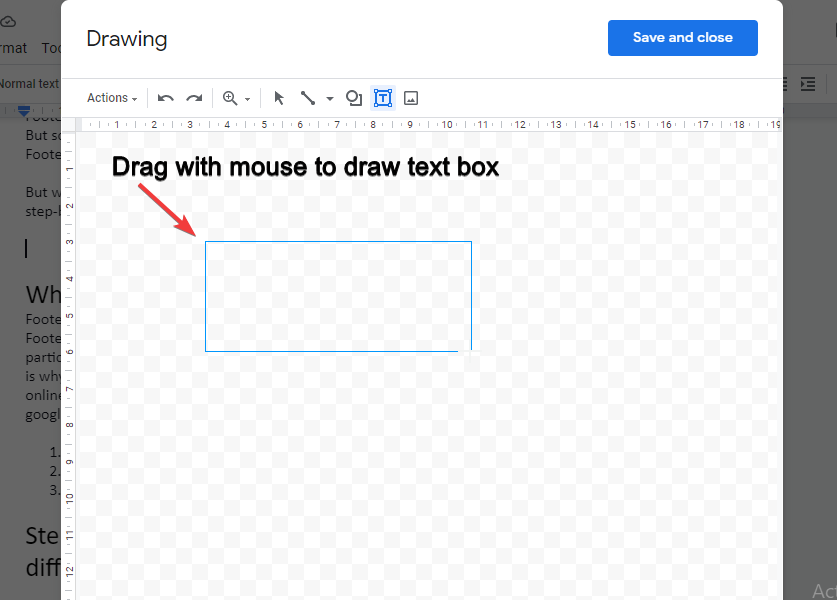
A box is ready with a blinking cursor, now write your text and then click on save and close.
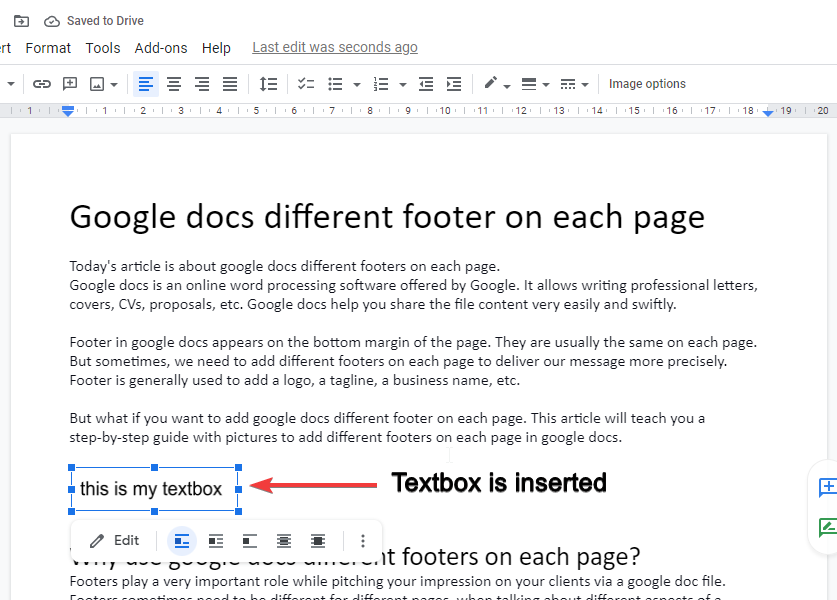
Step 5
Now your text box is added without background, now you can play around and explore more options that are described in the above paragraphs.
How to Insert a Text Box in Google Docs Video Tutorial
Notes
- Do not excessively drag your textbox because it will pixelate your text and the text will become very ugly.
- Always check the “lock aspect ratio” checkbox, it will work as a shift key and proportionally increase/decrease text box size
- You can use all text properties and features within your text box, such as colors, fonts, background colors, etc.
Conclusion
So today we learned a very useful feature of google docs and now we know how to insert a text box in google docs. This was a very quick guide with all the relevant information about the text box. We must know the feature and its usage to understand it better. So, after going through this article, you can answer all the following questions; What is the text box in google docs? How to insert a text box in google docs? Why do we use a text box in google docs? When do we need a text box in google docs? So, if you enjoyed this article and learned something new then please consider sharing this article with your friends and subscribe to the OfficeDemy blog for more tech articles and how-to guides related to google docs, and much more.


