
To Insert Calendar in Google Sheets
- Open Google Sheets.
- Navigate to the Templates Gallery.
- Select a calendar template.
- Customize it as needed.
OR
- Merge some cells horizontally in the first row.
- Adjust row heights.
- Fill in day names.
- Add day numbers for the month.
- Format the numbers as dates.
- Customize colors and styles.
- Copy this for other months.
- Hide gridlines if desired.
- Rotate the main text.
- Add text colors and fill colors as needed.
Google Sheets is a powerful spreadsheet software that performs complex computations and on the other end, it’s very interactive from the design aesthetics. We have so many templates available to use from Google Sheets, or we have a newly added Drawing feature that allows users to create almost anything on Sheets.
So, we can say that Google Sheets is a powerhouse for design and calculations as well. In this article, we will learn how to insert a calendar in Google Sheets. There are two ways to do it, I will show you both methods, and we will end up making a beautiful and interactive calendar in Google sheets with all the customizations and editing in our hands.
Importance of using Calendar in Google Sheets
Calendars are used in aligning your schedules for the coming days, weeks, or months. We already acknowledge the holidays, weekend days, and working days and schedule our projects and normal business affairs accordingly. Sometimes, we have a sort of data that needs a visual calendar diagram on sheets to make schedules.
So, this article is meant to teach you how to insert a calendar in Google Sheets from a template, and how to create your calendar on Sheets without using any external add-on. So, these are some reasons, we need to learn how to insert calendar in Google Sheets.
How to Insert Calendar in Google Sheets?
We have two main ways to insert calendar in Google Sheets. The first method is to use a Google Sheets pre-made template for a calendar and then customize it based on your need, and the second way is to create a fully-fledged calendar manually from the scratch, we will start with the template and then we will see the manual method, so without further adieu, let’s get started.
Insert Calendar In Google Sheets – From Google Sheets Template
In this section, we will learn how to insert calendar in Google Sheets from a Google Sheets template. We can use the pre-made templates for free, and then we can further customize them within Google Sheets. So, let’s see where we can get those templates.
Step 1
Open Google Sheets, then navigate to the Templates Gallery.
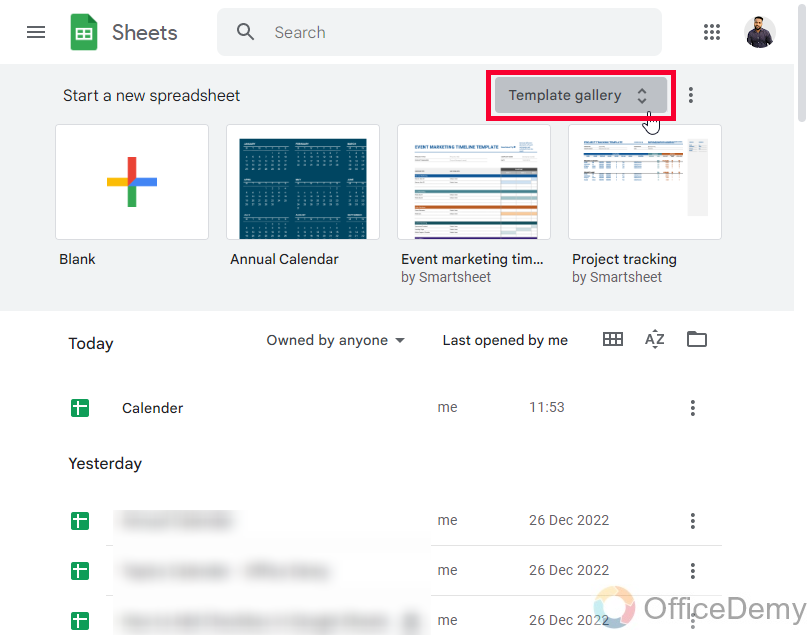
Step 2
Here, you will see a calendar template, click on it, and it will be opened in a new Google Sheets blank file.
OR
Step 1
Go to Google Drive
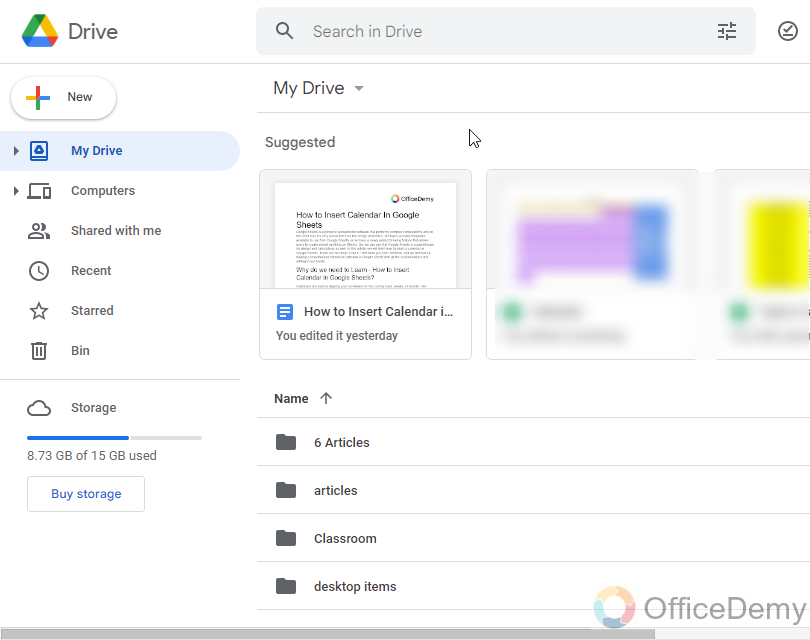
Step 2
Right-click anywhere on the white area, and then go to Google Sheets > From a template.

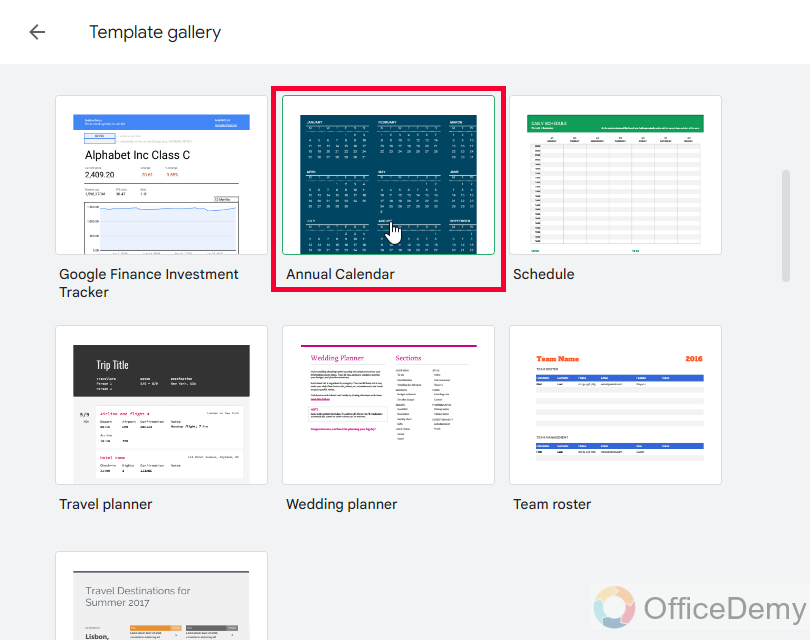
And you will be directed to the Template Gallery
From here you can follow the above two steps.
So, this is how to access the template and open it with Google Sheets. But, if you want to customize it, you can see the below section.
Insert Calendar in Google Sheets – Customize your Calendar
In this section, we will learn how to insert calendar in Google Sheets and how to edit it after adding it to Sheets. When you add a calendar template, you get so many tabs in your sheet files. The 12 tabs are the month’s tab 1 for every month, 1 is the main layout tab, and 1 is the editing tab.
Note: This calendar template automatically updates based on the current year. So, customization only means changing color, font, themes, etc.
Step 1
Go to Customize your calendar tab, and from here you can add other images replacing the original ones inside the cells to change the overall look of your calendar.
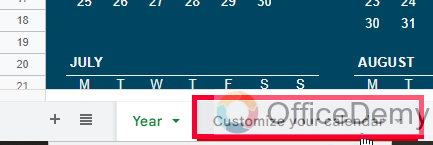
Note: If you change the theme here, it will not be affected. and all other changes will also not work because here you can only change the cell images or can add any type of text within the cells.
Step 2
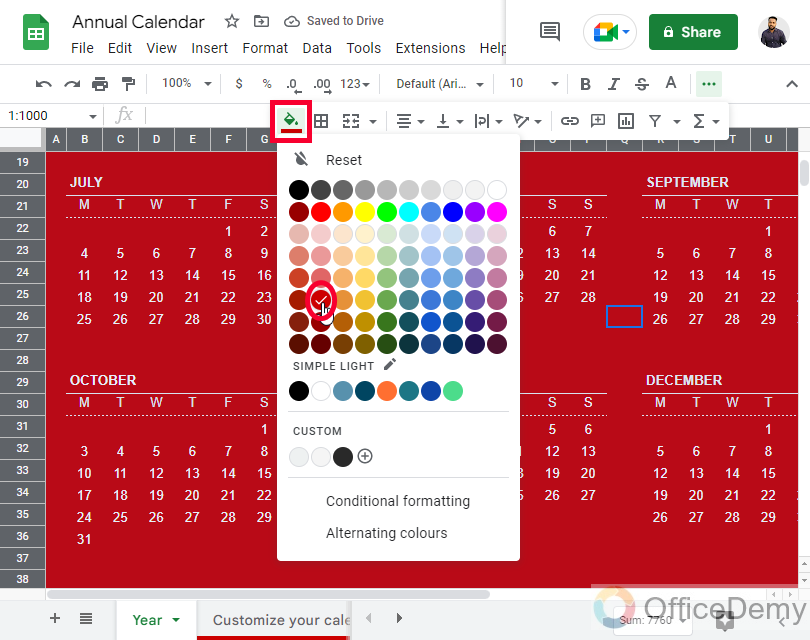
Go to the main first page and here you can change colors, fonts, etc.
Simply select the calendar and change the colors from the toolbar.
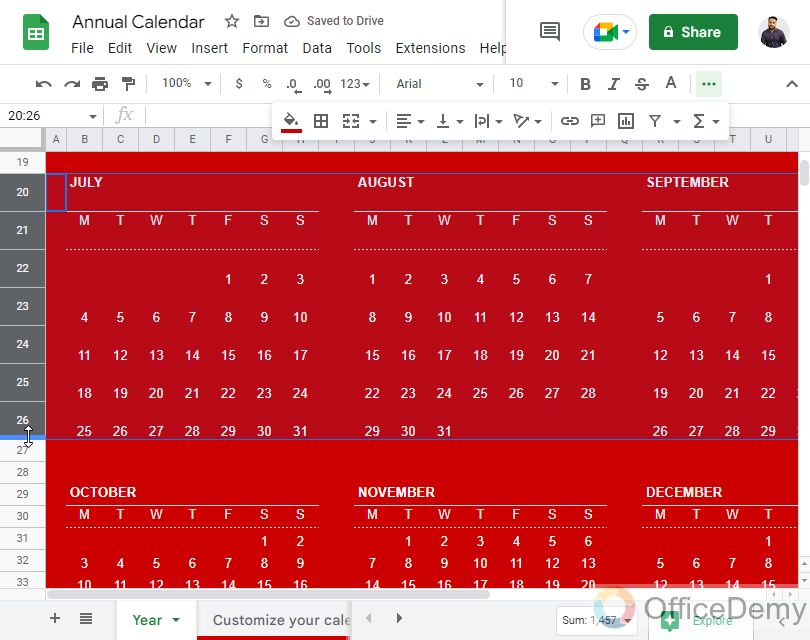
Step 3
You can change the height, width, or rows and columns if you want to make a larger or smaller version of this calendar
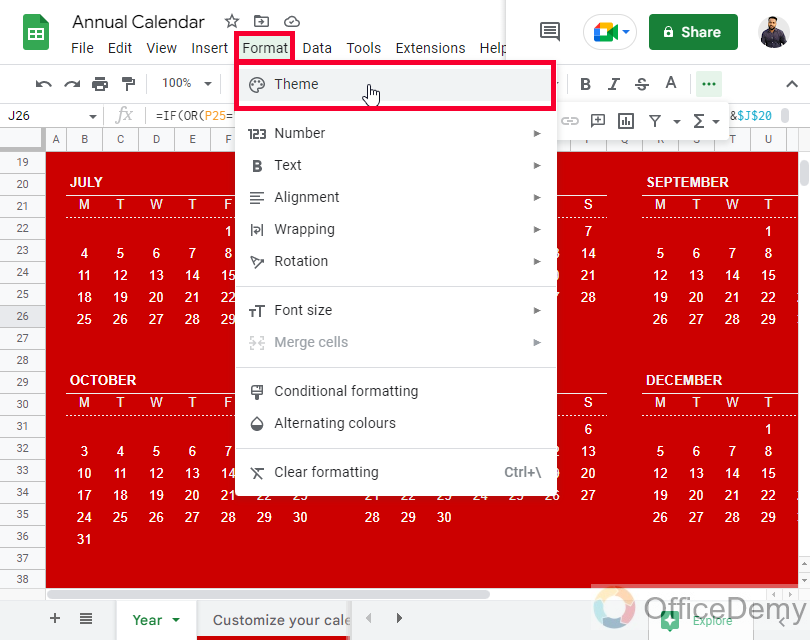
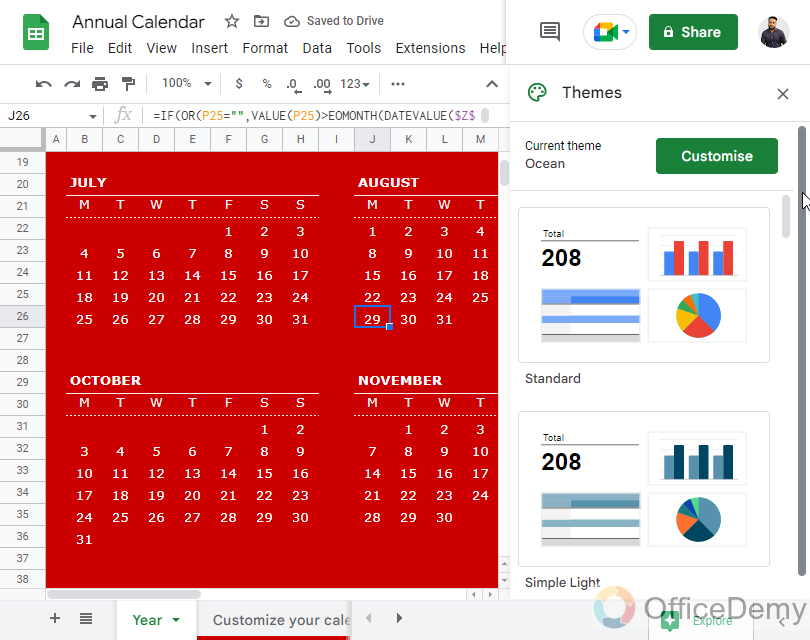
Step 4
To change the overall design of your calendar. Go to Format > Theme and select any theme from so many available themes.
So, these are some basic editing you can do with your template, but since it’s a pre-made template, you cannot make major changes to it.
In the coming section, we will see how to create a calendar from scratch without using any template.
Insert Calendar in Google Sheets – Creating a Calendar from Scratch
In this section, we will learn how to insert a calendar in Google Sheets, and we will focus on how to create a calendar in Google Sheets from scratch. Ok, so we don’t need any external add-on or any supporting file, we can directly start building the layout of our calendar, and the main benefit is that we are not limited to any layout, we can draw whatever layout and format we want. So, let’s start with creating the outer body of it, and then we will work on its content. I am building a 2022 calendar you can create for any year using the same method.
Step 1
Merge 7 cells horizontally of row 1
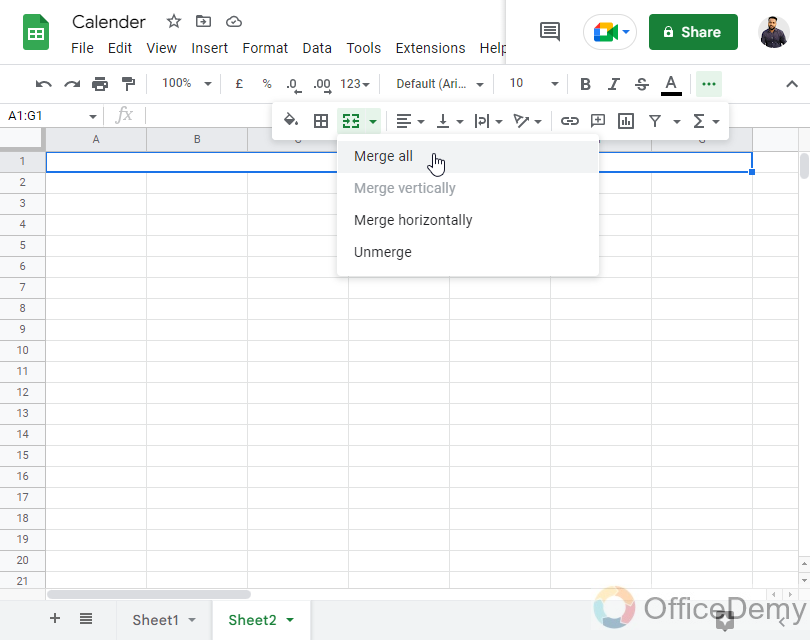
Step 2
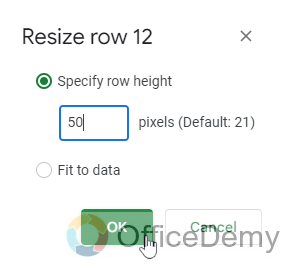
Now pick every alternative row starting from row 4 and change their height to 50px
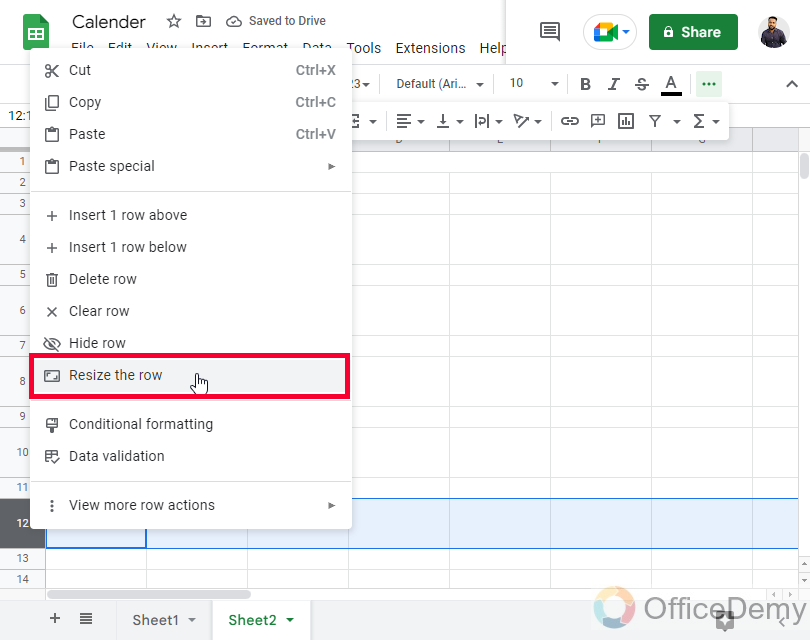
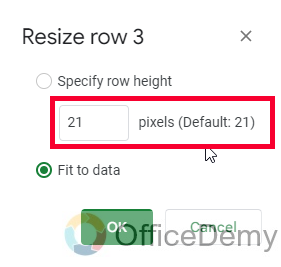
Step 3
For the remaining rows, keep the height as 21px default size.
Step 4
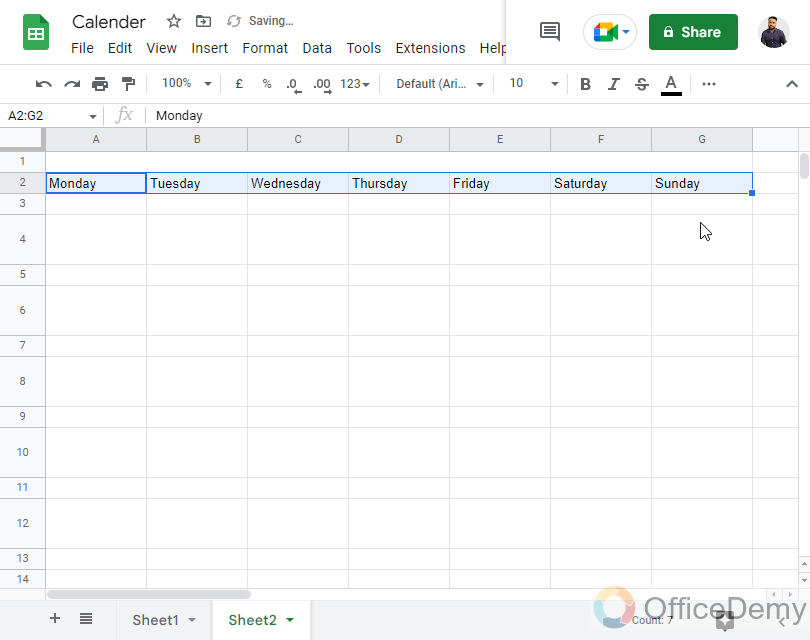
In the second row, write the day from which you want to start your weeks, such as Sunday or Monday, and drag it horizontally up to column G to autofill all the day’s names.
Step 5
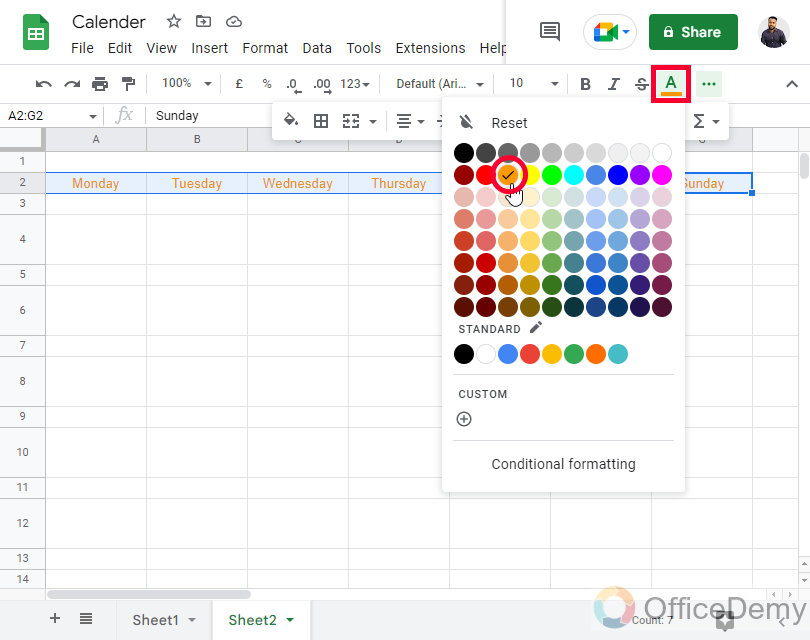
Give a text color to your days
Step 6
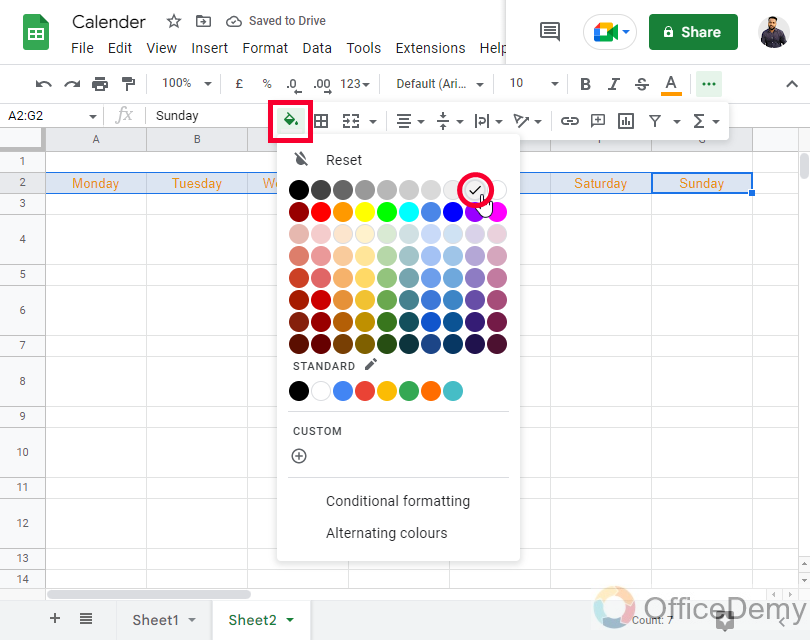
Add a fill color to your day’s cells.
Step 7
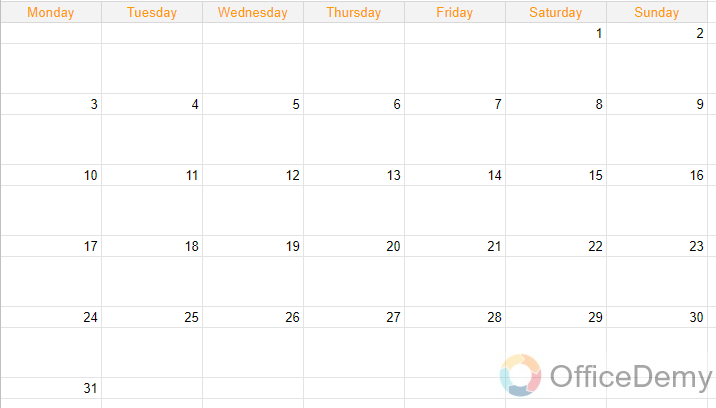
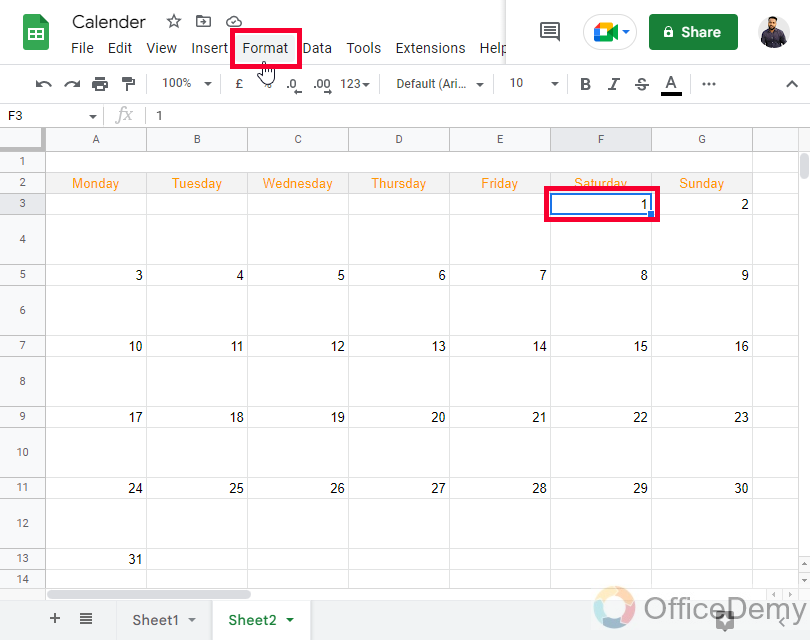
Now, see which is the first day of your current month. I am making a calendar for January 2022, so the first day of the month is Saturday, write 1 below the Saturday column in the first less-heightened row, then write 2 in the adjacent cell, and continue this in the row until the last day of the month
Step 8
Now it’s time to change the format, the numbers we have written in our calendar are in number format, but we want to change them into a custom date format.
Select any cell containing a date, and go to the Format menu
Step 9
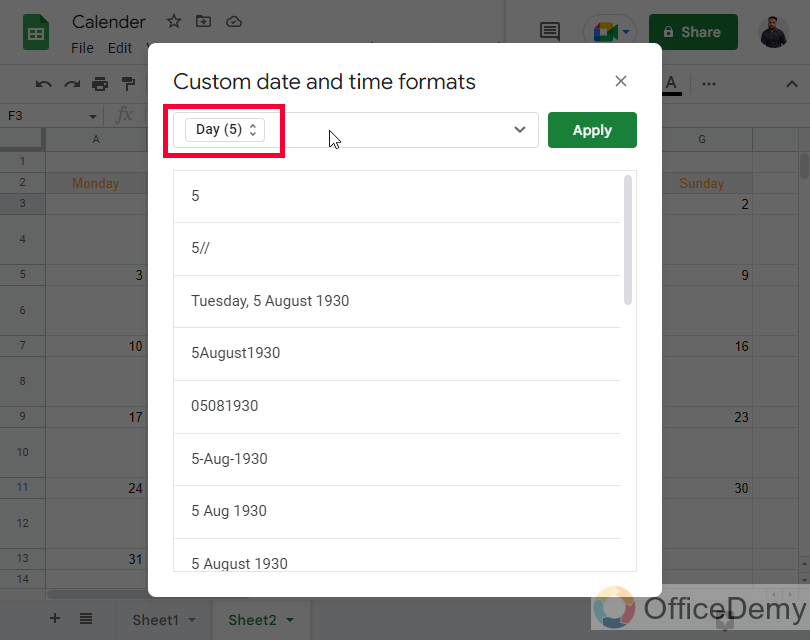
Go to Number > Custom date and time

Step 10
Select what you want to show, i.e., day, month, year, or all of it, normally we select only days for calendars.
Step 11
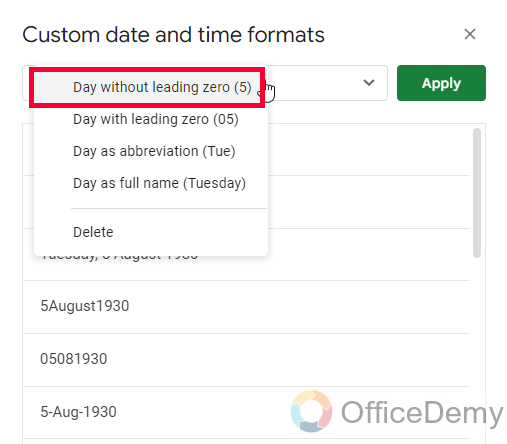
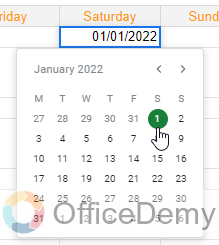
Now, set the day number format and choose 1, instead of 01
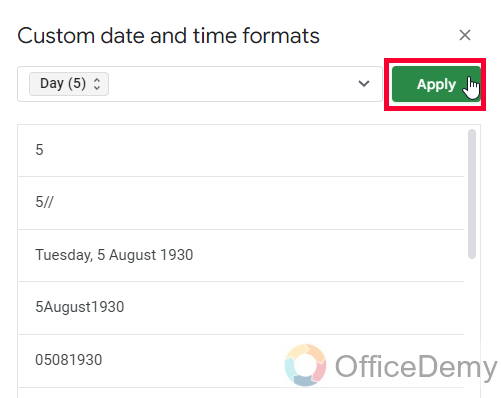
Step 12
Click on the apply button, and your selected cells will get the Date format, to verify it, double-click on your cell, and a date picker pop-up will appear.
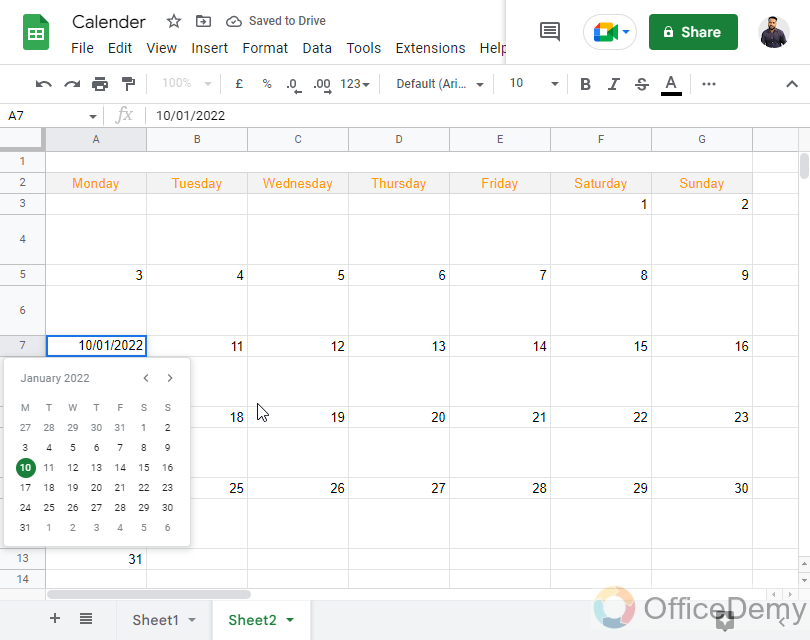
Step 13
Now, copy the format of this cell and paste it to all other numbers in your calendar that are representing dates.
Step 14
Give a fill color to your dates
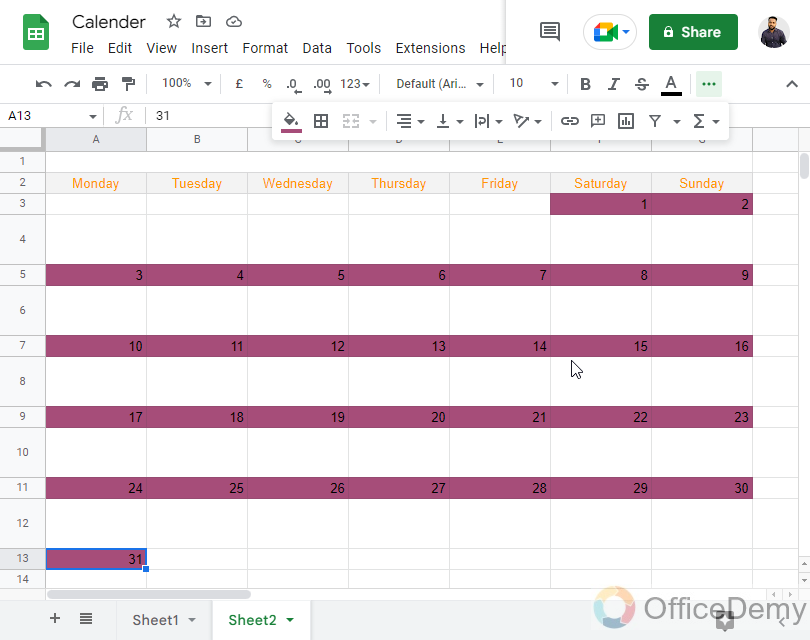
Step 15
Give a text color to your dates if you want
Note: Use contrast colors if you are using both text and fill colors. Such as purple fill color, and white text color.
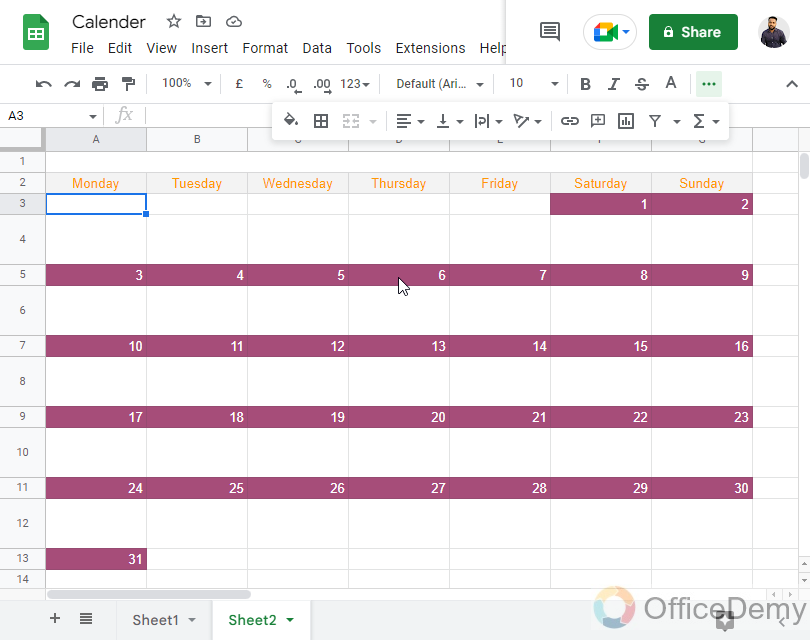
Step 16
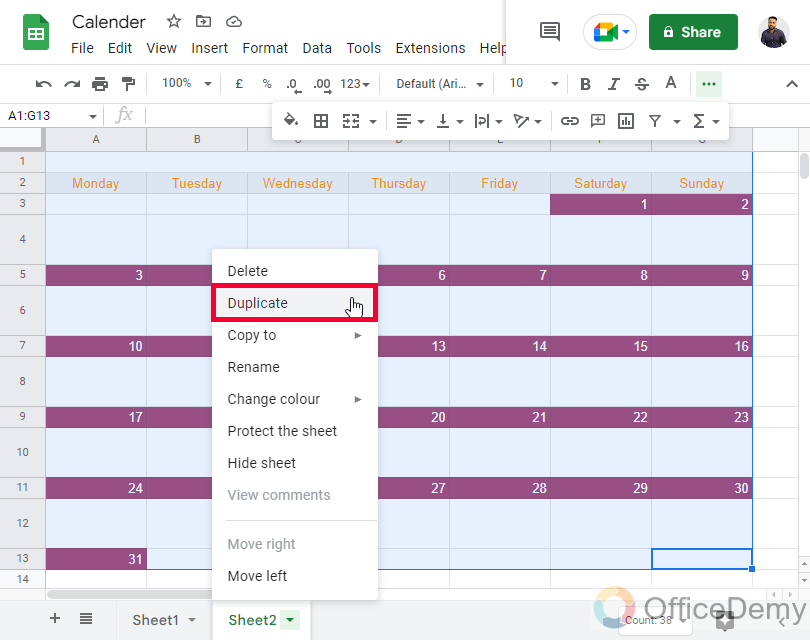
Now your calendar is almost ready for one month, you can copy this template and add more calendars for different months
Step 17
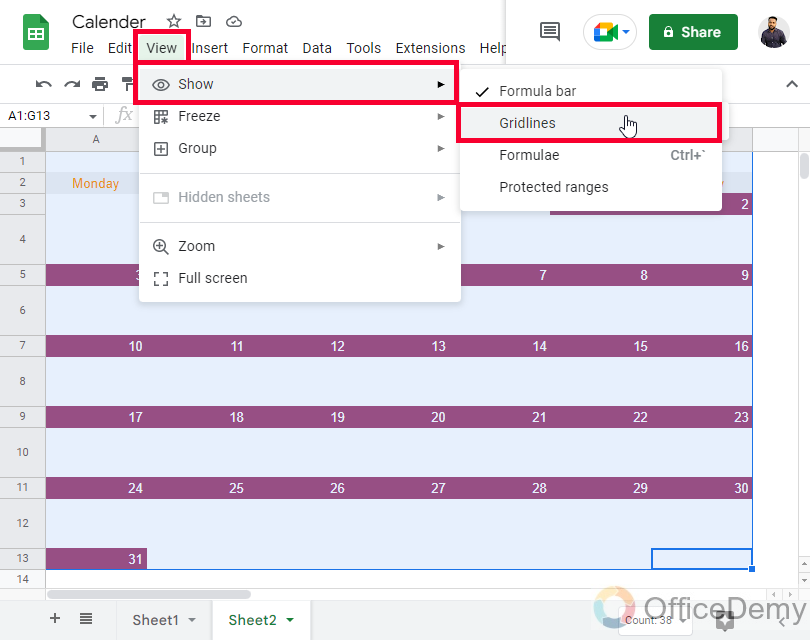
Go to View > Show > Gridline
Remove the tick mark from the Gridline to hide them
Step 18
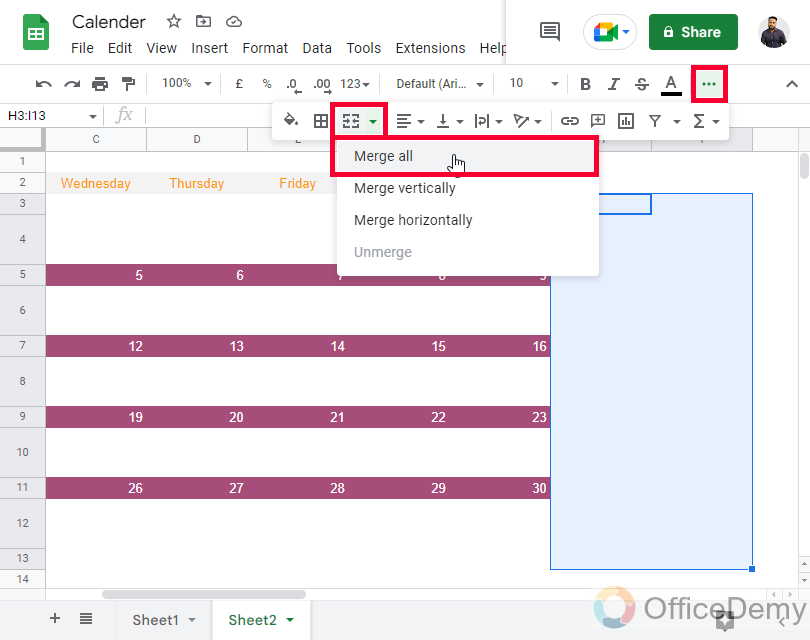
Select cells from H3:I13 and merge them using the merged cell in the toolbar.
Step 19
Write your main text here such as Jan 2022
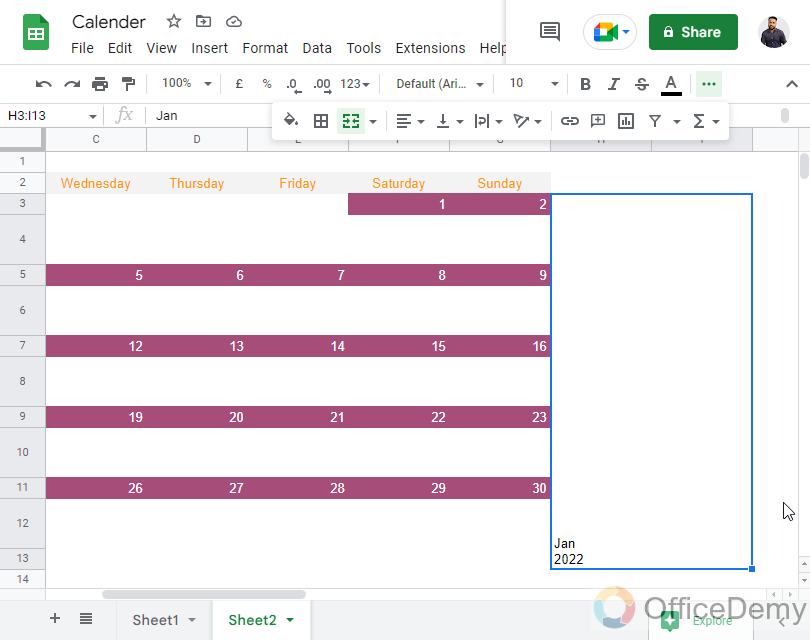
Step 20
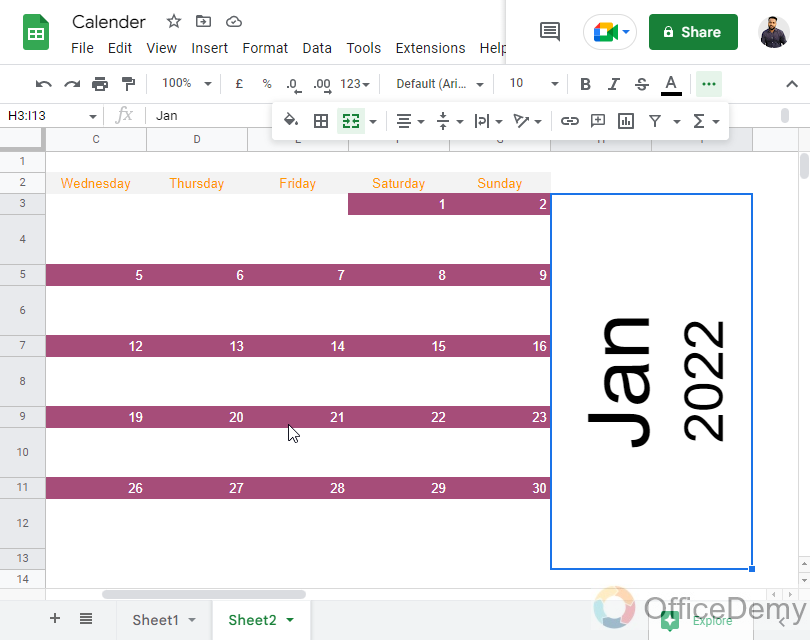
Select the text go to Text rotation in the toolbar, select Rotate up and then increase the font size
This changes your text position, and now it will be rotated upward at 90 degrees.
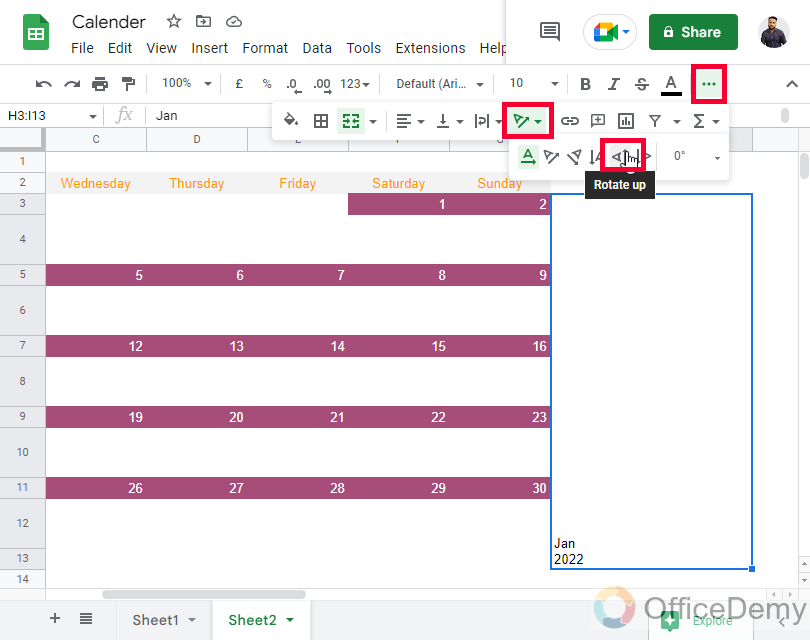
Note: You can change the degrees angle as well.
Step 21
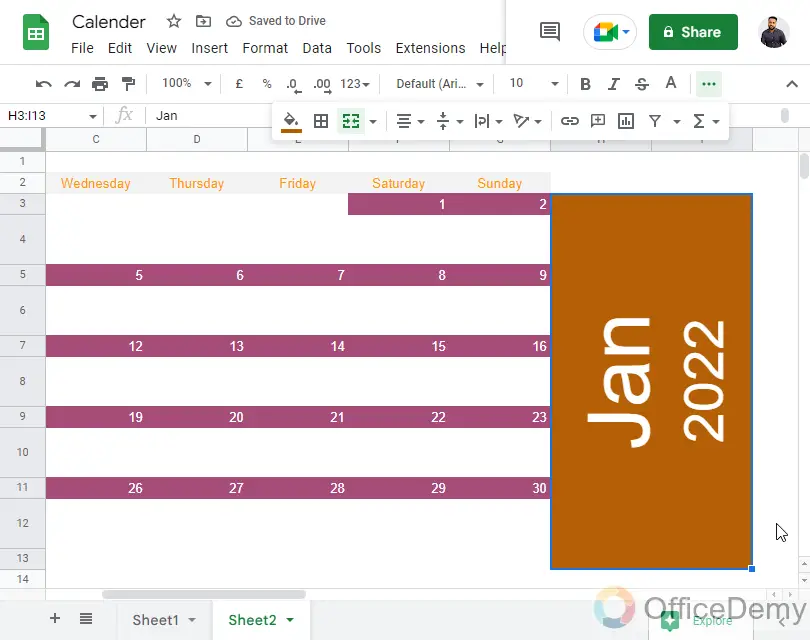
Assign a fill color, and text color to this box
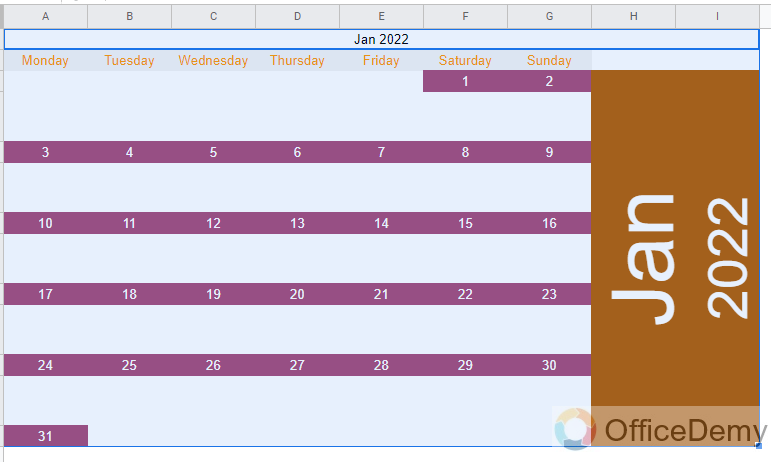
And this is how following the above steps you will end up making the complete calendar from the scratch in 10 minutes.
I hope you like this tutorial.
Get a Free Template here
Important Notes
- The calendar templates of Google Sheets are dynamic, which means they are automatically updated based on the year
- When you create a template from the scratch, you normally use static dates and months. But, if still you want to create a dynamic calendar you can do it using some functions and formulas, I will cover it in the coming articles for sure.
- Adding colors is your choice, you can keep a simple calendar with fewer colors as well.
- If you want to add a background image to your calendar you can do it using a drawing tool or an image tool. This is also a complex thing, so I will cover it in the coming articles for sure.
Frequently Asked Questions
Can I Use the Free Content Calendar Template in Google Sheets to Insert a Calendar?
Yes, the free content calendar template in Google Sheets allows you to easily insert a calendar. This versatile template enables efficient planning and organization of your content strategy, helping you stay on track with your publishing schedule. Utilize the power of Google Sheets and the convenience of this template to streamline your content planning process.
How to make a dynamic calendar in Google Sheets?
The calendar we created above is static. But, if you want to make a calendar that changes automatically depending on the current date, you can do it using the date functions. In Google Sheets you have a Day and Date function which can be used to write dates in your calendar, instead of static numbers you can write functions and take the current day inside them, similarly for a month, you can use the days’ function and you can choose the current month instead of writing month’s name manually.
Conclusion
So that’s all from how to insert a calendar in Google Sheets. We learned two methods to do it. First, we saw how we can add a calendar into Google Sheets using a Sheets free Template, then we learned how to edit it, further, we learned how to create a calendar from scratch, and you saw how easy it was and takes no more than 15 minutes as a beginner. I will see you soon with another useful guide. Keep learning with Office Demy.

