
To Label Slides in Google Slides
- Open your presentation.
- Click the slide you want to name.
- Replace the default title with your name.
- Click outside the text box to save.
OR
- Open your presentation.
- Click “File” > Choose “Rename“.
- Delete the old name, and enter the new one, and it saves automatically.
OR
- In Google Drive, find your presentation.
- Right-click on it.
- Select “Rename“.
- Replace the old title with a new one.
- Click “OK“.
In this article we will learn bout how to name or label slides in google slides using all possible methods.
Organizing your presentation by naming slides will allow you to find them quickly and easily as you need. This is a great way to increase the efficiency of your presentation design process. Whether it is a small presentation or a large one, this is an easy way to save time and make sure that your presentation performs well.
There is no specific right or wrong way to name slides in Google Slides. You do not need to adhere to any specific naming style or convention when naming your slides. The only requirement is that the name be unique, meaning that no other slide in your presentation has the same name. While this may make finding the right slide more complex if you have hundreds of slides, it is still important that each slide in the presentation has a unique name.
When using Google Slides, it is possible to name the slides in your presentation. Naming your slides can help you keep track of presentation file and locate them easily. Here, we will show you how to name and rename slides in Google Slides.
If you are interested to learn about how you can add an audio in google slides, please follow the link below.
How to Add Audio to Google Slides (3 Methods)
Benefits of Naming a Slide in Google Slides
- Using labels to name slides adds some advantages to find a specific slide to make a hyperlink to another Google slide.
- Additionally, when the name of the slides is linked to, you’ll see the names of the slides in the presentation. If you have lots of slides, this comes in handy when presenting.
- You can move to different slides by hyperlinking a slide that points to another google presentation slide. This is helpful if you want to move on from a specific slide.
- Naming slides can help keep your presentation organized and help you remember key points.
- Naming a slide in your Google Slides presentation can help make your presentation look polished and professional.
How to Name/Label a Specific Slide in Google Slides
By default, a slide’s title is the same as its name in Google Slides. We need to follow two simple steps to change it.
Step 1: Google Slides creates slide names automatically by examining the text in the title box. You can manually change it by clicking on the “Click to add title” text box on the slide. You can simply change the slide’s title by clicking on Click to add title.
So, to do it, open your google slide presentation. Simply click inside the box named “Click to add title” and start adding the title text.
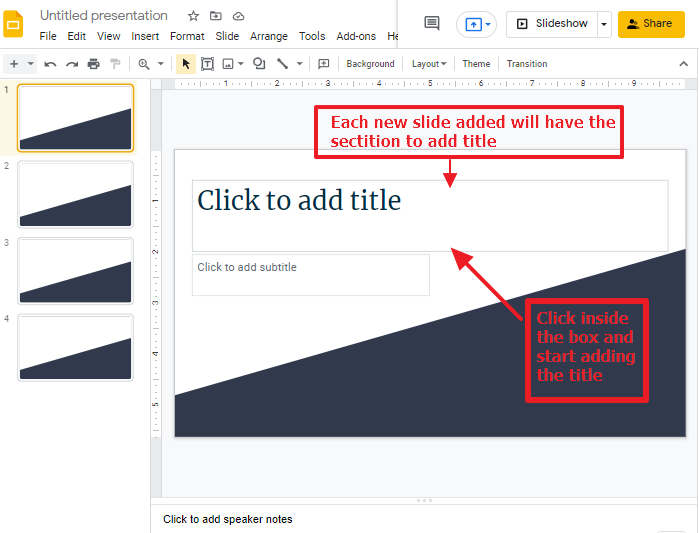
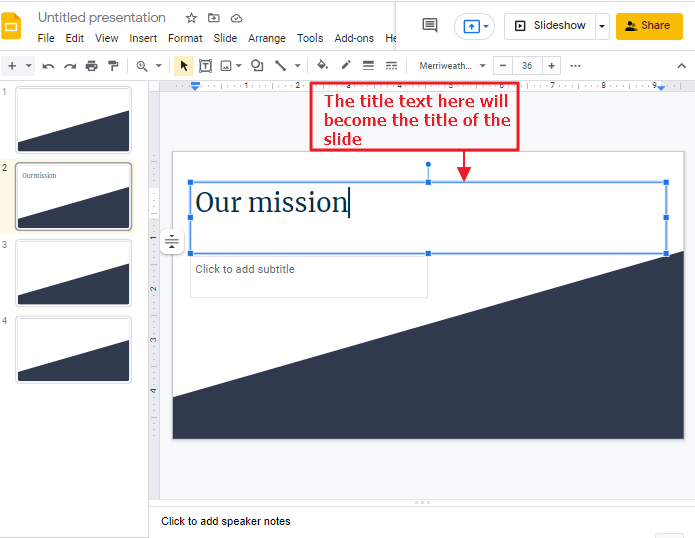
Step 2: When you click on the “Click to add title” box in the selected slide, the textbox will change to show an empty box. Now you can type any of your desired title for this slide. This title will act as the name of the slide on your presentation which you can change later.
That’s it. You are done.
How to View Google Slides Name/Label
It is not possible to directly view the name of the slides in Google Slides. Nevertheless, you should see the names of the slides when inserting a link into your google slide presentation.
Follow these steps to learn how to view the slides name step by step,
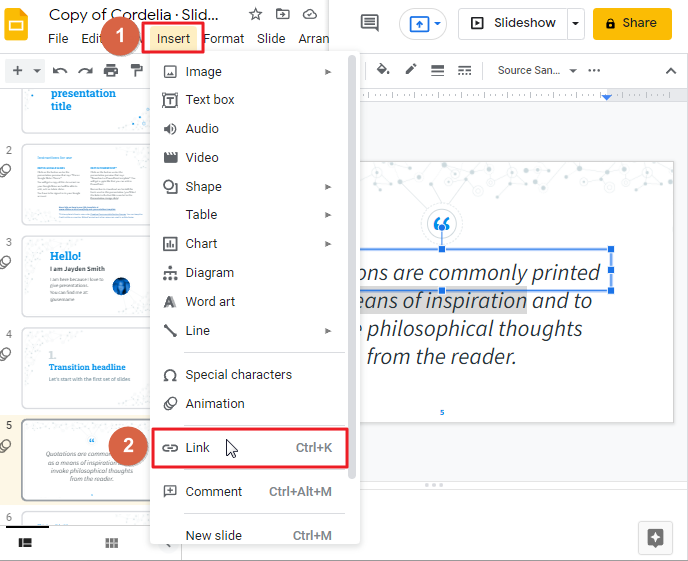
Step 1: Open your google slide presentation. Please select the text that want to be linked to other objects or sources.
Click on Insert which is located at the top of your screen in the menu bar. A drop-down menu will appear here. Click on Link.
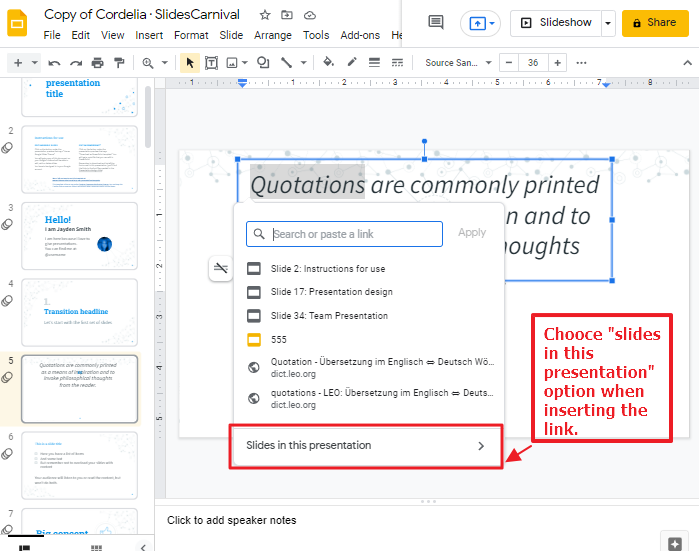
Step 2: On Google Slides, when adding a link, you will be presented an option that will allow you to add links to existing documents in your Google Drive as well.
If we want to view the names of the slides in this presentation, we need to link the text with existing slides. To do this, we need to click on the “Slides in this presentation” option which is located at the bottom of the dialogue box.
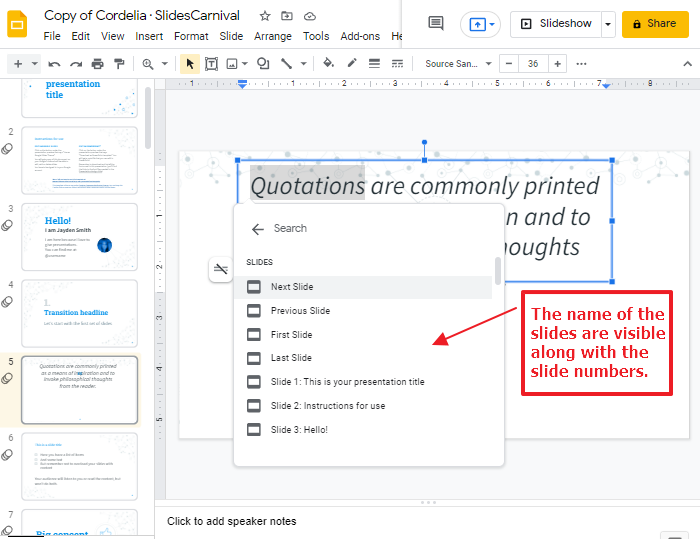
Step 3: In the next pop-up box, you will see that the name of the slide appears as well as the slide numbers. That’s the most common way to see your google slides name.
How to Change the Name/Label of a Slide Layout in Google Slides
In Google Slides, each slide has a layout called Layout. The layout is a slide that is made up of premade design elements rather than the slides themselves. You can find a list of available layouts by selecting “Slide” from the menu bar, then “Apply layout” from the drop-down list. To change the name of an existing layout, follow these steps:
Step 1: Open your google slide presentation. Click on Theme builder under the view tab in the menu bar. Theme builder allows us to customize our themes and layouts.
In previous version of Google Slides, we need to click on the “View > Master”.

Step 2: Once you open the “Theme builder,” the left side will display a “Streamline.” The Google Slides “Streamline” contains a list of all the slide layouts in the program. You can select the slide layout which you want to rename from the available slide layouts list.
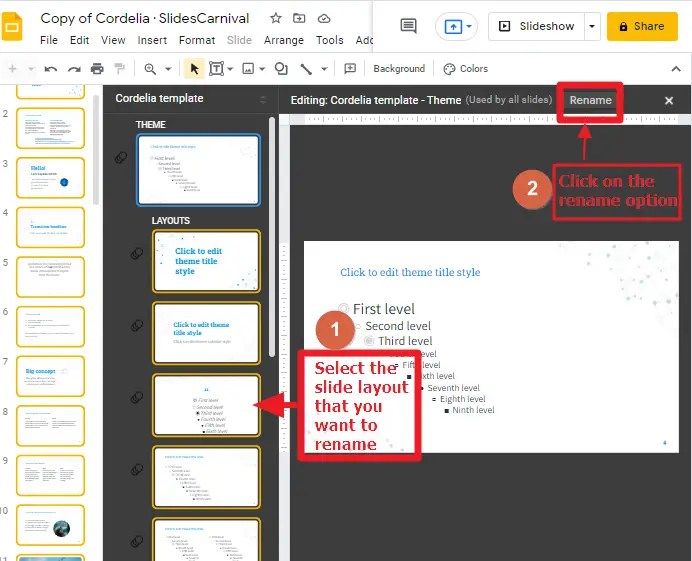
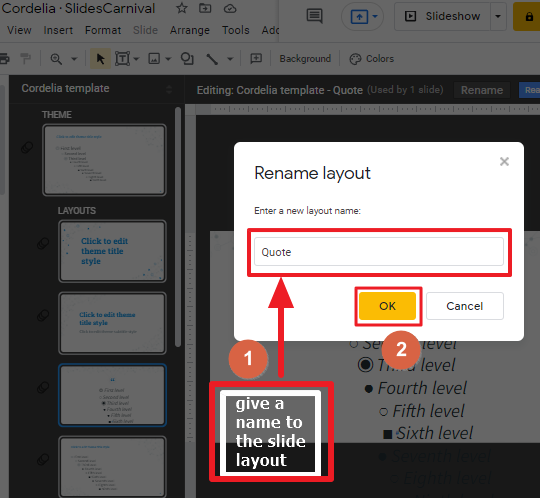
Step 3: After selecting your preferred layout that you would like to rename, click on the “Rename” button located at the top of the slide. A pop-up dialogue box will open. Here you can insert a new name for your slide.
When done, click OK.
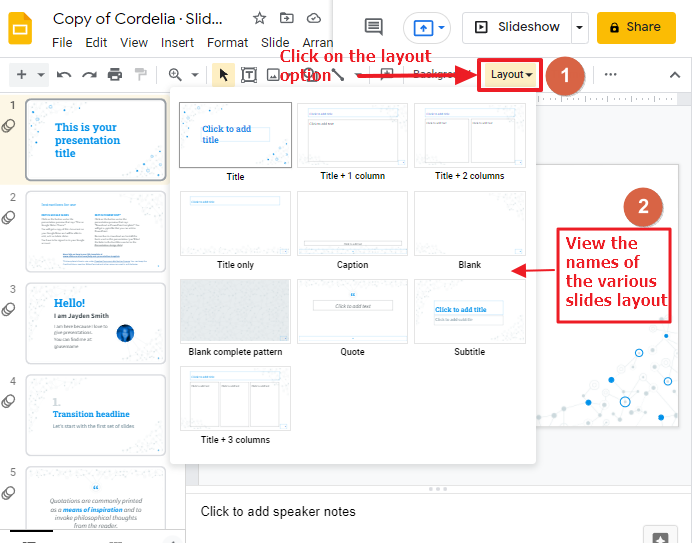
Step 4: You can check the name of the google slide layout by clicking on the “Layout” option from the google slides toolbar. Then, from the dropdown, you will be able to see the name of the layout under the slide layout preview. It is also possible to choose a different slide layout from this option.
How to Name/Label Google Slides Presentation
You will likely create more than one Google Slides presentation, so you’ll want to make sure that you can easily tell the difference between them. Name your Google Slides to help differentiate them and group them together by theme.
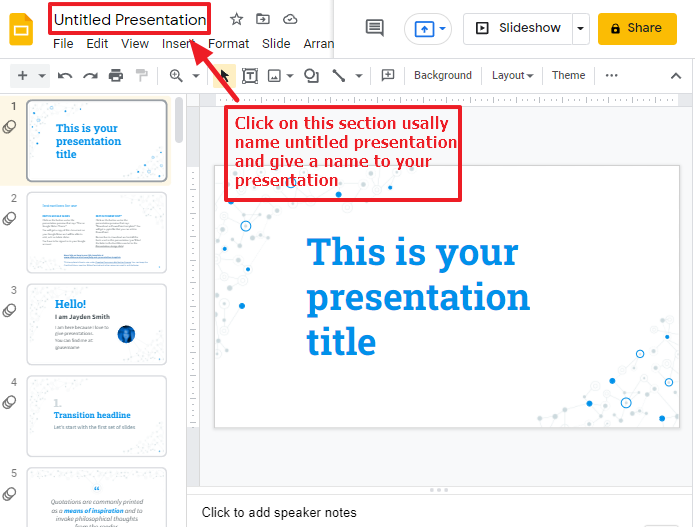
To name a specific presentation, simply click on the “Untitled presentation” box in the top-left corner of the screen, delete “Untitled Presentation,” and enter a new name. Remember that when you are finished with a document, you will likely want to save it to your computer or upload it to an online source so that your colleagues can access it from any device.
How to Rename Google Slides Presentation
In order to rename a Google Slides presentation, you either have to do it from the presentation itself or from your Google Drive folder. We’ll see both the methods below –
From the File Option
If you already have the presentation open, click on the File menu and click on “Rename,” or click on the name of the presentation and rename it there. Follow these steps below to rename a google slide presentation using the file menu.
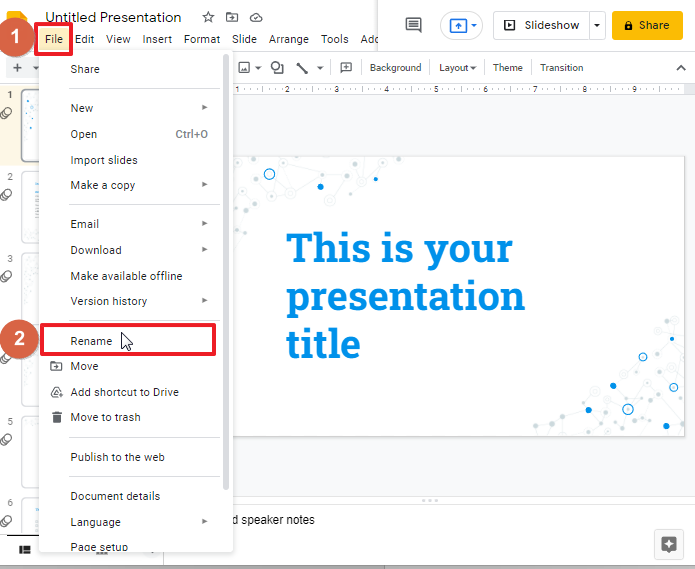
Step 1: Open your google slides and click on the File option which is located at the top of your screen. a drop-down menu will appear here. Click on Rename.
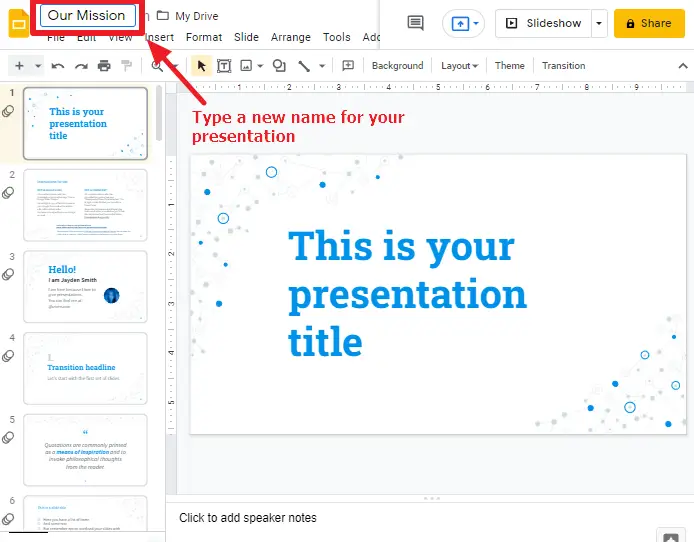
Step 2: As soon as you click on the Rename option, you will observe that the Title box has been selected. Now you can erase the old name from here and type a new name. Well, the new name will be saved automatically once you click outside the box.
From the Google drive option
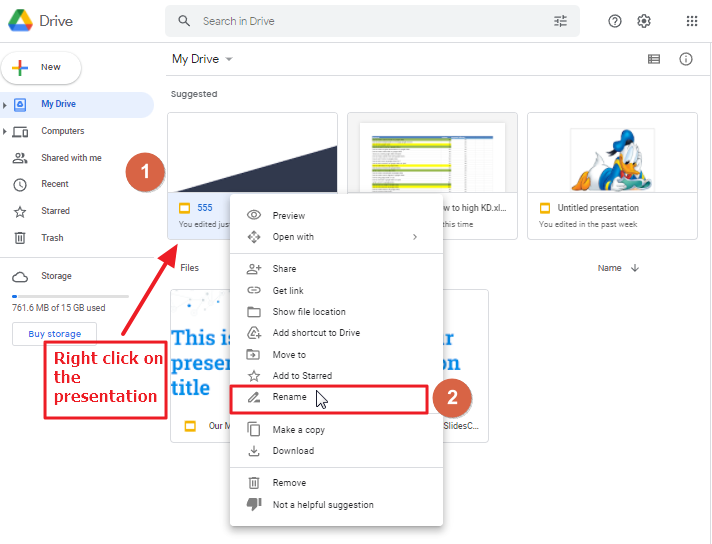
Navigate to Google Drive and access the presentation you want to rename. Within your list of files: Right click on the specific google slide that you want to rename.
Follow these easy steps described below to change the name of a google slide presentation from google drive.
Step 1: Once you open your google drive, there you will see several presentations. Find that exact presentation that you want to rename. Place the mouse on it and right click. A drop-down menu will appear here. Click on Rename.
Step 2: You will see a pop-up box will appear on your screen. In the middle of the box, there is the old title present there. Erase the old title and type the new name for your google slide presentation. Click Ok when you are done.
You will notice that the google slide presentation title has been changed both in the slide and Google drive.
Conclusion
You have just learned how to name or label slides in a Google Slides presentation. To sum up, it is important to not only name slides for organization purposes, but also for accessibility purposes.
We hope that you loved reading this article and learned some new tricks on keeping your presentation organized. We also shared a few tricks on how to make the most out of naming your slides. We hope that these tips help you with your next presentation. Now, if you want to learn more about Google Slides presentations and learn other cool tricks like this, don’t forget to check back on our website for more tips and tricks.


