
To Make Columns in Google Slides
- Open Google Slides and create a new presentation.
- Delete the default title and text boxes on the first slide.
- Click the “+” icon to add a new slide.
- Choose the “Title and Two Columns” layout.
- Your slide now has two columns for content.
OR
- Open a blank Google Slide.
- Use the text box tool to draw desired columns.
- Insert your content into the text boxes.
- Format columns using the Format options in the toolbar.
OR
- Create a new Google Slide.
- Go to “Insert” and select “Table“.
- Choose the number of columns needed.
- Insert the table onto your slide.
- Resize and position the table for columns.
- Add content to the table’s cells.
- Hide the table border to make it look like columns.
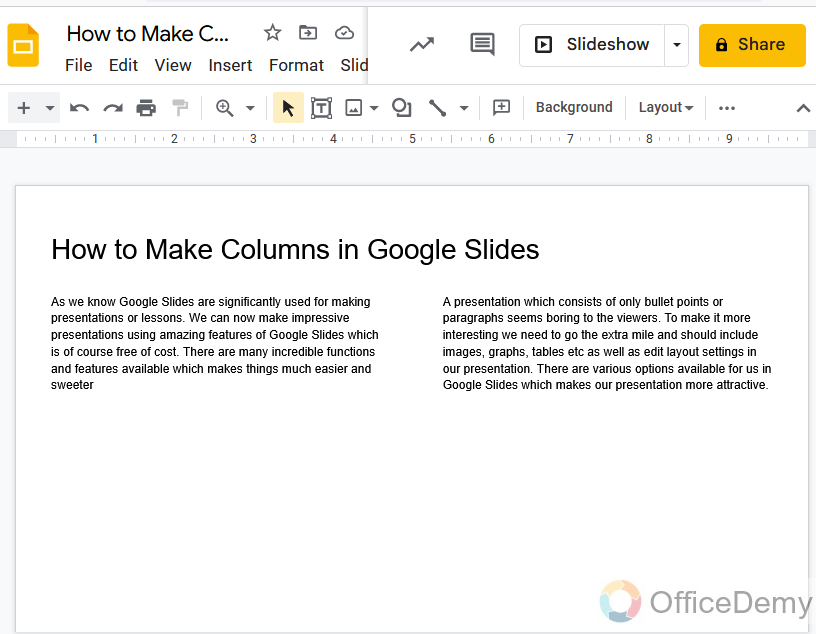
As we know Google Slides are significantly used for making presentations or lessons. We can now make impressive presentations using the amazing features of Google Slides which is of course free of cost. There are many incredible functions and features available that make things much easier and sweeter.
Many of us are still not aware of all the services provided by Google Slides. Among them, making columns is one of its useful features of it which we are going to learn today through this article. There are no limitations in Google Slides, which means you can make your desired number of Slides for your presentation. Sometimes adding rows and columns help us to explain information easily and it leaves a good impact on the viewer’s minds.
So, we’ve come up with this article which will teach you how to make columns in Google Slides. It will help you if you are stuck and now finding a way to present your data or information in columns. Before starting, let me tell you that the task is quite simple and easy to perform. You will be able to make columns in Google Slides after reading this article and can create more informative and attractive Slides for your viewers. So, continue to fully read this article and learn how to make columns in Google Slides.
Importance of Making Columns in Google Slides
A presentation that consists of only bullet points or paragraphs seems boring to the viewers. To make it more interesting we need to go the extra mile and should include images, graphs, tables, etc. as well as edit layout settings in our presentation. There are various options available for us in Google Slides which makes our presentation more attractive.
If we talk about our concerned topic, there are two ways in which we can break our text into columns. First, we can use a table and the second option is to insert multiple text boxes to have columns in any of your Slides. The difference between them is just the borders of the columns. If you want to show borders that separate your columns then use the first option which is adding a table. If you want to hide table borders you can also make them transparent, alternatively, if you don’t want to use tables then go for the second method and add text boxes that break your information into columns without showing borders.
You are also able to set the size and position of your table or text box and customize the layout of your choice. Now it’s time to learn how to make columns in Google Slides and create phenomenal layouts. In the next section, there is a detailed and step-by-step procedure available that demonstrates how to make columns in Google Slides. Let’s have a look at these steps and get ready to break the mold.
How to Make Columns in Google Slides?
Unfortunately, In Google Slides there is no direct way to make columns because it is not usually much needed. But if there is a need to make columns in Google Slides, then some hacks brought you to make columns in Google Slides. In this tutorial we will study three ways to create columns in Google Slides, now it’s up to your which method you prefer. These are three ways to make columns in Google Slides.
- Make columns with the help of a slide layout.
- Make columns with the help of a text box
- Make columns with the help of a table.
How to Make Columns in Google Slides – With the help of a slide layout
In Google Slides, there are some premade body layouts present in Google Slides by default. There is one layout that contains the title and two columns. With the help of this, we can make columns in Google Slides. And it is the easiest way to make columns in Google Slides, but if you need two columns in your slide. You can make columns in just a few clicks by selecting the slide layout, let me show you how we can select this layout and make columns in Google Slides.
Step 1
Open Google Slides and take a new file. If you want to make columns in Google Slides then delete the title box and text box already inserted in the first slide of Google Slides.
Step 2
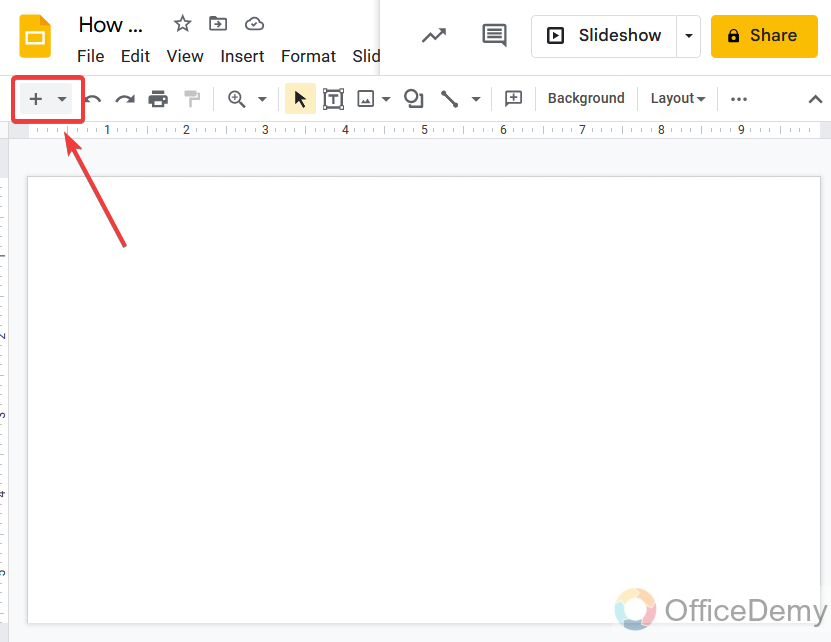
At the left corner of the window, Google Slides there is an icon indicating a plus sign as shown in the figure, click on it to open.
Step 3
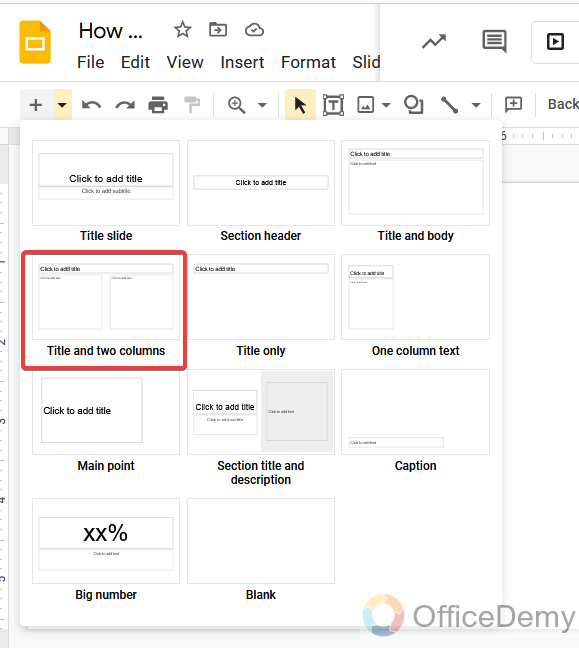
When you click on this icon, a dialogue box will open where you will find several different slide layouts in which you will also find the layout “title and two columns“. Select this layout to apply on Google Slides.
Step 4
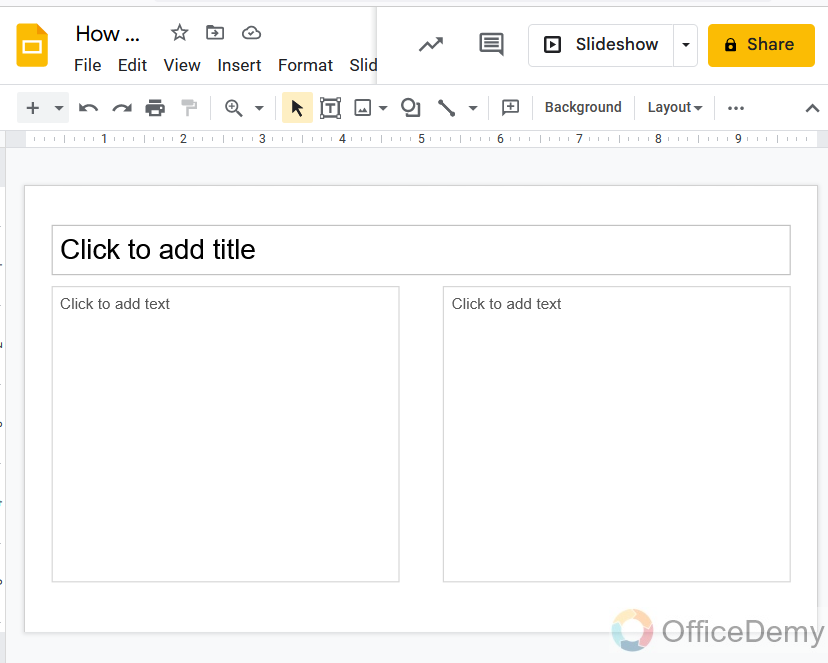
As you can see layout has been applied, and our slide has been divided into two columns with one title box.
Step 5
Now insert the data whatever you want to add in these columns. As I have added.
In this way, you can make columns in Google Slides, but there is a drawback to this method this is a pre-made layout by Google Slides, you can’t add or remove more columns although you can adjust them. So, to add more than two columns in Google Slides go to the next method to make columns in Google Slides.
How to Make Columns in Google Slides – with the help of a text box
In this method, you can make more than two columns as well with the help text box. As you need columns, you can draw the text box in your Google Slides. You can also add any type of data in these text boxes. You can also format these text boxes according to your style if needed and can make your data more colorful. We will show with the help of examples how to make columns in Google Slides with the help of a text box and how you can format them. So let’s get started without wasting our time.
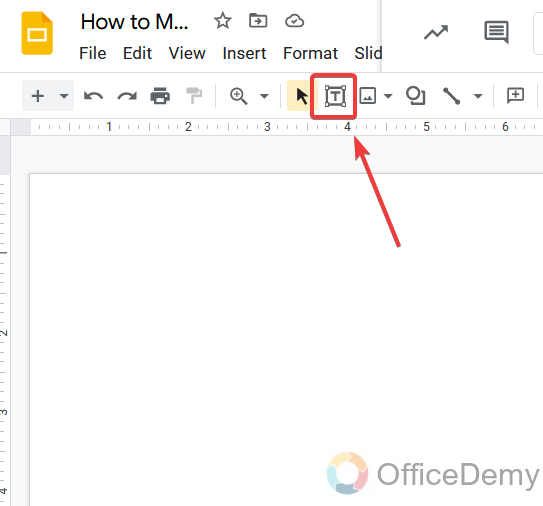
Step 1
This is your blank Google slide, here see in the toolbar at the front, you will find a text box icon to make a text box in Google Slides. Click on it to draw the text box.
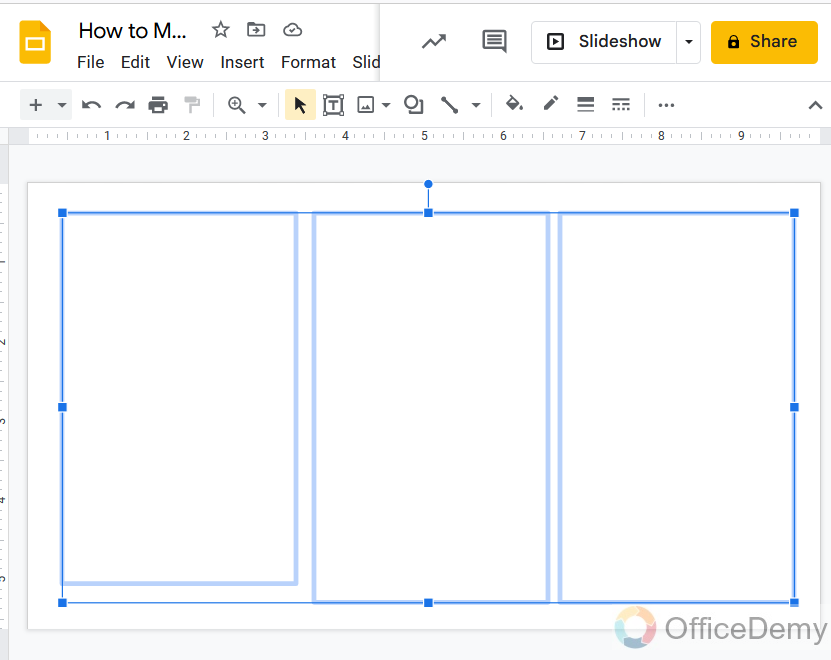
Step 2
As you can see, I have made three text boxes in Slides.
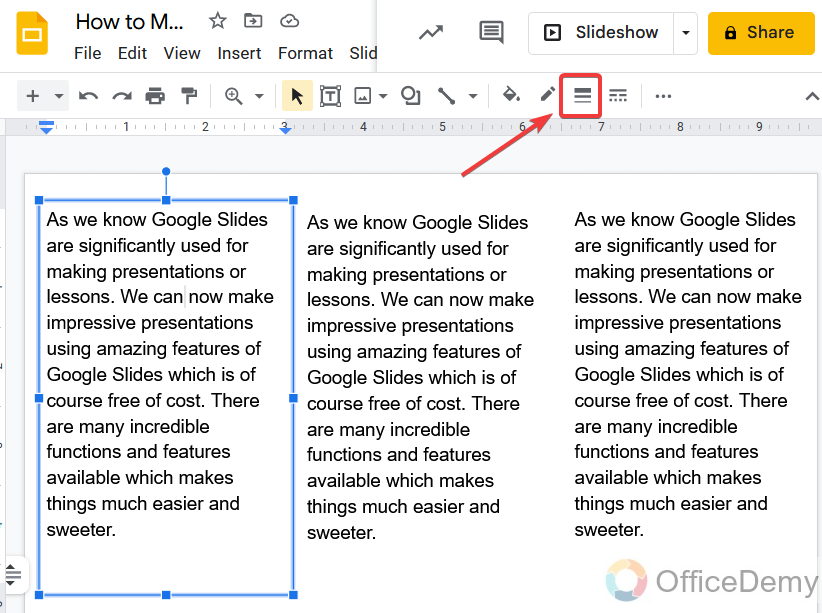
Step 3
Now put the data in the text boxes, you want to add. You can also insert pictures, charts, etc.

If you don’t like the pattern of these columns, you can format them with your styles. Let me show you an example,
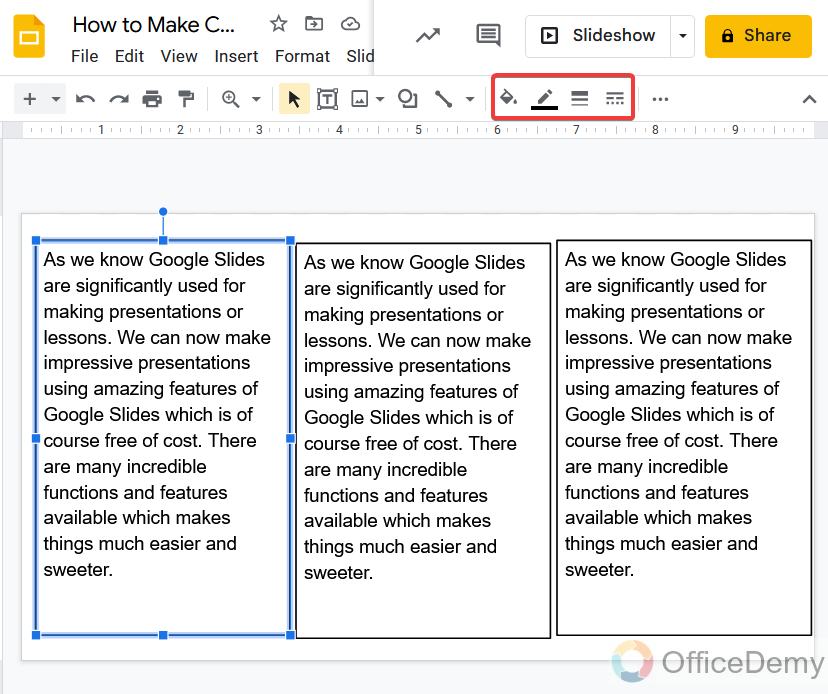
Step 4
Select the text box then see the format options in the toolbar, here you will find the outline option.
Step 5
When you click on this icon, it will ask for the thickness of the column’s border, select it according to your need.
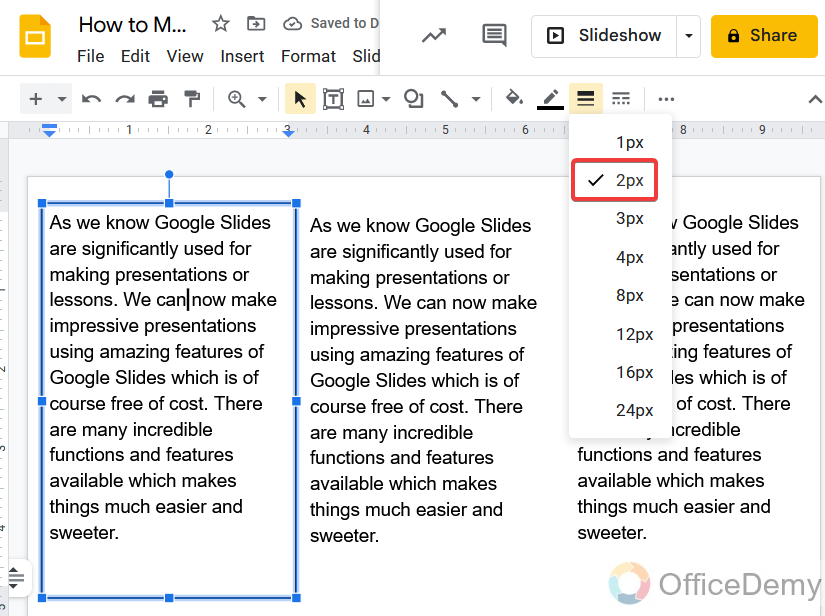
Step 6
As you can see the border has been set to all columns, now you can take the help of more formatting options like, fill color, text color, and outline color as shown in the figure.
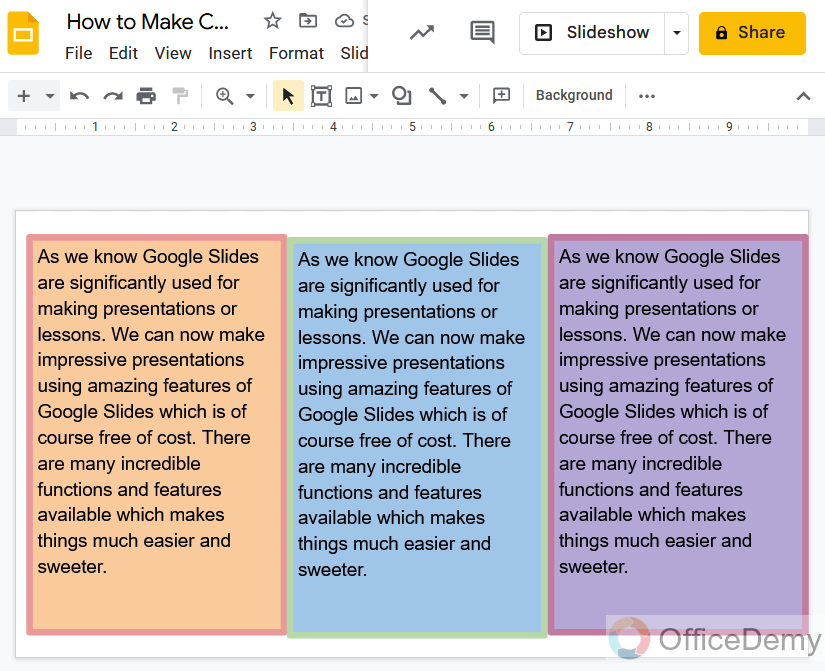
Step 7
This is the result in front of you, by using those tools we made our columns more colorful and attractive.
If you still need more than the above methods and want to find another easy way to make many columns in Google Slides then go through the following method to make columns in Google Slides.
How to Make Columns in Google Slides – with the help of a table
This method is a fabulous trick to make so many columns in Google Slides or Google docs. Just draw the table in the order that you need the number of columns. After inserting the table, you can expand it to all over the slide by dragging it and can put all the data that you want to insert. You can also format the table to make your columns beautiful. Let’s move to the steps to get a better understanding.
Step 1
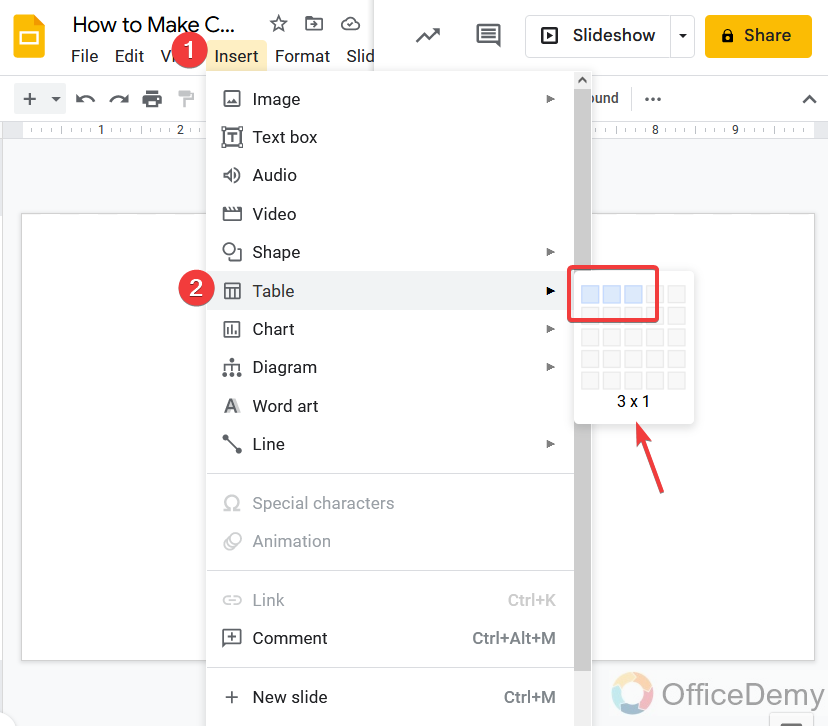
Take a new file in Google Slides and go into the “Insert” tab in the menu bar.

Step 2
Here, you will find the “Table” option. Click on it to expand more.

Step 3
Now you have to select as you need columns. If you need three columns then select the order 3×1, similarly if you need four columns then select the order 4×1. Here I took the order of 3×1.
Step 4
The table has been inserted now to make it columns, you can drag it all over the page.
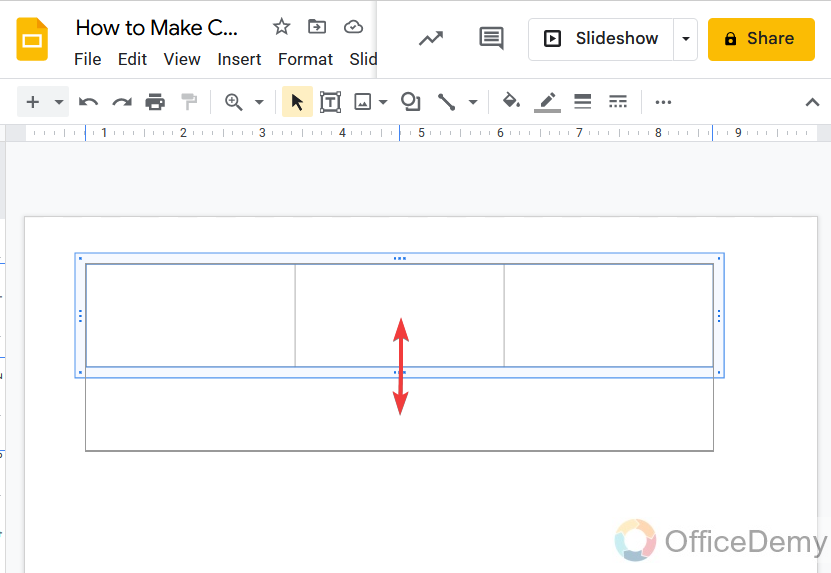
Step 5
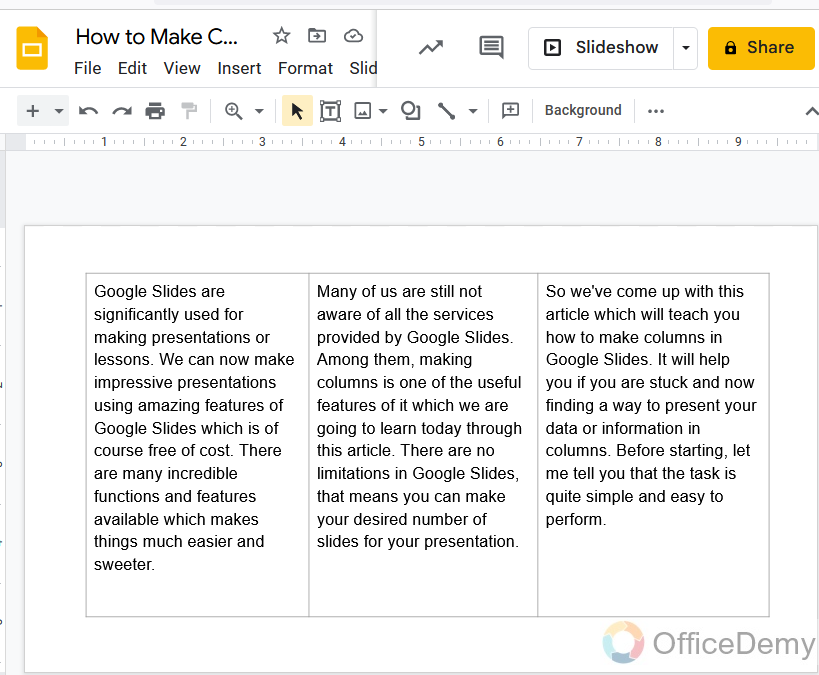
Once your columns are created, you can then add data to them. There are no restrictions to add which type of data or media.
May be possible somewhere, you dislike the table border around columns, so not to worry you can remove this border by following the steps.
Step 6
Select the table, and then look at the toolbar of the Google Slides, here you will find the border color option. Click it to open.
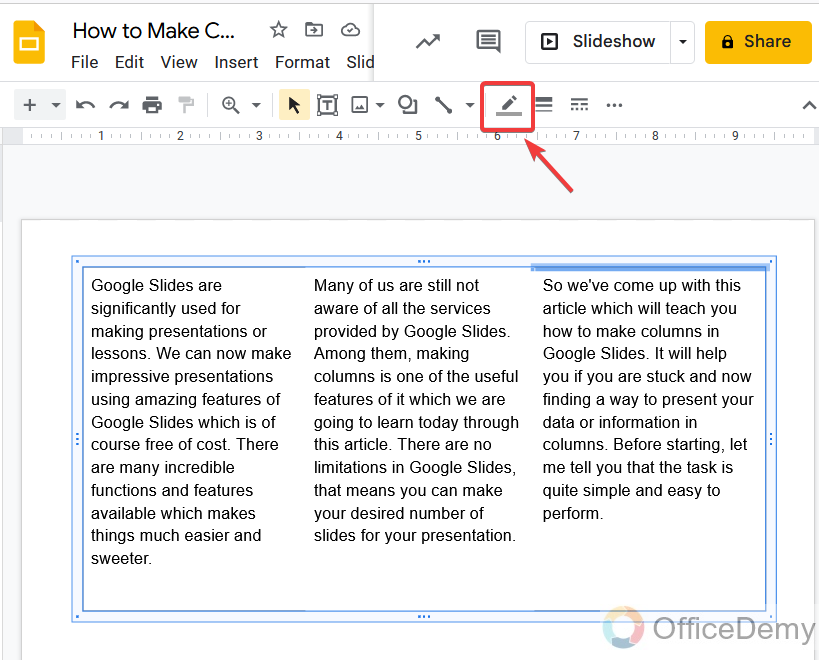
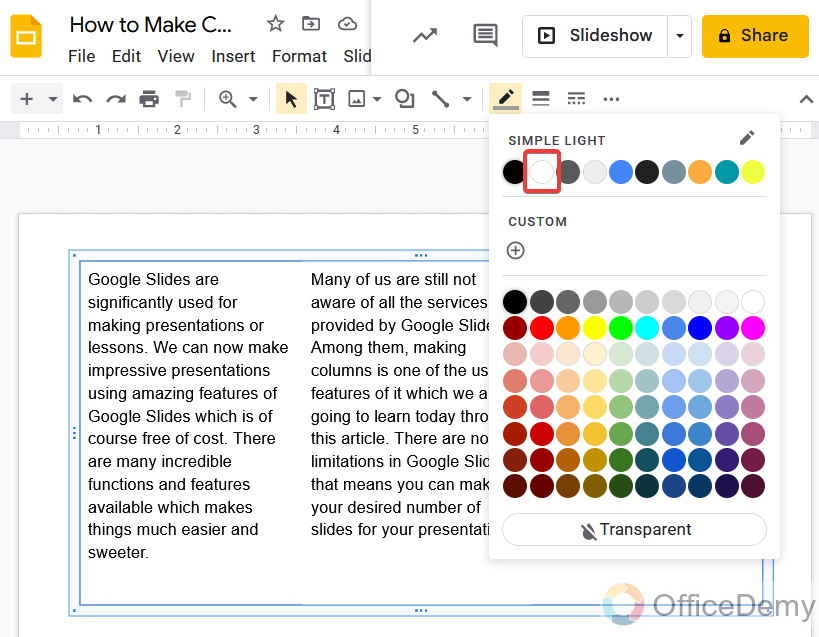
Step 7
As we know the slide background color is white, so I will choose a white color here to hide the table border.
Step 8
As you can see from the results, borders have been hidden, as we want our columns.

Conclusion
As we discussed that there is not any by default option in Google Slides to make columns, there this article on how to make columns in Google Slides is going to be very helpful to you in which we have covered several hacks with different methods to make columns in Google Slides. We have also learned how to format our columns to make beautiful text pattern. If you have any other trouble related to any Google apps visit our forum Office Demy and get the best solution.


