
To Make Google Slides Look Good
- Use Animated Objects.
- Use Backgrounds.
- Use Subtle Transitions.
- Use GIFs, botmoji, etc.
Welcome to another tutorial of our Google Slides series. In this article, we will learn how to make Google Slides look good. It’s a very generic topic, so what else do we need to make our Slides look good? Well, it depends, for what reason you are setting up your file matters when you start using some presentation features. But for most common and general purposes presentations. I will explain three smart ways to make Google Slides look Good and amazing when you present.
Google Slides is full of new customization features. It’s just like a presentation designer; it has hundreds of features that maybe we don’t use because we don’t know them. Today I will reveal some exciting features of Google Slides to make it look good, and I will explain to you the complete process to implement those features and apply them to your presentations.
Importance of making Google Slides Look Good
When we create a presentation design from scratch it looks boring. But, when we use a fully-fledged theme, then it looks amazing. Why? Because themes are designed by designers who know all the designing features of Google Slides and they simply used them to create appealing themes. Well, every Google Slides user has the privilege to use all its features for free, then why not? We can use exciting features of Google Slides to make Google Slides look good, amazing, and attractive to the audience.
We need to learn how to make Google Slides look good to make our Slides look good. I mean there is no answer to it, every creator wants to make their Google Slides look good. We just need to learn and understand the excellent set of features Google Slides gives us to control our overall design and make great presentations that talk to their consumers/audience. So, therefore today I am here to teach you how to make Google Slides look good.
How to Make Google Slides Look Good?
We will use all the built-in features within Google Slides, we are not going to download any plugin, any add-on, or any kind of extension. We will use all purely native methods to do it, but what are things that are actually required to make Google Slides look good? Well, there are so many, we will learn three significant designing aspects and will implement them in a sample presentation to make Google Slides look good.
- Using Animations
- Using Backgrounds
- Using Subtle Transition
How to Make Google Slides Look Good – Using Animated Objects
In this first, we will learn how to make Google Slides look good using animating objects. In Google Slides we have the power to use animation exclusively on each slide and further exclusively on each object. The object may be an image, shape, diagram, paragraph, heading, chart, table, or any element that is used in Google Slides. We can animate them using built-in functionality. We can animate more than one object on the same slide with different effects and at different times. Too much excitement? Let’s move forward to learn how to use animation on objects.
I have a sample opening slide of a presentation in which I am using some animation with several effects and timing.
Step 1
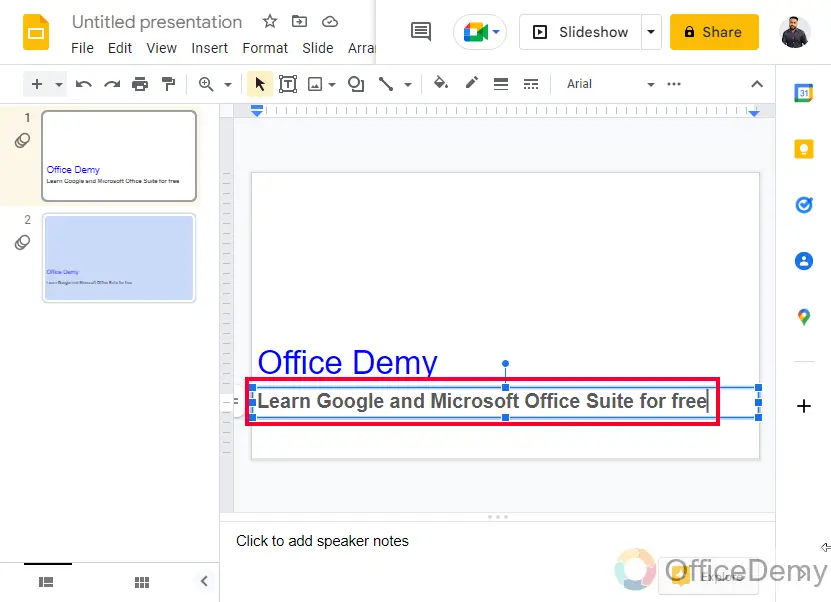
Firstly, I have my heading here.

Step 2
Now I have a sub-heading here
Step 3
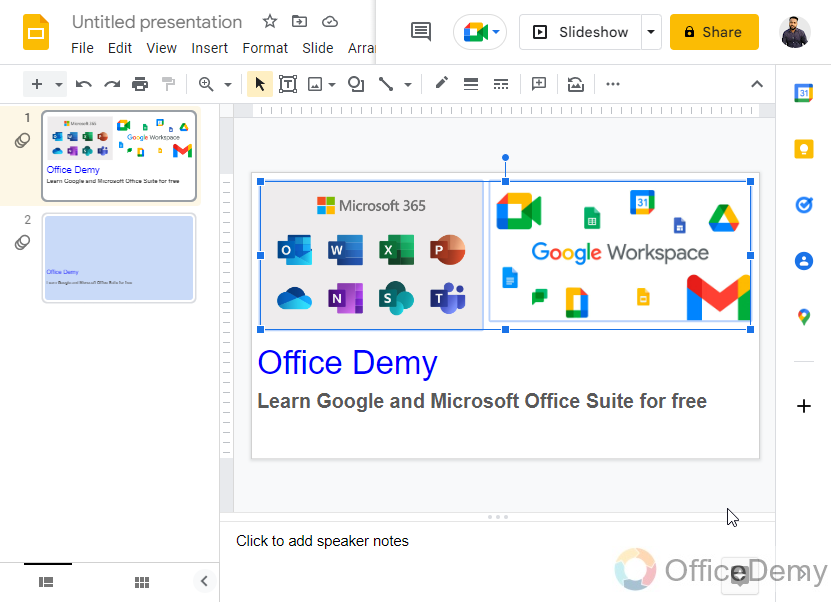
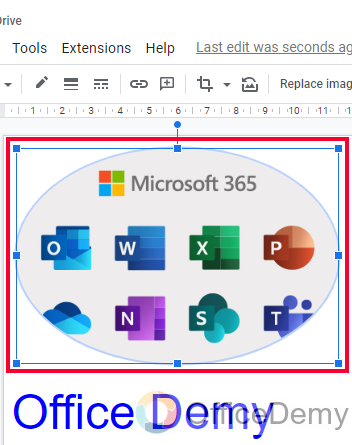
Here I have two images
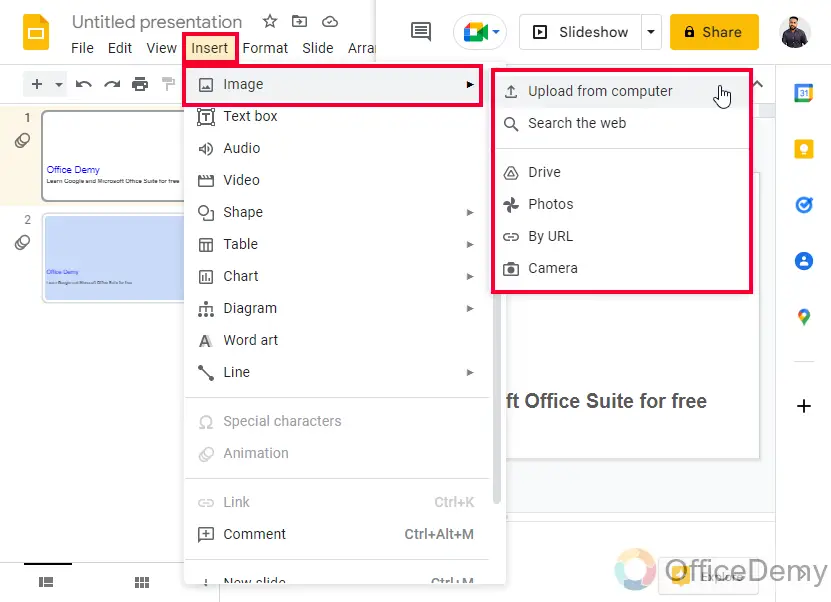
To add an image, go to Insert > Image > then select any source to upload an image
This is my starting slide, now I want to animate all four objects here; first is my heading, second is my sub-heading, third is my image, and fourth is my other image.
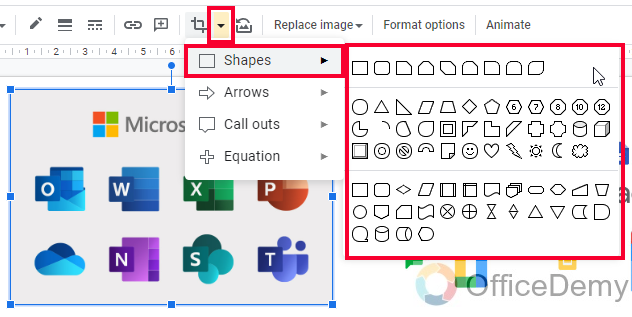
You can insert images into various shapes like squares, rectangles, circles, ovals, etc. Here I have used a Flow chart connector it looks like a tilted oval.
Step 4
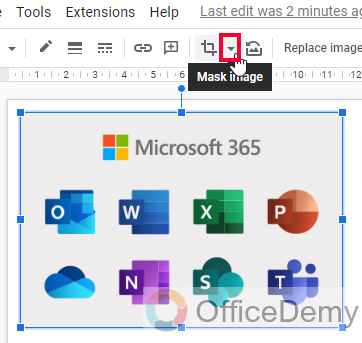
You can mask your images inside shape by selecting the object, and then going to the Mask image option in the toolbar, selecting a shape and your image will be masked in that shape.
Step 5
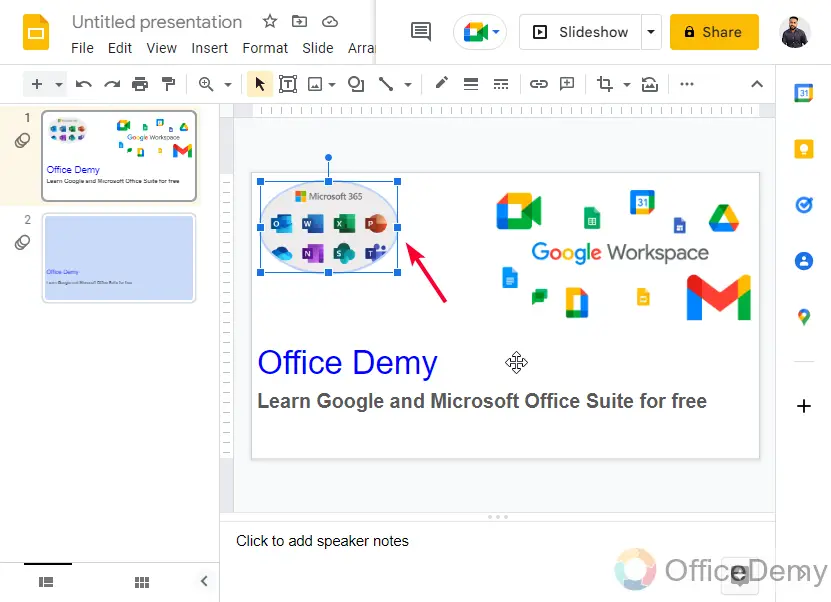
To animate any object, select the object
Step 6
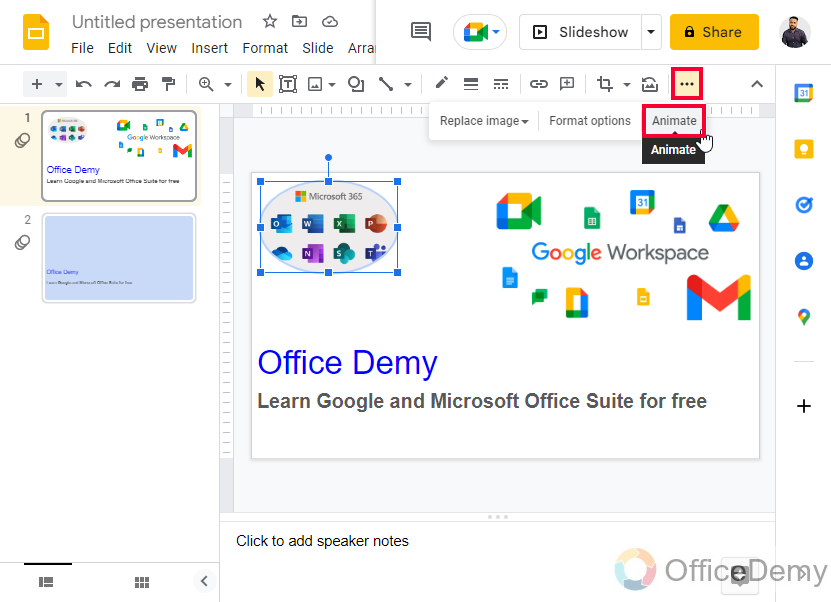
Click on the Animate button in the toolbar, if not found then click on three dots and then the Animate button.
Step 7
Select the animation type
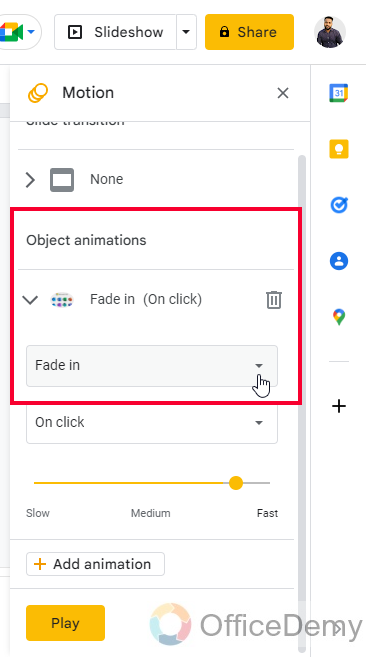

Step 8
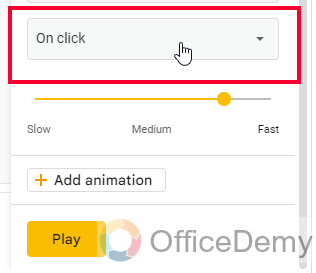
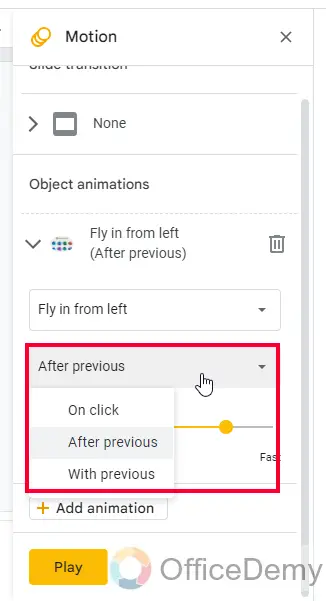
Select the animation condition
Step 9
Set the animation time (default time is recommended)

Step 10
To see your animation working, click on the Play button.
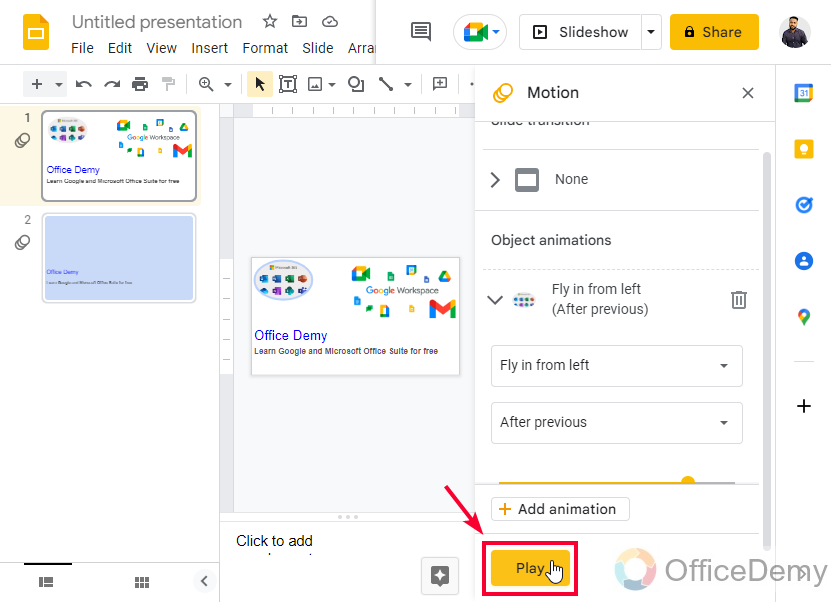
This is how your animation works. It looks better in the Slideshow mode.
Using the same steps, you can animate more elements on your Slides such as images and headings.
I have animated all four objects here and now you can see how my opening slide looks like
Step 11
The result after animations.
I hope you like this. This kind of animation is mostly used with images and objects, and less with text. It is up to you how you want to utilize this feature of Google Slides.
How to Make Google Slides Look Good – Using Backgrounds
When a create a presentation from scratch it comes with a default white background, and it looks boring. We can use custom backgrounds to improve our presentation’s look and enhance design ethics to make Google Slides look good. In this section, we will learn how to change background colors, and how to add custom images to the background.
So, here I have a simple slide, with a small title heading and a subtitle heading on the page with no background.
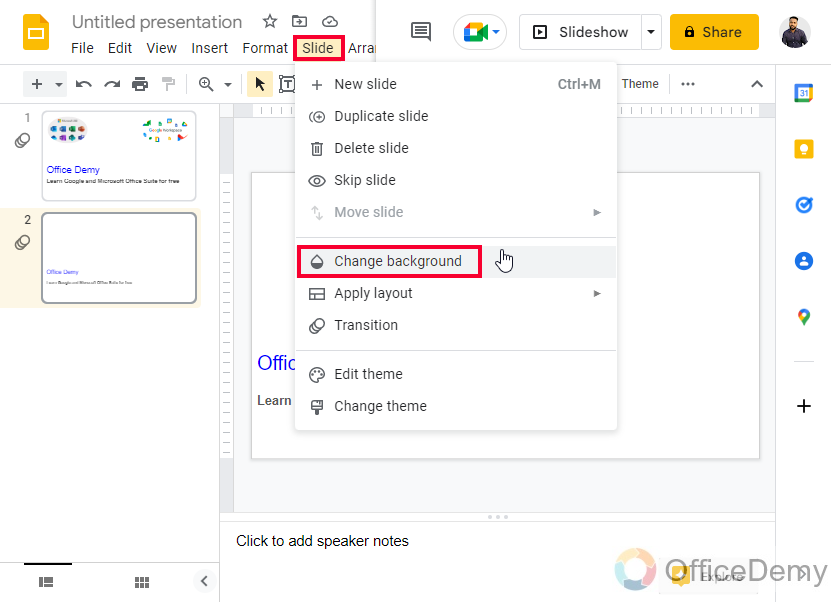
Step 1
To add a background, go to the Slide tab and then click on Change background.
Step 2
A pop-up window will appear
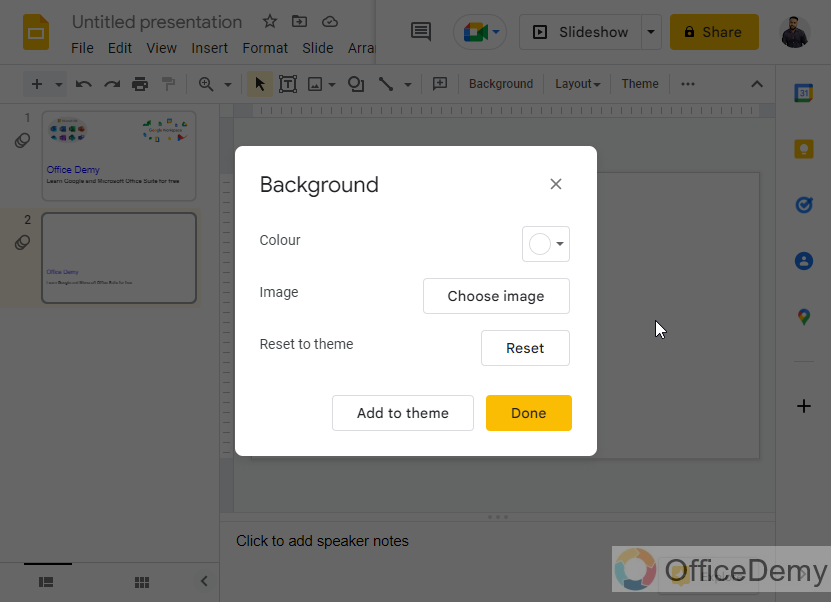
Step 3
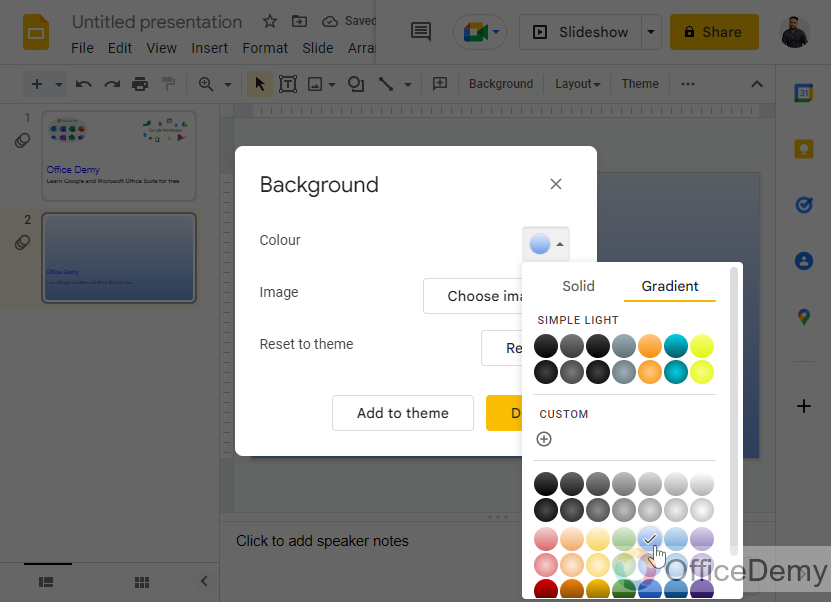
Here firstly, you can select a color to add to your background such as blue.
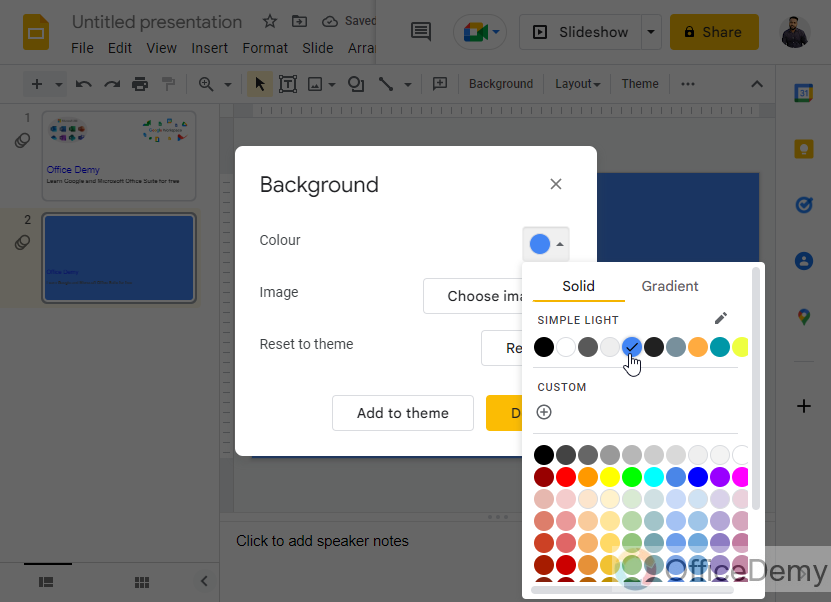
Step 4
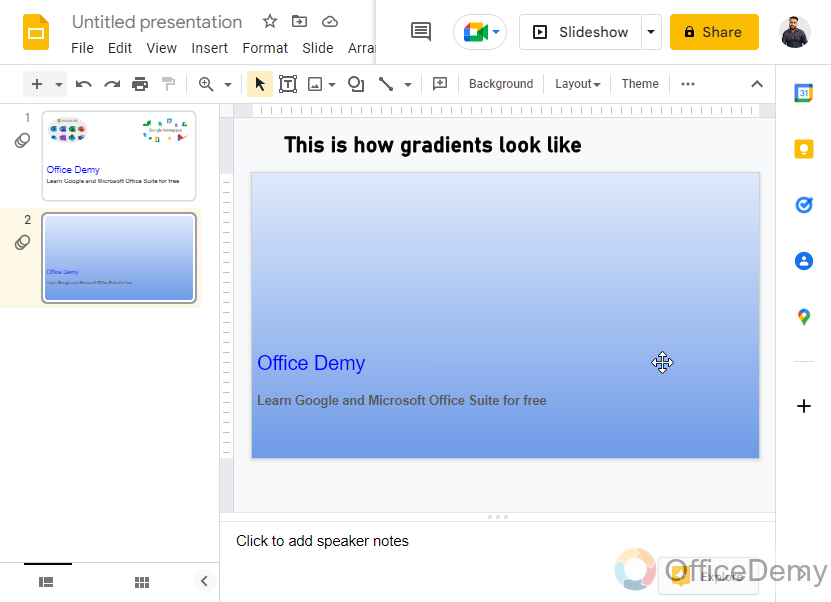
Along with solid colors, you can switch to the Gradient tab inside the color box to choose a gradient for your background.

Step 5
Below you have an image option to add as your background.
You can click on it to choose an image from various sources.
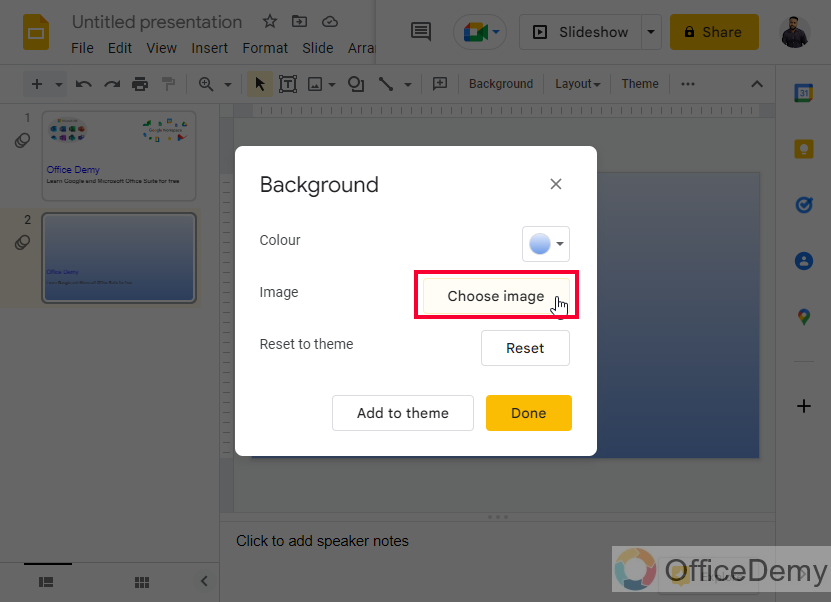
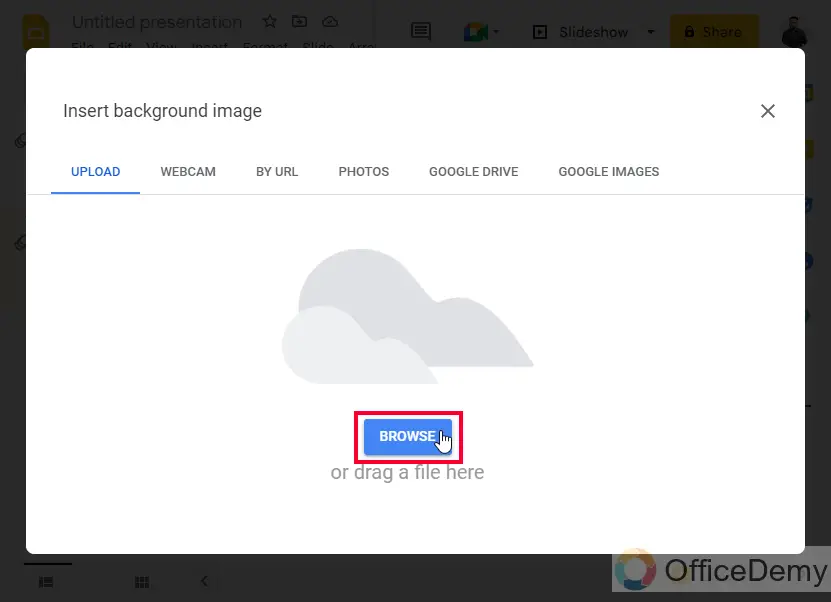
You have so many options like

- Upload: You can upload a file from your computer
- Webcam: You can capture an image from a webcam
- By URL: You can use an image URL to upload it here
- Photos: You can add an image from Google Photos
- Google Drive: You can pick an image from your Google Drive
- Google Images: Add an image from Google images
Step 6
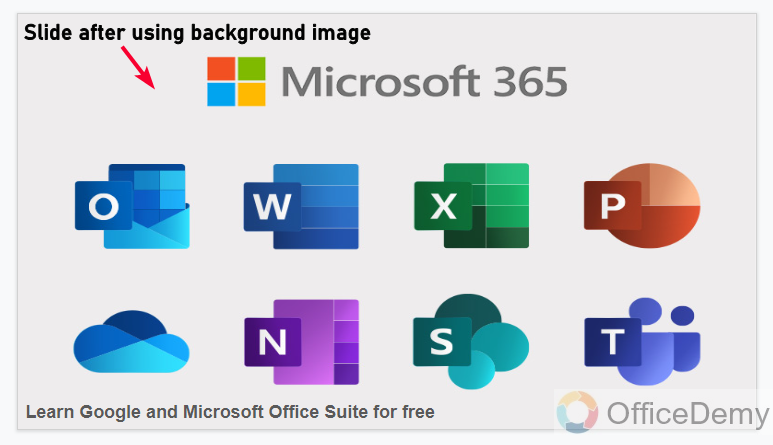
Let’s say I am uploading an image from my computer, so I will be in the Upload tab and click on the Browse button (You can also drag and drop an image here)
I will find the image in the directory and double-click it to upload it to Google Slides. The image will automatically be added as the background.
Step 7
Click on the Done button
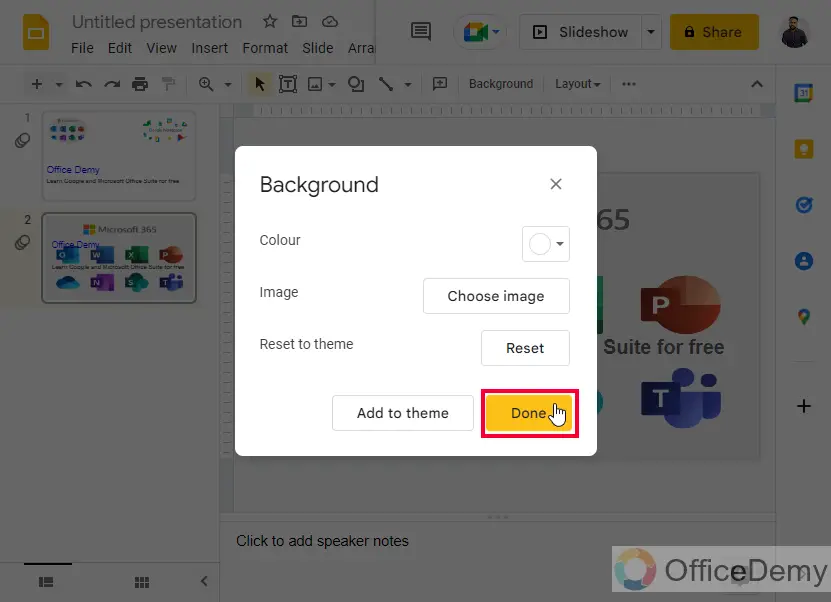
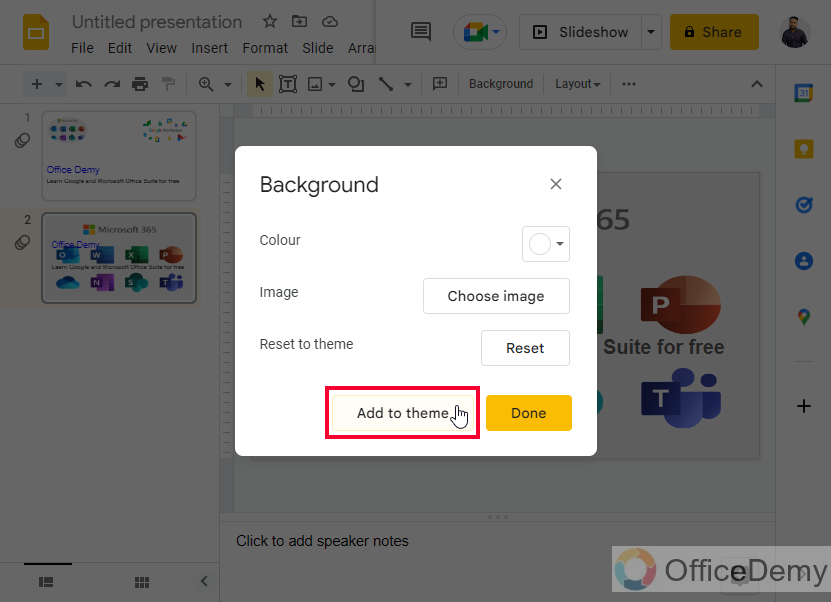
Step 8
You have another button adjacent to the Done button, which is Add to the theme, this button is used to add selected background to the theme (means that it will add this background to all the slides in the current file)
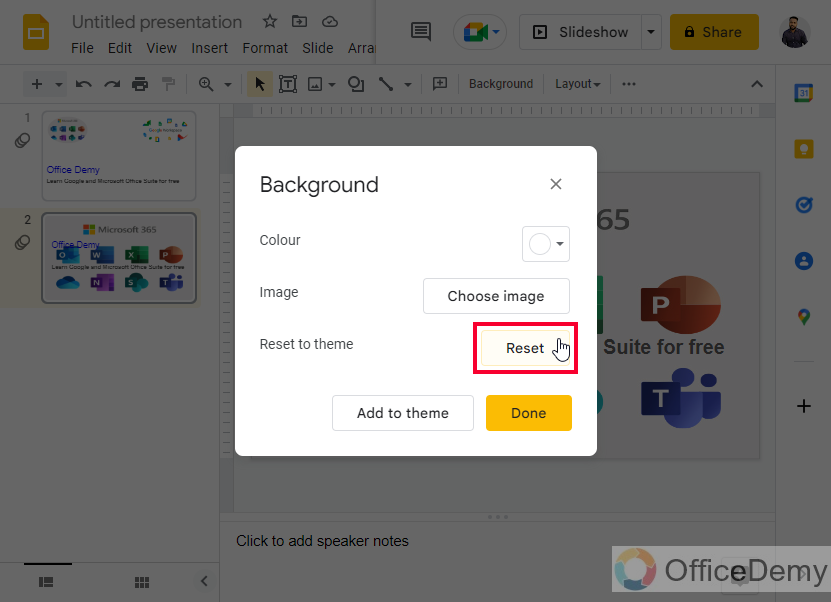
Step 9
A Reset button here to reset to the default background
How to Make Google Slides Look Good – Using Subtle Transitions
In this section, we will learn how to make Google Slides look good using subtle transitions in the presentation. There are many transitions available in Google slides to apply on slides. Note that the transition on the overall slide is Slide transition, and the transition on any element is called object animation. Let’s see how to make the subtle transition on our slides.
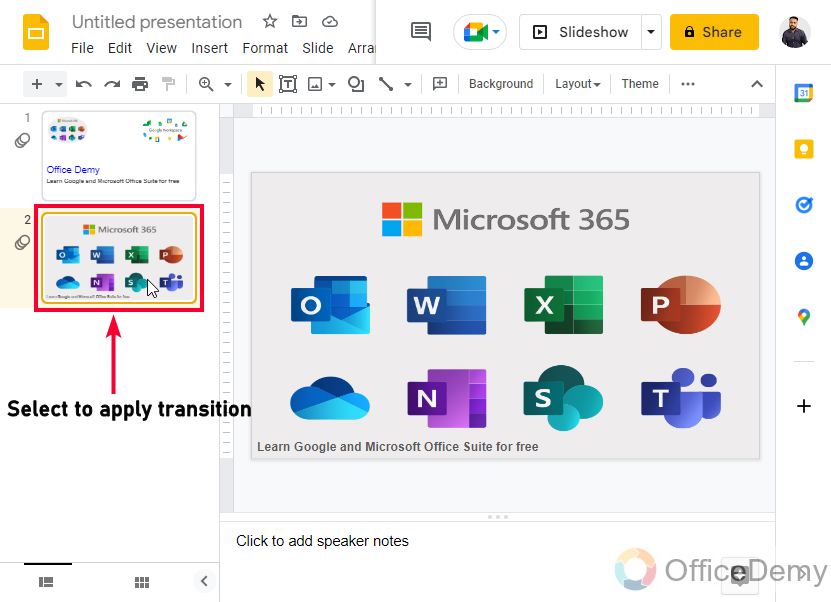
Step 1
Select the slide to which you want to apply transition on its opening
Step 2
Click on the Transition button in the Toolbar
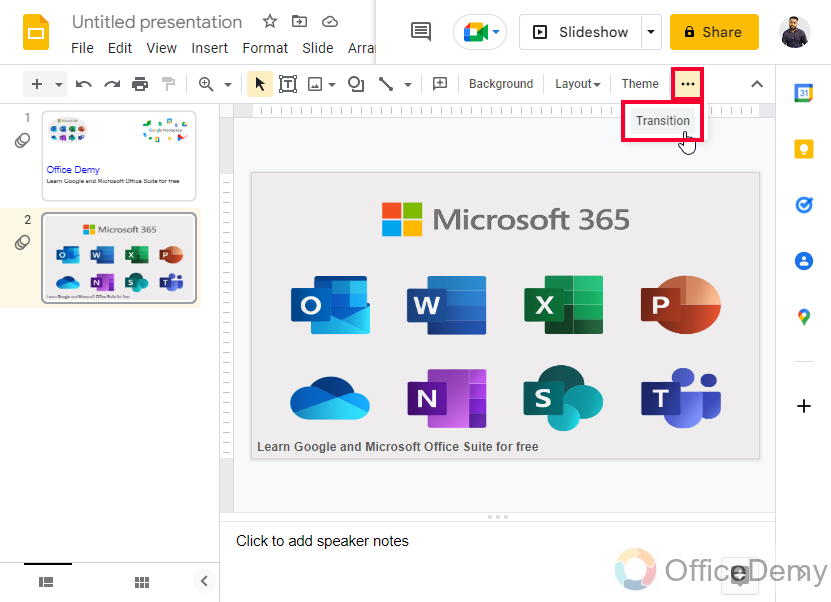
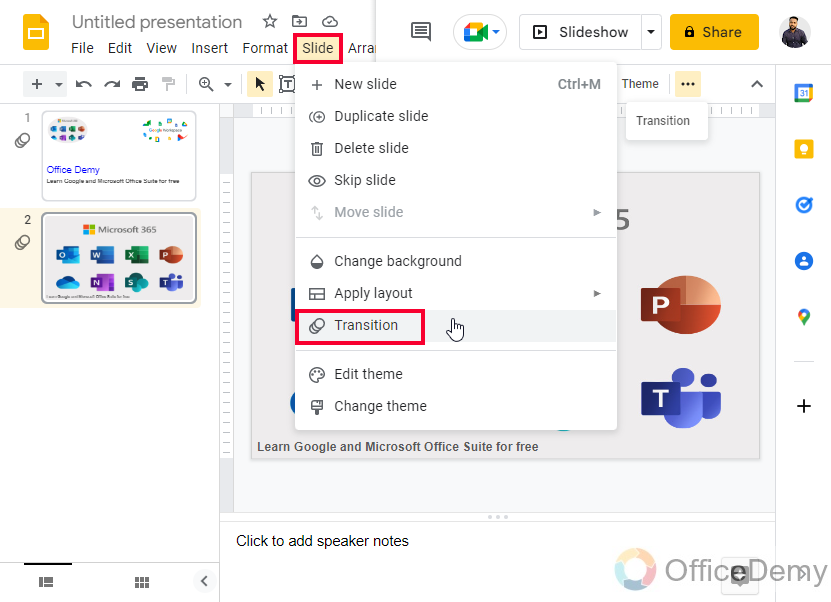
Or
Go to Slide > Transition
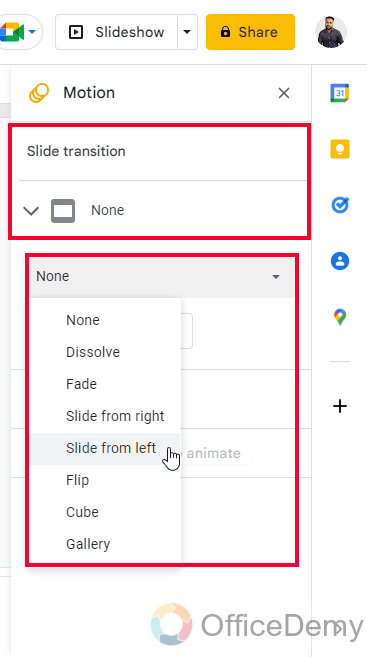
Step 3
A Motion panel will open on the right side.
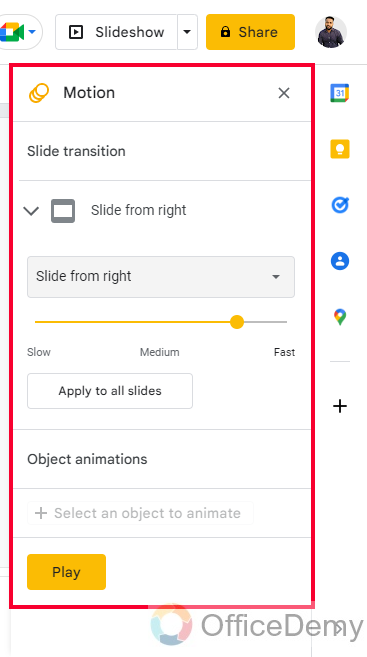
Step 4
Inside the Slide transition drop-down, select the Transition type from the drop-down
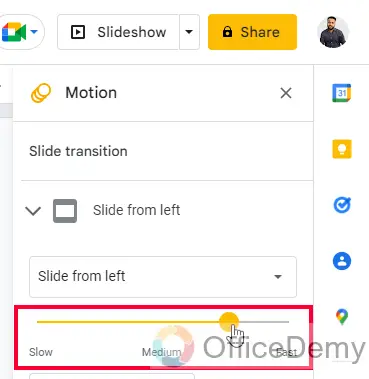
Step 5
Select the time duration for this transition
Note: This transition will only be applied on the current slide, if you want to add this to all the slides, you can click on the button “Apply to all slides”
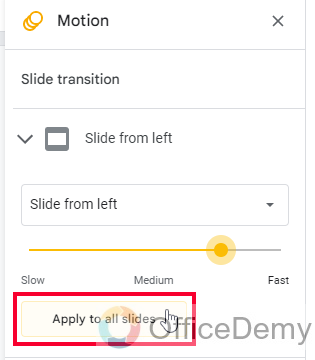
Step 6
Click on the Play button to see the transition playing

So, this is how you apply transition on your slides or to all slides. It makes your presentation looks 3x better. But you must use subtle transitions, effects like spinning, and revolving does not look good, keep the transition simple and quicker.
I hope you find the above three methods useful to make your slides look good. I hope you are going to apply these great methods in your next presentation.
Important Notes
- All Slides can have different transitions and also can have the same transition
- Objects are animated, and slides are transitioned. Both are similar but have different features
- Transitions and animations look great in Slideshow mode, so when you are testing any of them you must see them in the full-screen slideshow mode.
- Some very high-quality images may not be uploaded to use as background images. Make sure you have a normal-quality image, or you can compress your image file before uploading it to Slides.
Frequently Asked Questions
Can I Use the Cool Effects on Google Slides to Make the Slides Play Automatically?
Yes, you can use the cool effects on Google Slides to make the slides play automatically. By selecting the Automatically play option, your google slides will seamlessly transition from one slide to another without any manual input. This feature enhances the overall flow and engagement of your presentations, making them more dynamic and captivating. Utilize the automatically playing google slides option to create impressive and professional presentations effortlessly.
Can I Use Animation to Make My Google Slides Look More Appealing?
Adding google slides animation can indeed make your presentations more appealing. With animated elements such as transitions, movement, and visual effects, you can engage your audience and enhance the overall visual experience. Incorporating animation can help emphasize key points, convey complex ideas, and make your Google Slides stand out from the rest.
How to insert images into shapes in Google Slides?
Google Slides added a new exciting feature to mask images into shapes, to insert an image into a shape first add the image and resize it. Then select the image and go to the Mask image button in the toolbar, now select any shape and your image will be masked inside that shape. It can be resized after masking
Conclusion
Wrapping up how to make Google Slides look good. We have seen and learned three exciting features of Google slides that are used to make Google Slides look good and amazing. There are many more features that can be used for this purpose, we will surely cover them in some upcoming articles.
I hope you find today’s lesson helpful. I will see you soon with another helpful tutorial, till then take care & keep learning with Office Demy.


