
To Crop & Mask an Image in Google Slides
- Import an image.
- Use the “Crop” tool to focus on the part of the image you want to shape.
- Adjust the crop handles as needed and press Enter.
- Select the cropped image and choose a shape to use as a mask.
In this article we will learn step by step procedure how to crop an image and how to mask an image in google slides.
Masking is the process of hiding a portion of an image while leaving a portion of it visible. This can be done by replacing various pixels with transparency. You can then use the crop feature to cut away unwanted parts and perfectly space the edges in your photo. In other words, image masking is the process of separating an image from its background, either to cause the image to standout on its own or to place the image over another background.
Why we need to Mask an image in Google Slides?
- To make a creative presentation in google slides
- Personalization to create presentation
- Fun
How to Mask an Image in Google Slides
In this tutorial we are going to learn how to mask an image in google slides step by step.
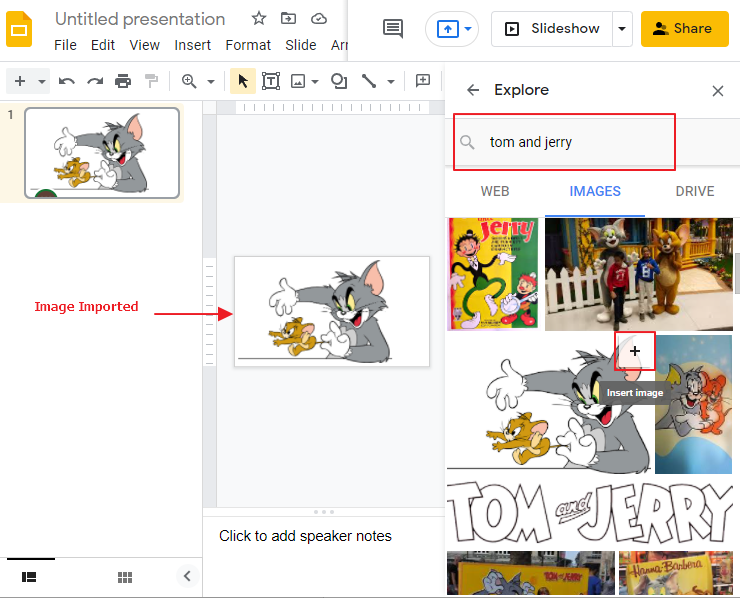
Step 1: Import an image using the Explore tool. Open a google slide untitled presentation. Click on the Explore tool.

Step 2: Search your docs and web in the search bar under Explore tool.
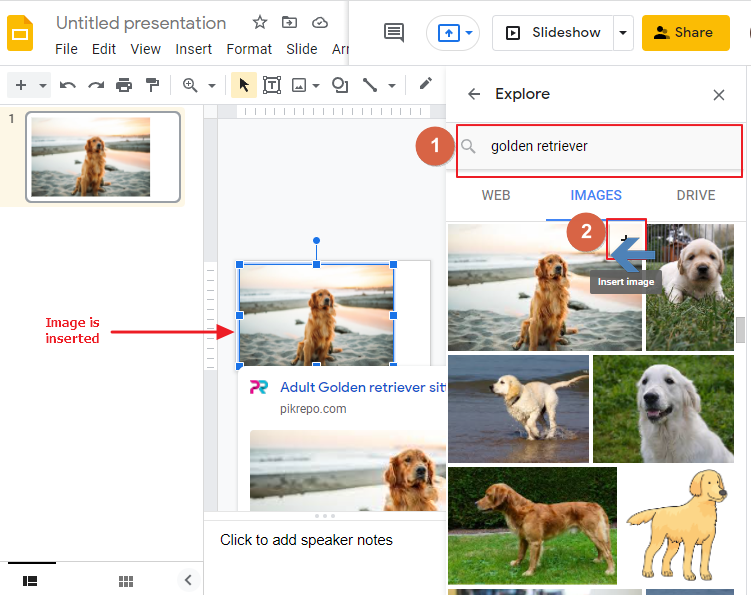
Here, I am searching for a Golden Retriever dog. Click on INSERT. So, the image is INSERTED.
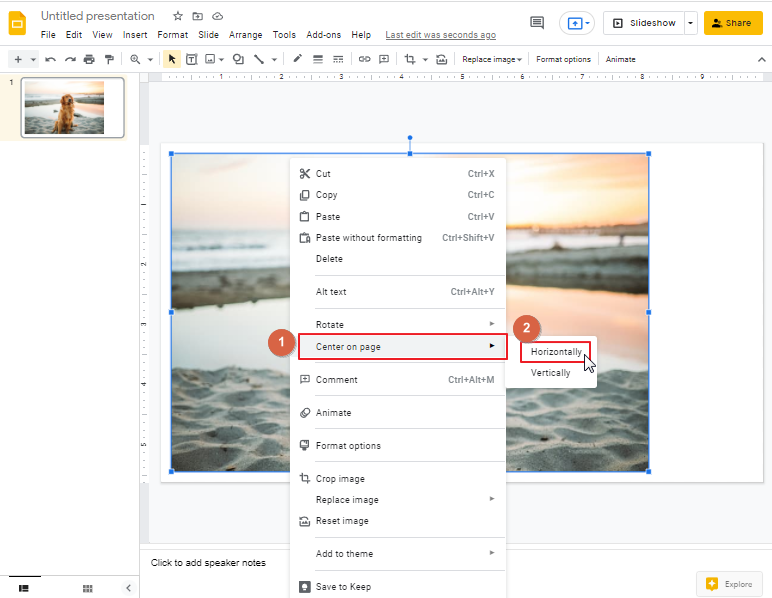
Step 3: here I have centered the image Horizontally on the page. RIGHT click on the image. Click on Center on Page. Click on Horizontally.
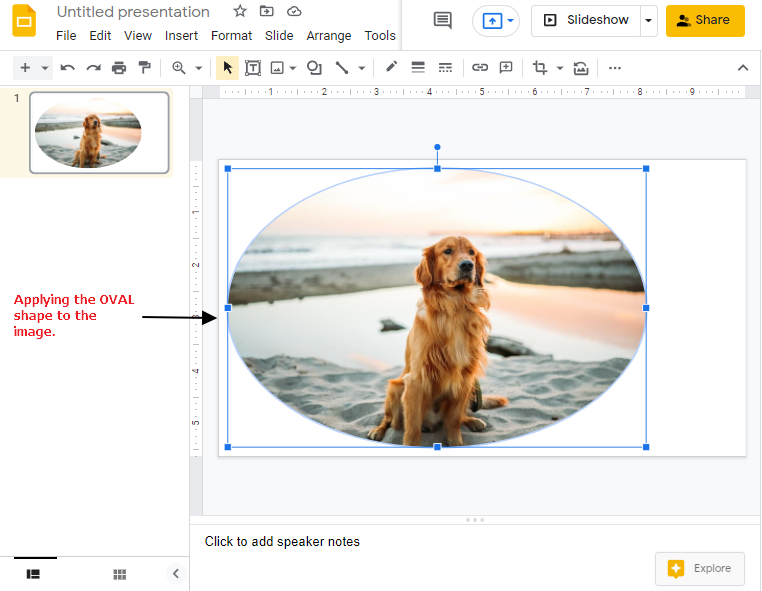
Step 4: Well, here to bring the image into a shape, select the image first otherwise mask image icon will not be activated. Click on MASK IMAGE. A drop-down menu will appear. Select a shape according to your preference. I have chosen the shape OVAL.

After applying the OVAL shape to the image. Example below,
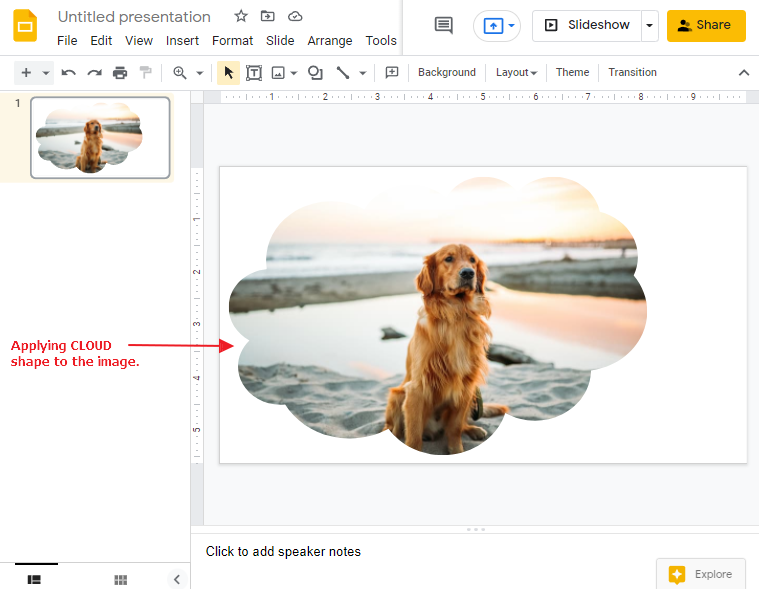
Another example with Cloud shape,
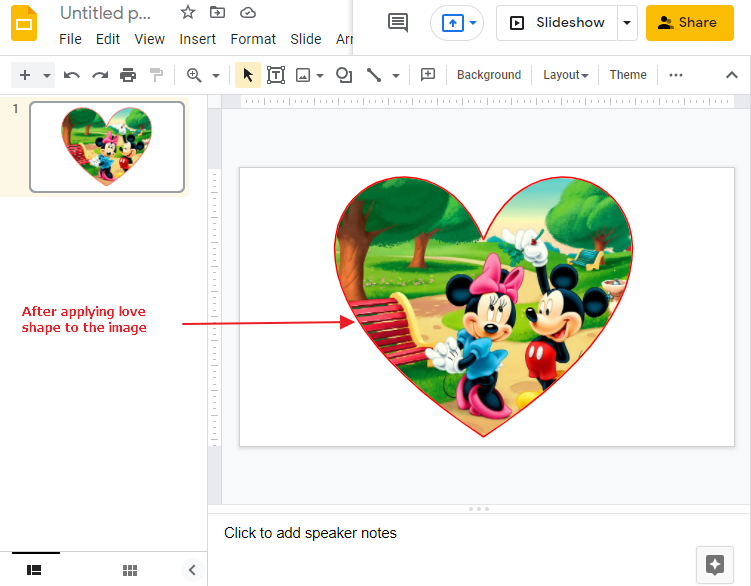
Another example with LOVE shape into the image with a border line 3PX,
How to Crop and Mask an Image in Google Slides
To avoid unwanted parts of an image, we must crop an image first. To crop and mask an image in google slides follow these steps,
Step 1: Import an image from Explorer.
Step 2: Focus on the part that you want to bring into a shape. Select CROP. Now Crop the image. Drag the crop handles to your desired points.
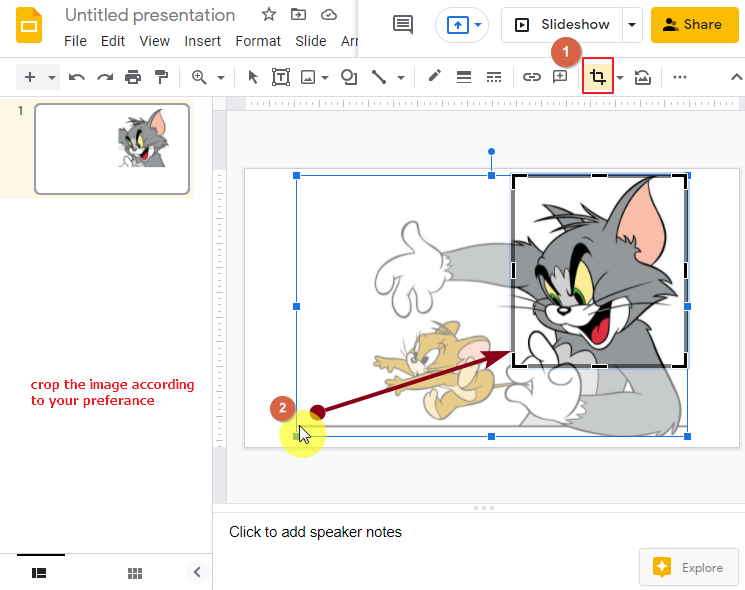
Press Enter.

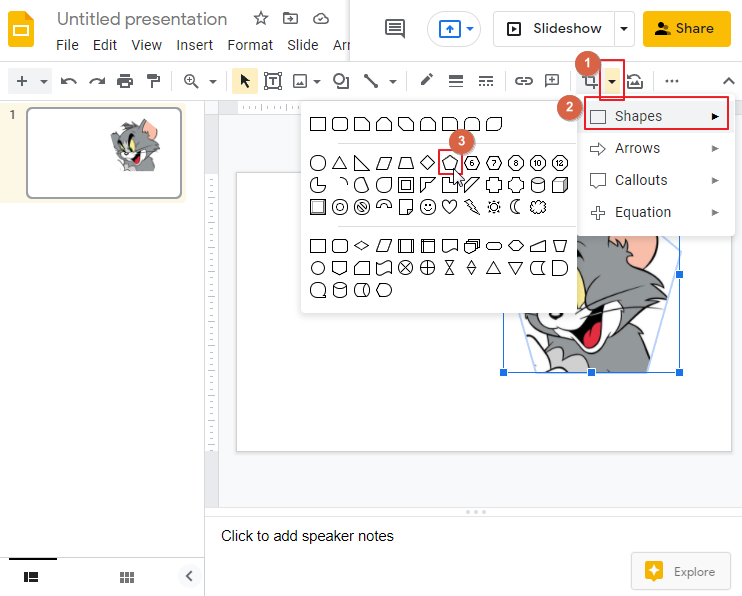
Step 3: Select the cropped image so that MASK IMAGE icon activates. Select a shape according to your preference. Apply it.
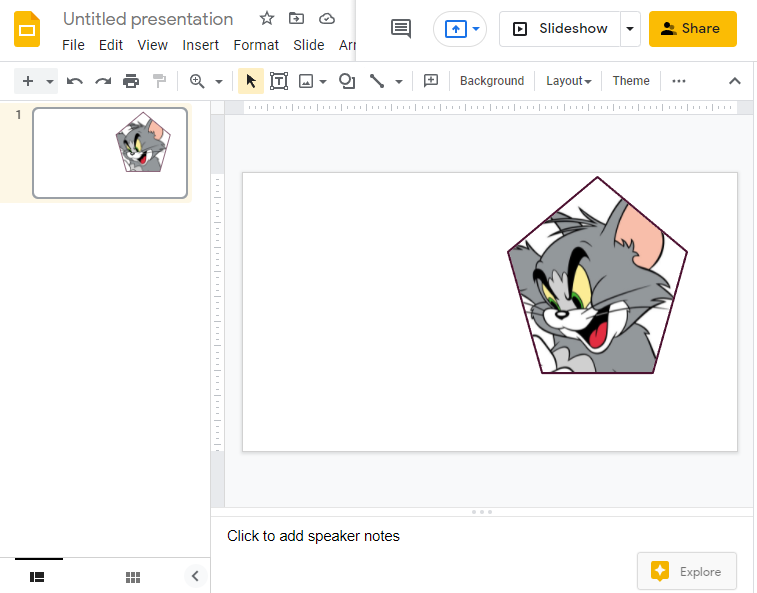
After applying REGULAR PENTAGON shape, with a borderline of 4PX, here is the final image,
GIF Presentation of How to Crop & Mask an Image in Google Slides
Conclusion
We can now easily see why masks are useful, they can help you blend different photos in different ways, as well as masking an image collage to a specific shape of your choice. By following the steps above, you should now have a good grasp of masking techniques in Google Slides. It’s important to remember that you don’t always need to create the most complex mask — only the right mask.
Hope you have enjoyed the article. don’t forget to see our other sections to solve your problems here in OfficeDemy.com


