
To Pin an Email in Outlook
- Open Outlook and locate the email you want to pin.
- Resize the Outlook window to see your desktop.
- Drag the email outside the Outlook window and drop it on your desktop.
- Drag the email from your desktop back to Outlook’s toolbar until you see “Pin to Outlook” and release it.
- Right-click on the Outlook App in the toolbar to see your pinned message.
OR
- In Outlook, select the email(s) you want to pin.
- Click the small flag icon that appears on the right side.
- The email is now flagged but not pinned.
- Go to the View menu and choose Tasks.
- In the Tasks section, you’ll find all flagged emails.
OR
- Open Outlook from Office 365.
- Hover over the email you want to pin.
- Click the pin icon to move the email to the top and pin it.
Hi all, welcome to another quick Outlook guide. As we all know, Outlook is a popular email client that is widely used by individuals and organizations to manage email communication. With the influx of emails that people receive every day, it’s easy to overlook important messages that require immediate attention. Fortunately, Outlook provides a handy feature that allows users to pin important emails to the top of their inbox, making them easily accessible and ensuring they don’t get lost in the sea of other emails.
In this guide, we will explore how to pin an email in Outlook, step by step. Whether you are a busy professional or an individual looking to streamline your email management, this feature is sure to come in handy. We will learn three methods step by step, two for the Outlook app, and one for the Outlook web version.
Importance of Pin an Email in Outlook
Well, we can understand how important the topic is how to pin an email in Outlook, it can be an essential skill for individuals who receive a large number of emails daily. With so many emails flooding our inboxes, it can be easy to overlook important messages that require immediate attention. By using the pin feature, users can ensure that crucial emails remain at the top of their inbox, making them easily accessible and reducing the risk of missing important information. Additionally, this feature can be particularly helpful for individuals who receive emails from different clients or projects, allowing them to prioritize and manage their workload more effectively.
The pin feature can also help to improve productivity and reduce stress levels. By keeping important emails in plain sight, users can avoid the need to search through their inboxes for information or worry about missing critical deadlines. This can help to reduce the amount of time and mental energy spent on email management, freeing up more time to focus on other tasks. So, these are the reasons we should know to learn how to pin an email in Outlook.
How to Pin an Email in Outlook
I will show you 3 methods in this tutorial, all the methods are easy and very quick. We will start with the Outlook App, and then we will see how to pin an email in the Outlook web version as well. So, let’s get started.
Pin an Email in Outlook – using Drag & Drop Method
In this section, we will learn how to pin an email in Outlook using the drag-and-drop method. The method is very easy but a little tricky, it’s not like any common method we usually practice to do any task in Outlook. But, don’t worry as long as you follow the below steps, there will not be any problem for you.
Step 1
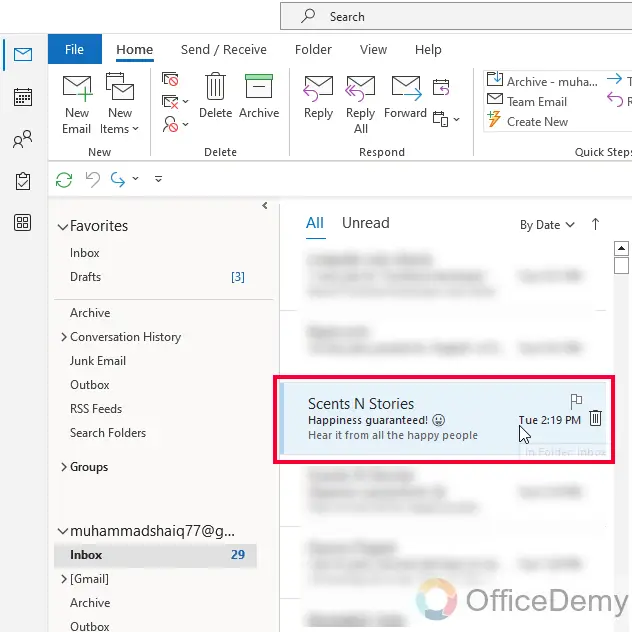
Open your Outlook app and look for the email message you want to pin.
Step 2
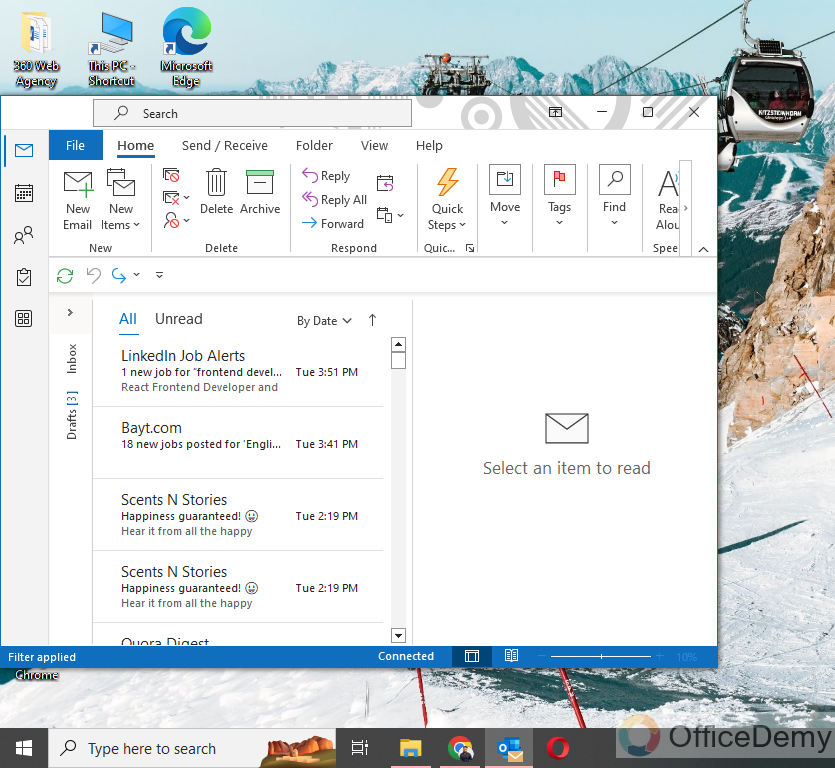
Now, resize the Outlook window so that you can see your desktop screen in the background
Step 3
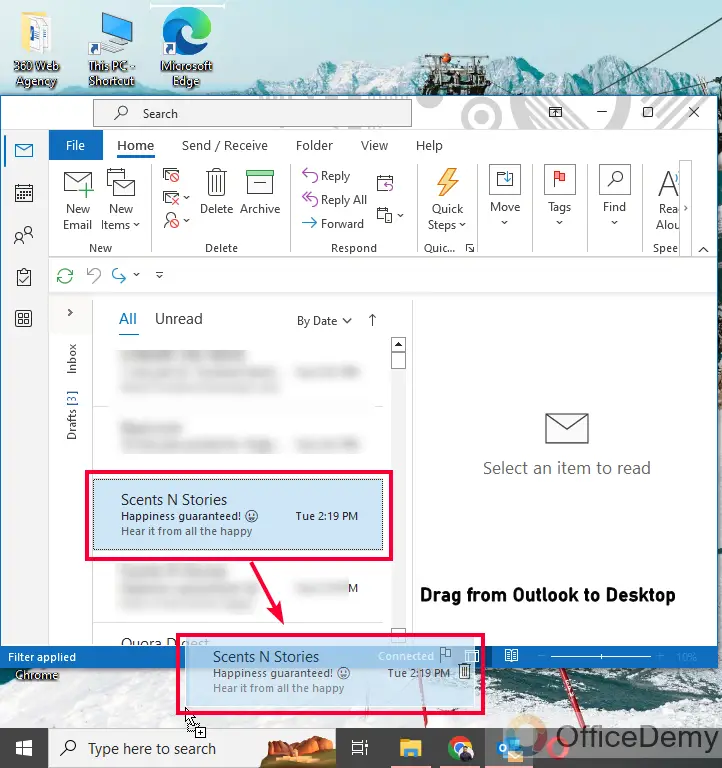
Now hold the email message in your Folder, drag it outside to the Outlook window, and drop it on your Desktop screen
Step 4
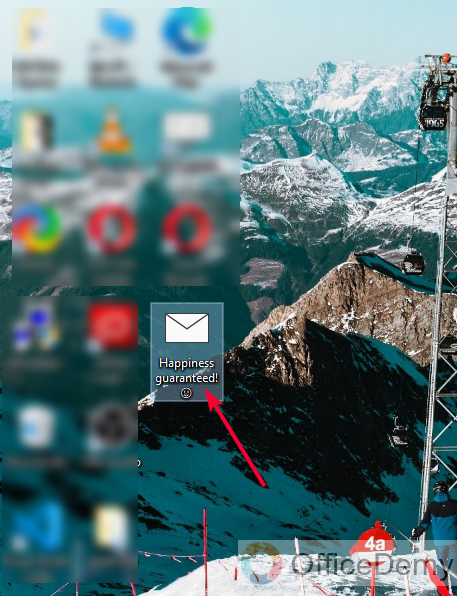
You can see your email message copy is now on your desktop
Step 5
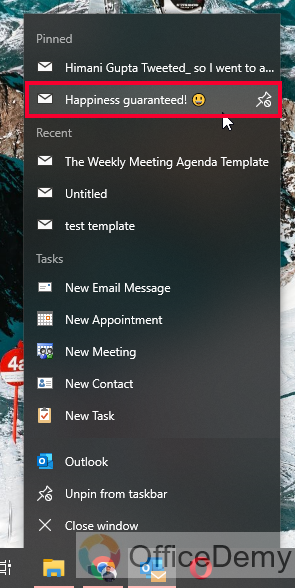
Now hold it on your desktop and drag it to your Outlook App in the toolbar, you will see a message “Pin to Outlook”, seeing this message; you just need to leave your mouse click and drop the email message here.
Step 6
Right-click on the Outlook App in the toolbar, and you will see your message at the top section called “Pinned”
Step 7
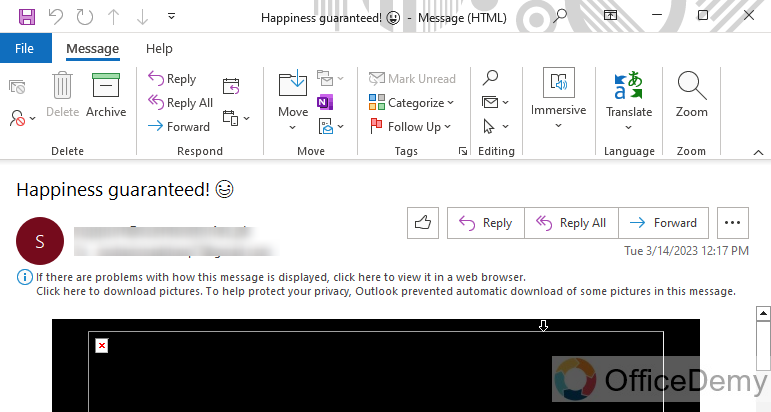
To open this message quickly, click on the message and it will open in the new outlook window.
Note: You can pin a maximum of 6 email messages here in the pinned section.
So, this was how to pin an email in Outlook. But this is not the only way. Let’s see another method quickly.
Pin an Email in Outlook – Using Flag
In this section, we will learn how to pin an email in Outlook using the Flag method. The flag is a slightly different feature in Outlook, but we can use it as a pin method as well. So, let’s see how this method works.
Step 1
In your Outlook app, select your email message (they can be one or multiple)
Step 2
On hover, you will see a small flag icon on the right side of the message
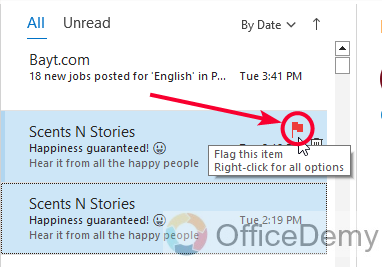
Step 3
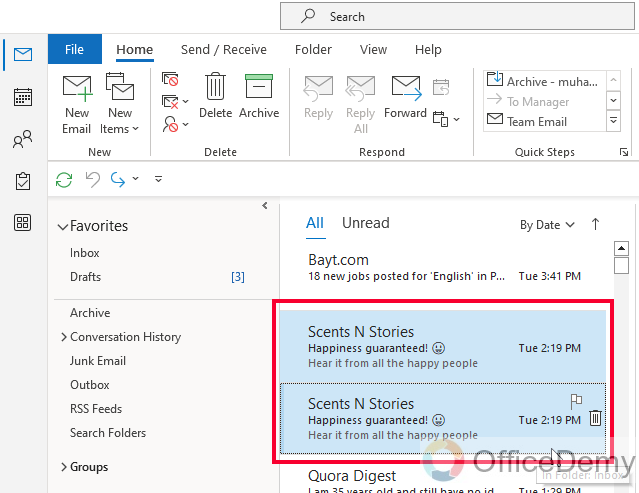
Click on the flag icon and the message will be flagged but not pinned on the top (It will not change its position)
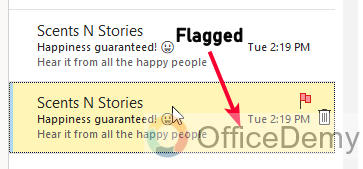
Step 4
Now you have marked this email message as a flag, now you can access it quickly without scrolling even after many days, just go to the View Menu
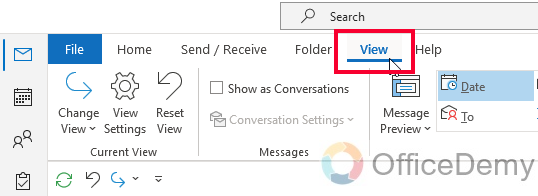
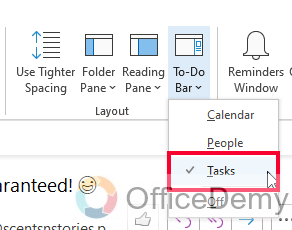
Step 5
Click on the To-Do bar dropdown in the layout section
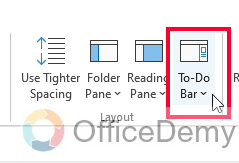
Step 6
Select Tasks from the options
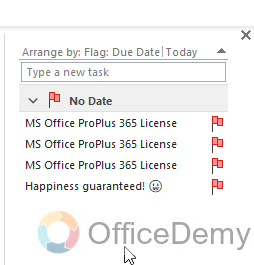
Step 7
On the right-most side, you will see all the flagged messages will appear in a stack
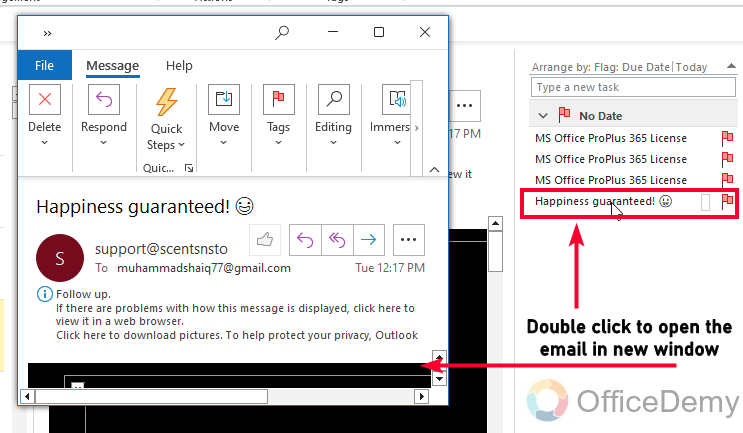
Step 8
To open any message just double-click on the email message and it will be opened in a new Outlook window.
Pin an Email in Outlook – In Outlook Web
In this section, we will learn another way to pin an email in Outlook, but this is for the Outlook web version. Some of us prefer the web version of Outlook, so this method is for those, I would say it’s 2 times easier in the web version than in the app. Let’s see the simple steps below.
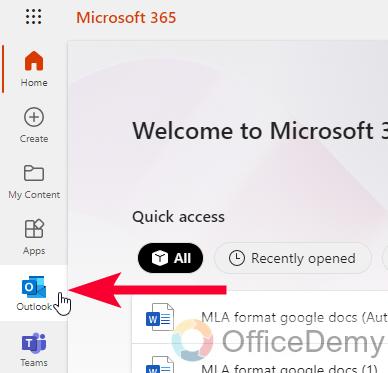
Step 1
Open your Outlook from Office 365 dashboard.
Step 2
Hover over the email message inside the folder, and you will see some quick options there.
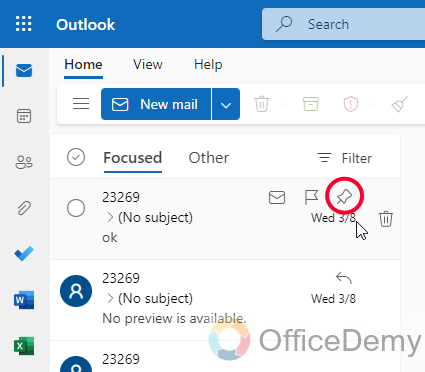
Step 3
There is a pin icon, click on it, and it will become blue and will move the email to the top now it’s a pinned email that will always be showing up on the top.
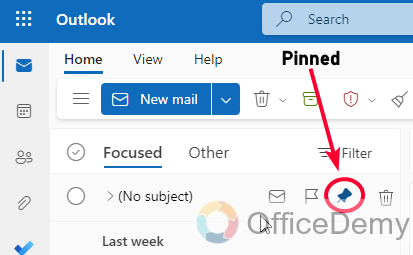
This is how easily you can pin an email in the Outlook web version.
So these were today’s methods for the topic of how to pin an email in Outlook. I hope you find the above methods helpful.
Important Notes
- Pinning an email is a way to keep it at the top of your inbox so that it’s easily accessible.
- To pin an email in Outlook, right-click on the email and select “Pin.”
- You can also pin an email by clicking on the “Pin” icon located in the top right corner of the email.
- Pinned emails will have a small pin icon next to them, indicating that they are pinned.
- To unpin an email, right-click on the email and select “Unpin,” or click on the pin icon again to unpin it.
- You can also pin multiple emails at once by selecting them and clicking on the “Pin” icon in the top ribbon.
- If you want to customize the order of your pinned emails, you can drag and drop them to rearrange their position.
Frequently Asked Questions
How do I know if an email is pinned in Outlook?
When an email is pinned in Outlook, it will have a small pin icon next to it, and it will be colored. This pin icon will appear both in the email list view and the email preview pane. Additionally, pinned emails will remain at the top of your inbox until you unpin them, making them easy to spot.
Can I pin multiple emails at once in Outlook?
Yes, you can pin multiple emails at once in Outlook. To do so, select the emails you want to pin (you can use CTRL + click to select multiple emails), and then click on the “Pin” icon in the top ribbon. This will pin all the selected emails at once.
What’s the difference between pinning an email and marking it as important in Outlook?
Pinning an email in Outlook will keep it at the top of your inbox, regardless of its importance level. Marking an email as important, on the other hand, will highlight it in yellow and include it in the “Important” folder in Outlook. While both features can help you keep track of important emails, pinning is generally more useful for emails you need to access frequently, while marking as important is more useful for emails that are significant but don’t require frequent access.
Conclusion
Wrapping up how to Pin an email in Outlook. We learned three methods today, and I hope you find the above article helpful. Thank you for your love! keep learning and spreading the knowledge.


