
To Share Only One Tab in Google Sheets
Hide Unwanted Tabs
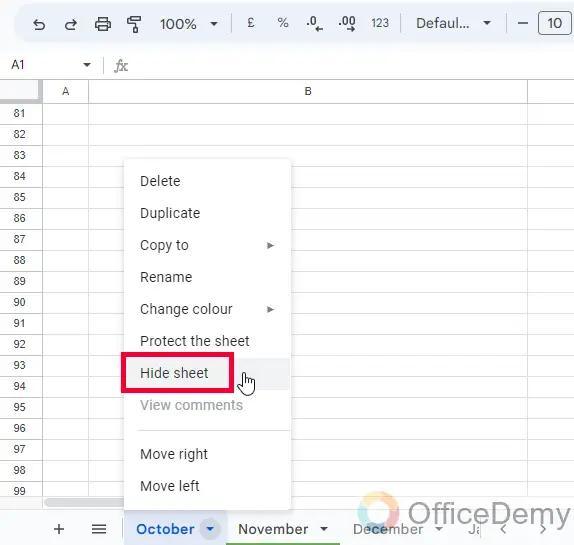
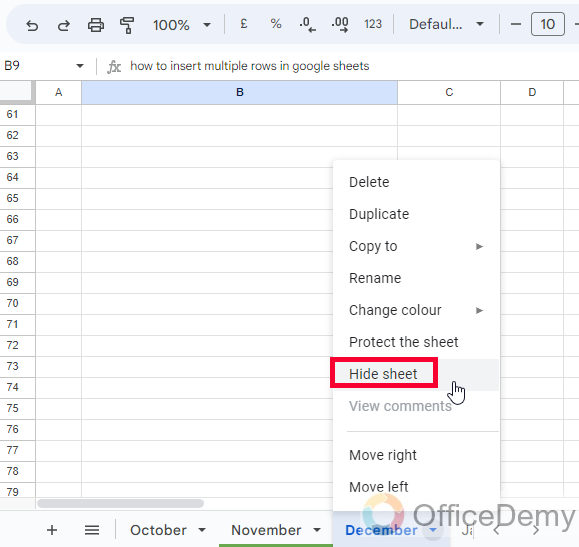
- Right-click on the tab to hide and choose “Hide sheet“.
- Repeat for all tabs you want to hide.
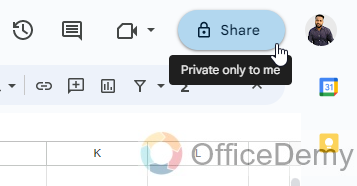
- Click “Share” in the top-right corner.
- Enter email addresses, set permissions, and click “Send“
OR
Create a Copy of the Tab
- Open the Google Sheet.
- Right-click the tab to share and choose “Copy to > New Spreadsheet“.
- Open the new sheet.
- Click “Share,” add users, set permissions, and click “Send“.
OR
- Protect Sheets
- Right-click the tab you want to protect and choose “Protect the sheet“.
- Enter a description.
- Select the sheet.
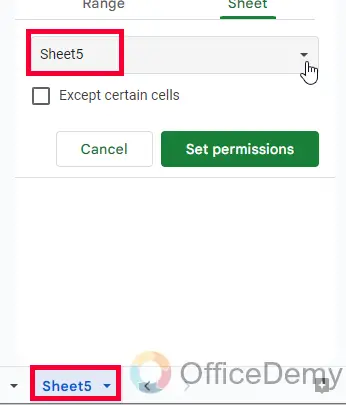
- Click “Set permissions“.
- Choose options like “Only you” and click “Done“
Well, the answer is yes. Greetings, fellow spreadsheet enthusiasts! Welcome to Office Demy. Today, we will show you how you can share only one tab in Google Sheets. As we all know, Google Sheets is an incredibly versatile tool that allows for seamless collaboration and sharing of data. However, sometimes we may want to limit the access of collaborators to only one specific tab or worksheet within a larger workbook. So, let’s dive in and explore whether this is possible, and if so, how to do it.
As always, it’s important to make sure that you have a clear understanding of the underlying concepts before diving into the nitty-gritty of the process. In this case, we’ll need to understand the difference between sharing an entire Google Sheet and sharing only a specific tab. While it may seem like a small distinction, it can have a big impact on the level of control you have over who can view and edit your data. So, grab your favorite beverage, fire up your computer, and let’s get started on this exciting journey into the world of sharing Google Sheets tabs!
Why do you need to Share Only One Tab in Google Sheets?
Sharing only one tab in Google Sheets can be incredibly useful when you’re working with a large workbook that contains sensitive or confidential data. By limiting access to only the necessary tab, you can ensure that collaborators only see what they need to see and don’t accidentally modify or delete any other data. This is especially important when working with financial or personal data, where even small errors or unauthorized changes can have serious consequences.
Another reason you might need to share only one tab in Google Sheets is if you’re working on a project with a large team, and each team member is responsible for a specific aspect of the data. By sharing only, the relevant tab with each person, you can ensure that they can access and modify the data they need without getting overwhelmed by the entire workbook. This can help increase efficiency and productivity, as each person can focus on their specific tasks without getting bogged down by irrelevant data.
How to Share Only One Tab in Google Sheets?
We have various methods and workarounds to learn how can you share only one tab in Google Sheets. So, without any delay, let’s get started with the first method.
Share Only One Tab in Google Sheets – Hide Unwanted Tabs
In this section, we will learn how you can share only one tab in Google Sheets, using a very simple method. This method involves sharing the entire sheet and hiding the tabs that you don’t want collaborators to access. This method performs well and is used by many users.
Step 1
Open the Google Sheet that you want to share.
Step 2
Right-click on the tab that you want to hide and select “Hide sheet“.
Step 3
Repeat step 2 for all tabs that you want to hide.
Step 4
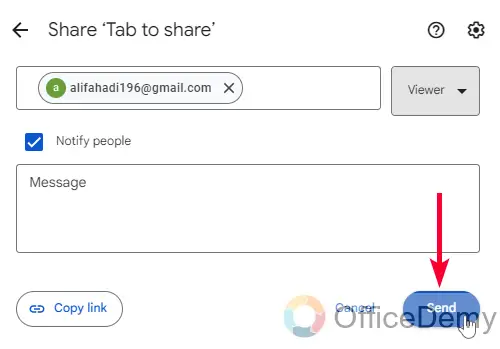
Click on the “Share” button in the top-right corner of the screen.
Step 5
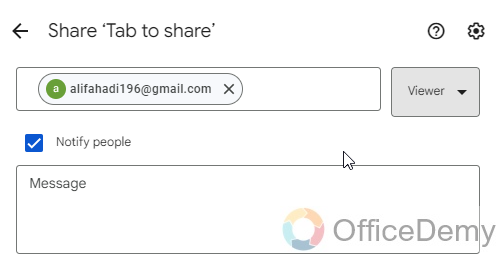
In the “Share with people and groups” window, enter the email addresses of the people you want to share the sheet with and select the appropriate sharing permissions.
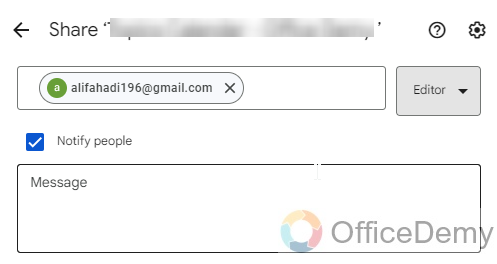
Step 6
Click “Send” to share the sheet.
Share Only One Tab in Google Sheets – Create a Copy of the Tab
In this section, we will learn how can you share only one tab in Google Sheets, by not sharing the entire sheet. This method involves creating a copy of the tab you want to share and sharing only that copy. So, there is no need to hide any tab.
Step 1
Open the Google Sheet that contains the tab you want to share.
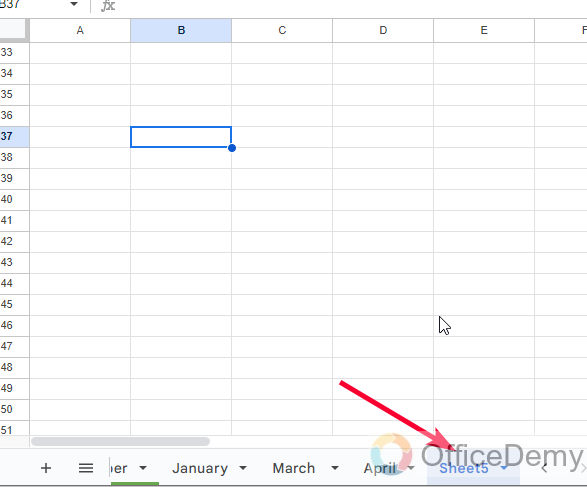
Step 2
Go to Tab you want to share, right-click, and select “Copy to > New Spreadsheet”
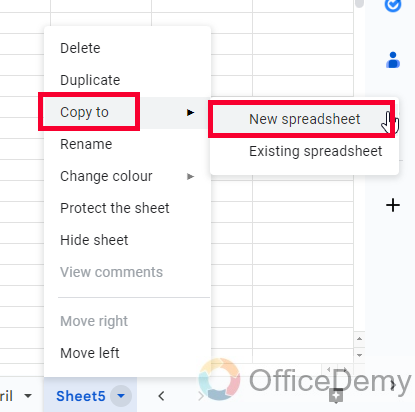
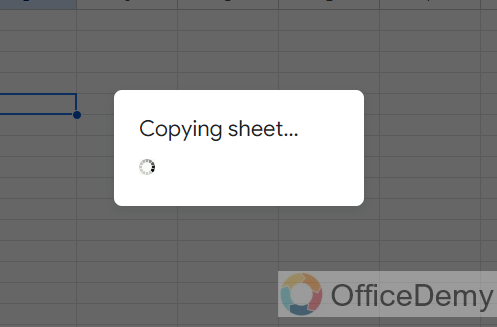
Step 3
This will create a brand new copied workbook with only one tab that you selected and copied.
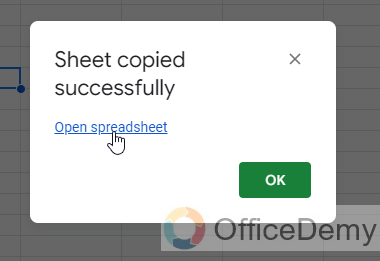
Step 4
Click on the “Open Spreadsheet” button to open the new sheet.
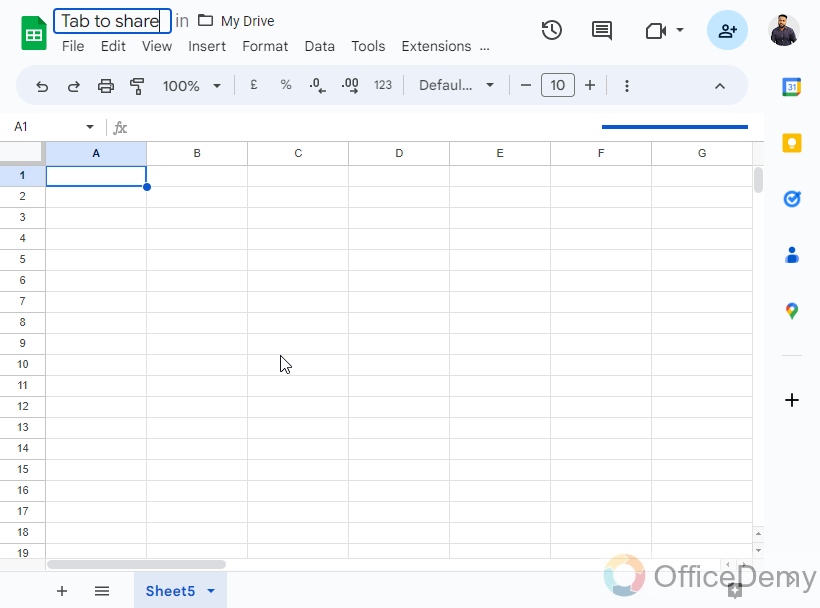
Step 5
Rename your sheets or workbook if you need to.
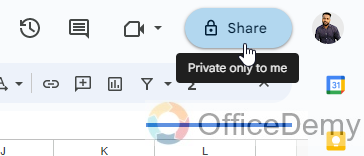
Step 6
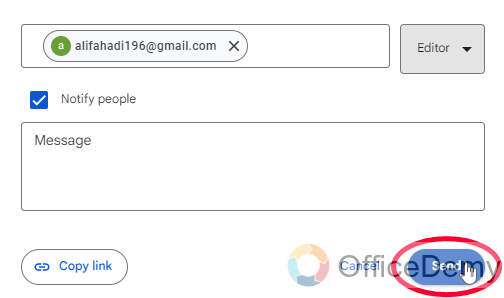
Click on the “Share” button, and then follow the same steps as the previous method to add users and give appropriate access to them.
Step 7
Click “Send” to share the tab.
So, this is how you can share only one tab in Google Sheets using two different methods.
Share Only One Tab in Google Sheets – Protect Sheets
In this section, we will learn how you can share only one tab in Google Sheets. Well, we have another method like the sheet hiding method. This is the sheet-protecting method. So, let’s see how we can protect our sheets when sharing the entire workbook.
Step 1
Open the Google Sheet that you want to share.
Right-click on the tab that you want to hide and select “Protect the sheet“.
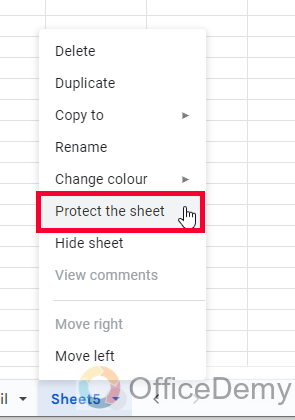
Step 2
Enter a Description
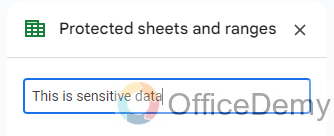
Step 3
Select the Sheet from the entire workbook to protect.
Step 4
Click on the “Set permissions button”

Step 5
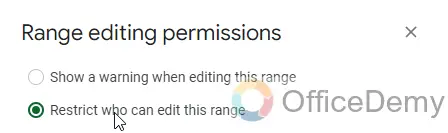
Select any radio button option, from “Show a warning when editing this range” or “Restrict who can edit this range”
Step 6
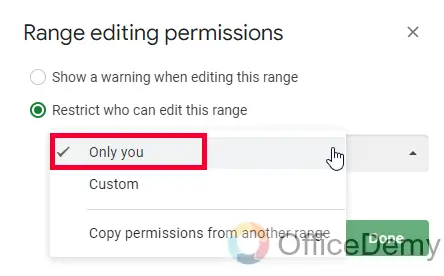
Click on the dropdown below and select “Only you” from the options.
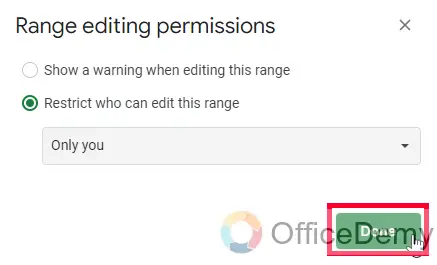
Step 7
Click on the “Done” button and your sheet is now protected from everyone except you.
Step 8
Your sheet is protected, and it will show a “Lock” icon associated with it indicating it’s a protected sheet.
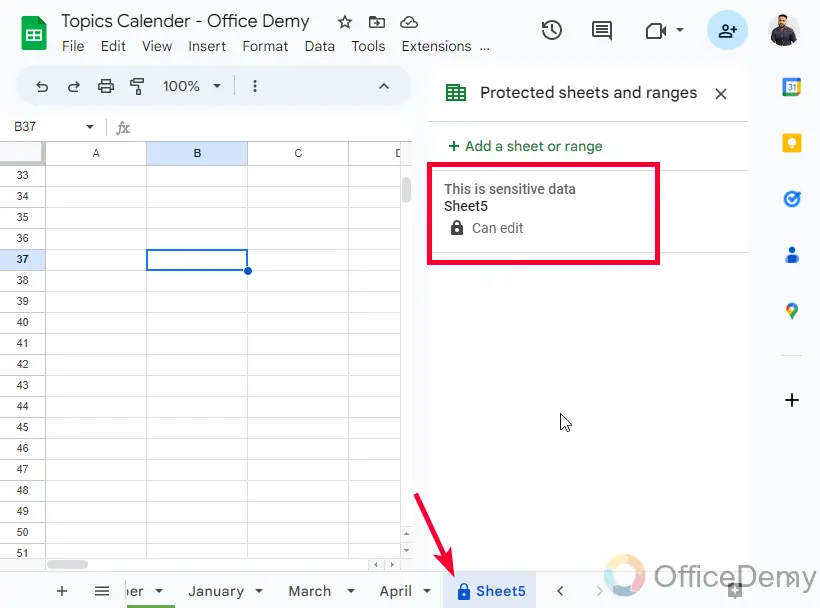
This is how you can share only one tab in Google Sheets using the tab protection feature.
Important Notes
- You can also protect ranges like sheets using the same method.
- You can set permissions, and allow only a few people to make edits
- If you have already set permissions for a few users, now you can copy these permission settings from any sheet to any sheet.
- There are many third-party add-ons available (free and paid) you can use them to share only one tab of your Google Sheets file, but I don’t recommend them, as we have so many built-in methods available for that.
- Be careful when using the “Hide Sheet” method, as collaborators can still access the hidden tabs if they know how to unhide them.
- When using the “Create a Copy of the Tab” method, changes made to the original tab won’t be reflected in the copied tab.
- Third-party add-ons can provide additional features and flexibility when sharing only one tab in Google Sheets.
- Make sure to select the correct sharing permissions when sharing the tab to avoid any unauthorized access or edits.
- Consider using protected sheets and ranges to further control access and editing of the shared tab.
Frequently Asked Questions
Can I Use the Same Methods to Get the Sheet Name in Google Sheets as to Share Only One Tab?
To retrieve the current sheet name in Google Sheets, you can utilize the same methods as when you want to share only one tab. With the keyword retrieve current sheet name, you can easily access the sheet name and perform the necessary actions without any modification.
How to share multiple tabs using Google Sheets?
You can use the protect range method, or the copy to new spreadsheet method to share multiple tabs, but you’ll need to repeat the steps for each tab you want to share.
How to share a tab without giving collaborators access to the rest of the sheet?
All of the above methods allow you to share only the selected tab and restrict access to the other tabs in the sheet.
Will changes made to the original tab be reflected in the copied tab when using the “Create a Copy of the Tab” method?
No, changes made to the original tab won’t be reflected in the copied tab. You’ll need to create a new copy of the tab to update it with the latest changes.
How to unhide a hidden tab in a shared Google Sheet?
Collaborators with edit access can unhide a hidden tab by right-clicking on any tab and selecting “Unhide sheet“. Be sure to use other methods, such as creating a copy of the tab or using a third-party add-on, if you need to restrict access to the tab.
Conclusion
That’s all from how you can share only one tab in Google Sheets. I hope you find this guide useful and helpful for you to share your spreadsheet’s tab safely. I will see you soon. Keep learning with Office Demy.


