
To Use Voting Buttons in Outlook
- Open Microsoft Outlook.
- Click “New Email” > Options.
- Within the “Tracking” group, click on the “Voting Buttons” icon.
- Click on your preferred option, or choose “Custom” to create your own.
- If you select “Custom,” a Properties window will appear.
- Here, you can enter your custom voting options, separating them with semicolons > Click “Close” to confirm.
Hi, today we are going to learn how to use voting buttons in Outlook. We all use Outlook very often and you must have had a time when you are trying to schedule a meeting or gather feedback from a group, it can be challenging to get everyone on the same page. Fortunately, Outlook provides a convenient feature called voting buttons that can help streamline the process. With just a few clicks, you can add voting options to your emails and meeting invitations, making it easy for recipients to respond and provide valuable feedback.
In this article, we will explore the different methods and the benefits of using voting buttons in Outlook and provide step-by-step instructions to help you get started.
Importance of using Voting Buttons in Outlook
Well, learning how to use voting buttons in Outlook can bring many benefits and advantages to your daily communication. First and foremost, voting buttons can save you time and reduce back-and-forth email exchanges by providing a quick and easy way for recipients to respond to your requests. Additionally, voting buttons can help you gather valuable feedback from your team members, customers, or colleagues, which can lead to better decision-making and improved collaboration.
Moreover, voting buttons can be particularly useful when scheduling meetings, as they enable attendees to indicate their availability and preferences, reducing scheduling conflicts and making it easier to find a time that works for everyone.
Finally, using voting buttons in Outlook can give you a more professional and organized image, as it shows that you value your recipients’ time and are committed to efficient communication. So, these are some good reasons to learn how to use Voting buttons in Outlook.
How to Use Voting Buttons in Outlook?
We have a simple and straight process to use these voting buttons in outlook. They can be included in an email message and then sent to your recipients then everyone including you can choose an option and then the sender, the initiator can summarize the results easier to see which options are selected by the majority of the people. Let’s learn it practically.
How to Add Voting Buttons in Outlook in a Mail
In this first section, we will learn how to use voting buttons in Outlook, we will see how to add voting buttons to a mail. We have some presets of options provided by Outlook, but we will also see how to make custom options. So, let’s get into it.
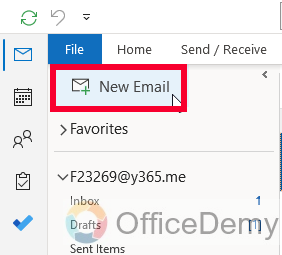
Step 1
Open your Microsoft Outlook App and click on the New Email button
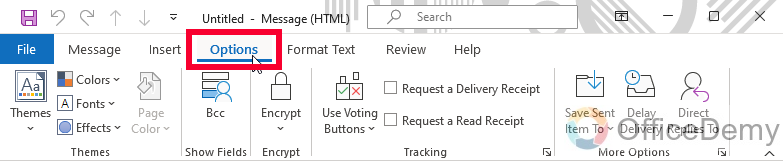
Step 2
A New Email Message window will appear, now from here you need to click on the Options tab in the main menu
Step 3
Now you will see a voting button option in the Tracking section
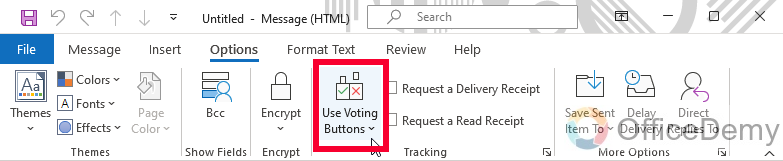
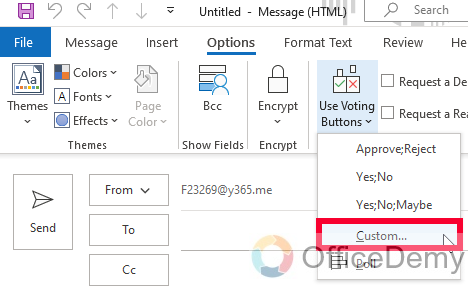
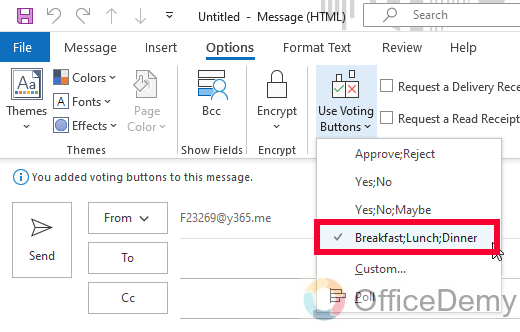
Step 4
Click on the Voting button icon, and you will get some presets options; these are Approve; Reject, Yes;No, Yes;No;Maybe, Custom, and Poll.
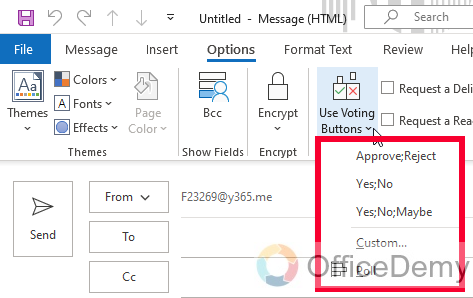
Step 5
Click on any of the above three options sets if they fulfill your need, else click on Custom.
Step 6
Now you will have a new Properties pop-up opened in front of you, here can see the checkmark and a dropdown list next to it.
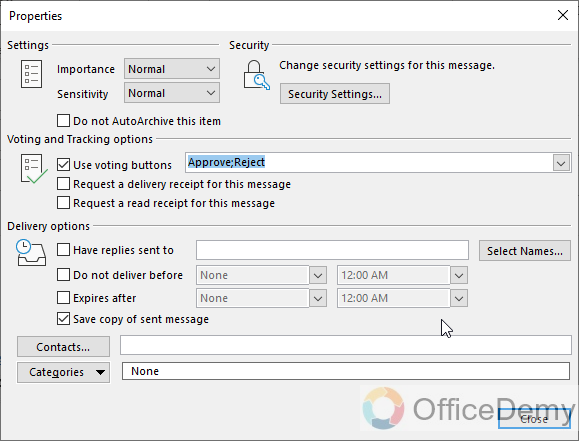
Step 7
Click on the dropdown list, and here you can see the format, options are written separated by a semicolon; so you can write your own following this syntax

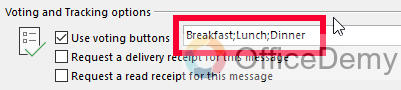
Step 8
Clear the text box, and start writing your options, such as Breakfast; Lunch; Dinner. These are three options for my recipients for a mail in which I will ask them their preferences of outing on coming Sunday.
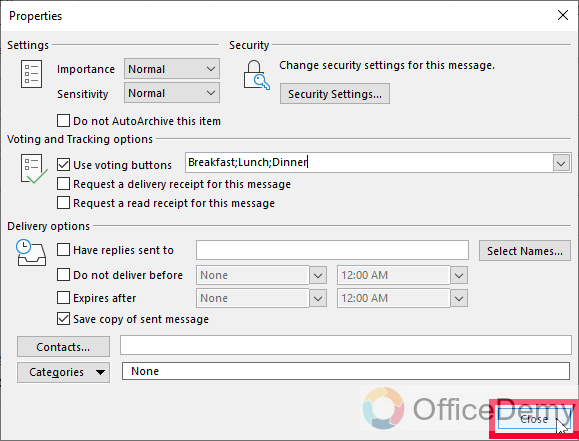
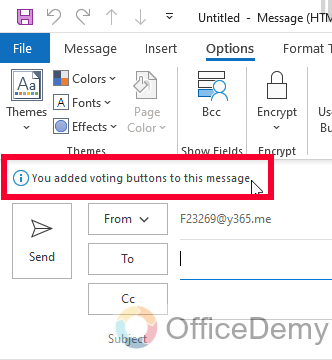
Step 9
When you are done, just click on the Close button below.
Step 10
Now you can see here the confirmation that the voting buttons are included in this message.
Step 11
Further, to check if the custom voting buttons are added, you can again click to “Use Voting buttons”, and you will see your custom-made option is checked.
So this is how to use voting buttons in Outlook as an initiator.
How to Use Voting Buttons at Receiver’s End
In this section, we will see how to use voting buttons in Outlook, how voting buttons may look and interact with the receivers at their end, and how you will handle if you get mail having voting buttons in it.
Step 1
Open the email message when you receive it.
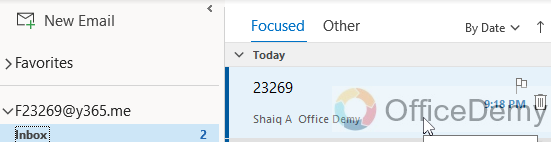
Step 2
You will see a highlighted line above the message.
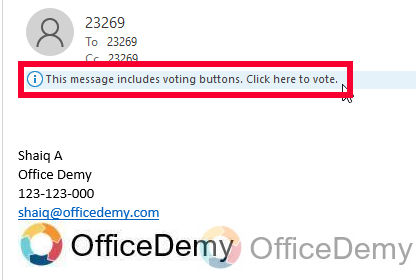
Step 3
Click on it, and you will get the option of voting inside this message.
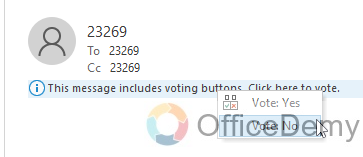
You can click to vote on any option from the given list directly from here.
So, this is how you can react to a mail that contains a voting button inside it.
How to Use Voting Buttons in Outlook at Initiator’s End
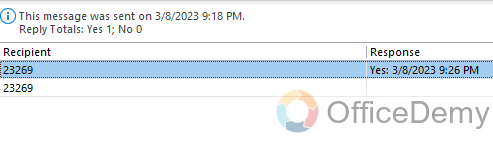
Finally, now we need to learn how to use voting buttons in Outlook, and we are going to see what they look like after being voted and sent back to the Initiator. The purpose of this section is to read the votes easily and in a precise way.
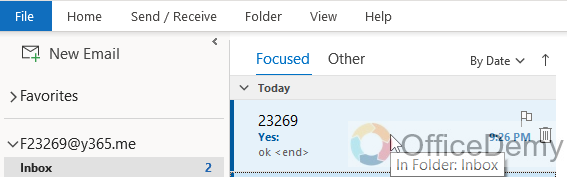
Step 1
You will get back the email as you get any email replied to your inbox, open it
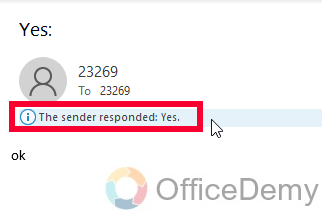
Step 2
You can see here the reply and now you can click on the Voting section and then click on “view voting responses”
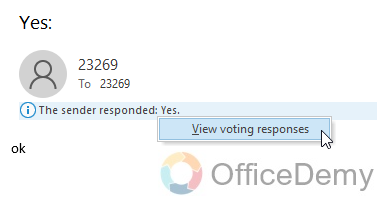
Step 3
Now you have a summary here and you can easily see them
Pro Tip:
You can go to File Print to print these responses. You can also select all the responses and copy them then paste them into the excel file easily.
So this is all about how to use Voting buttons in Outlook. I tried to show you all three perspectives and use cases of Voting buttons in Outlook.
Frequently Asked Questions
How to add voting buttons to an email in Outlook?
When composing a new email, click on the “Options” tab and select “Use Voting Buttons” from the “Tracking” group. Then select one of the pre-defined options or create your custom options.
Can I add voting buttons to a meeting invitation in Outlook?
Yes, when creating a meeting invitation, go to the “Tracking” group on the “Meeting” tab and select “Use Voting Buttons.”
How to view the responses to an email with voting buttons in Outlook?
Open the original message and select “Tracking” in the “Show” group of the ribbon. Here you’ll be able to see who has responded and their selection.
Can I create my custom voting options in Outlook?
Yes, select “Custom” when using the voting button feature and enter your options, shown in the first section of this article.
Can I use voting buttons in a group email in Outlook?
Yes, simply compose your message, click “Options,” and select “Use Voting Buttons” to gather feedback from everyone in the group.
Are voting buttons available in all versions of Outlook?
Yes, voting buttons are available in all versions of Outlook, including Outlook 365, Outlook 2016, Outlook 2013, Outlook 2010, Outlook 2007, etc.
Can I change or remove the voting buttons after sending an email or meeting invitation?
No, you cannot change or remove the voting buttons once the message has been sent.
Conclusion
This is all about how to use Voting buttons in Outlook. I tried to tell you all the important things regarding the Voting buttons in Outlook. I hope you find this article helpful, and you have learned new things about the Voting buttons in Outlook. I will see you soon with another helpful guide. Keep learning with Office Demy.


