
To Wrap Text in Google Docs
- Click on the image, then click the “wrap text“.
- Adjust the margin size between the image and text.
- Choose the image’s position, either inline with text or fixed.
- Customize the image’s position in the x and y axes if needed.
- Select the layout (left, center, right, top, or bottom) for the image.
In this article we will learn about how to wrap text in Google Docs and why we need text wrapping in a document.
What must be the factor that makes a document unique? It’s the content and the appeal. Google Docs offers simple and cordial features to accentuate the document. One of the perks of Google Docs is that the formatting settings of the text do not alter when downloaded to the computer or published on another site.
As much as the content is vital, so is the text format. Consistent formatting helps the content look more presentable. A document with the proper text formatting is trackable and readable. Unlike the font formatting that defines the font style, color, and size, paragraph formatting defines the text spacing and alignment. Google Docs is one of the accessible online tools with formatting settings that makes the document intriguing.
What is the need for text wrapping?
Word wrapping is a feature that allows a line of text to automatically lead to the next line whereas text wrapping allows images to not to interfere with the line spacing of the text. The images must be in line with the text.
- Helps to save space
- Organizes the images and text to accommodate each other
To wrap text around images, Google docs provide image options to edit the position of the image with relative to text.
How to wrap text in Google Docs
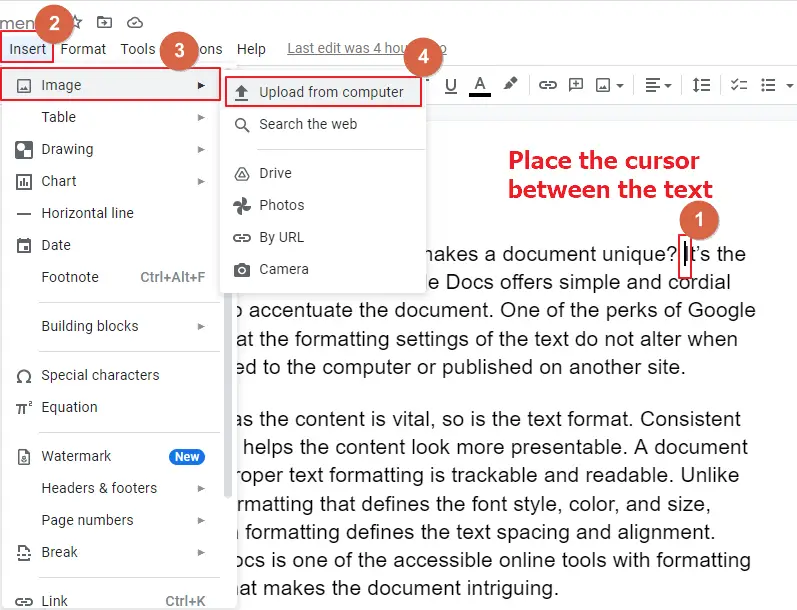
Step 1:
Open Google Docs. Create the content you want to publish. Place the cursor in between the text and insert an image.
Go to Insert -> Image -> Upload from computer.
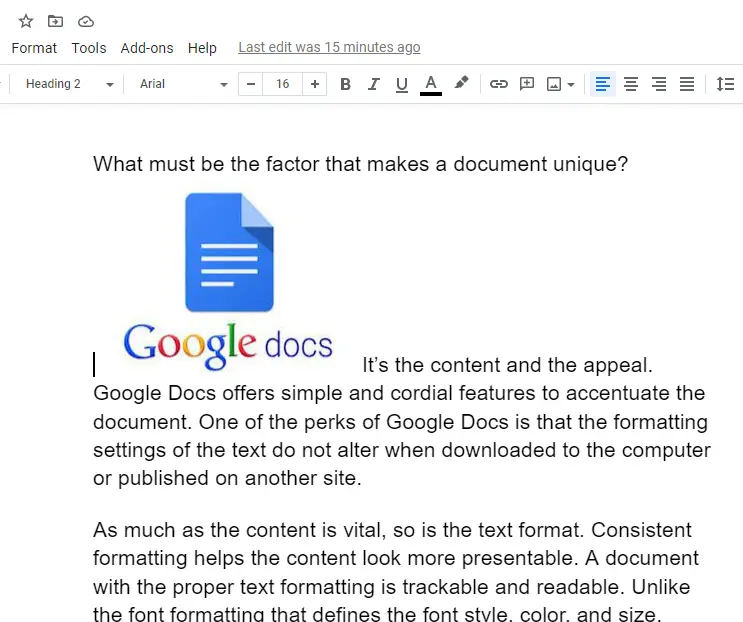
Step 2:
The image is embedded in line with the text as shown in the image below. There are empty spaces around the image.
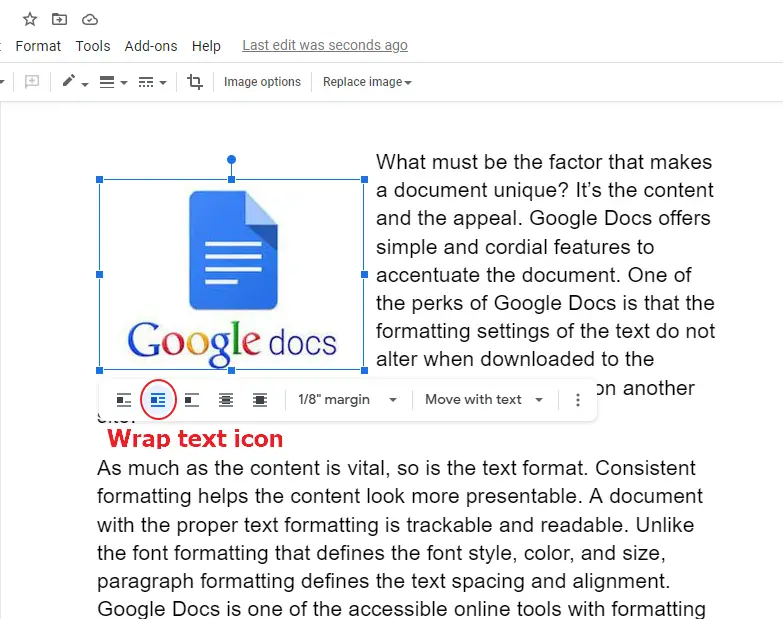
Step 3:
Click the image. A menu bar with image options appears below the image. In the style menu options, select wrap text icon to wrap the text with the image.
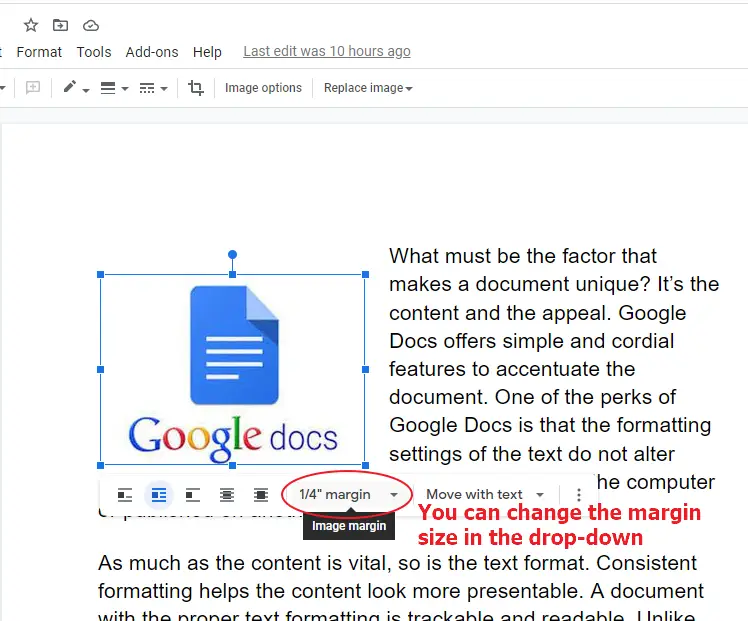
Step 4:
To alter the margin size of the image from text, click the image margin drop-down in the menu bar.
Step 5:
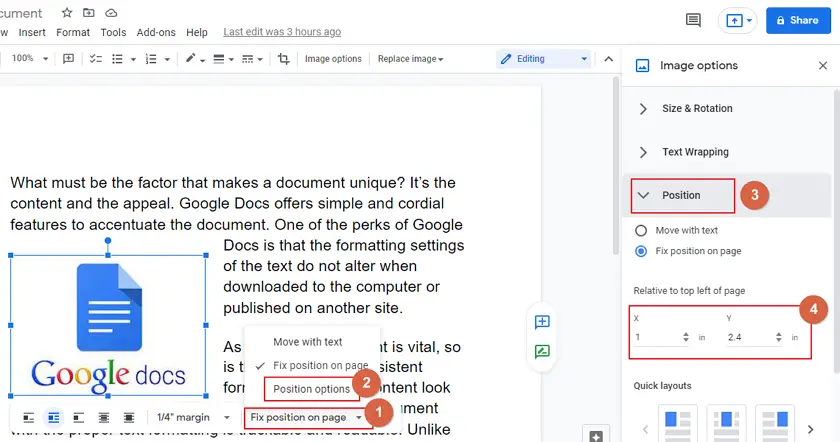
To alter the position of the image, click the position options in the menu bar. The image can be wither moved with the text or fixed on the same position.
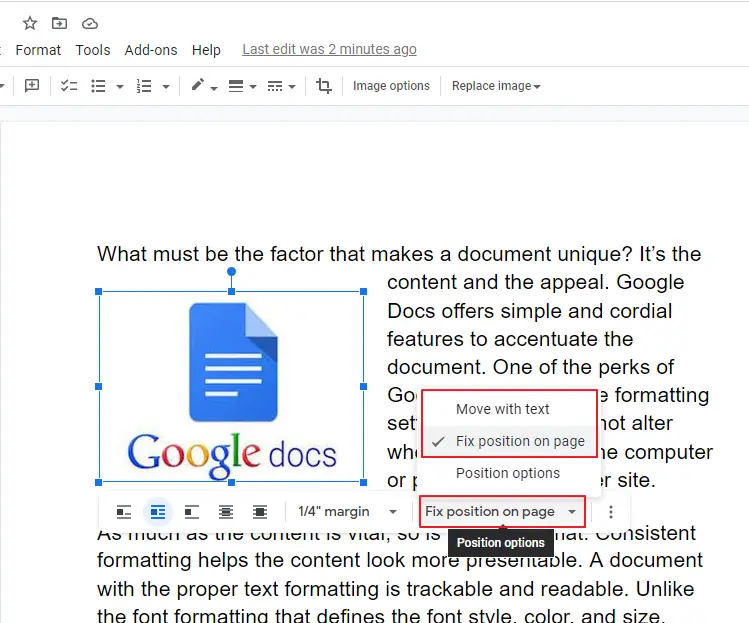
Step 6:
To change the position of the image to left, right or center, select Position options in the drop-down. The Image options toolbar appear in the right-side corner of the screen. Click Position tab in the Image Options toolbar. You can manually customize the position of the image in the x axis and y axis labels.
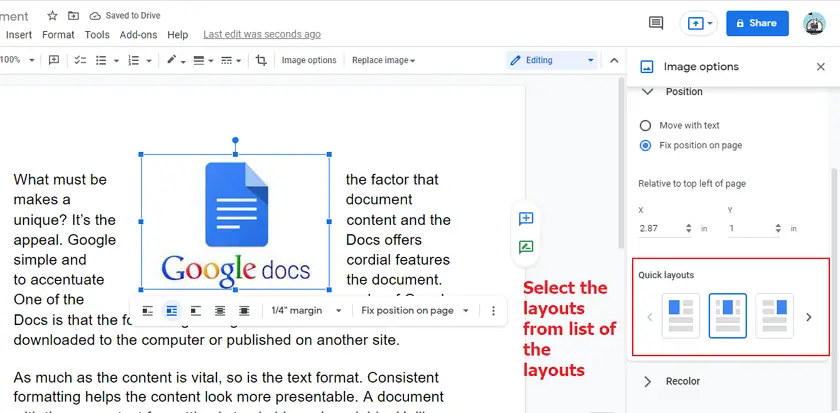
Step 7:
To change the layout of the image from left to center to right or to top and bottom, select the layouts in the Quick layouts section.
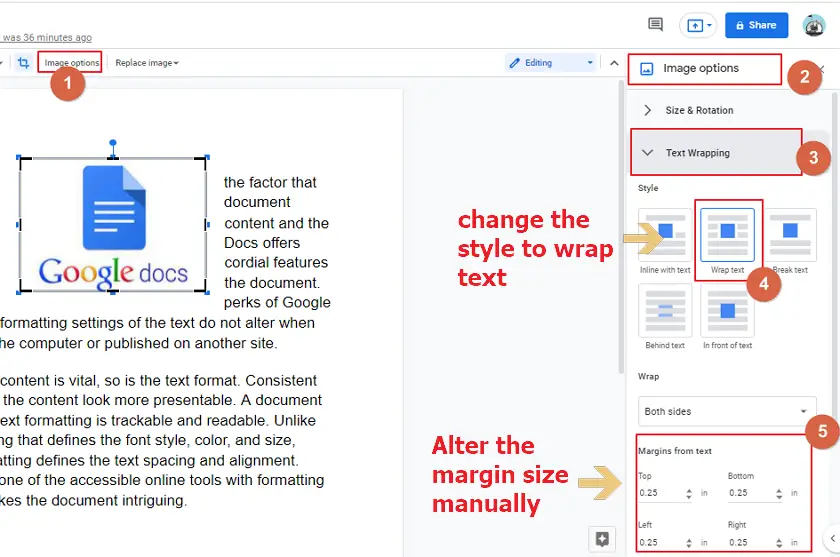
Step 8:
You can wrap text in the Image Options menu as well. Click the image and select Image options menu displayed below the menu bar. The Image options setting appear on the right-side corner of the screen. Select Text Wrapping tab to change the style to Wrap text. You can edit the margin size manually in the Margins from text section.
Google doc provides an easy option to wrap text around the image. Unlike text wrap, word wrap is automatic in Google docs. It helps to break the text and lead to the next line.
- Wrap text style option is easily accessible
- You can wrap text on both sides, left only and right only.
Video Tutorial: How to Wrap Text in Google Docs
Notes
- Google Docs does not manually wrap text around the image like the word wrap.
- You can always change the position of the image anywhere in the document by adjusting the x-axis and y-axis labels in the Position tab.
Frequently Asked Questions
Is It Possible to Add Accent Marks When Wrapping Text in Google Docs?
When working on Google Docs, you may wonder about adding accents in google docs. Fortunately, yes, it is possible! By using the Insert Special Characters feature, you can easily add accent marks to any text in your documents. Simply select the desired character and it will be seamlessly incorporated into your wrapped text.
Conclusion
This article provides the knowledge of how to wrap text around images in Google Docs. The wrap text option in Google docs saves space and provides perfect text alignment. Google docs preserve the formatting setting for imported and exported documents. So, the text wrapping around the image will not be affected when published.


