
To Insert Timer into Google Slides
- Find a timer video on YouTube.
- Copy the video’s URL.
- In Google Slides, insert the video using the URL.
- Adjust the video’s size to fit the slide.
- Start the presentation for the timer to run.
OR
- Install the “Slides Timer” extension from the Chrome Web Store.
- Use text codes (e.g., <<2:00->>) to add timers.
- Customize timers as needed.
- Start the presentation to activate timers.
In this article we will learn about how to insert timer into google slides using two different methods.
Timing is important when you’re giving a slide presentation, especially if your audience has already seen the accompanying material. A Google Slides timer lets you keep track of the time and pace your presentation appropriately. You can easily accomplish this task by using an app, extension or add-on in your browser that connects to your Google Slides presentation.
It’s easy to feel confident and prepared when you know exactly how long your presentation will take. This presentation timer plugin makes it simple to manage your time so that you spend the perfect amount of time on each slide.
Benefits of Adding Timer in Google Slides
- Start your presentation on time, every time. When you set a timer to automatically advance, Google slide can help keep you on schedule by jumping to the next slide after the specified number of minutes.
- A timer can help you time specific portions of your presentation, so you can make sure that you stay on schedule and don’t run over time. Google Slides itself doesn’t have a built-in timer function, but you can incorporate third-party timers in some cases.
- Use the video timer to efficiently present your thoughts. An estimated time for each slide is provided, but you may need to adjust your presentation depending on the information that develops or questions your audience may ask. The video timer provides flexibility and helps guide you through your speech to ensure that every point is covered fully.
- Our timer will allow you to go to the next slide when you finish speaking. Don’t worry about going over what you said on one slide. It will conveniently stop where you left off, providing you with flexibility and space if needed.
- The 2-minute timer provides you with expert guidance on the best presentation duration. However, the timer is set to play through the entire video so that you have the option to adjust depending on your presentation.
Whether you’re giving an informational speech to your class or preparing for an important business presentation, it can be useful to stay within a specific time guideline.
You can use Google Slides as a timer to keep your presentations on schedule. You may be able to use add-ons within Google Slides or need third-party tools or extensions to help.
This article explains how to implement and incorporate a time tracker into Google Slides to present complex material in the time allowed.
How to Insert Timer into Google Slides
Inserting a Video Timer in Google Slides
A great to include videos in your presentation is to use a timer for each one. The first method of embedding a video in a presentation is to insert a .swf file that has an associated timer. You can create the .swf file yourself or find one on the Internet to embed in your Google slides presentation. One point to be noted when adding videos via YouTube or other video sharing sites is that you need to make sure your laptop or computer is connected to the internet to view them properly when you are giving your presentation. To be in safe side, you can download a copy of your presentation and run it on your computer while you are online, then save a copy of the presentation as an HTML file.
However, I am going to show you how to insert timer in google slides through video. So let´s get started,
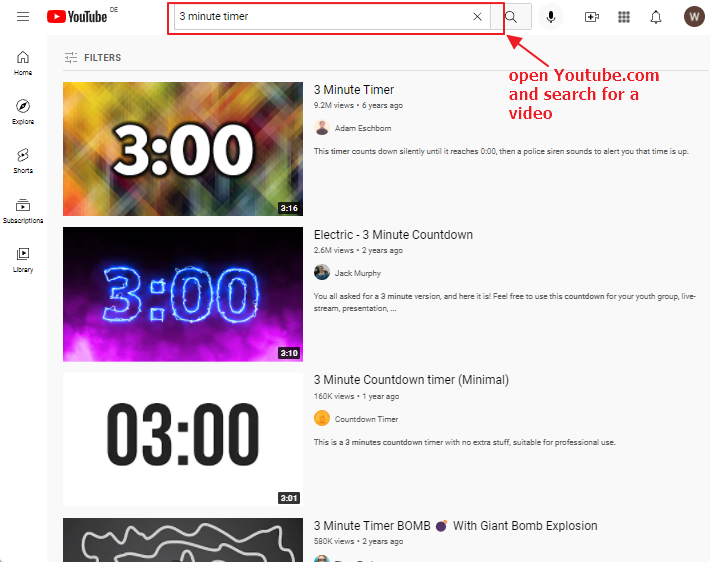
Step 1: Go to YouTube.com. There are many different types video available for creating a timer on presentations. Simply type in the number of minutes that you want the timer to run and pick one suitable one from different options.
Video options for timing yourself are available in a variety of shapes, sizes, and colors on YouTube. A simple search for the time length of your choice—in this instance, 3 minutes—yields different options. For the sake of this article, we’ll go with a single-color black screen.
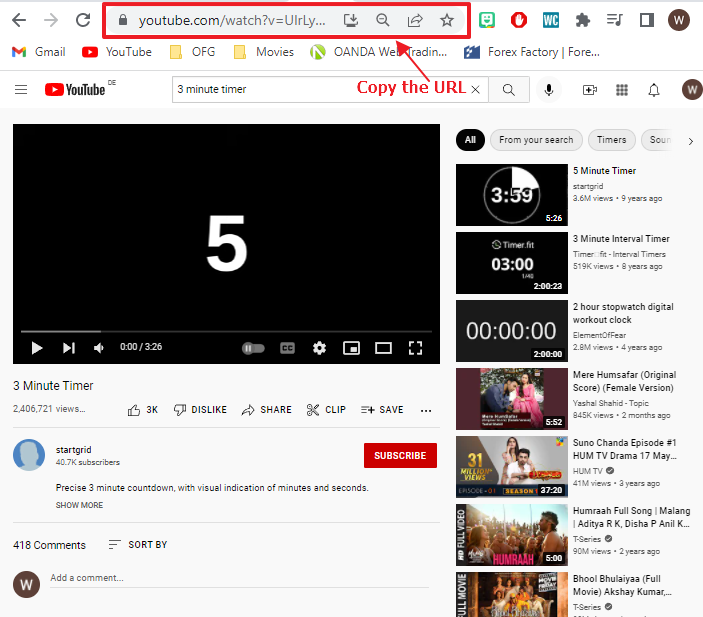
Step 2: After you click on the video you want to embed; a URL will appear in the address bar. Right-click your mouse to bring up the context menu and select “Copy” or Select the URL by clicking on it and press “Ctrl+C” keys on your keyboard to copy the selected URL.
Step 3: Now, insert a timer into a Google Slides presentation. Click on the slide where you want to place or insert a timer. In the menu bar, click on “Insert” and select “Video.”
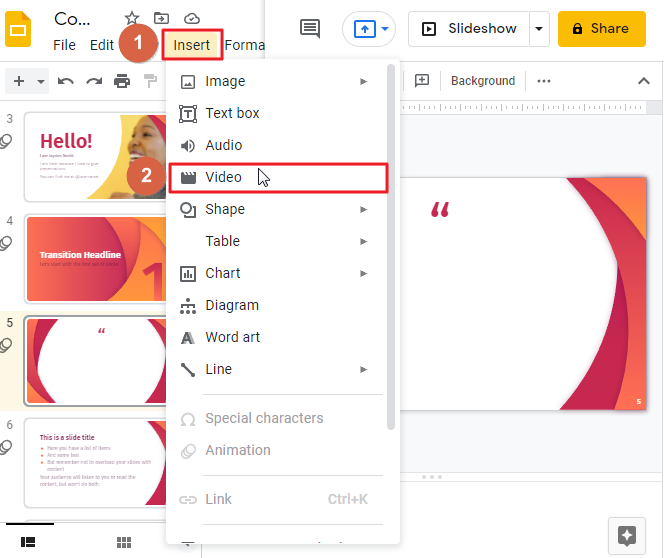
This will open a box in which you can specify the details of the video you want to insert.
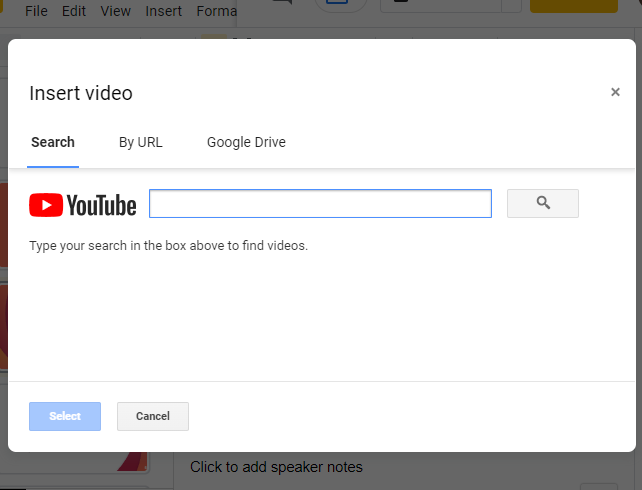
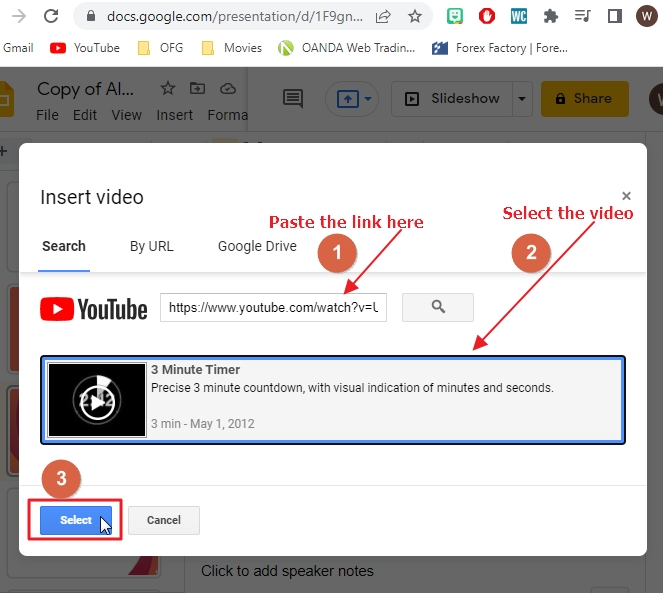
Step 4: The next step is to add/insert the video. Navigate to the “Search” tab, paste the URL (link) of the video that you have already copied, and click “Enter”.
Alternatively, you can search for a specific term on YouTube instead of pasting a link. This allows you to search for a term or phrase without having to navigate to YouTube or any other video-sharing site. However, I find that I obtain better results faster by searching directly on YouTube.
Once your selected video appears, click on the video to select it and click on Select option located at the bottom left corner of the dialogue box.
At this point you can choose to upload a short video in your presentation if you have received one from a colleague via Google Drive or downloaded one from YouTube.
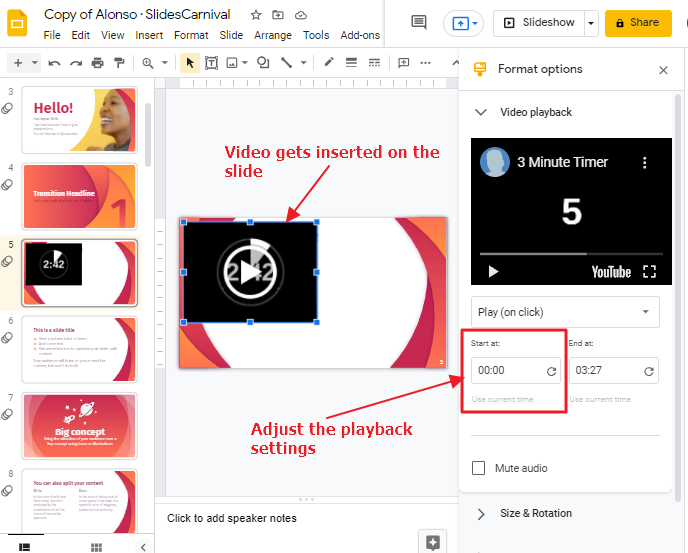
Step 5: After inserting the video onto the slide, you will see a Format tab on the right-hand side of the window. Click on this tab to access additional settings related to the video’s playback.
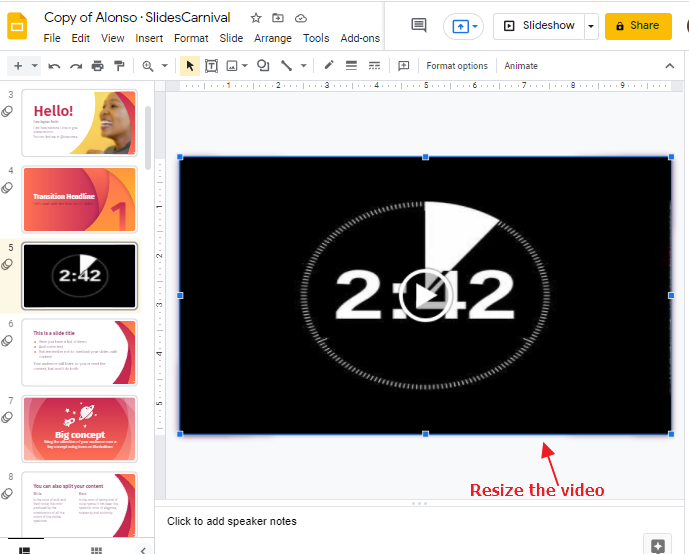
Step 6: Finally, my advice is to make the video big enough so that it covers the full height of the slide (top and bottom). This will show the video on the entire slide during a slideshow. It is best to make videos that fill the entire slides. This way they will be seen on the slide during the show mode.
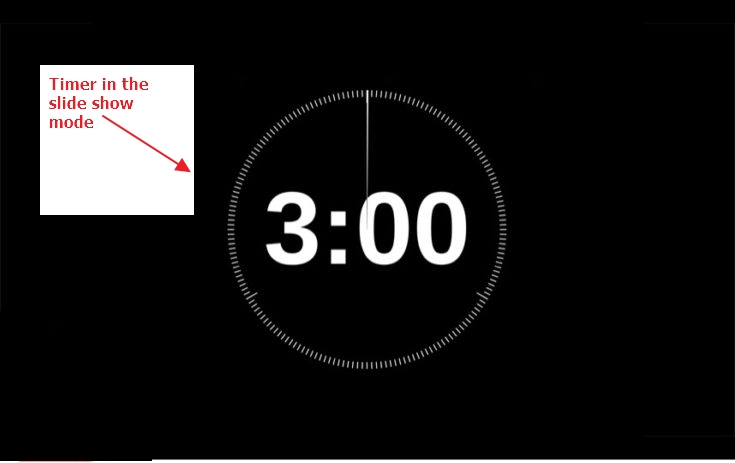
When you’ve made the changes, enter the slide show in Slideshow mode so you can watch the timer count down.
Insert Slides Timer Extension in Google Slides
To avoid adding a video to your presentation and to customize the appearance of the timers, install the “Slides Timer” extension. If you prefer not to show a video in your presentation, or if you are looking for a great deal of flexibility in customizing how the timers appear whenever the slides change, use the “Slides Timer” extension.
Benefits of slide timer extension
The Timers extension is particularly useful for presentations that don’t include videos or for presentations that include videos, but you want to control the appearance of the text for timing purposes.
How to insert slides timer extension in google slides
An extension called Slides Timer has been developed by ClayCodes and released to the public as an open-source program. It is a Google Chrome browser extension. By using this add-on, you can convert a text-based code to a function by typing a simple code.
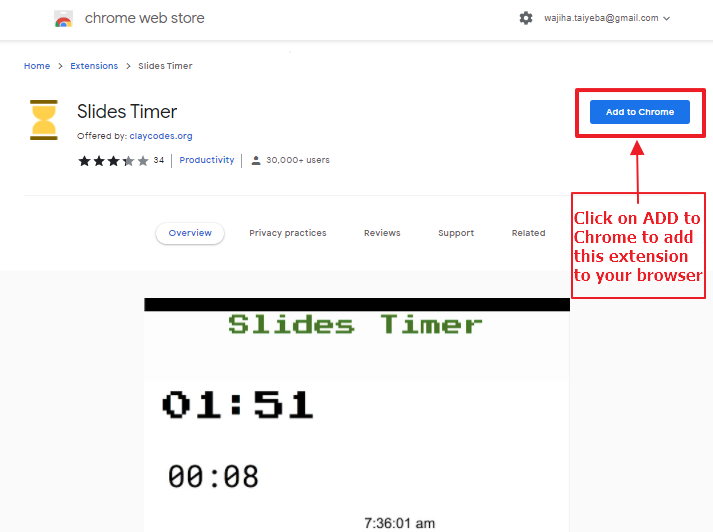
To use the extension, you should first go to the Chrome Web Store and find the Slides Timer extension.
To begin, please follow these three steps:
Step 1: Firstly, you need to install the extension; to add the extension to your Chrome browser, go to the Chrome Web Store page and click Add to Chrome. A dialog will appear.
Step 2: To allow access to the Slide Timer extension, click on the “Add Extension” button in the dialog box. A notification will appear that the Slide Timer extension has been added.
Step 3: Now time to click on the slide’s timer extension.
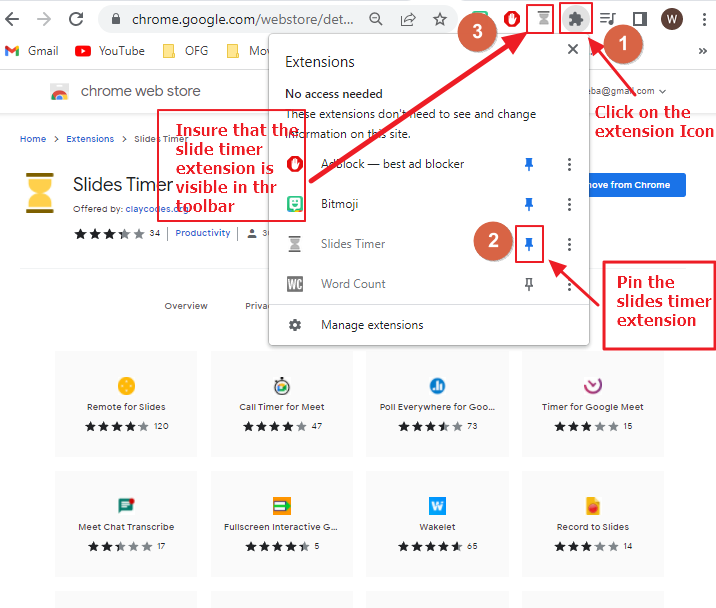
Step 4: Now you can go to Google Slides, where you’ll find the “Extensions” icon, on right side of the “Search bar.” Click it to access the “Slides Timer” extension tutorial.
How to use the Slide Timer Extension
The Slides Timer extension come up with some advanced features that allows you to add a timer, stopwatch, or clock to your slides.
Countdown Feature
To add a countdown timer in google slides, you can use the text box located in the toolbar. Add a countdown timer to your slideshow or presentation by typing in “<<2:00->>” where the numbers represent the time, and a colon symbol separates the numbers from the minutes.
Next, you choose a “Slideshow” / “Present” option, and it will convert the text to a countdown timer automatically.

Count up Feature
For a count-up timer, add a text box to your slide and type the desired time in the box. For creating a countdown timer or stopwatch include adding a text box and typing “<<“countdown time”+>>” or “<<“stopwatch time”+>>” in the text box.
As an example: To create a stopwatch that starts at zero seconds, type <<00:00+>> When you return to the “Present” screen, the number will be in the format of a stopwatch.
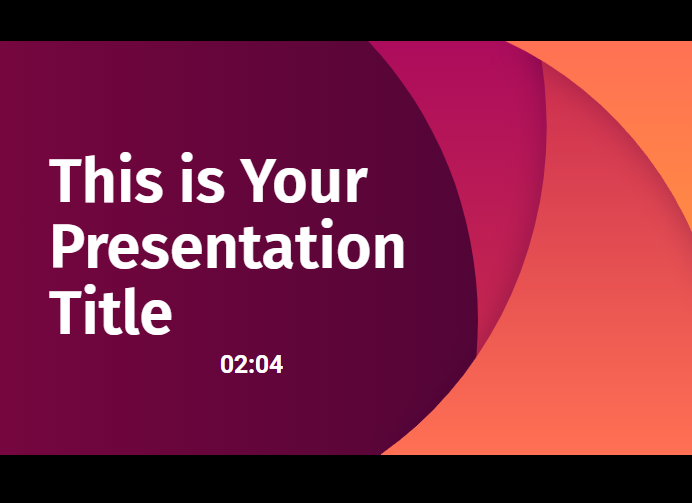
To count up, I set the stopwatch up at 2:00. You can see that the stopwatch is counting up in the presentation mode in the example image given above.
Countdown Feature
This extension displays the current time ( local time zone), you can do it by inserting a text box on your slide and type <<time>>. The time displayed on your presentation will be the current time in hours and minutes, with a marker for AM or PM.
Move to next slide Feature
The Slides Timer also lets you set up a timer that will automatically move to the next slide after a certain amount of time. For example, you can put your presentation on a minute timer that will move to the next presentation slide after 1 minutes. All you need to do is type <<01:00-+>> into a text box and Slides will take care of the rest.
Date Feature
If you want to add the current date in a Google Slides presentation slide, place a text box on the slide and type the statement “<<date>>” into it. In the Present screen, this will automatically display the current date and default to a format of mm/dd/yyyy. This reflects the current date when you present at any time without making an adjustment.
How to Set Up Google Slides to Auto-play in Presentations?
The Google Slides program provides an Auto-play option that allows you to set your presentation to automatically change slides after a specific amount of time. This can be very helpful when you are presenting at a meeting, and you do not want to be always present to advance the slides.
This topic is worthy of its own article. I therefore have written an entire article on this topic that you may find useful. It can be read here! Here is a link to my dedicated post about this topic:
How to Continuously Loop Slides in Google Slides (2 Methods)
Conclusion
In conclusion, a video timer is a useful tool for presenters and viewers alike. You can use it to create a sense of urgency around a topic, to keep your audience focused on the task at hand, or simply as a reference point in your presentation. If you want to make sure you’re presenting confidently and effectively, try out some video timers in your next presentation!
I hope this article has been helpful in showing you how to create a timer in Google slides. This feature provides a simple, easy-to-use tool for creating timers that can be inserted into your slideshows, which is useful when you want to incorporate activities within your presentation.
With this article I hope that you learned how to insert timer on google slides and able to understand the importance of timer. In case you have any further questions regarding timer, please do not hesitate to drop me a message. I would be glad to answer any questions you may have.


