
To Add Picture to Microsoft Teams
- Click on the Profile icon.
- Click on the Picture circle.
- Click on the “Upload Picture” option.
- Click on the Save button.
- Click on the Close button.
OR
- Go into the Chat tab.
- Select and open the chat.
- Click on Attach file icon.
- Click on Upload from the device option.
- Browse and select the picture and click on the Open button.
- Click on the Send button.
Today we will learn how to Add Picture to Microsoft Teams. As we all know Microsoft Teams is being very popular among businessmen and office workers for virtual group meetings and video conferences. Moreover, it offers many other features like adding pictures to send someone via Microsoft Teams chat. As Microsoft Teams is being used globally, sometimes it becomes difficult to recognize the person that you are connecting with, therefore Microsoft Teams also provide the facility of adding profile pictures to Microsoft Teams through which anybody can easily recognize you. If you don’t know how to add pictures to Microsoft Teams, then below is a complete guide on how to add pictures to Microsoft Teams.
Advantages of Adding Pictures to Microsoft Teams?
First, we will have to see where we are adding a picture to Microsoft Teams, if you are adding a profile picture to Microsoft Teams then it can help you to represent your profile to others so that your colleagues and co-participants can easily recognize you. If you are adding a picture to Microsoft Teams chat then it can be helpful to you while sending any data like assignments, charts, reports, etc. So, let’s see how to add pictures to Microsoft Teams.
Step-by-Step Procedure – How to Add Picture to Microsoft Teams
As we have discussed above, In Microsoft Teams, there are two different scenarios where you can add a picture to Microsoft Teams. The first scenario is to add a profile picture to Microsoft Teams and the second is to add a picture to Microsoft Teams chat. In this tutorial on how to add pictures to Microsoft Teams, we will learn both scenarios with the help of the following examples.
- Add picture to Microsoft Teams to profile picture
- Add picture to Microsoft Teams chat
Add picture to Microsoft Teams to profile picture
In this guide to adding pictures to Microsoft Teams, we will learn to add pictures to Microsoft Teams profile. When you open Microsoft Teams, a profile icon is displayed at the right top corner of the window where you can add a picture to represent your profile. In the following steps, you will learn how you can add profile pictures to Microsoft Teams.
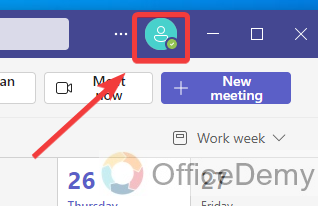
Step 1
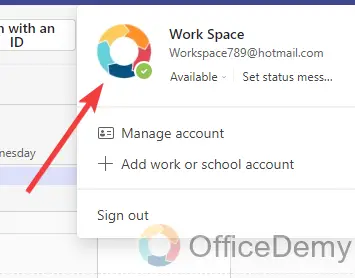
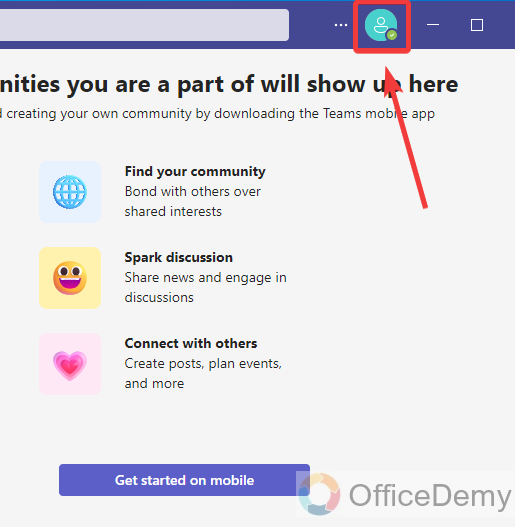
When you open Microsoft Teams, you will see an “Icon” for a profile at the right top corner of the window along the Close and Minimize button as directed below. To add a picture to your profile, click on this icon.
Step 2
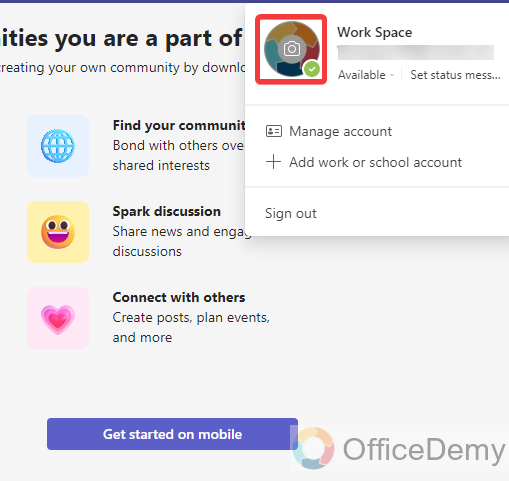
When you click on that profile icon, a small drop box will open with this profile icon where you will see a small circle section for the profile picture as highlighted in the following picture. To add a picture to this profile section, you will have to click on this circle.
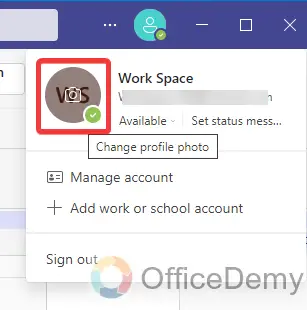
Step 3
Clicking on that profile picture will give you the following options, as we are adding a picture to the profile, we will click on the “Upload picture” option as highlighted in the following picture.

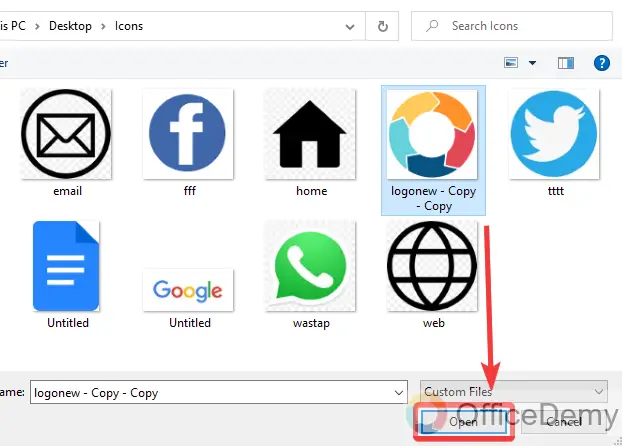
Step 4
When you click on this “Upload Picture” option, a new separate window will open in front of you through which you can select the picture from the device. Browse and select the picture then click on the “Open” button.
Step 5
As you click on the “Open” button, your selected picture will instantly be added to your profile, now just click on the “Save” button to save these changes as highlighted below.

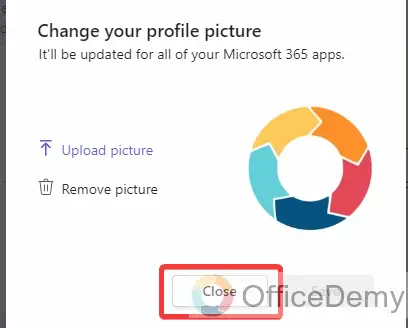
Step 6
Once your changes have been saved click on the “Close” button as highlighted in the following screenshot to close this window.
Step 7
Now you can see the result in the following picture, the picture has been added to the profile of Microsoft Teams as we required.
Add picture to Microsoft Teams chat
When we talk about adding pictures in Microsoft Teams you may probably need to add picture to the Microsoft Teams chat to send someone. If you don’t know how to add a picture to Microsoft Teams chat, then below is the complete guide to add a picture to Microsoft Teams chat.
Step 1
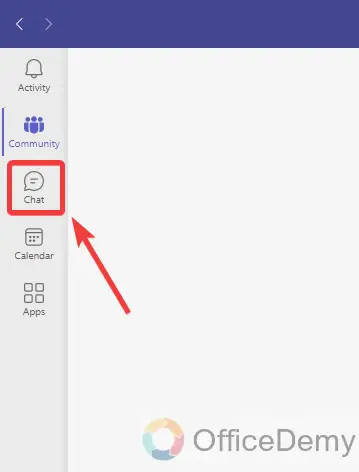
If you want to add a picture to the Microsoft Teams chats, first you will have to go into the “Chat” tab of Microsoft Teams from the left side panel as directed below.
Step 2
When you click on the “Chat” tab in Microsoft Teams, the chat section of Microsoft Teams will be in front of you, now select the chat in which you want to add the picture as I have selected below.

Step 3
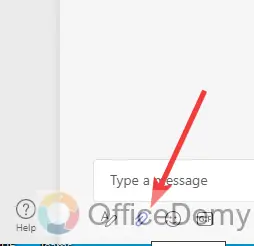
When you open a chat in Microsoft Teams, you will find several options regarding messages at the bottom of the window as directed below. In these options click on the “Attach” file icon.
Step 4
This attached file icon will give you a couple of options in which you will have to select “Upload from this device” as we are adding a picture from the device. If you want to upload pictures from the cloud, you will have to select “Attach cloud file“.

Step 5
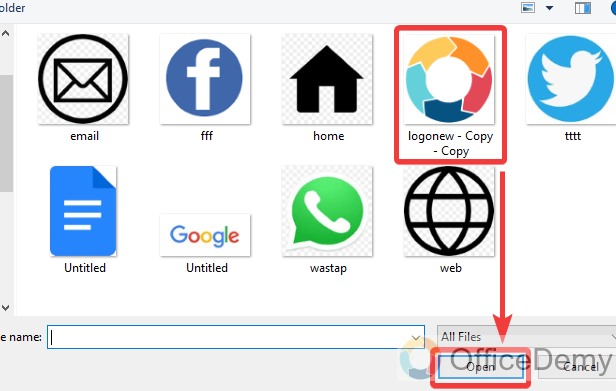
Clicking on “Upload from this device” will give you a small separate window from where you can select a picture from your device. Browse and select the file and then click on the “Open” button as highlighted below.
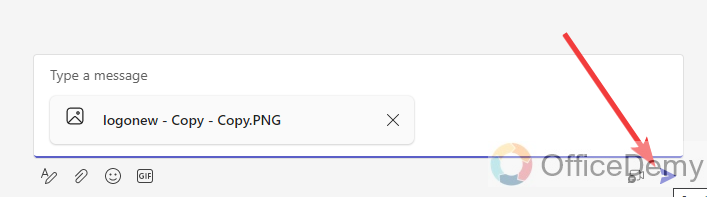
Step 6
As you click on the “Open” button, your picture will be uploaded to the selected chat. If you want to send this image to the selected person, click on the following directed “Send” button.
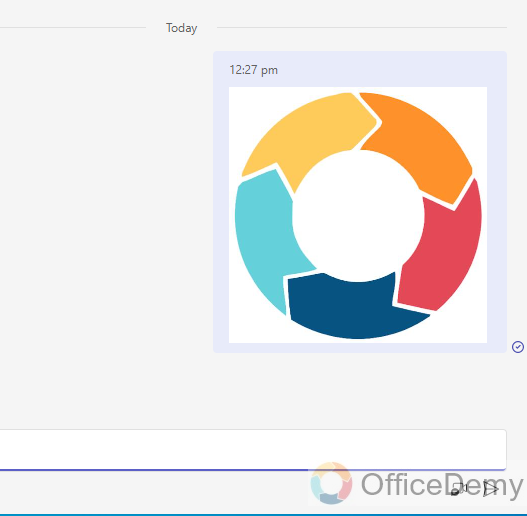
Step 7
Your selected picture will be sent to the person as a result below.
How to Add Picture to Microsoft Teams – FAQs
Q; How to remove pictures from Microsoft Teams?
A: We have learned how to add a picture to Microsoft Teams, but you have already uploaded a picture on Microsoft Teams and now you want to remove it then you can also remove the picture on Microsoft Teams with the help of the following steps.
Step 1
Go into the Profile from the profile icon of Microsoft Teams located at the right top corner of the window as directed below.
Step 2
When you click on that profile icon, a small drop box will open where you will see your picture, if you want to remove this picture then click once on it.
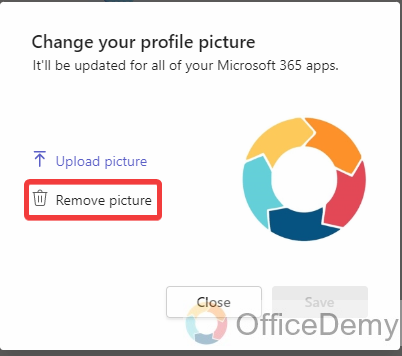
Step 3
As you click on the picture, a new small pop-up window will appear in front of you with a couple of options. If you want to remove the picture then click on the “Remove picture” option as highlighted in the following picture.
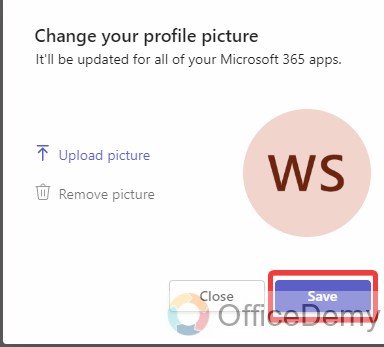
Step 4
As you click on the “Remove picture” option, your picture will be removed. To save these changes now, click on the “Save” button as highlighted in the following picture.
Q: Why am I not able to add pictures to Microsoft Teams?
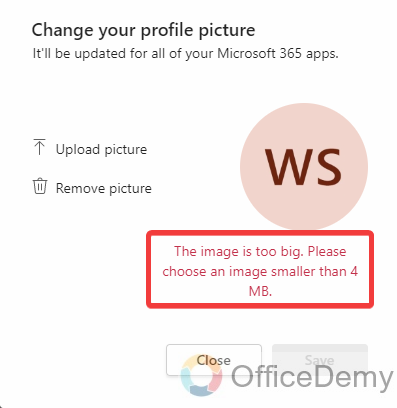
A: If you are adding a picture to Microsoft Teams but you are getting errors or are not able to upload a picture, this is mostly just because of the heavy size. Microsoft Teams only supports pictures less than 4 MB, so if you want to add a picture to Microsoft Teams, you must select a picture of less than 4 MB. If you select the picture of a size of more than 4 MB then you may get the following error as can be seen in the following picture.
If you are choosing a picture of size less than 4 MB and still are not able to upload a picture then you might check Microsoft Teams updates, or you should clear cache on Microsoft Teams. Learn how to update Microsoft Teams and how to clear cache on Microsoft Teams.
Conclusion
Now, you know how to add picture to your profile and Microsoft Teams chat both with the help of reading the above article on how to add pictures to Microsoft Teams. If this article is found helpful to you must let us know in the comment section below.
