
To Add Columns in OneNote
- Place the cursor in the table.
- Go to the Table tab.
- Click on the Insert Left or Insert Right.
- Or, right-click Click on the Table option.
- Then click on the Insert Left or Insert Right.
Hello, and welcome to another OneNote guide. Today, we will learn how to add columns in OneNote. When we create a Table in OneNote, it asks for the number of rows and columns before creating but sometimes these number of columns are not enough for the data we require. In such a situation there is nothing to worry about, nor do you need to create a new table because you can add additional columns to the existing table. In this guide, we will teach you how to add columns in OneNote.
Advantages of Adding Columns in OneNote?
When you are working on tabular data in OneNote, but available cells or columns are not enough for the given data then you may need to add columns in OneNote, or you may need to add more additional data or information to the table om such a situation as well you may need to add columns in OneNote. Whatever the situation is, you can learn how to add columns in OneNote with the following detailed guide.
So, this topic is going to be beneficial to all OneNote users who want to enhance their experience with the OneNote App and embed columns in it, these are actual columns, not the tables, columns can be added in greater quantity and have no direct connection with the table. So, these are some benefits of Adding columns in OneNote.
How to Add Columns in OneNote
In this tutorial, we teach you how to add columns in OneNote desktop and mobile versions both.
- Add columns in the OneNote desktop
- Add columns in the OneNote mobile
1. Add Columns in OneNote Desktop Application
In this section, we will learn how to add columns in the OneNote desktop application. In the desktop version of OneNote, there are two different ways to add columns. In this method, we will discuss both. So, stay focused to understand both methods and implement which you like the most and find easy for your scenario.
Step 1
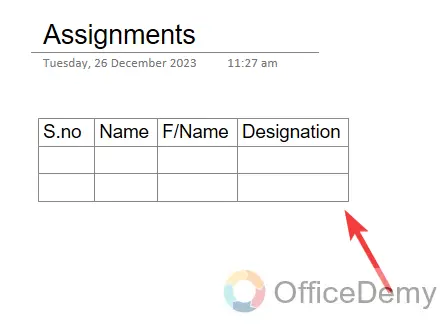
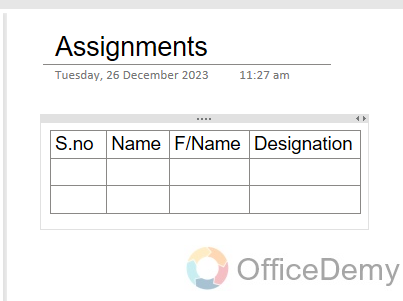
To add columns in OneNote, first, you need a table as in the following example, here we have a table of four columns in which we need to add more columns. Let’s see how we can add columns in OneNote.
Step 2
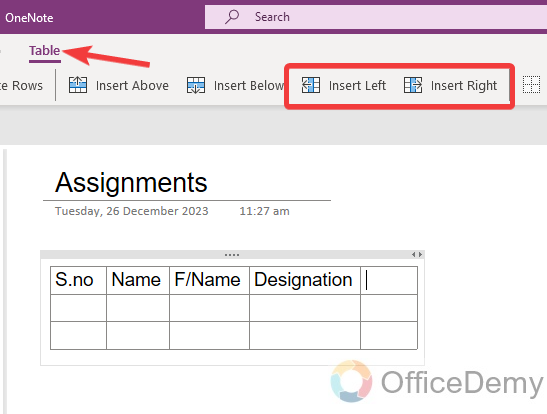
To add columns in OneNote, place your cursor in the table that will give you a new Table tab in the menu bar of OneNote as a result. In this Table tab, there is an option for “Insert left” and “Insert Right” through which you can easily add columns in OneNote. When you click on “Insert left”, it will add a column at the left side of the cursor in your table and if clicking on “Insert Right”, it will add to the Right side of the cursor.
Step 3
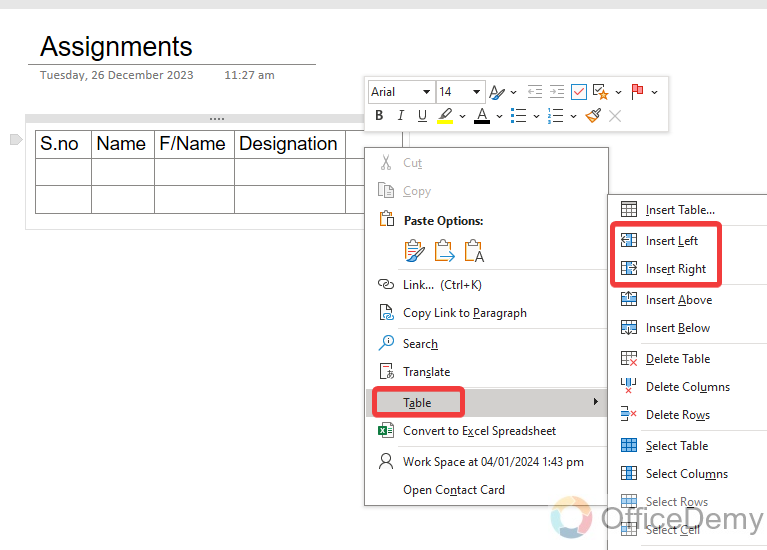
There is another way to add columns in OneNote as well, place your cursor in the table and Right Click, and a small drop-down menu will open, click on the “Table” option another drop-down menu will open where you will also find these “Insert left” and “Insert Right” options as well as highlighted below.
Step 4
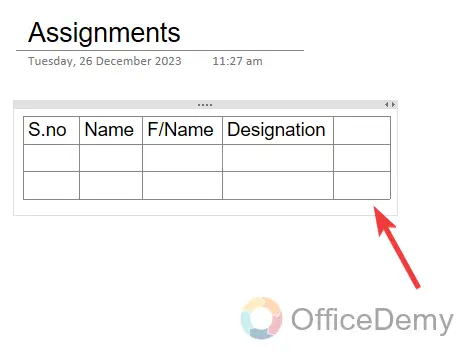
Here, I clicked on the “Insert Right” from the tab, so we have gotten a column at the right side of the cursor as a result below. In this way, you can add columns to your Table anywhere.
2. Add Columns in the OneNote Mobile Application
People think that adding columns in OneNote mobile is challenging but it is not so, you can also add columns easily in OneNote mobile as well.
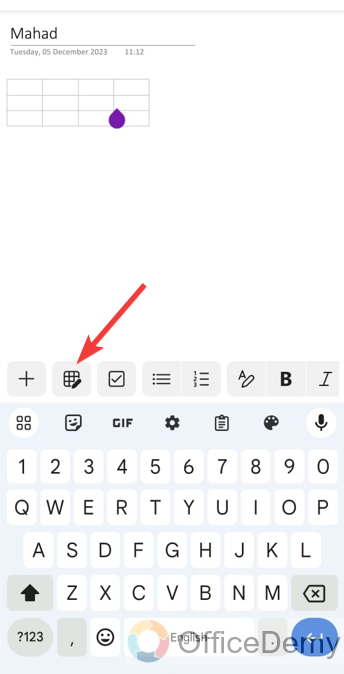
Step 1
In Microsoft OneNote mobile as well, first place your cursor where you want to add columns in OneNote. As you click on the table, you will see a Table formatting option along the tools above the keyboard as directed below.
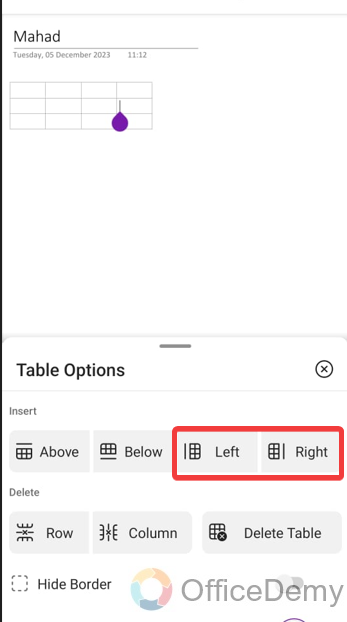
Step 2
When you click on this Table formatting icon, you will see several options regarding table formatting in front of you, here you will see “Left” and “Right” options through which you can add columns in OneNote mobile.
Frequently Asked Question
How to remove columns in OneNote?
If you need to remove columns from the table in OneNote then follow the following instructions.
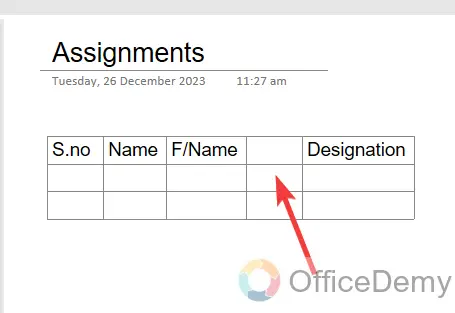
Step 1
If you want to remove a column from a table in OneNote, first of all, place your cursor in the column that you want to remove from the table, as I have placed below.
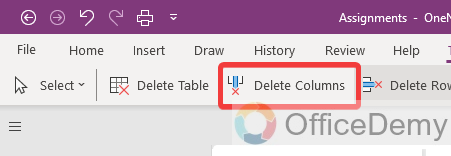
Step 2
When you place a cursor in the table, a Table tab appears in front of you in the menu bar in which you can see a “Delete Columns” option. Click on it to remove a column from the table in OneNote.
Step 3
Here you can see the result in the following picture, the selected column has been removed now in this way you can remove the column in OneNote.
How to add rows in OneNote?
As we know the horizontal distribution of the cells is called rows that are above or below, so if we click on the “Insert above” it will add a row above the selected row and If we click on the “Insert Below” so it will add a row below the selected row. Let me show you practically in the following steps.
Step 1
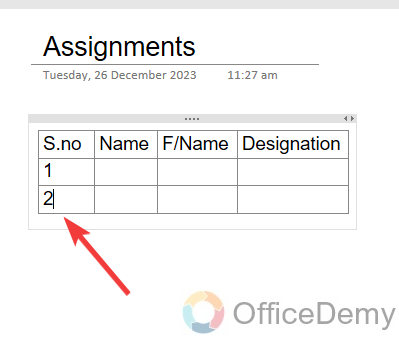
In the following example, we see here we have a table of three rows, if you want to add more rows to this table, first place the cursor in the table.
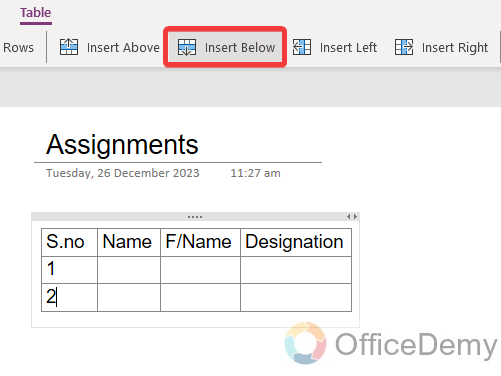
Step 2
Go into the “Table” tab from the menu bar, and then click on the “Insert above” or “Insert below” as we have to add a row below the selected row so here, we will click on the “Insert Below” button.
Conclusion
That’s all about how to add columns in the OneNote Desktop app, and OneNote Mobile Application. Now you know how to add columns in OneNote, you can extend your table as much as you want after reading the above article. I hope you find it helpful. Thanks, and keep learning with Office Demy.

