
To Add Custom Stickers to OneNote
- Go to Insert tab.
- Click on the Three dots option.
- Click on “Stickers”.
- Select a custom sticker from the panel.
- Make customization if needed.
- Click on the “Done” button.
Today, we will learn how to add custom stickers to OneNote. Microsoft OneNote has announced a new feature with an update adding custom stickers to your notebook. Yes! Microsoft OneNote always brings tremendous features to their users to enhance their productivity more and more by adding custom stickers is one of them. Now you can use stickers in OneNote according to your current situation, circumstances, and even your mood.
If you are also interested in adding custom stickers to OneNote, then read the following complete guide on how to add custom stickers to OneNote.
Benefits of Adding Custom Stickers to OneNote
Stickers are specially used to express your facial and emotional expression with the text or documents. Then think how it will be when you are allowed the facility to add your custom stickers through which you can perfectly express your mood and situation. In this tutorial, we will teach the exact features of OneNote and how to add custom stickers to OneNote.
Stickers, that too custom stickers, come under the multimedia communication or chat features, and they can enhance the user experience in any form. If you are making some kind of page, or template in OneNote, then this feature can help you craft better ones. So, let’s continue learning how to add custom stickers to OneNote.
How to Add Custom Stickers to OneNote
The procedure of adding custom stickers to OneNote is the same as adding simple stickers to OneNote, just select the sticker make customization, and then insert it. Let me show you practically in the following step by step guide below.
Step 1
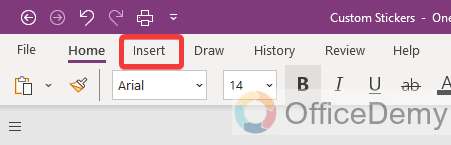
Once you have opened the notebook and page in which you need to add custom stickers then go into the “Insert” tab from the menu bar of Microsoft OneNote as highlighted below.
Step 2
In the Insert tab, you will see an option for “Stickers”. If you don’t find it then click on the “Three dots option” at the end of the ribbon, a small drop-down will open where you will find the “Stickers‘ option. Click on it to add custom stickers.

Step 3
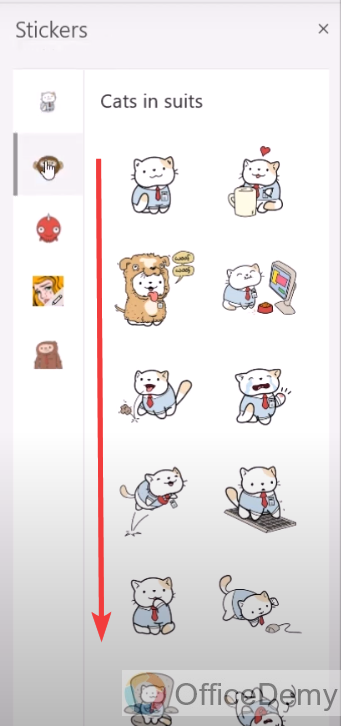
As you click on the “Stickers” option, a new panel will open from the right side of the window where you will see so many different categories of custom and non-custom Stickers that you can insert by just clicking once on them.
Step 4
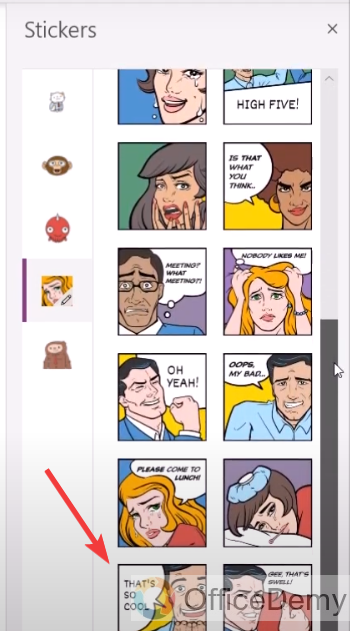
Let’s suppose, here I am selecting a custom sticker from the list that contains a comment in it as can be seen below.
Step 5
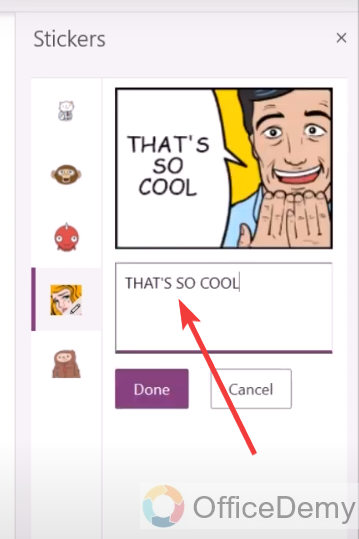
When you click on this custom sticker, it will not directly insert into the notebook but first, it will open in an edit mode to make any customization. If you see in the following example, here is a comment with a sticker that you can customize if you need it according to the situation.
Step 6
Here, if you see below, I have erased the previous comment and have written a new comment according to my current situation or regarding the note.
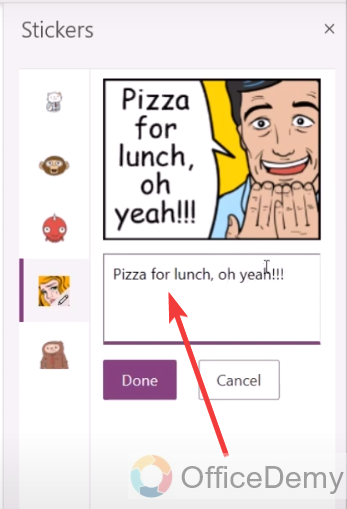
Step 7
Once you have customized your sticker then just click on the “Done” button to save these changes and add them to a notebook as well.

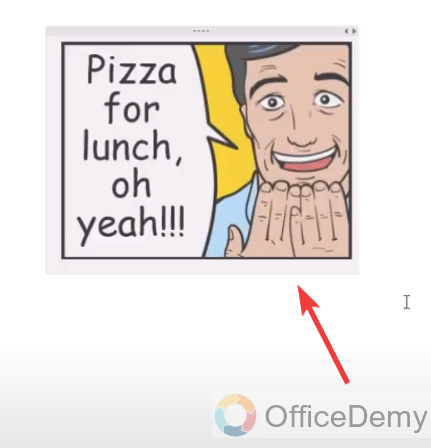
Step 8
Here you can see the result in the following picture, our custom sticker has been added now as required. In this way, you can easily add custom stickers to OneNote.
Frequently Asked Questions
Can we remove custom stickers from OneNote?
If you have added a custom sticker to OneNote for that there is no longer a need, or you accidentally have added a wrong custom sticker and want to remove it then you can very easily remove it as well from your notebook. Just you need to select the sticker that you want to remove and then press the “Delete” button, your sticker will be removed from the notebook, or you can also click on the “Delete” button from the Home tab of the menu bar as highlighted below after selecting the sticker to remove the sticker.

Conclusion
Hope you will be amazed to see that now you can create your stickers on OneNote. Hope the above article on how to add custom stickers to OneNote will be very beneficial to you.
![How to Draw on OneNote [Complete Drawing Guide]](https://www.officedemy.com/wp-content/themes/rehub-theme/images/default/noimage_336_220.png)


