
To Create a Shared OneNote
- Open notebook.
- Click on the Share button.
- Go into the Manage Access option.
- Click on the Start sharing option.
- Enter the participant’s email address.
- Set up rights for the participant.
- Click on the Send button.
OR
- Open the notebook.
- Press and hold Click on the notebook.
- Click on the Share button.
- Enter the participant’s email address.
- Set up rights for the participant.
- Click on the Send button.
Microsoft Workspace including OneNote is becoming more popular among users as they are becoming collaborative applications. Now you can allow one or more users to view and edit your notebooks as well in OneNote by sharing them. In this article on how to create a shared OneNote, we will teach you how you can share the rights of your notebook with others to make changes with them or to just view them.
Benefits of Creating a Shared OneNote
No doubt sharing is caring. In OneNote, if you are working on a project and making a draft for the project, you can share your OneNote to take other’s opinions to make an errorless work. Creating a shared OneNote also saves your time and effort too. You don’t need to share the entire file you can just give access to them. Editor right while creating a shared OneNote can allow someone to edit your notebook if you want to make someone edit your notebook without sharing the entire file.
How to Create a Shared OneNote
In this tutorial on how to create a shared OneNote, we will learn to create a shared OneNote in both versions of Microsoft OneNote desktop and mobile.
- Create a shared OneNote in the desktop version
- Create a shared OneNote in the web version
1. Create a shared OneNote in the desktop version
Most users use Microsoft OneNote on the desktop version, if you are using it too and want to create a shared OneNote then follow the following instructions.
Step 1
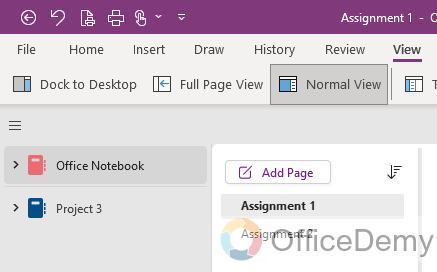
Once you have opened Microsoft OneNote then first open the note that you want to make shared in OneNote.
Step 2
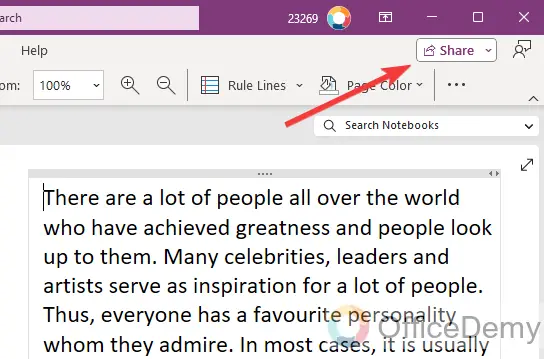
After opening the note, look at the right top corner of the window, here you will see a “Share” button as directed below. Click on it to create a Shared note in OneNote.
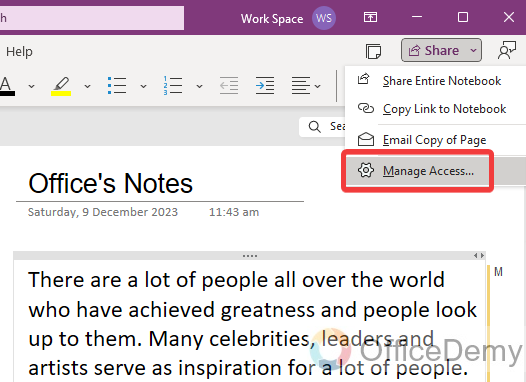
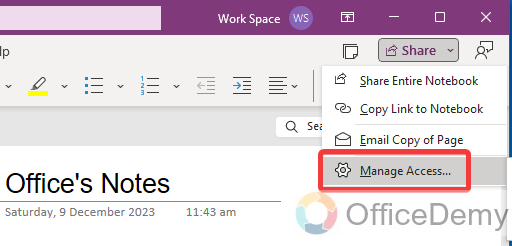
Step 3
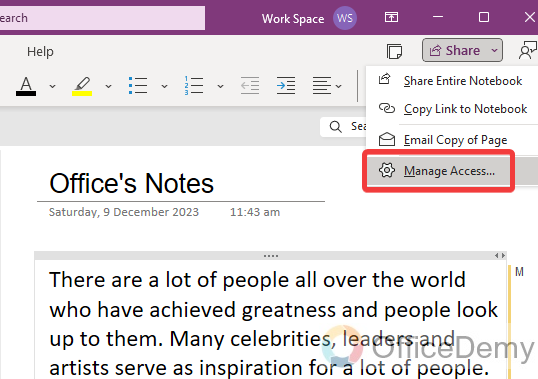
A small drop-down menu will open when you click on this Share button, on this drop-down menu, click on the “Manage Access” option as highlighted in the following picture.
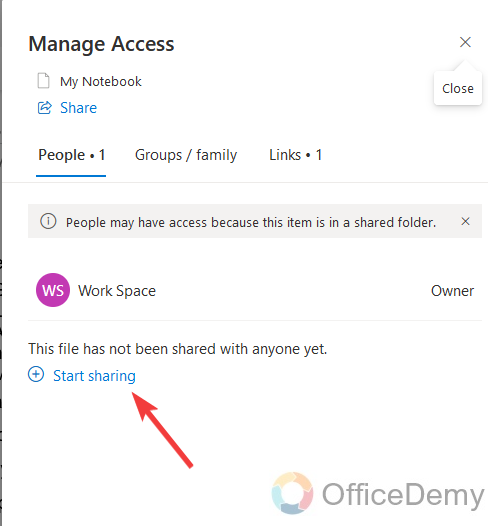
Step 4
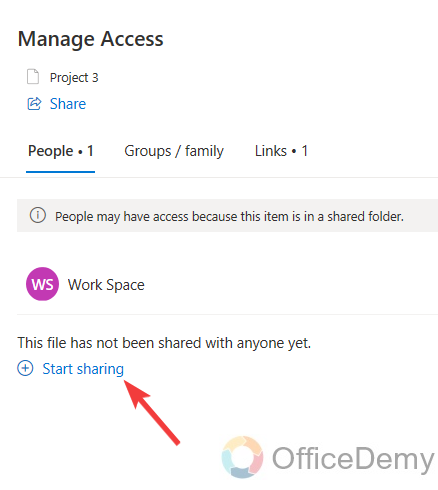
Clicking on this Manage Access option will give you a new separate small pop-up window, on this window you will see a message that “This file has not been shared with anyone yet”, along with this message, you will also see a “Start sharing” option.
Step 5
As you click on the “Start sharing” option, it will ask you to enter the Email address of the person in the following field with whom you want to share this file.
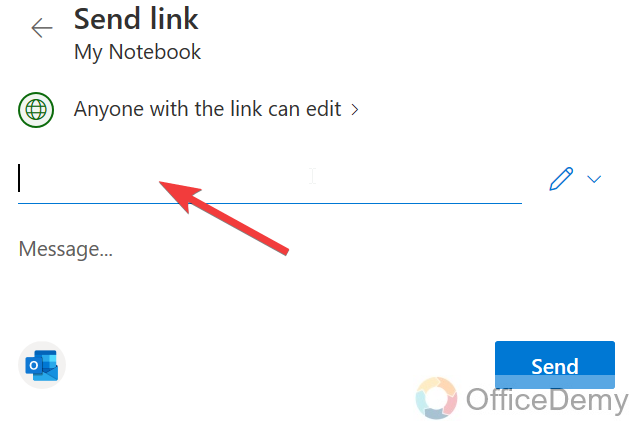
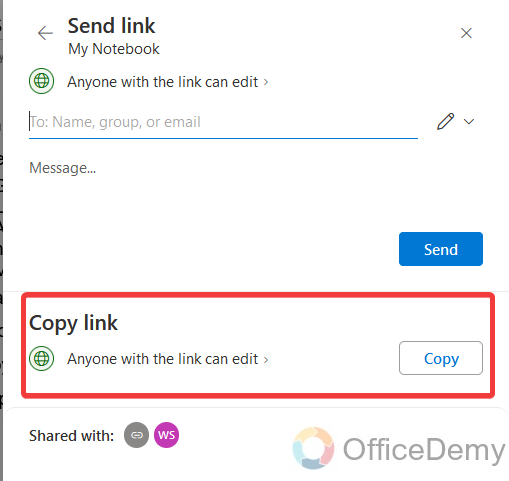
Step 6
Once you have written the email address of the person, you will see a Pencil icon along this option as highlighted in the following picture through which you can set permissions for a shared note. This option can be very helpful while creating a shared OneNote.

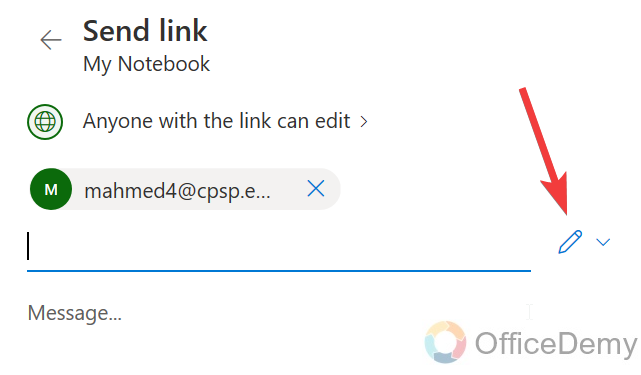
Step 7
When you open this Pencil icon, a small drop-down menu will open with the following highlighted options in which you will find a couple of options “Can Edit” and “Can View” for the shared user. Now it’s up to you to grant the rights to the shared user.
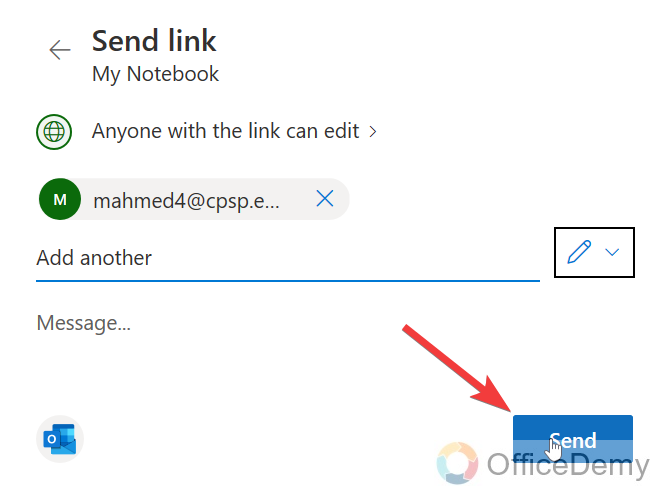
Step 8
Once you have all done, setting up permissions and adding the user address simply click on “Send” as directed below to create this note as a shared file.
2. Create a shared OneNote in the Web Version
In this method we will learn how to create a shared OneNote in mobile version, Microsoft OneNote also provides its mobile version, now you can create your digital notebooks on mobile. Below are the steps to create a shared OneNote on mobile.
Step 1
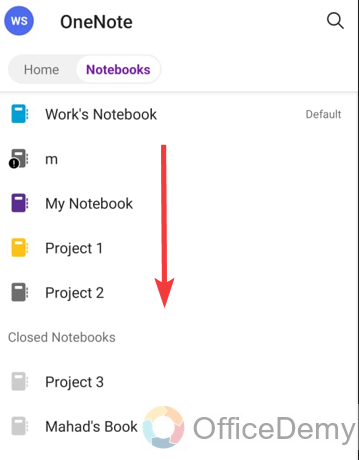
When you open Microsoft OneNote on your mobile, you will see the following screen first in front of you. To create a share in OneNote, you will have to go into the “Notebook” section of OneNote on mobile.
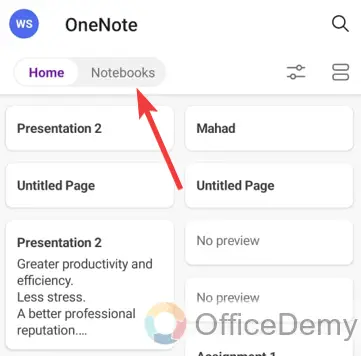
Step 2
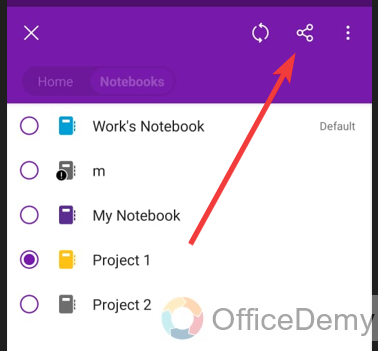
As you click on the “Notebooks” tab, all notebooks will appear in front of you here, now select the notebook and press and hold the click on the notebook that you want to make Shared in OneNote.
Step 3
As you select the notebook, a Share icon will automatically appear in front of you at the left top corner of the mobile as directed below. Click on it to make it shared in OneNote.
Step 4
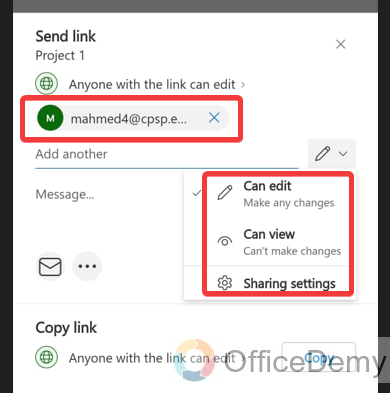
A small pop-up will appear in front of you when you click on the share icon and write the email address of the participant with whom you want to share the OneNote. Here you will also find a small pencil icon through which you can set the rights of the participant as highlighted in the following screenshot.
Step 5
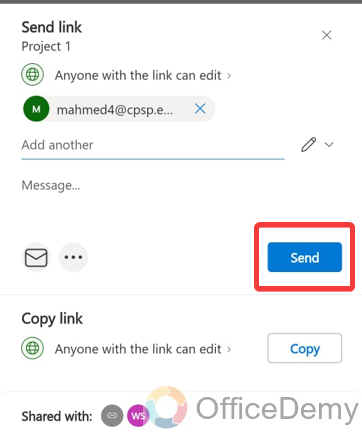
Once you are done with adding the participant and setting up the right permission then simply click on the “Send” button to make your notebook shared in OneNote mobile.
Frequently Asked Questions
How to create a link in OneNote?
It is most useful when you are sharing OneNote with an outsider to create a link for a notebook. If you don’t know how to create a link in OneNote, then go through the following steps.
Step 1
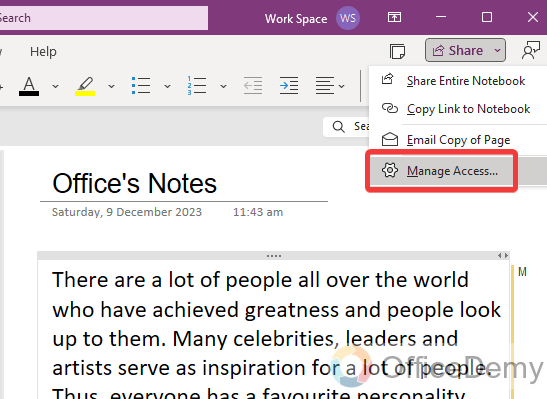
If you are creating a link in OneNote, first, open that notebook in OneNote then click on the “Share” button located at the right top corner of the window then click on the “Manage access” option from the drop-down menu.
Step 2
Clicking on the “Manage access” option will give you a small pop-up window where you will have to click on the “Start sharing” option can be seen in front of you in this pop-up window.
Step 3
As you click on the “Start sharing” option, you will get the “Copy link” option through which you can create a link for your notebook that can be shared with anyone to edit your notebook.
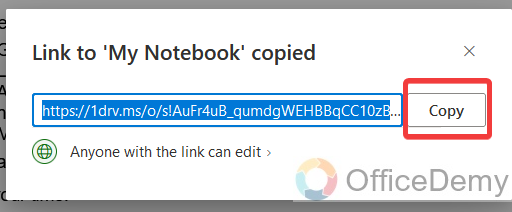
Step 4
As you click on the “Copy link” option, it will give another small pop-up where your link will be generated for the notebook now, you can use this link to share with anyone by just clicking on the “Copy” button as highlighted below.
How to set a password while creating a shared in OneNote?
Microsoft Teams also offers the facility of setting up a password while creating a shared OneNote to encrypt your notebook. Read the following guide to set up a password while creating a shared OneNote.
Step 1
To set a password while creating a shared in Microsoft OneNote, you will have to go into the “Manage access” option can be found from the “Share” button of OneNote located at the left top corner of the window.
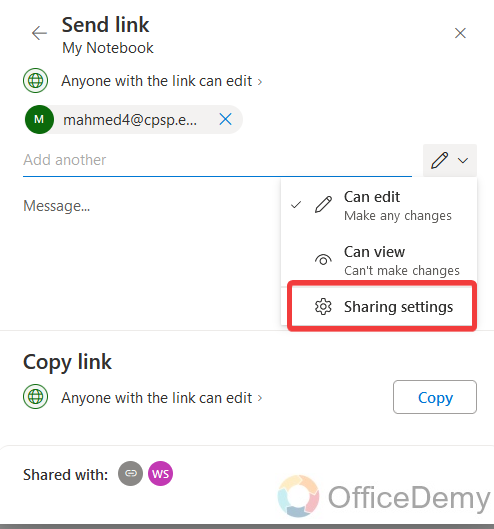
Step 2
A small pop-up will appear in front of you, click on the small pencil icon, and it will give you a small drop-listed menu where you will have to click on the “Sharing settings” as highlighted in the following screenshot.
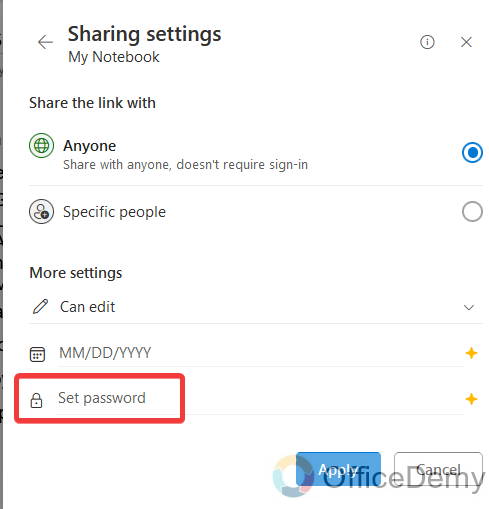
Step 3
In this “Sharing settings” option, you will find the “Set password” option as can be seen in the following picture through which you can easily set the password while creating a shared in OneNote.
How to create unshared in OneNote?
If your notebook is shared with someone and now you want to remove the access follow the following steps.
Step 1
First of all, open the notebook that you have shared before then click on the “Share” button of Microsoft OneNote. A small drop-down menu will open, click on the “Manage access” option.
Step 2
A small pop-up window will appear in front of you when you click on the “Manage access” option, on this window you will see all the participants listed in front of you with whom you have shared. Click one by one on them to remove them.
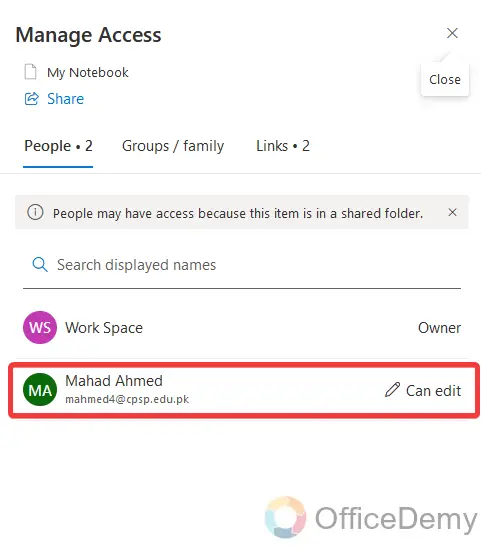
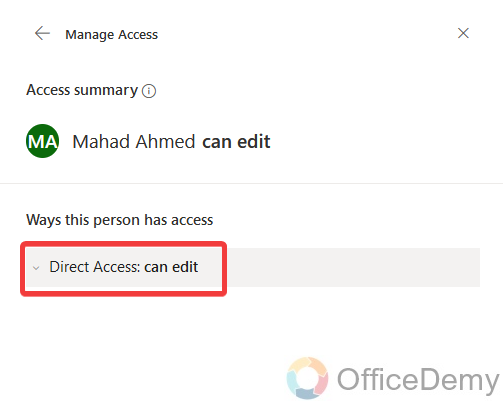
Step 3
When you click on the shared person, you will see the following window in front of you, click on “Direct access: can edit” as highlighted in the follow
ing picture.
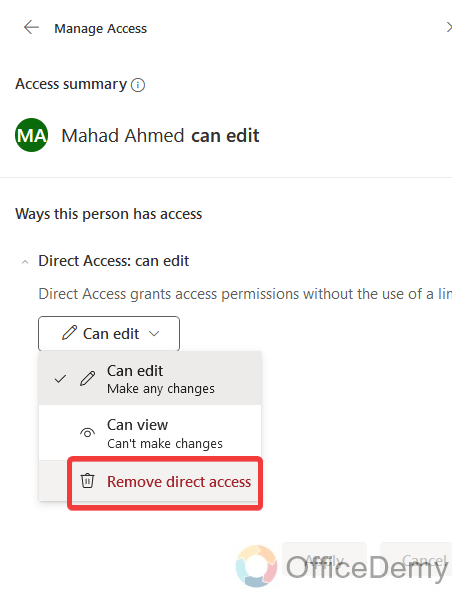
Step 4
Here you will find the “Remove access” option in the drop-listed menu as can be seen below, click on it to remove the person.
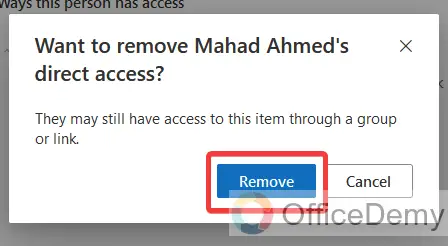
Step 5
Another small pop-up will appear in front of you to confirm you to remove it, click on the “Remove” button. Once you have removed all the shared participants, your notebook will become unshared in OneNote as required.
Conclusion
Hope you like the above guide on how to create a shared OneNote through which now you can make your notebook editable and viewable with your colleagues. Hope it will be beneficial to you.

