
To Make a Timeline in Microsoft Word
- Open a blank document in landscape orientation.
- Insert a 13-column by 10-row table.
- Row height to 1.5 cm.
- Remove table borders.
- Add a horizontal line in the 5th row for division.
- Place circles in each column as breakpoints.
- Merge cells for phase sections and add text.
- Hide gridlines.
- Customize fonts and colors as needed.
Hi. Today, we will learn how to make a timeline in Microsoft Word. Creating a timeline is an effective way to visualize important events and milestones, whether for historical purposes or to illustrate project schedules. Microsoft Word offers an easy-to-use feature for creating timelines, allowing you to organize information chronologically and present it in a visually appealing format. Whether you’re a student, professional, or hobbyist, learning how to create a timeline in Microsoft Word can help you communicate complex information clearly and concisely.
In this article, we will provide a step-by-step guide on how to create a timeline in Microsoft Word, along with tips and tricks for customizing your timeline to suit your needs. This is going to be a fully custom timeline without using any tool, starter template, or third-party add-in. Whether you need a timeline for a school project, business presentation, or personal project, this guide will help you create a professional-looking timeline with ease.
Importance of making a Timeline in Microsoft Word
Well in today’s world, being able to communicate effectively is more important than ever. Microsoft Word has become the go-to tool for creating and editing documents in both personal and professional settings. Knowing how to highlight text in Word is an essential skill that can make your documents stand out and convey your message more clearly.
Highlighting text in Word allows you to emphasize important information, organize your thoughts, and improve readability. With the ability to customize your highlights with different colors and styles, you can create visually appealing documents that are easy to navigate. Whether you’re a student working on a research paper or a professional preparing a presentation, learning how to highlight in Microsoft Word is a valuable skill that will help you communicate your ideas more effectively.
How to Make a Timeline in Microsoft Word?
This is a fully-fledged guide on how to make a timeline in Microsoft Word. We will start from the very scratch and at the end, you will have a great template of your own. So let’s dive deep, and see the steps to make a timeline in Microsoft Word.
Make a Timeline in Microsoft Word – Set up the Table
In this section, we will learn how to make a timeline in Microsoft Word. The first section starts with creating a table and then working on the internal details of it. So, first, make the table, follow the steps, and repeat with me so you get a more clear understanding of what I am doing.
Step 1
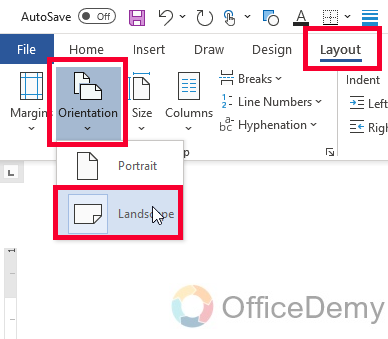
Open a blank Microsoft Word document, and go to the “Layout” tab, select “Orientation” > “Landscape”
Step 2
Go to the “Insert” tab in the ribbon > Table > Insert a table.

Step 3
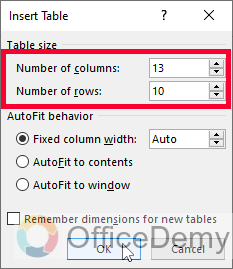
Add rows and columns values, choose 13 columns and 10 rows, and click on the Ok button
Step 4
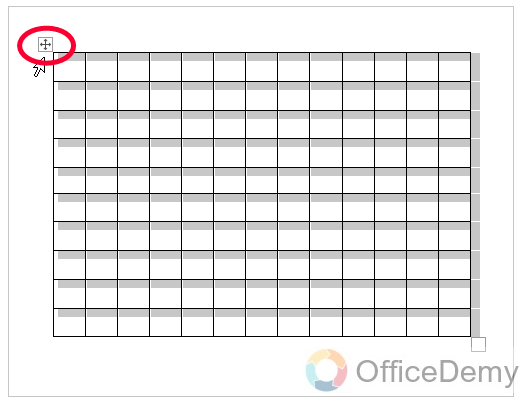
Your table is added, now select the entire table by clicking on the button on the top left corner of the table.
Step 5
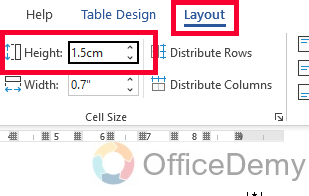
Go to the Layout tab, select Height, and set the height to 1.5 cm
Step 6
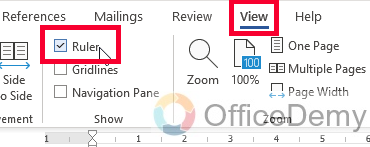
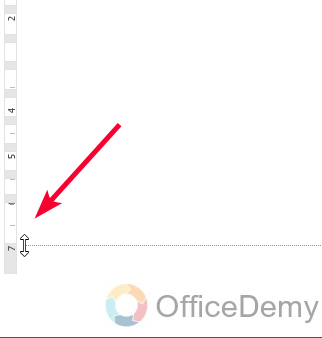
If your table exceeds the page size, then hold and drag down the vertical ruler of your page, if you can see the ruler, Go to View, and add a checkmark to “Ruler” in the “Show” group
Step 7
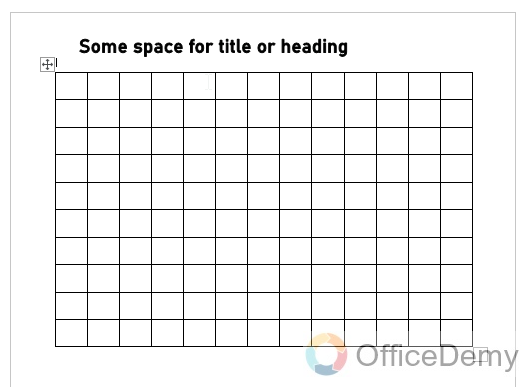
Place your cursor in the first row of the first column, and press the Return Key (Enter key) to make some space over the table for the heading.
Step 8
Now select the entire table again, and go to the Table Design tab
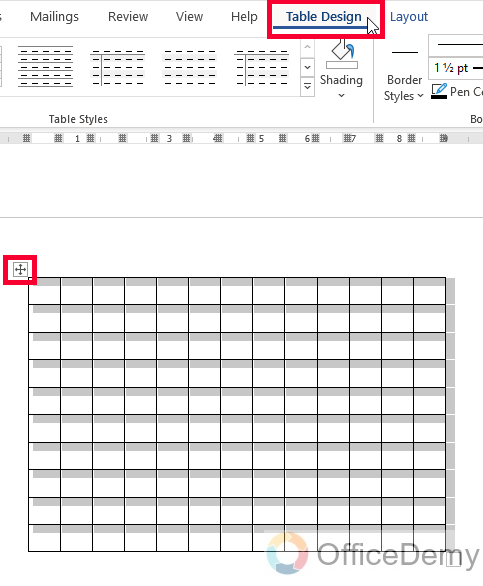
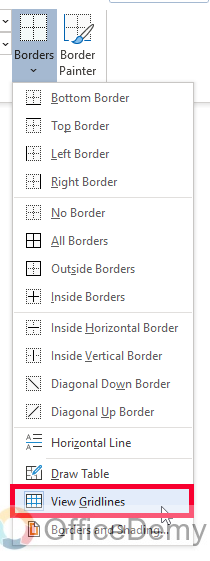
Step 9
Select the Border button’s dropdown, and click on the “View Gridlines” button
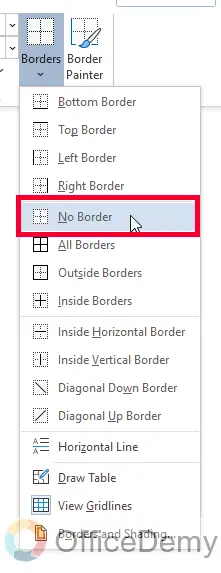
Step 10
Then, select “No border” from the same border dropdown.
Now your table is ready. We will proceed further in the next section.
Make a Timeline in Microsoft Word – Creating Break Points
In this section, we will continue learning how to make a timeline in Microsoft Word, and we will learn to create breakpoints of different phases of our timeline, they can be years, weeks, months, phases names, etc.
Step 1
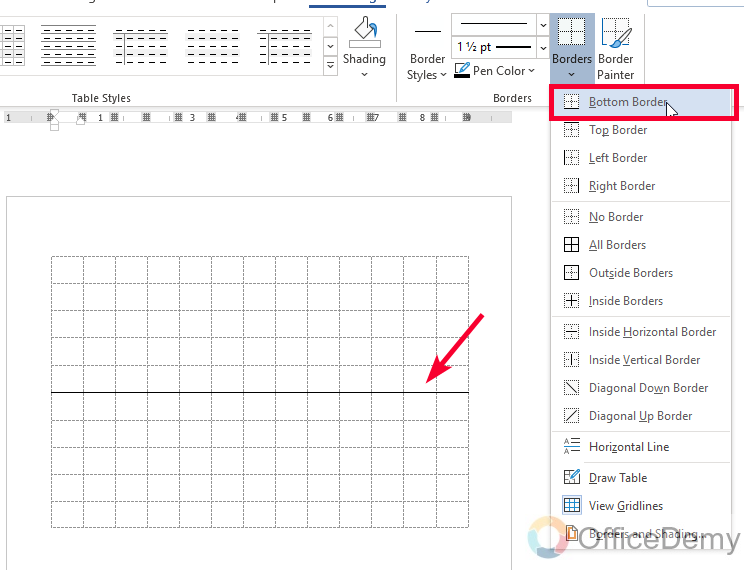
First, create a think horizontal line in the center point of the table, for this select the entire 5th row from the top, go to borders and choose bottom border.
Step 2
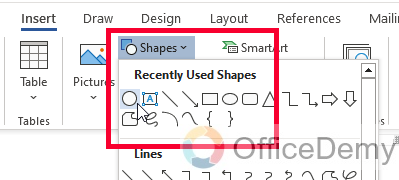
Now create circles for each phase as a breakpoint of that phase, for this, you can use shapes > circle.
Step 3
Set them to the center point of each column with a space of 1 column
Step 4
Now we will make sections for each phase, for that you simply need to think first and then make sections, if you dont want to think you can follow my idea
Step 5
Do this for all 6 breakpoints.
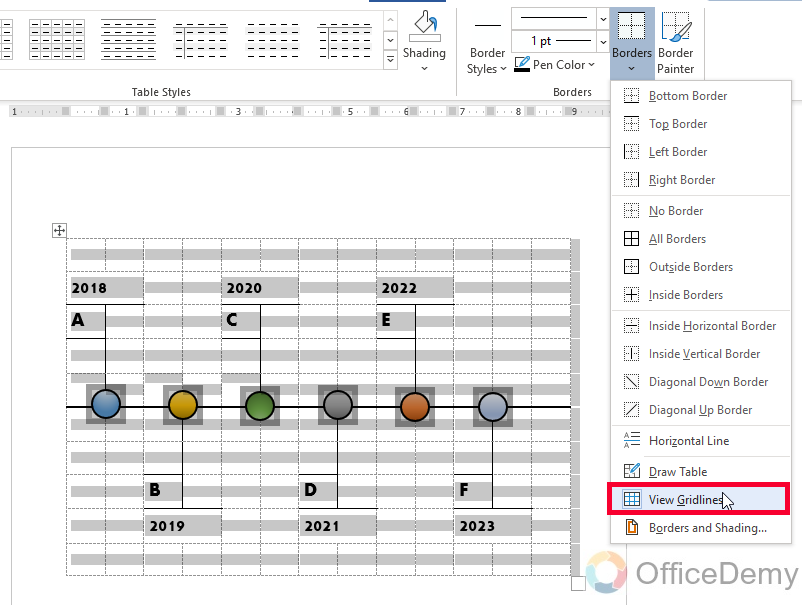
Step 6
Now we need to hide the Gridlines for better visualization of our timeline.
Select the entire table, go to Borders, and again select “Show Gridlines”, this option was already toggled-on, selecting it again will toggle it off.
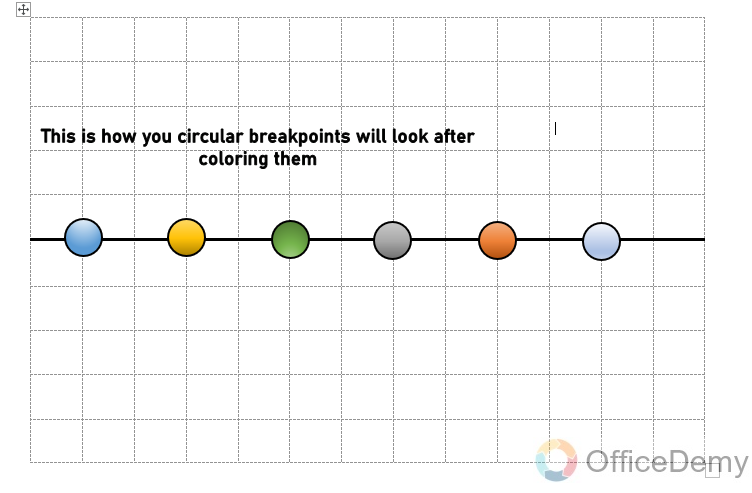
Step 7
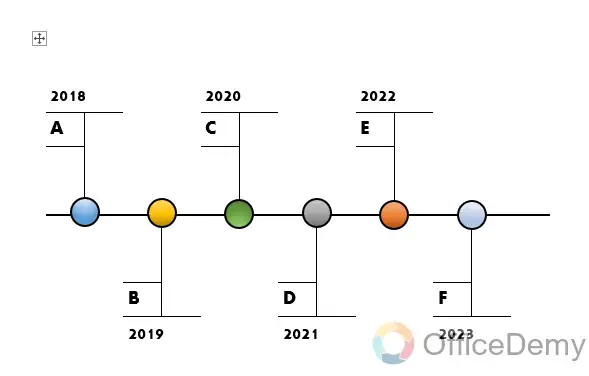
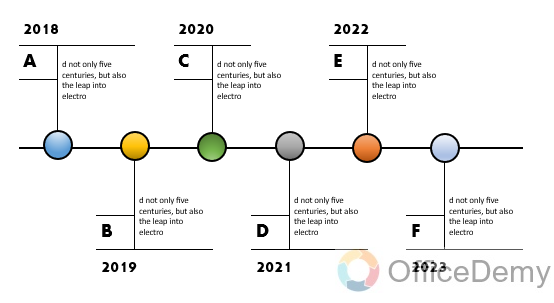
Now, this is what our timeline looks like after the addition, and naming of the breakpoints.
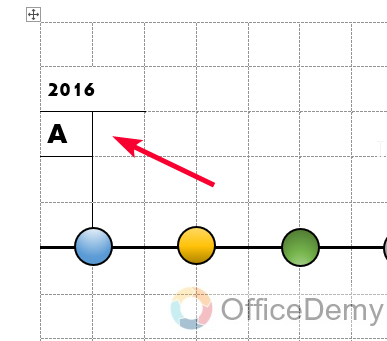
Step 8
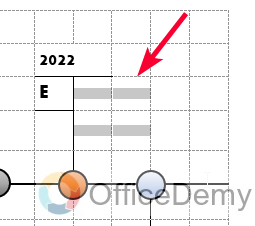
Now, merge these four cells on every breakpoint to add the text for each phase of our timeline, it can be targets, goals, achievable, or anything you want.
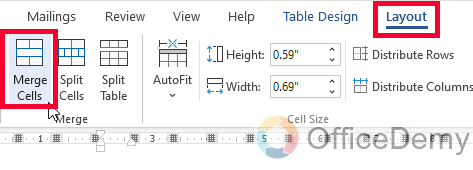
For this, go to “Layout” and select merge after making the selection on the desired cells.
Step 9
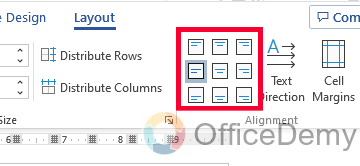
Add your text and adjust the text position from the “Layout” Tab, using the 9 position boxes given inside the Alignment Group.
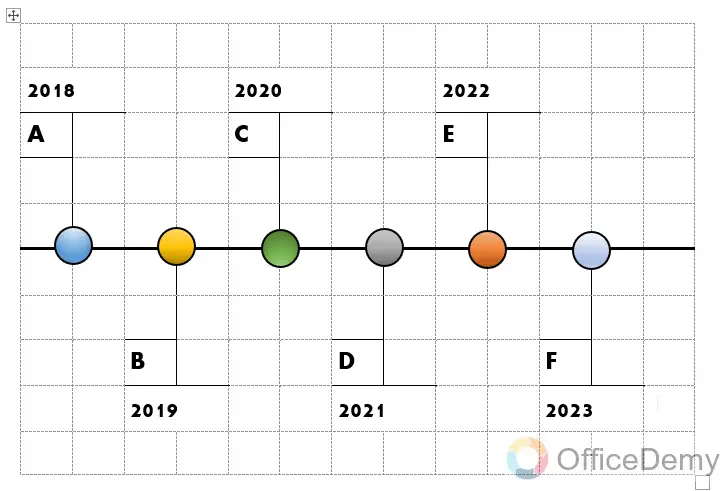
Step 10
After adding, and adjusting the text for all the breakpoints. This is how our timeline looks.
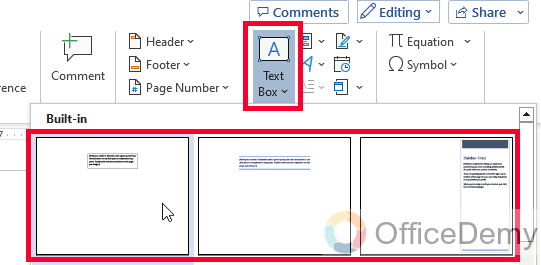
Step 11 (Optional)
Now add a textbox and add a title or heading for your timeline
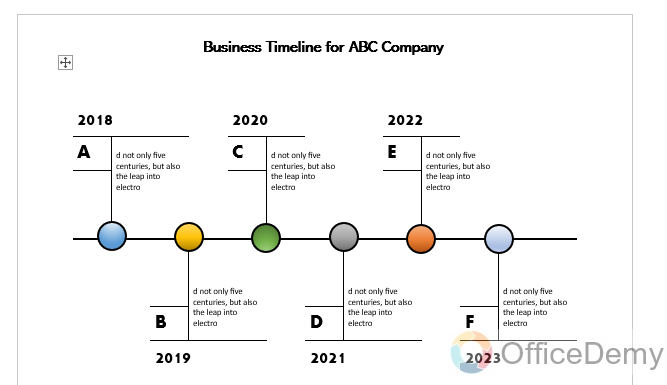
This is how to make a timeline in Microsoft Word without using any starter template, any reference, any third-party add-in, or even the Internet connection.
Copy/Download Free Timeline Template
Useful Notes
- This is not an official design of the term “Timeline”, you can create anything that comes to your mind that looks attractive, and do your job.
- Try to use bold fonts in your timeline
- Use contrast colors of the checkpoints for enhanced visibility
- You can use bolder, or lighter weights for your lines as per your requirements.
- Don’t forget to hide the gridlines, otherwise, the timeline will not look great.
Frequently Asked Questions
How to Merge cells of the tables in Microsoft Word?
Select the cells you want to merge, go to the Layout tab, and click on the Merge Button in the Merge group
How to apply the gradient to the checkpoints in the timeline?
Select the shape, go to fill color, and select Gradient from the given options, inside Gradient, select radial or linear, select a pre-set of gradients, or create a new one by selecting a color from the color box, adjust the gradient by moving the colors or left to right, not right to left.
How to add a title to my Timeline?
You can best use the textbox feature to add a title above your timeline in Microsoft Word
Can I use get the Timeline template used in this guide?
Yes, you can use this template for free, here is the Google Docs version of the Timeline Template
Note that this Google Docs version may have some alignment issues, its better to get it and download it as a Microsoft Word document for a better experience.
Conclusion
That’s all from how to make a timeline in Microsoft Word. I hope I have cleared all the things, and the guide was not too fast or hectic. I tried to keep and simple, and I skipped on extremely basic things to make a comparatively enjoyable guide for mid-level users. Thanks and keep learning with us. Also, tell in the comments what more templates you want to make in Microsoft Word. Stay connected with Office Demy.


