
To Put an Outline on Text in Google Slides
- Go to the “Insert” > “Word Art“.
- Type your text in the provided box and press Enter.
- Select your text > “Fill color” > Choose a color to fill.
- Adjust the “Border Weight“.
- Optionally, change the “Border Color“.
- Your text will now have an outline.
In this article we will learn about how to put an outline on text in google slides.
Google Slides allows you to select your fonts, text color, size, and much more. When using Word Art, you can select the outline of your text, which can be any color or size of your choice. Google Slides allows you to create a project in different sizes as well as create interactive presentations such as displaying documents, spreadsheets, and web pages.
Why do we need to outline a text in Google Slides?
Outlining will help to create the theory and content of your correspondence in a logical and timely manner. This enables you to choose from crucial territories or relevant information easily, thus giving you footing when beginning the writing procedure.
How to Put an Outline on Text in Google Slides
To create a text-based outline in Google Slides, you should click Insert in the main menu, choose Word art, type in the required information, and then click Enter. In the Display Options menu, push the Fill color button, then select a color from the palette. To change the outline color, click on the Border color button, and then choose a color. You can adjust the position of the text as needed.
Follow these steps to put an outline on text in google slides.
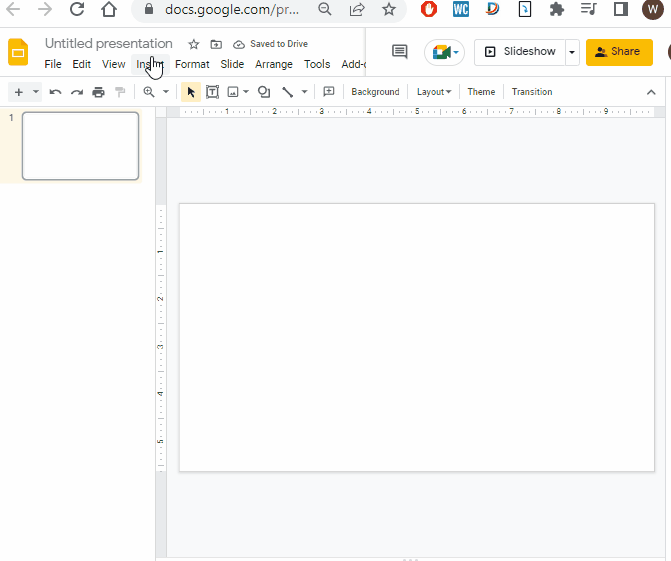
Step 1: You can directly open Google Slides using your browser by almost instantly typing docs.google.com presentation in the address bar. Only Chrome, Safari, Firefox, and other browsers will be able to do this.
Step 2: Only Paragraphs created with Word Art can be added to Google Slides using outlines. Note that the text should be encoded using Word Art. Visit Insert on the menu bar and click Word Art; follow the steps shown in this screenshot.
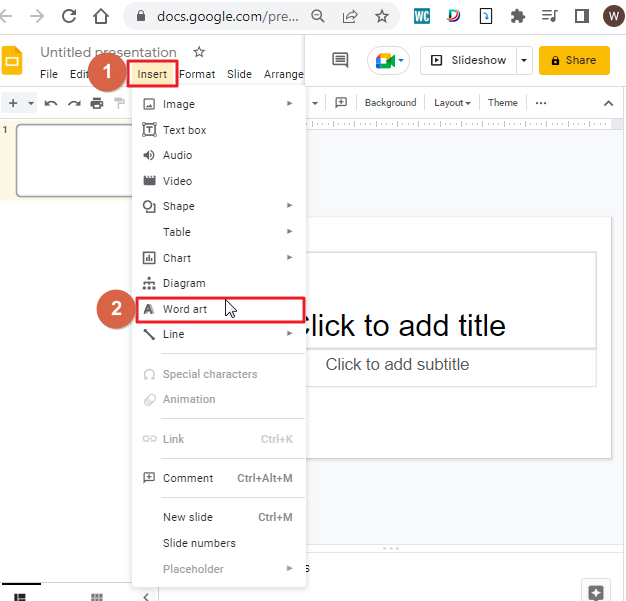
Step 3: As soon as you click on Word Art, a box will appear on your screen where you can type in your text.
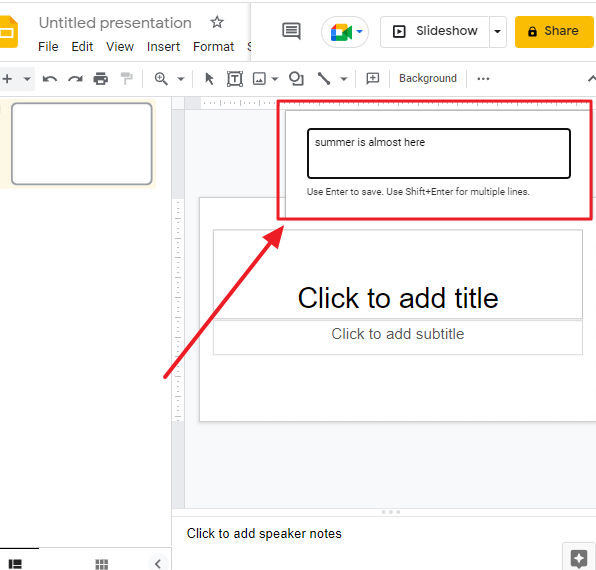
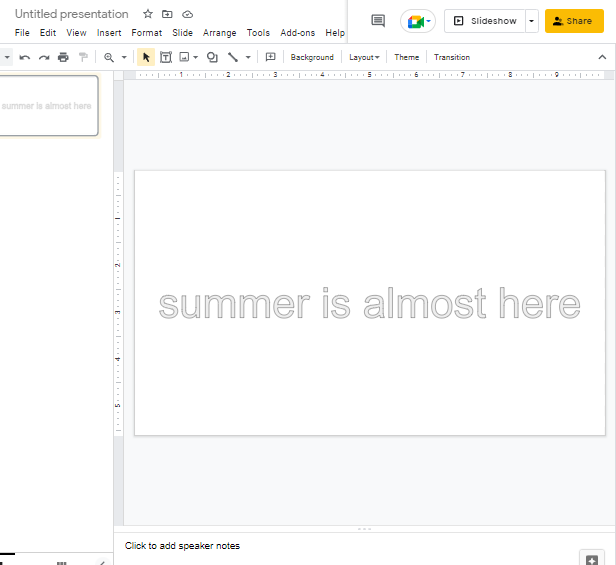
Step 4: Hit Enter on the keyboard and your text will be displayed on your slide in text boxes.
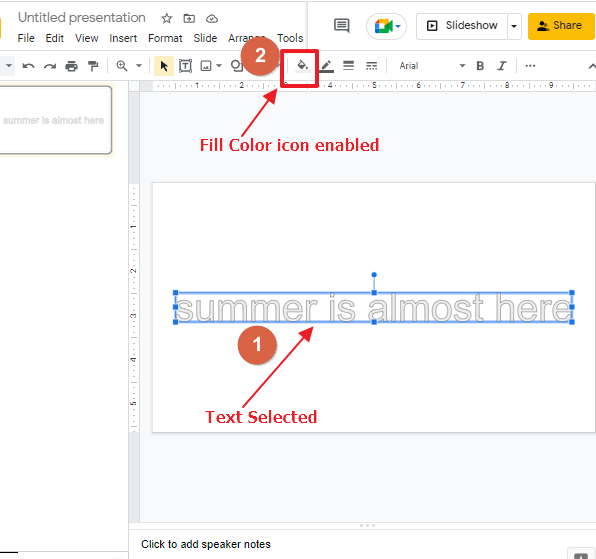
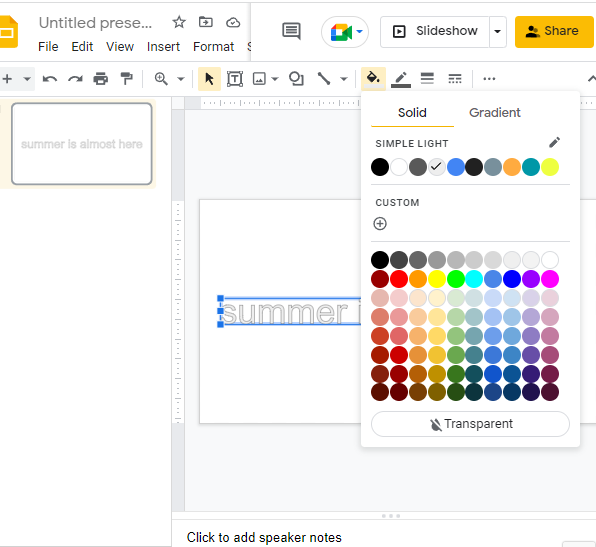
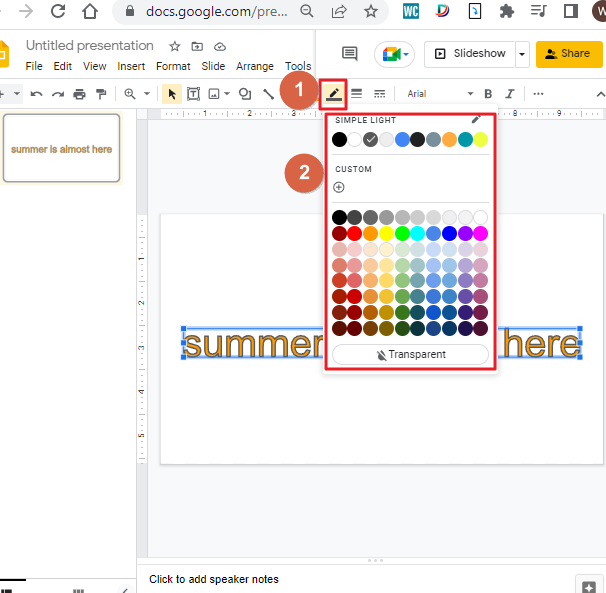
Step 5: Give your text some color to make it stand out and thereby look great. The process is similar in the same way as filling a shape in Google slides. Now, you will use the color tools and borders. Select the text first so that the fill color icon will be enabled in the menu bar which is disable by default.
A drop-down menu of different shades will pop up. Select the color that you think will look best with your text.
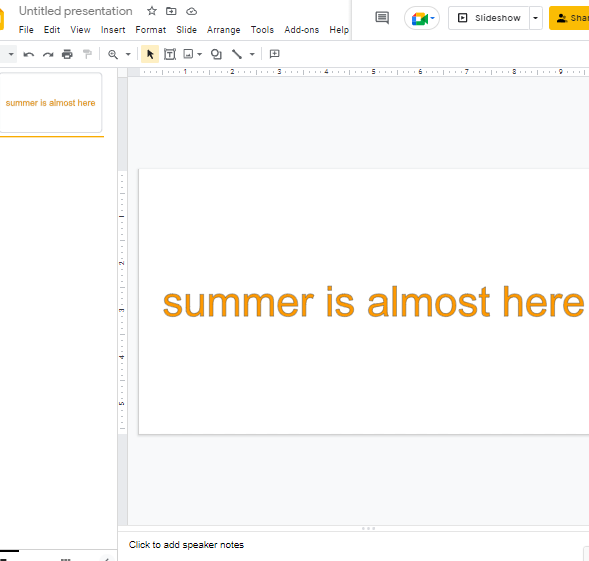
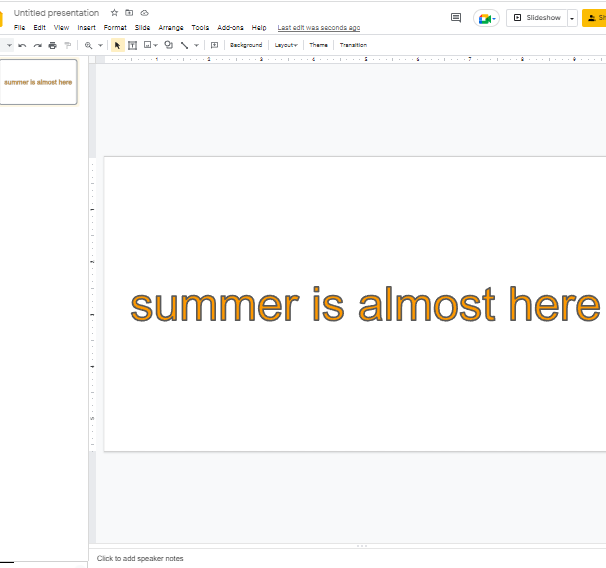
For example, I have chosen orange. This is how my text looks after adding the color.
Step 6: Your text’s outline appears unusually narrow at first glance. However, it’s there, you just can’t see it due to the sensitive border weight of your text. It’s vital that you choose to thicken the border. Click the Border Weight icon in the menu bar to view a list of options to select thicker border weight. Once you have made an express choice, you’ll see a clearer outline of your text.
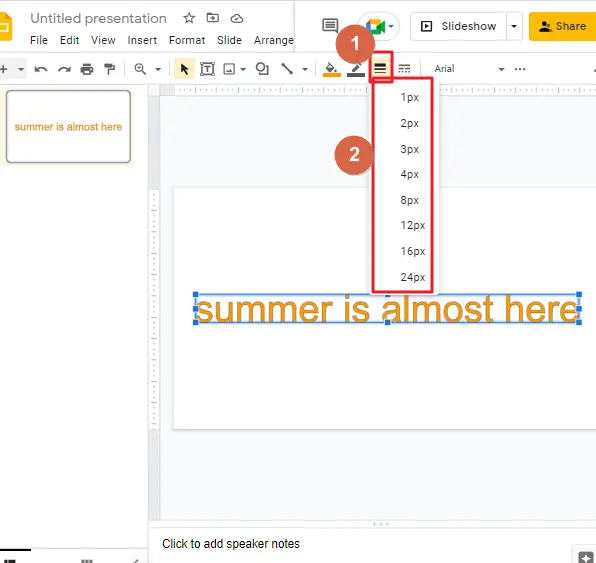
The default value for the border weight is 1px, which is rather thin. As you can see in the illustration above, we selected 3px which looks good.
We do not suggest selecting 12px, 16px, or 24px as your text’s graphics will be too tall and distort its shading.
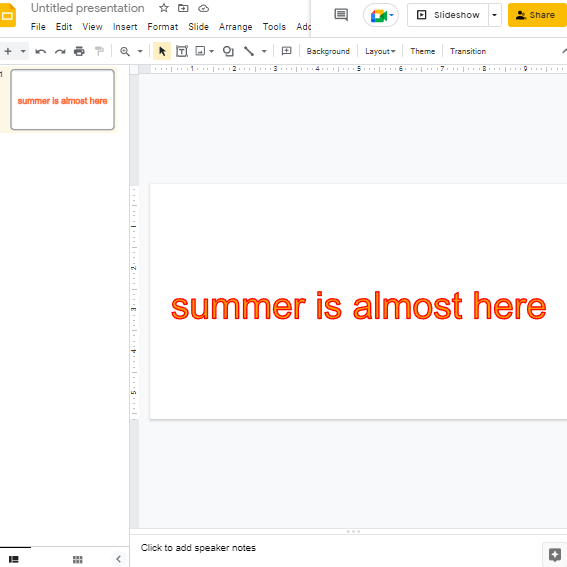
Step 7: This option is totally optional; however, it can make the look of your text more pleasing to the eye. You can adjust the border color of your text’s outline by tabbing on the Border Color button, which resembles a pen with a white-colored line over it. A drop-down menu will appear showing a variety of color choices. All you need to do is click the color of your choosing. You can select to have an outline in black, red, or white, for instance.
I have chosen red as a border color. This is how my text looks after changing the border color.
That’s it. You are done.
Some FAQs to help you organize your work
Can I add drawings to Google Slides and wrap text within it?
Yes, Google Slides allows you to add text with a wrapping and images, but you cannot draw freehand images or add shapes.
Can I add bold shadows to text in Google Slides?
Yes, you can add shadow effects to any text in Google Slides by simply highlighting the content and opening the Format Options menu. Then, click the Drop Shadow option.
How Can I add borders to my Google Slides presentation?
You can include a border to your Google Slides document by dragging out a shape, for instance, a rectangle and rounded rectangle. Just make the shape transparent so it won’t influence the content of your text box.
How do you place text above a shape in a Google Slides document?
Open a presentation in your computer’s Google Slides application. Go to the slide where you want to add a text box or object. Choose what you would like to insert by clicking Insert at the top, then click on the desired options. Click the Text box, Image, Shape, or Line.
Video Tutorial: How to Put an Outline on Text in Google Slides
Conclusion
Thank you for reading this article. We hope it was helpful in explaining how to put an outline to text in google slide. If you enjoyed the article, feel free to share it with friends and colleagues who you think might find it interesting as well. We wish you the best of luck in your future academic endeavors!


