
To Show Hidden Rows in Google Sheets
- Select all the rows.
- Go to the File tab.
- Click on Unhide rows.
Learn more ways in the Article below!
Are you confused or shocked that your rows in Google Sheets were missed? Then don’t worry! Today we are here with an article on how to show hidden rows in Google Sheets in which we will discuss all the conditions to show hidden rows in Google Sheets.
Why should we learn to Show Hidden Rows in Google Sheets?
Let’s suppose, you have hidden rows from your data in Google Sheets to focus on some specific rows, but you need to see your all data later then you may need to show hidden rows in Google Sheets.
If you don’t know how to show hidden rows in Google Sheets, then move the following step-by-step guide on how to show hidden rows in Google Sheets.
How to Show Hidden Rows in Google Sheets
In this tutorial, we are going to learn four different criteria for unhiding rows in Google Sheets. It depends on the condition of how rows are hidden in Google Sheets then we will show them accordingly. These scenarios are as below.
- Show hidden rows in Google Sheets by upward/downward pointing arrows
- Show hidden rows in Google Sheets by grouped sets of arrows
- Show hidden rows in Google Sheets by the Unhide rows option
- Show hidden rows in Google Sheets by removing the filter
Show Hidden Rows in Google Sheets – Using upward/downward pointing arrows
When we hide any row in Google Sheets, it creates upward/downward pointing arrows along the surrounding rows. You can easily unhide the rows by clicking on them.
Step 1
As you can see in the following example, we have some tabular data in which you can see some rows are missing. As you can see, rows no. 5, 8, and 12 are hidden in the following example.
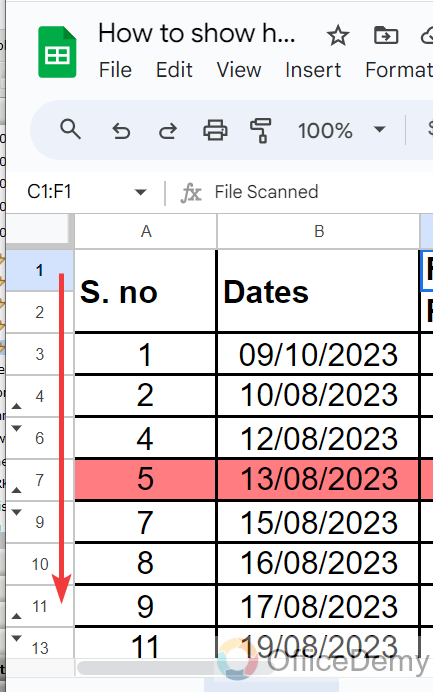
Step 2
If you need to unhide these rows then keep an eye on these rows, you will see small up and down arrows as highlighted in the following picture. You can unhide these rows by clicking on just one.

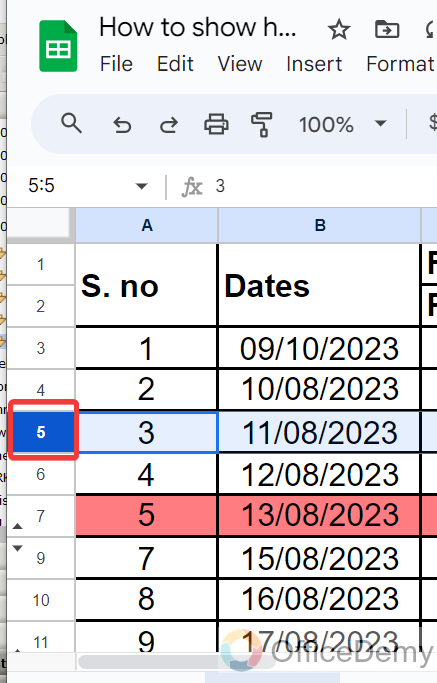
Step 3
As you click on these small arrows, the hidden row will be shown instantly. As you can see, the result in the following picture row no. 5 has been displayed.
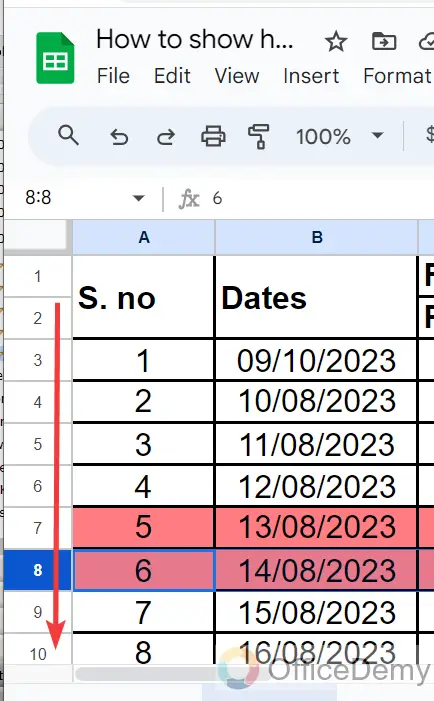
Step 4
In the same way, you can also unhide the rest of the rows in your sheet by clicking just on these small arrows. I have made all rows unhide in the following picture.
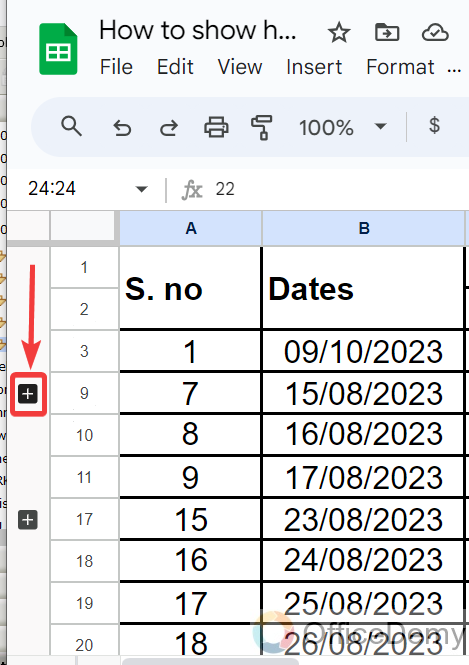
Show Hidden Rows in Google Sheets – Using grouped sets of arrows
One of the methods of sorting rows is to make group sets of rows, when we do so, it may hide these rows and create a set. A plus sign occurs along these sets through which you can simply show the hidden rows in Google Sheets.
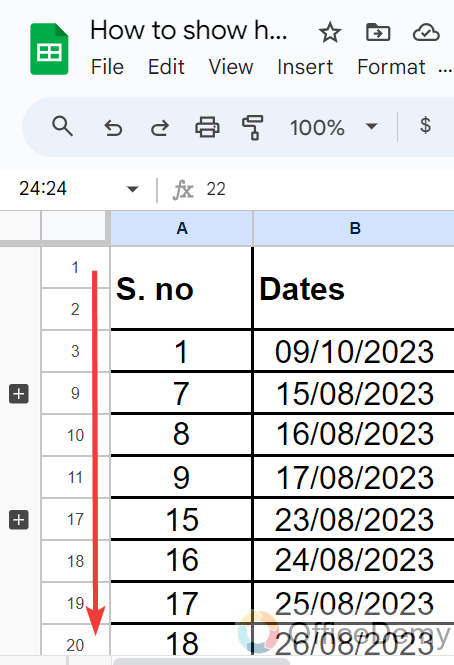
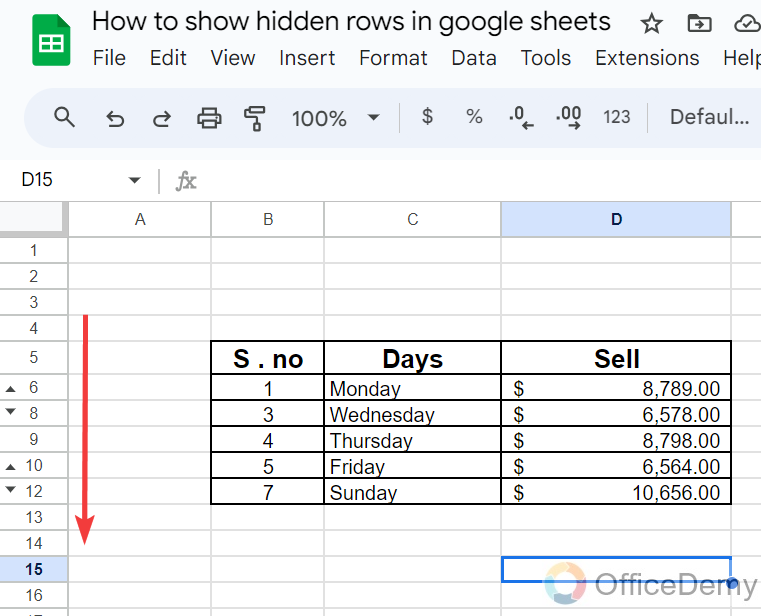
Step 1
As you can see in the following picture, some rows are missing in the following data. When you collapse a row group, it hides all the rows that were grouped as in the following example rows 12-16 are hidden.
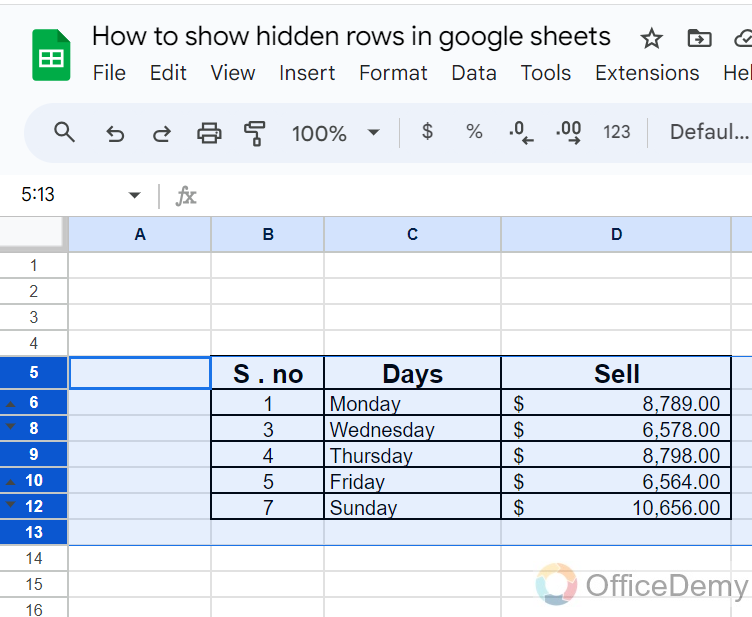
Step 2
When you sort your Google Sheets rows in a group, a plus sign button is created along the rows through which you can make them visible when needed. Click on this plus sign button to show hidden rows as highlighted in the following picture.
Step 3
As you press this small plus sign button, all hidden rows will be shown in jiffy as you can see the result in the following picture as well, all rows have been displayed now.
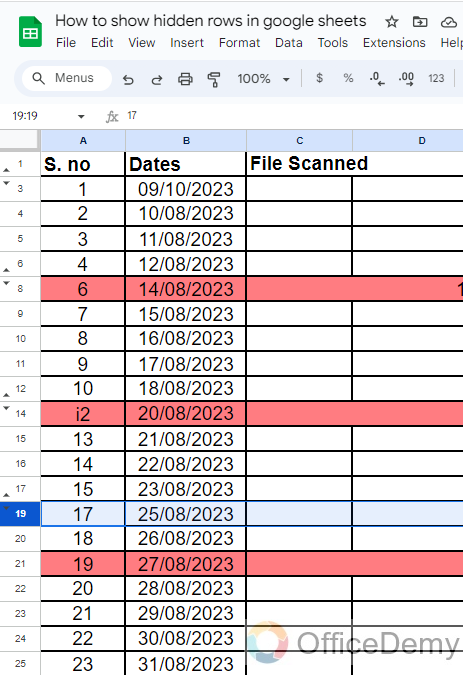
Show Hidden Rows in Google Sheets – Using the Unhide Rows option
This method is suitable when there is huge data with large numbers of hidden rows in Google Sheets, and you want to show them all simultaneously then follow the following method to show hidden rows in Google Sheets.
Step 1
As you can see in the example below, we have a huge data set with large numbers of hidden rows, and manually unhiding them can take a long time and can also cause errors. So try the following way of unhiding rows in such type of situation.
Step 2
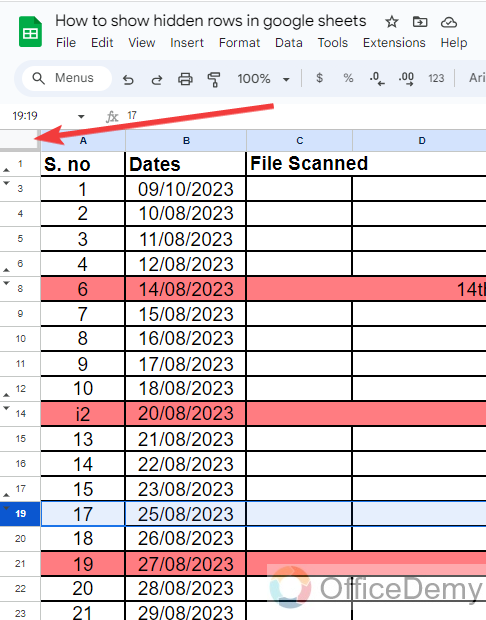
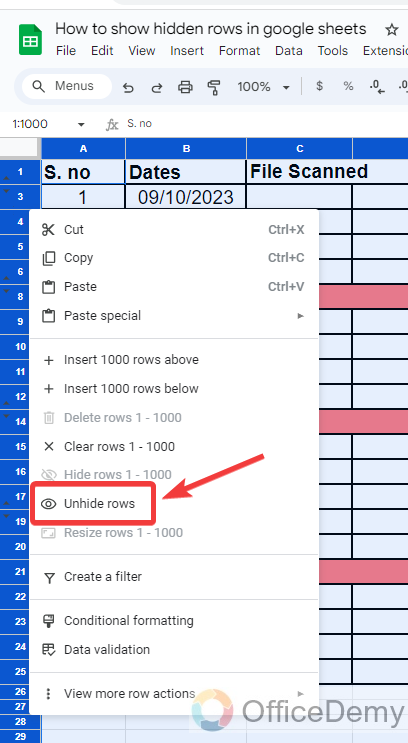
The first thing you will need to do at all, just select all the rows in your entire spreadsheet. To select all these rows, click on this small box located just below the cell range box as highlighted in the following picture or you can also simply press a shortcut key of Ctrl + A to select all.
Step 3
Once you have selected all the rows of your entire sheet, then press the right click of the mouse on any row of your Google Sheets, you will see an “Unhide rows” option from the drop-down menu as highlighted below.
Step 4
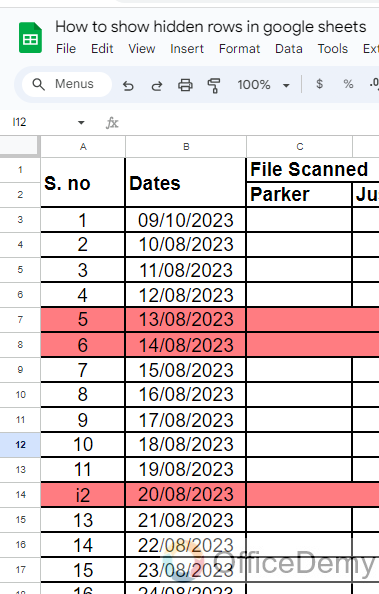
The result is in front of you, as you can see in the following screenshot as well, all rows have been unhidden now with just one click.
Show Hidden Rows in Google Sheets – by Removing the filter
The filter feature is the most useful in Google Sheets, but when you apply any filter in the rows it hides certain rows. To show them you need to remove the filter from your data. Below are the steps to remove the filter to show hidden rows in Google Sheets.
Step 1
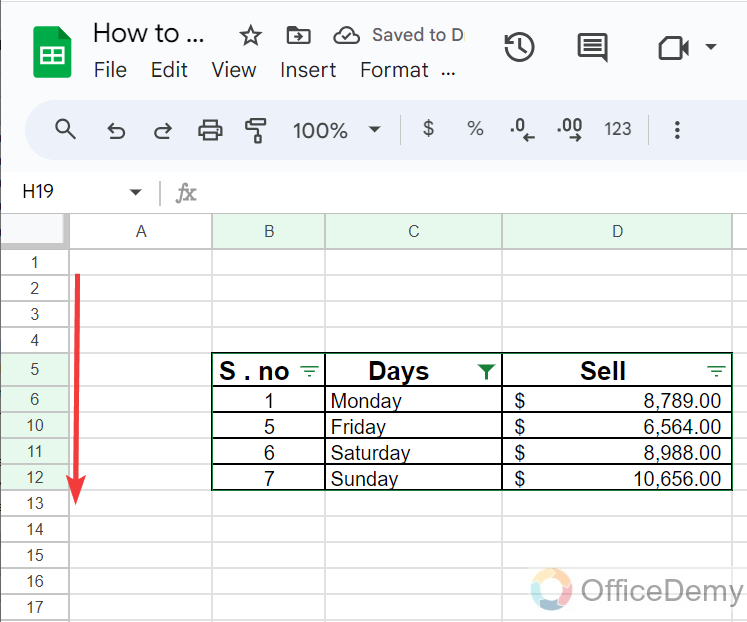
If you concentrate on the sequence of rows in the following example, some rows are hidden. This is due to the Filter option on Google Sheets as can be seen in the following picture. You can show these hidden rows by just removing the following filter.
Step 2
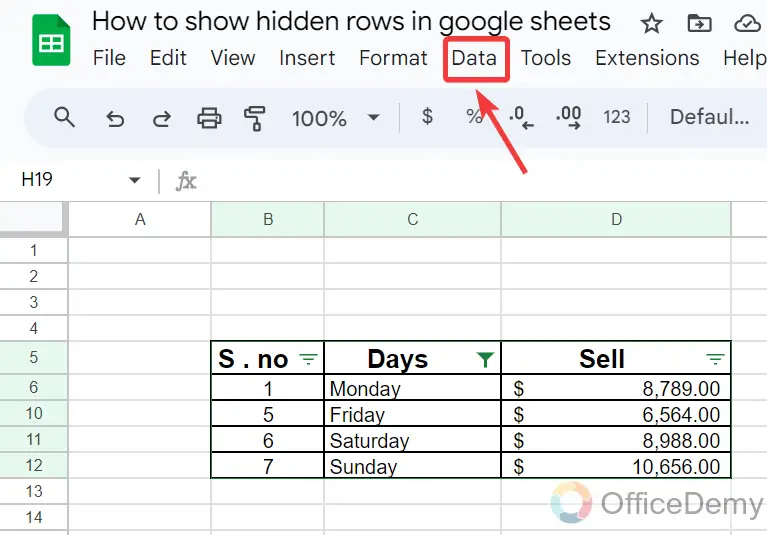
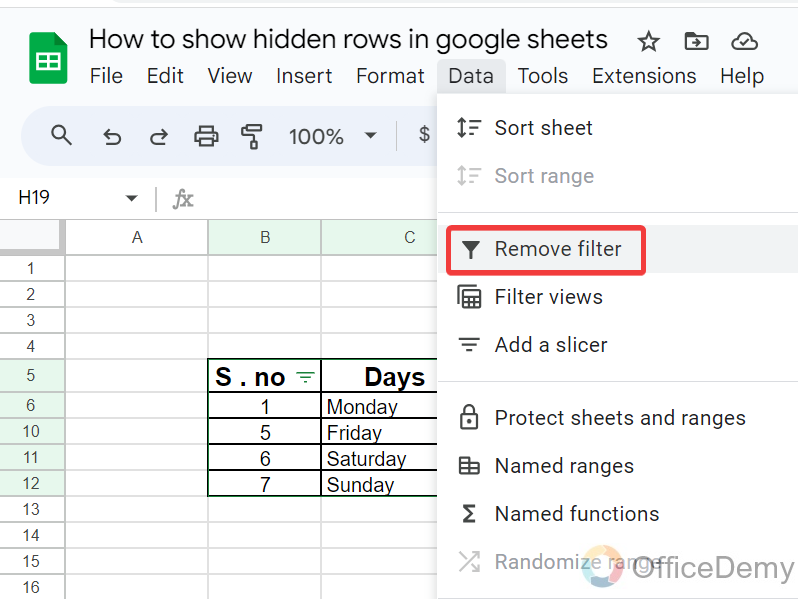
To remove this filter from your data, go into the “Data” tab from the menu bar of Google Sheets as directed in the following picture.
Step 3
When you click on this “Data” tab and open the drop-down menu, in this drop-down menu you will see your “Remove filter” option through which you can easily remove all filters applied to your data. Let’s click on it to remove these filters.
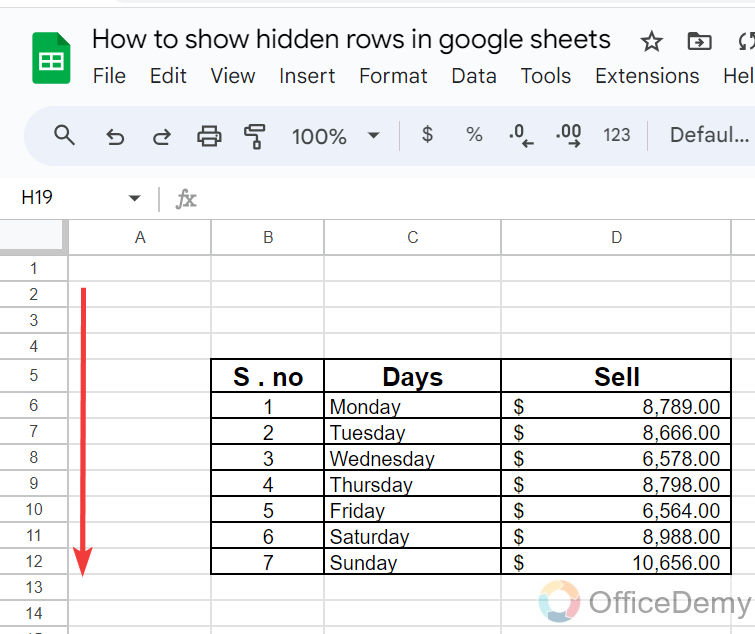
Step 4
Now see the result in the following picture, as you remove the filter from your data, all rows will be shown in front of you as required.
Frequently Asked Questions
Q: Is there any shortcut key to show hidden rows in Google Sheets?
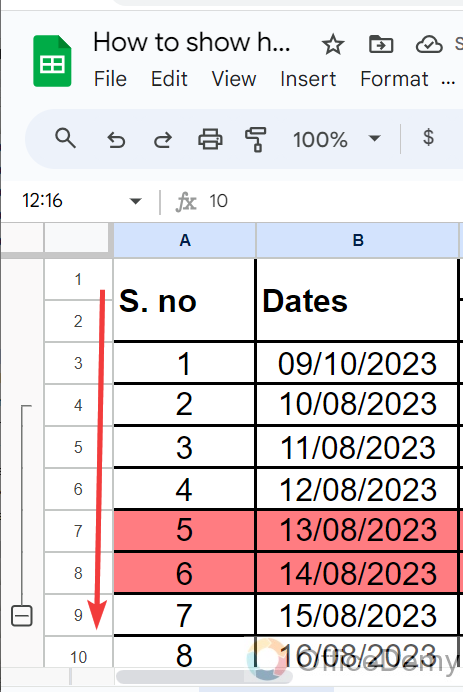
A: Google Sheets is also now more efficient than other spreadsheet software and offers many shortcut ways to perform tasks. Similarly, if there is any hidden row in your Google Sheets, you can unhide them by just pressing a shortcut key. Let me show you practically in the following steps.
Step 1
Let’s take an example of some tabular data in which some rows are hidden as can be seen in the following picture. Let me make all rows shown with the help of a shortcut key.
Step 2
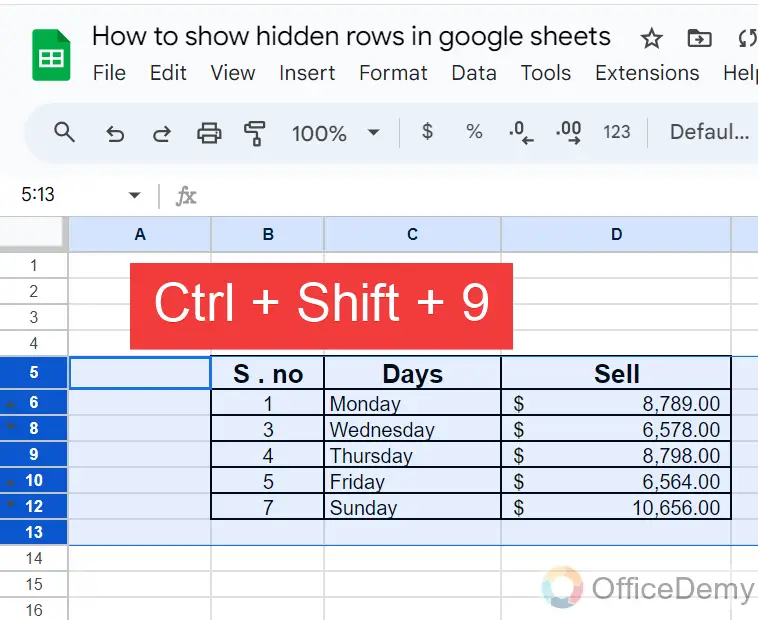
To show all hidden rows in Google Sheets by a shortcut key, first, you will select the rows that include hidden rows as I have selected in the following picture.
Step 3
After selecting the rows in Google Sheets, press “Ctrl + Shift + 9” simultaneously, all hidden rows will be shown immediately.
Step 4
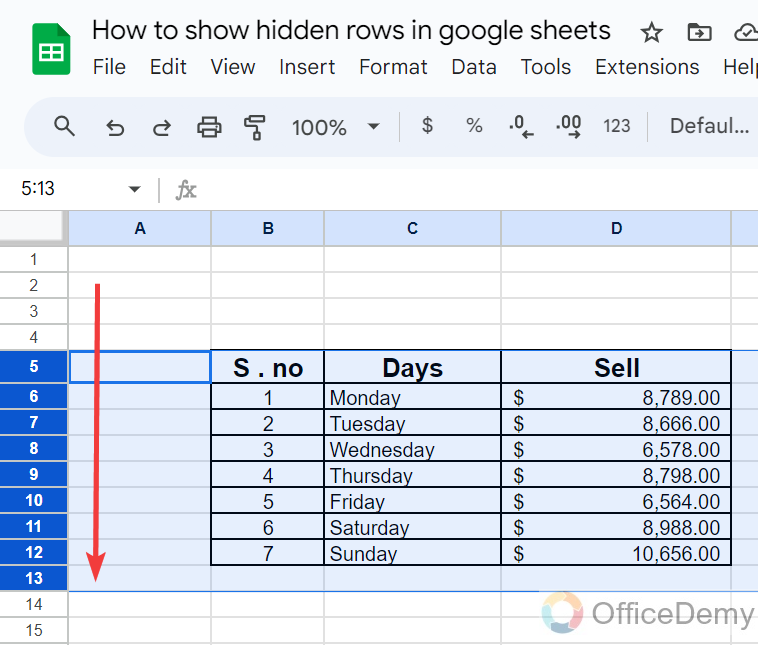
As you can see the result in the following screenshot, all rows that were hidden now have been shown with the help of a shortcut key.
Q: How to delete a row in Google Sheets?
A: To delete a row in Google Sheets is very simple, just press the right click of the mouse on any row and then click on the Delete option as described below.
Step 1
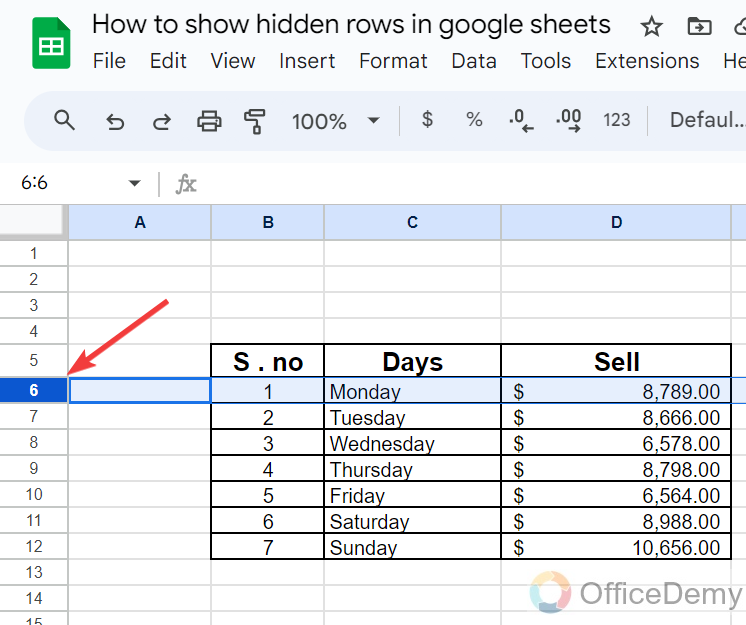
If you want to delete a row from Google Sheets, then first select the row that you want to delete, You can select the row by clicking twice on it as I have selected below.
Step 2
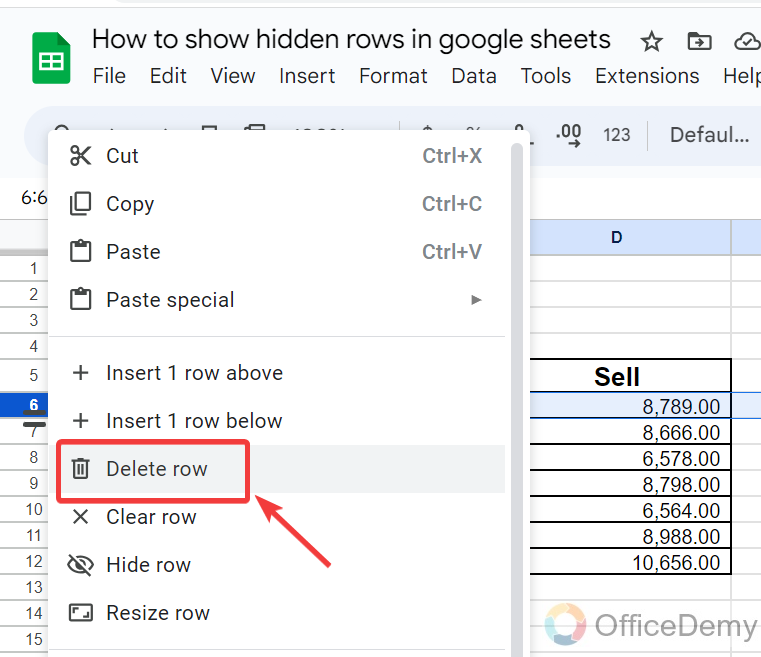
Once you have selected the row, then press the right click of the mouse on it, and you will see a “Delete row” button as highlighted in the following picture. You can delete any row by just clicking on it.
Q: How to insert a row in Google Sheets?
A: While working on a sheet, if you need an extra row between your data to add, then you can insert a row in Google Sheets with the help of the following steps.
Step 1
To insert a row as well, first, you will have to place your cursor where you want to Insert a row in your sheet. Let’s suppose you want to insert a row above the 7th row and then place your cursor on the 7th row.
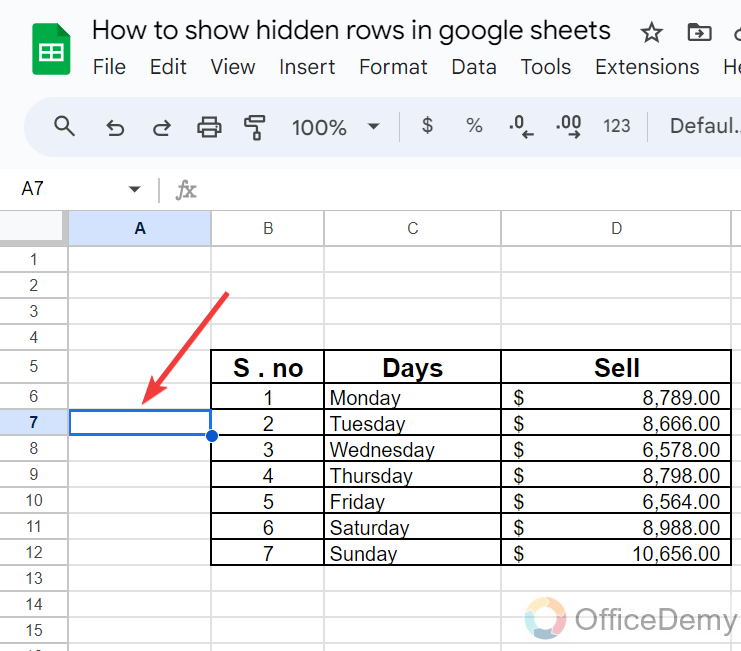
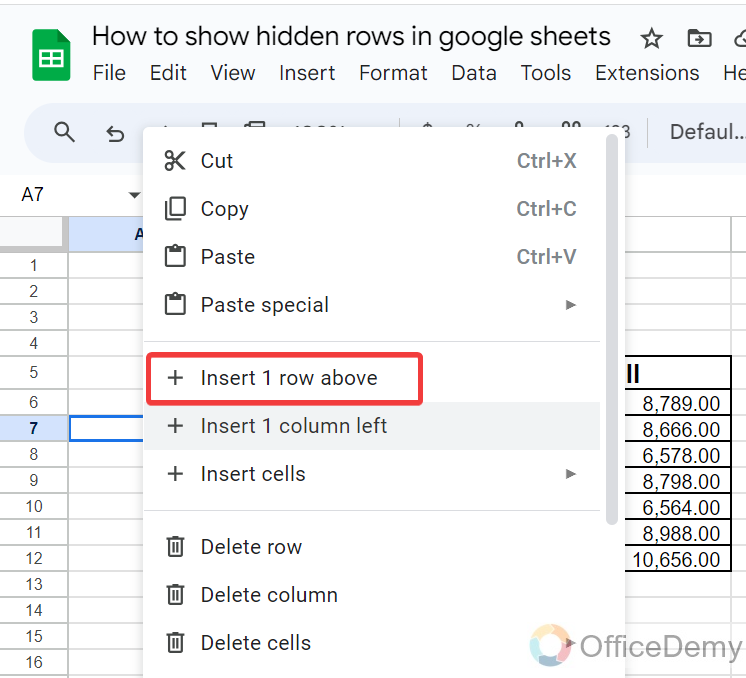
Step 2
After placing your cursor, press the right click of the mouse on it, In the drop-down menu you will see an option for inserting a row “Insert 1 row above“. When you click on it, Google Sheets will insert a row above the 7th row.
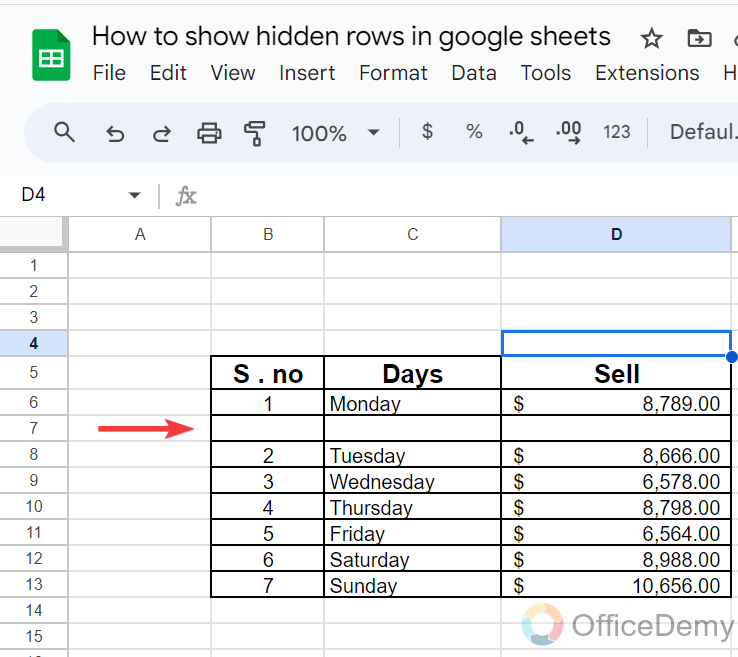
Step 3
As you can see from the result below, ow has been inserted. In this way, you can insert a row in Google Sheets anywhere.
Conclusion
Now, I don’t think that you are going to have any trouble with unhiding rows in Google Sheets, because in the above article, we have learned all scenarios when rows are missed in Google Sheets. Hope it will be helpful to you with profound thanks.


