
To Create an Interactive Form in Microsoft Word
- Open Word Options.
- Customize Ribbon > Check “Developer“.
- Click “OK“.
- Use the Developer tab to Insert text fields, date pickers, checkboxes, and dropdown lists.
- Right-click elements > Access properties.
- Set placeholders, default values, and restrictions.
- Restrict Editing on Developer tab.
- Allow only form filling.
- Start enforcement and set a password.
- Save as a Word document.
- Optionally, save it as a PDF for electronic completion.
Today we will learn how to create a form in Microsoft Word. Creating a form in Microsoft Word is so easy, but you will be delighted to hear that Microsoft Word can do more professionally for you while creating a form in Microsoft Word. Yes! You can not only create a form in Microsoft Word but also can make it fillable to other people.
A form in which you create some placeholders for different types of required information, such as text, dates, yes-no questions, check marks, drop-down menus, and so on. This makes it easier for everyone to fill out the form. These all things are going to be described in the following article on how to create a form in Microsoft Word.
Importance of Creating a Form in Microsoft Word
Let’s suppose you are playing an administrative role for an organization or operating a small company, you may need a permissible format like a form for any query. Let’s suppose you are owing a school administration and need a form for your students to electronically be filled in. Don’t waste your time and let’s move towards the next section to learn step by step procedure of how to create a form in Microsoft Word.
How to Create an Interactive Form in Microsoft Word
The procedure of creating a form depends on the content of your form. In these steps, we will give you an overview of all options where and how they can be used.
Step 1
Before starting, we will add a tab in the menu bar of Microsoft Word namely “Developer“. In this tab, we will find some professional tools to make a fillable form in Microsoft Word in a professional way. To add this tab, go into “options” from the file menu of Microsoft Word.
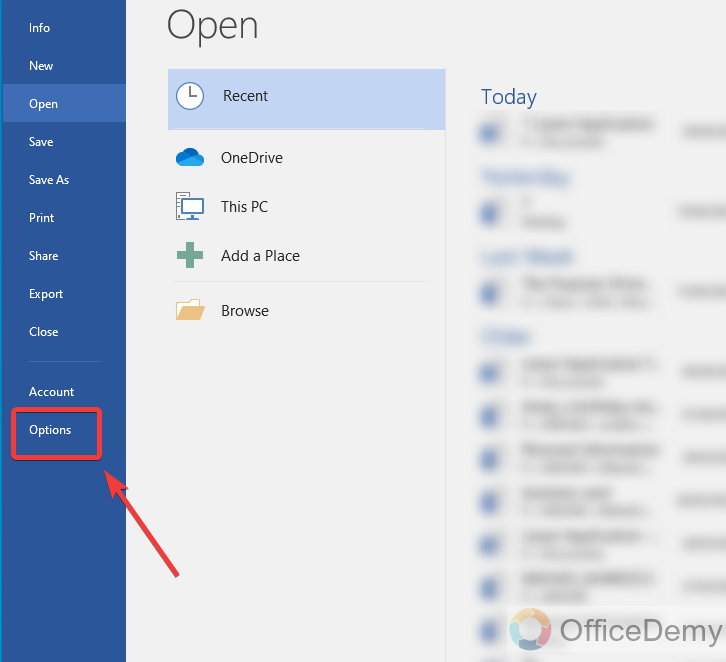
Step 2
When you open Microsoft Word’s options, you will see some different options apart vertically at the left side of the window in which click on “Customize Ribbon“.
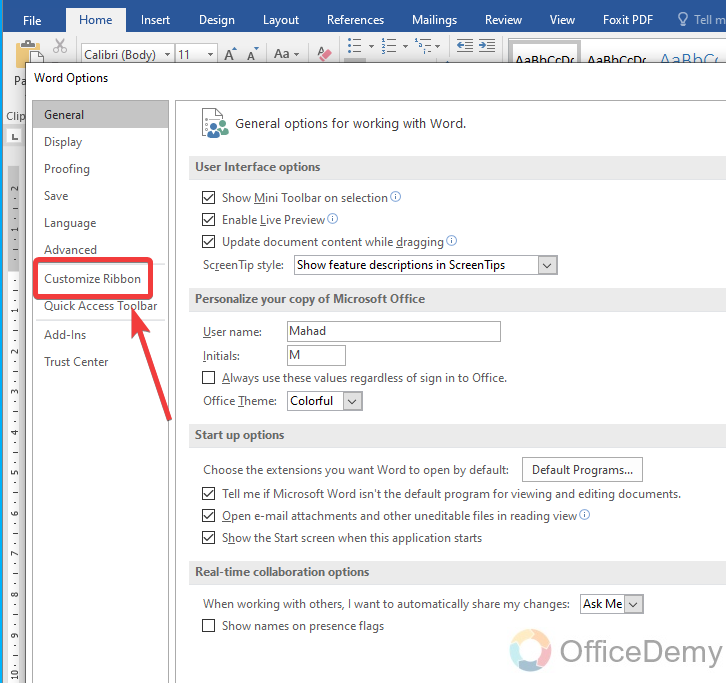
Step 3
In the “customize ribbon” at the right side of the window, you will see a section for main tabs. Find the tab “Developer” and check it to add it to the menu bar of Microsoft Word.

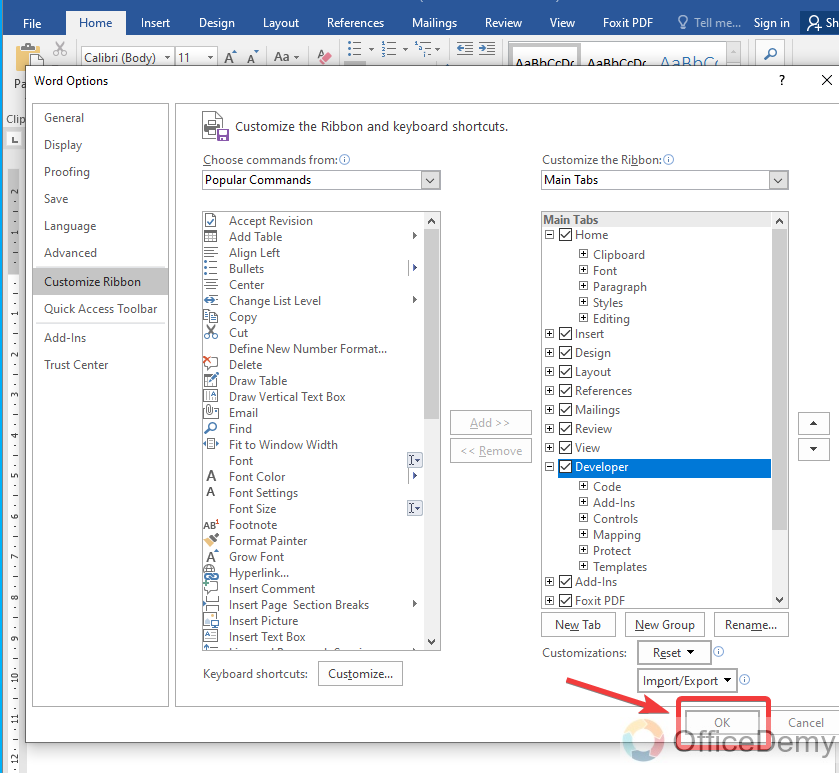
Step 4
Once you have done with the changes, then click on the “OK” button to save these changes.
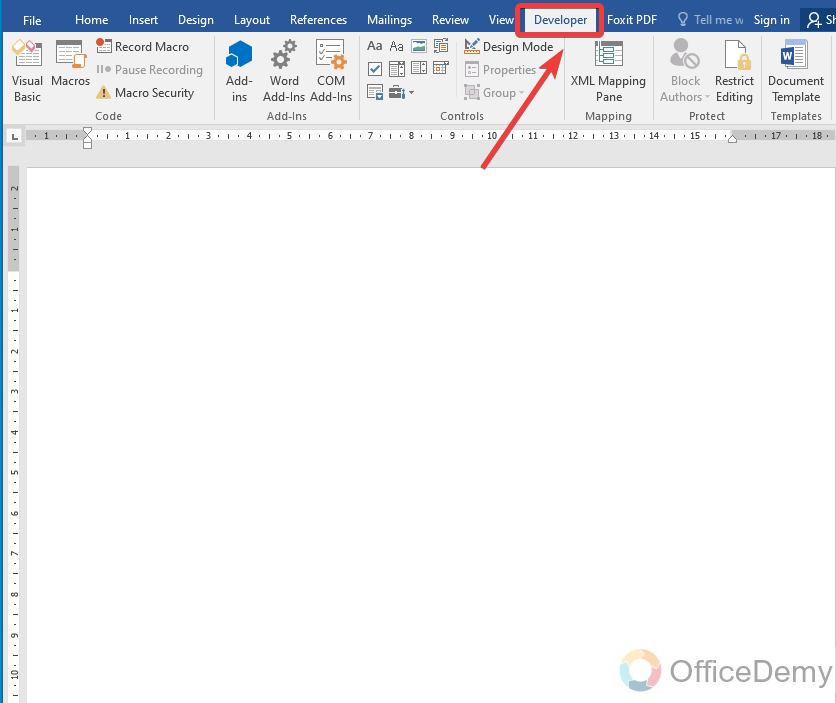
Step 5
Then, you will see in the menu bar, you will find a new menu tab in your menu bar of Microsoft Word.
Step 6
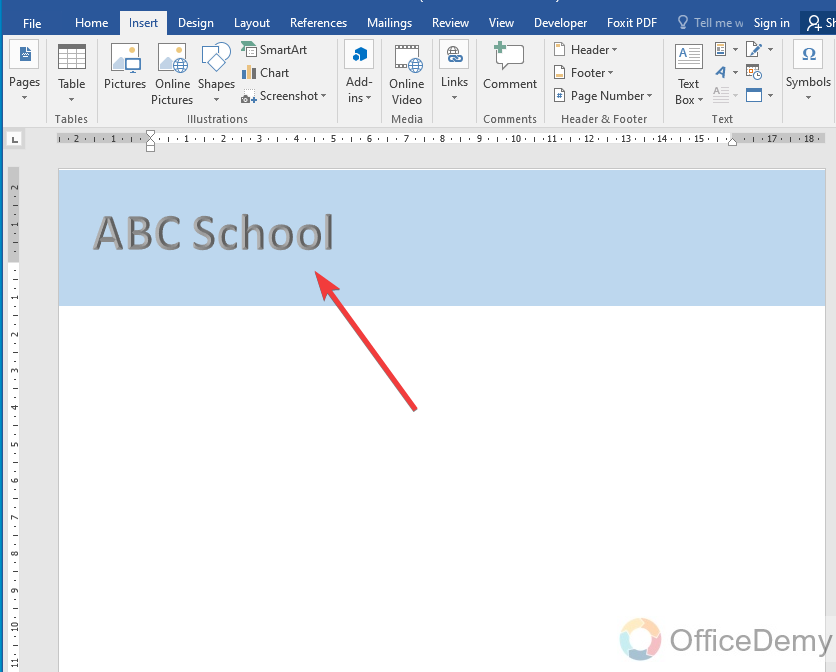
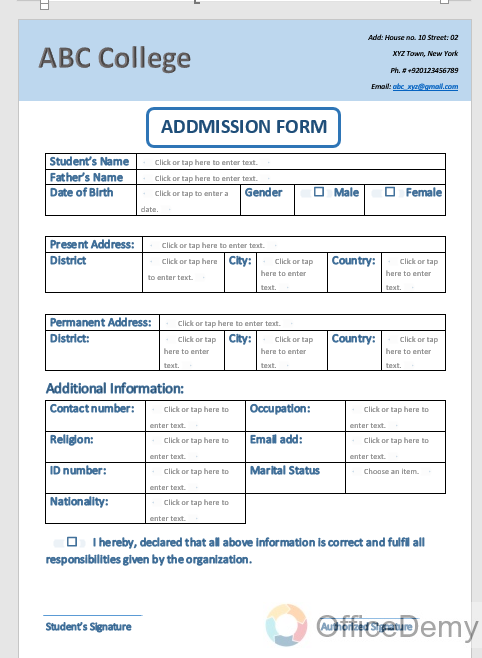
Now let’s start making a form in Microsoft Word. As here we are making an admission form, first, we will add a title name of your organization. You can use Word art or simple text to add a title and then can format it. I have also inserted a top border to highlight the title with the help of shape.
Step 7
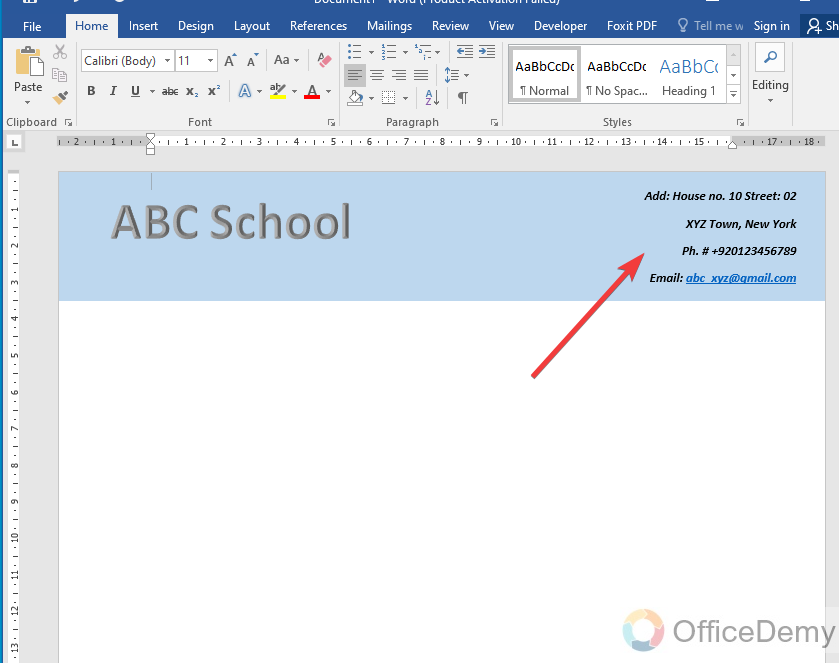
On the right side, I am writing about contact details about the organization. This is all up to you, you can add these details at the bottom of the form as well.
Step 8
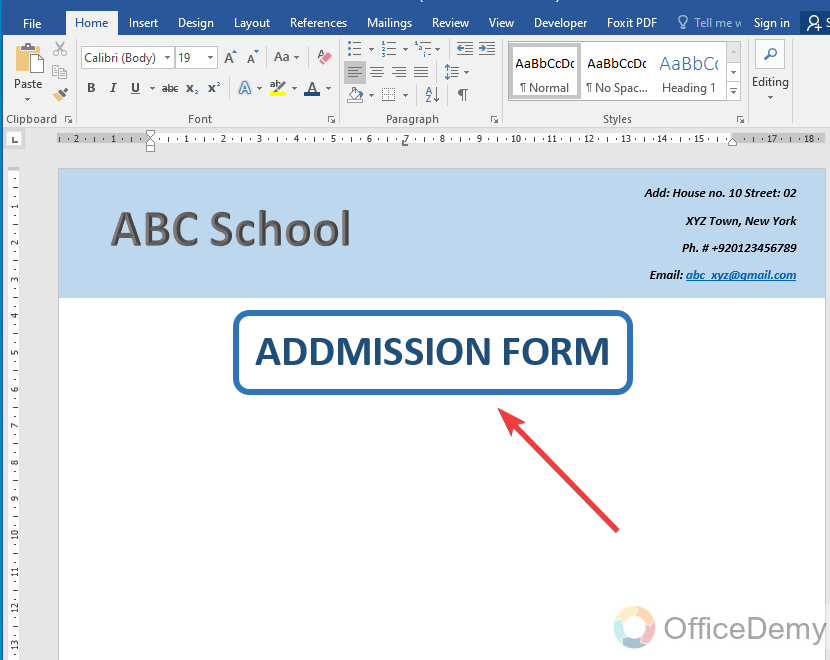
As we are making an admission form then your form must be entitled with its type, as I have entered in the following picture.
Step 9
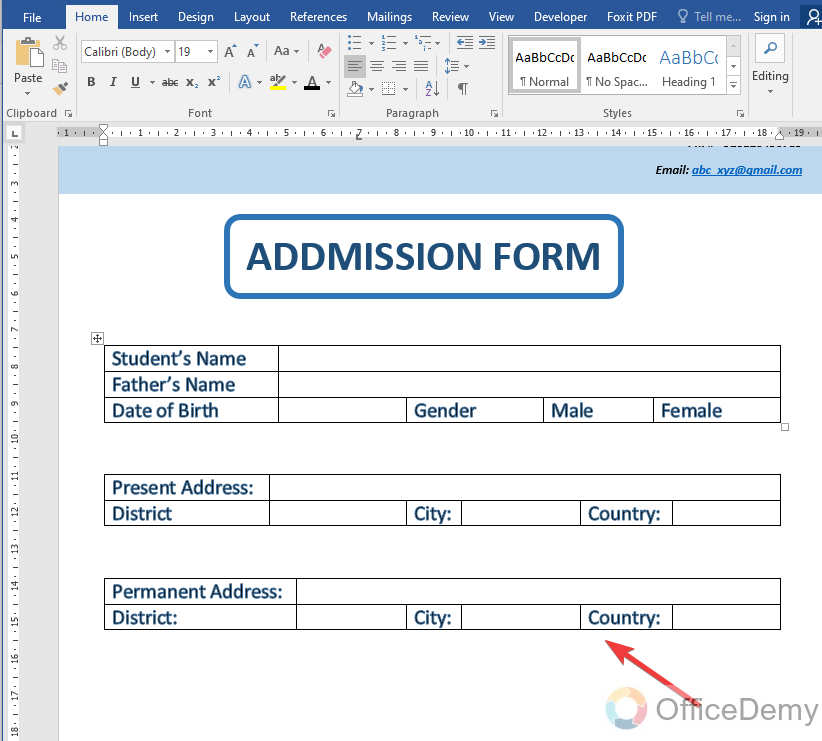
In the first requirements, I have added basic information tabs to require the student’s basic information i: g Name, father’s name, date of birth and gender, etc. You can easily insert a table from the insert tab of the menu bar and edit the information that is required.

Step 10
In the second part of the form, students will provide their present and permanent addresses which are as follows.
Step 11
After the address, I am asking for other remaining additional information which you can make as follows with the help of a table.
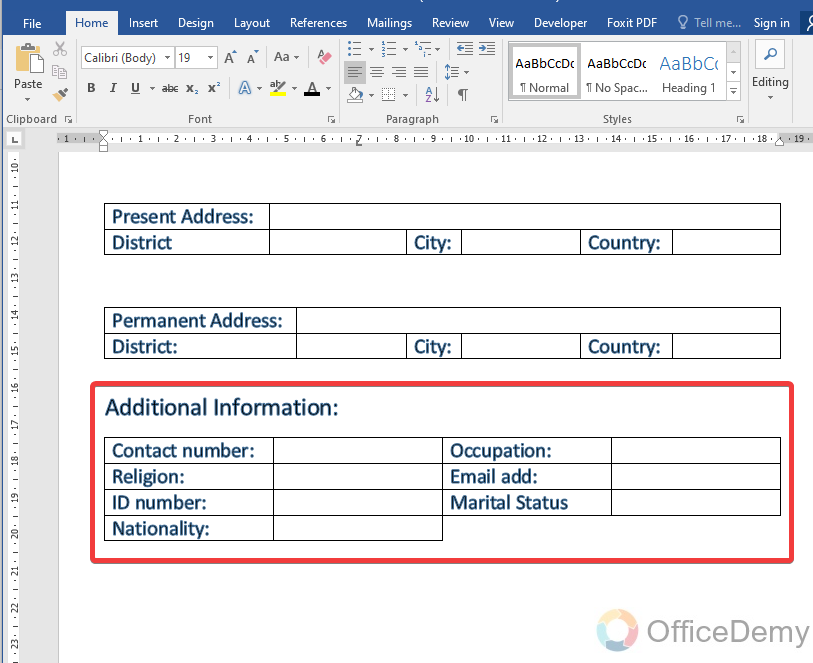
Step 12
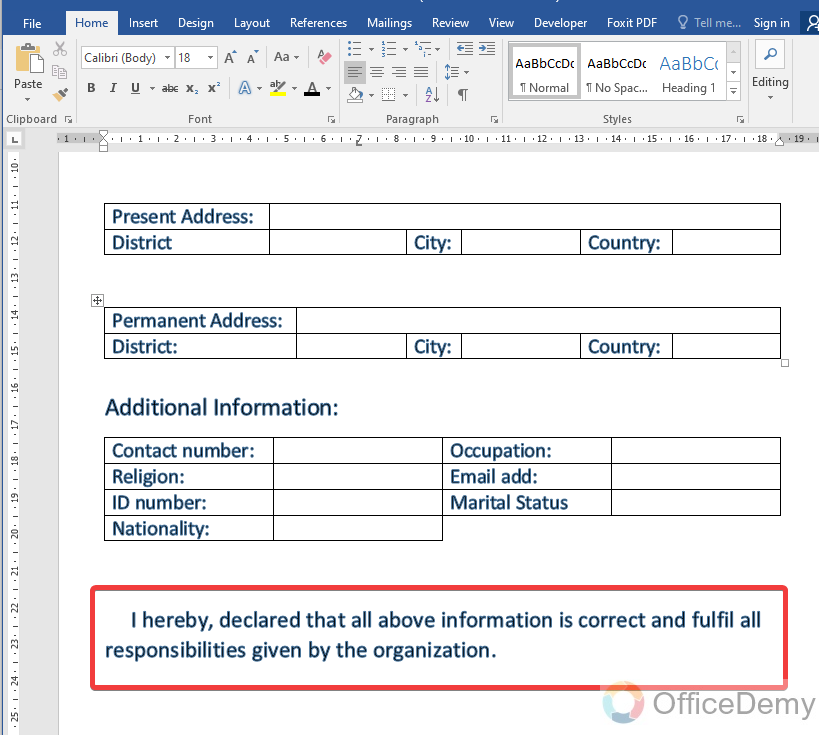
As you must know, many forms include a section for its terms and conditions or verification of the provided information. Similarly, after all the information, I have added a line here by simply writing text that students would confirm.
Step 13
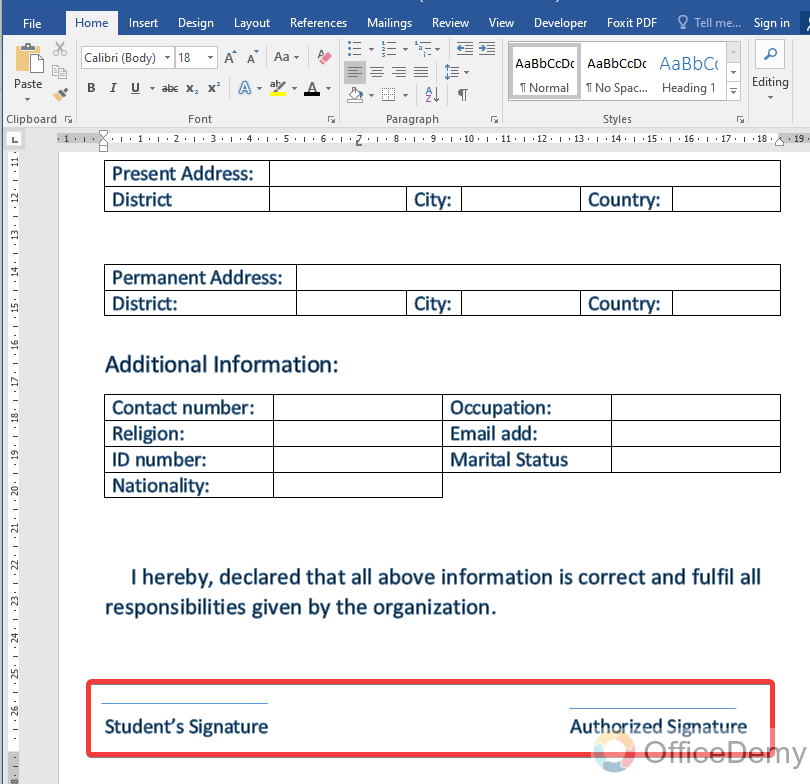
In the last, I am adding a portion for signatures of the candidature and the client.
Our form has been completed with all essential requirements; you can also add more things to this form according to your need. The method will remain the same. But this is a simple form that the user can download and can fill up manually. But you can make a fillable form as well in Microsoft Word.
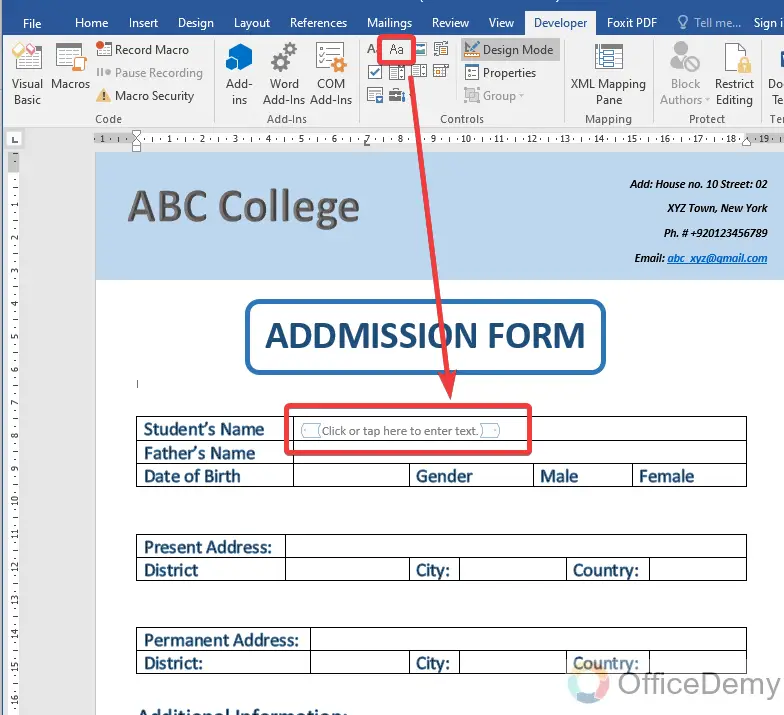
Step 14
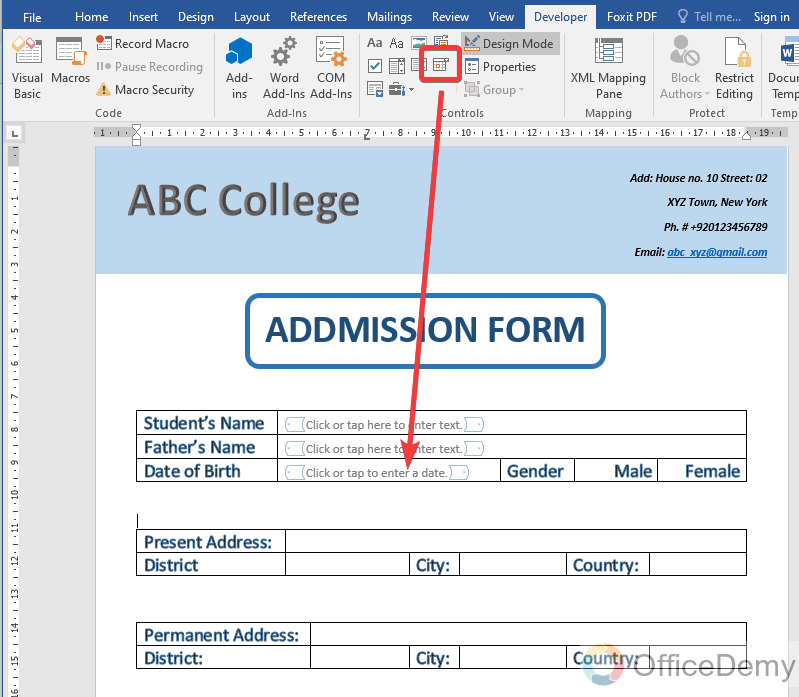
First place your cursor at the first box of the text then open the developer tab from the menu bar of Microsoft Word. You will find the “Plain text content control” icon from the “Controls” section as shown in the following picture.
In the same way, place this plain text control option throughout the form where you need simple plain text.
Step 15
In the date of birth dialogue box, we need to insert a date, so place the cursor in this box and then click on “Date picker content” from the developer options as shown below. This tool will allow you to automatically pick the date you want to insert in the form.
Step 16
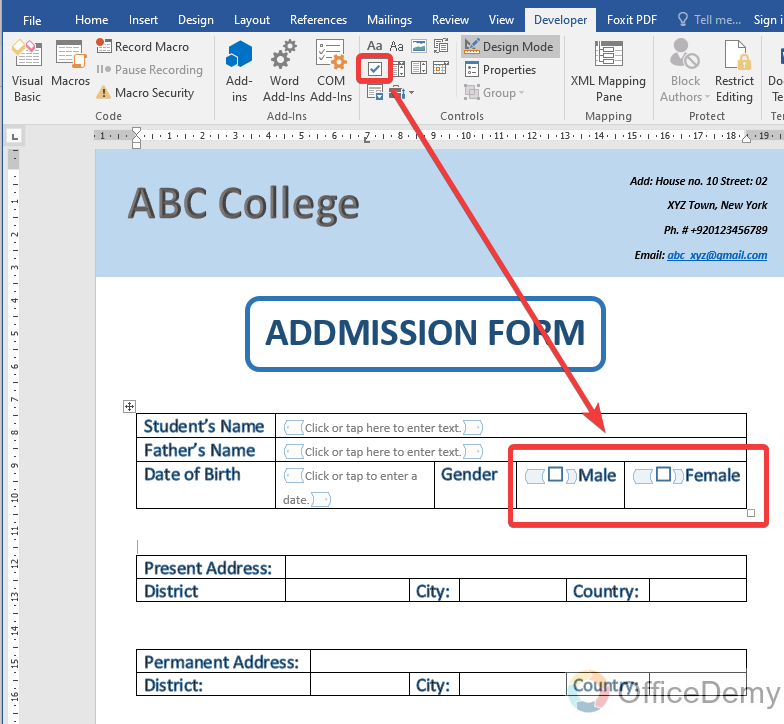
Similarly, if we talk about gender then there are usually two options, in which students had to tick any one of them, so here I am inserting a check box content from the developer options.
Step 17
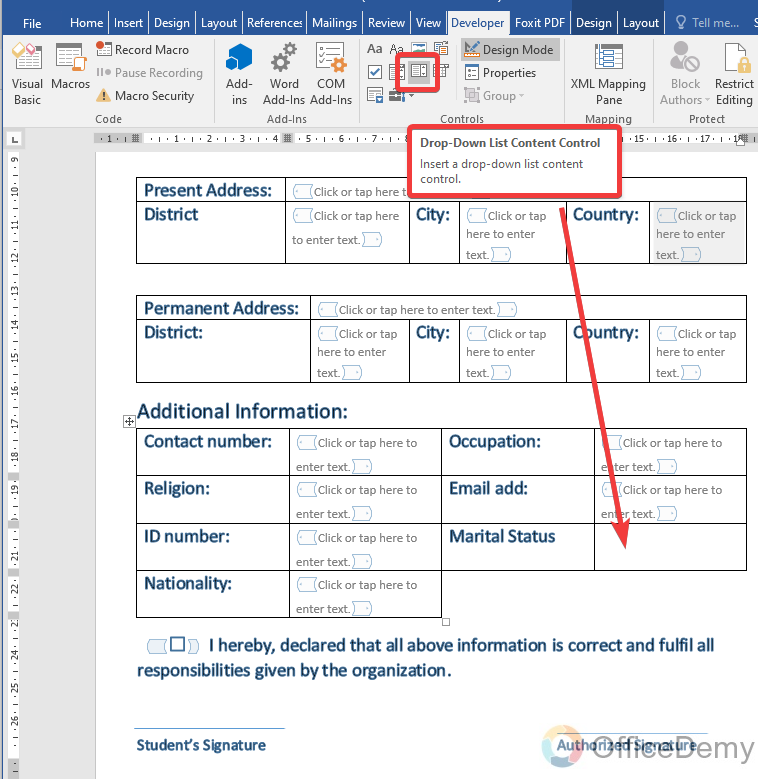
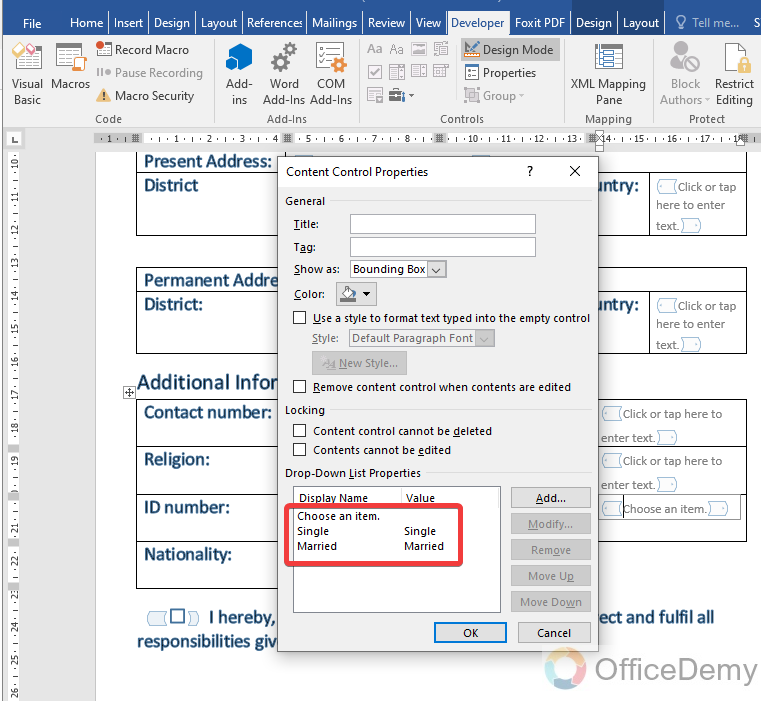
If you have ever filled out an online form, you must have experienced a drop-listed menu content to select the given category or information. I am using this “drop-down list content” in the Marital status. You can easily find this tool in the control section of the developer tab.
Step 18
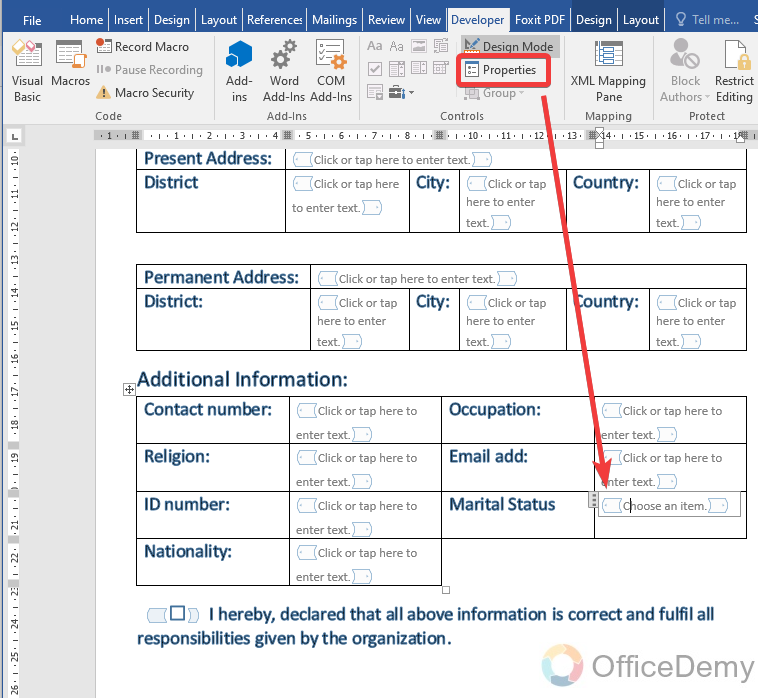
Once you insert this tool in the dialogue box, then open its properties to add content to the drop-down list.
Step 19
A new pop-up window will open for the properties where you will find an “Add” button as shown in the following picture.
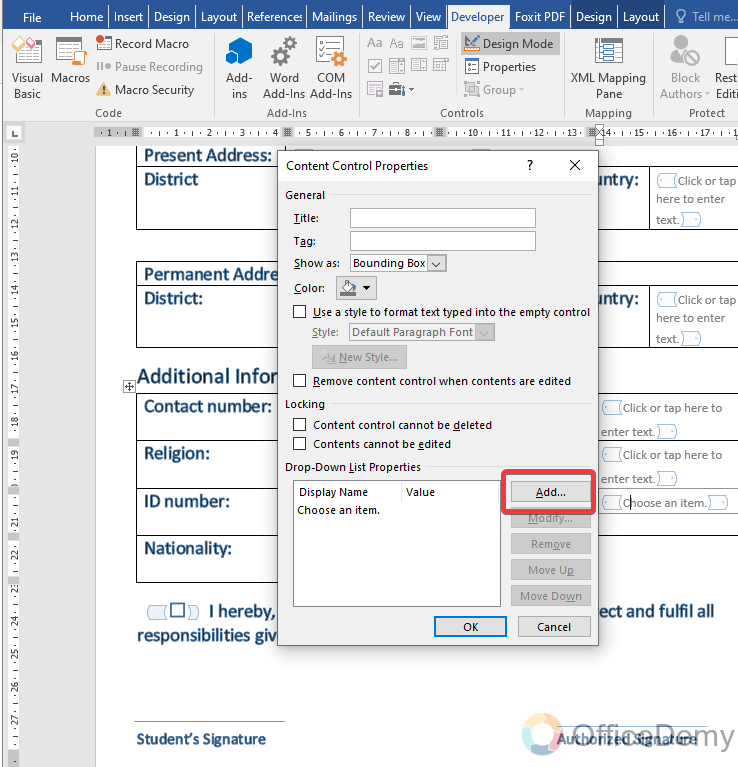
Step 20
Click on this button and add the content one by one which you want to show in the drop-down list. As I have added here single and married to select marital status.
Step 21
This is a short demo film because of our previous work.
In this way, you can create any professional or non-professional form of any category.
Frequently Asked Questions
Q: How to protect a form in Microsoft Word?
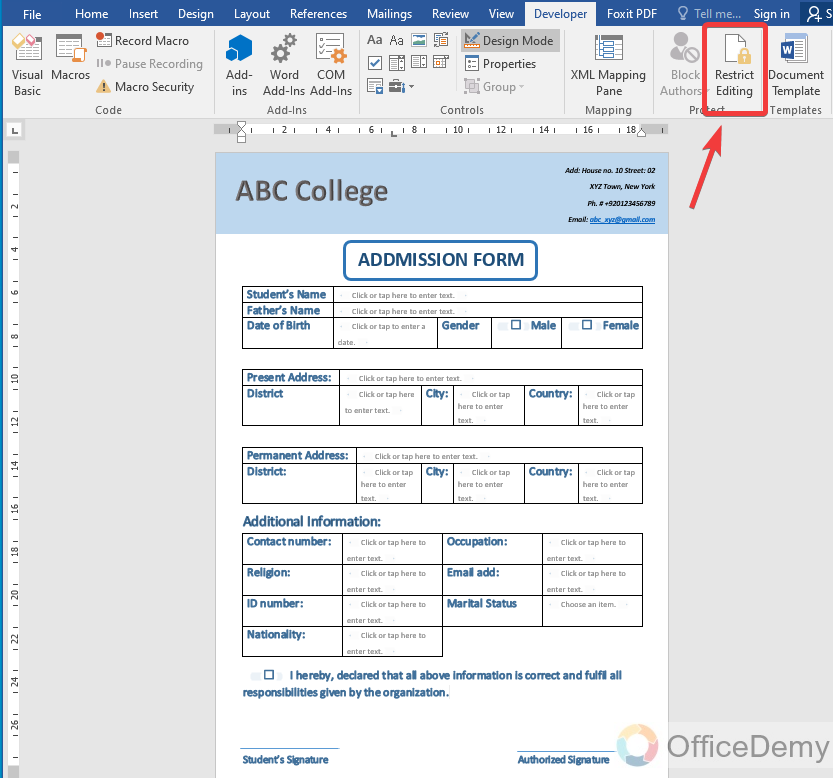
A: Once you have filled up your form in Microsoft Word and want to protect it from unwanted changes from others. Microsoft Word’s developer tab also provides the feature of restricting your document to protect it. Just look at a couple of steps as follows; you will learn how to protect form in Microsoft Word.
Step 1
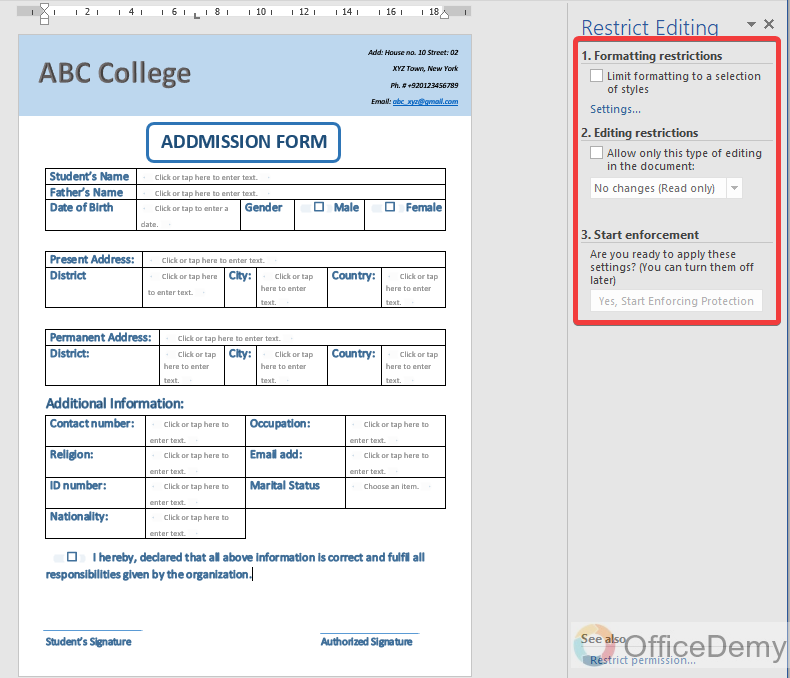
First, go into the “Developer” tab of the menu bar, where you will find the “Restrict editing” option as highlighted in the following picture.
Step 2
As you click on this option, you will see a side pane menu on the right side of the window, where you will see several options to restrict your editing. With the help of these options, you can protect your document.
Q: How to export a form in pdf in Microsoft Word?
A: Most of the public demands for documentation prefer pdf format, so if you want to export your form in pdf as well in Microsoft Word, then nothing to worry Microsoft Word has made it so easy in just a few steps which are below.
Step 1
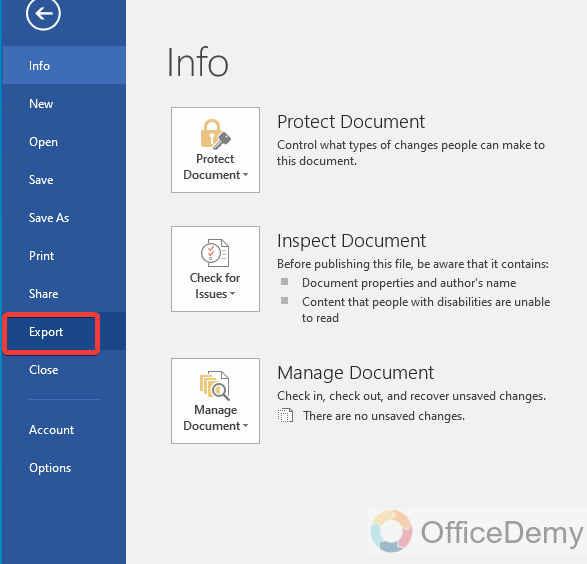
Go into the “File” menu of the menu bar, where you will find an “Export” button at the side menu. Click on it.
Step 2
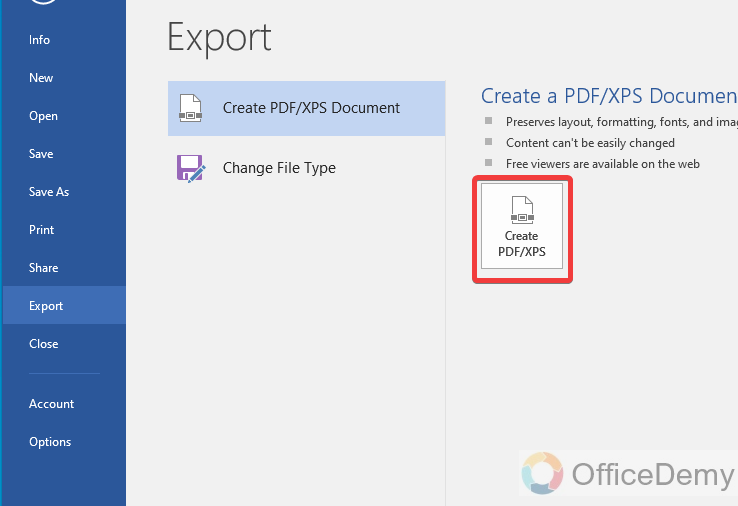
Here, your destination, a create PDF button through which you can export your Word file into pdf form.
Conclusion
So that’s all about how to create a form in Microsoft Word. If we keep an eye on the entire above article on how to create a form in Microsoft Word, we will observe that this tutorial contains all the essential things which can be useful for creating a form in Microsoft Word. If you have learned all the above steps, then you can create any type of form in any category professional or non-professional. The developer tools make your form more interesting in Microsoft Word, in this tutorial we have also covered all of them deeply. Hope you will have no more trouble after reading the above article on how to create a form in Microsoft Word.


