
To Voice Over on Google Slides
- Install the “Screencastify” Chrome extension.
- Open it, select your screen, enable the microphone, and disable the camera if desired.
- Use additional tools, like drawing.
- Click “Record” to start.
- Stop the recording by clicking the stop icon.
- Edit or download the recording in Screencastify’s dashboard.
OR
- Download the recording from Screencastify.
- Convert the video to audio online.
- Split the audio into chunks for each slide.
- Upload these audio chunks to Google Drive.
- In Google Slides, go to “Insert” > “Audio” for each slide and select the corresponding audio chunk.
- Format audio playback to “Automatically” play with each slide.
Hi. In this article, we will learn how to do a voice over on Google Slides. In Google Slides, we don’t have any direct or built-in method to do a voice over. Although Google Slides allow us to import audio files, and then embed them with our sheets and control them internally using audio playback and many similar features. But, how to do a voice over on Google Slides is a different thing. We sometimes, need to be on our slides and according to the slides changing, and the screen time for each slide we narrate the presentation by our voice over. And, for this purpose, we need to record or do a voice over on Google Slides.
So today, I have a great third-party application that helps us to do a voice over on Google Slides, and also allows us to download that audio recorded along with video locally, and also gives us the power to edit the audio file along with the presentation screen video in the built-in browser. This application is a lightweight chrome browser extension that can be added to Chrome from the chrome web store or the Screencastify official Website. We have already used this tool as a video recorder in this series of articles, if you want to learn how to record a presentation in Google Slides, you can refer to this article.
When to use Voice over on Google Slides?
As we know, we need to watch out for our presentation on screen when preparing for it. Without knowing the length and screen time of each slide, we cannot prepare to present this presentation using our voice narration. So, importing audio files after recording is not the way to go here. What we need is a real-time voice over tool to record our voice in real-time while going through the presentation, I know this can be done using a simple offline recorder while keeping the presentation on the screen. But it can be damaging, it can break because you have to worry about two screens while using an integrated add-on can help you focus on the presentation and glance at the below toolbar that is making sure that your voice is being recorded while you are practicing your voice narration with the presentation.
But there is no problem if you use any offline voice recorder to do a voice over on Google Slides. I simply prefer the Screencastify chrome extension because it’s a real-time recorder, it can record audio and video, and it can record your desktop screen, browser tab, and even your webcam. It gives a good sound and video quality, allows you to download recordings, allows you to edit recordings internally using its built-in editor, and the most interesting feature is that it does not leave a watermark when recording a video. So, knowing all the key points we can understand how useful it is to do a voice over on Google Slides, and therefore we need to learn to do a voice over.
How to do a Voice over on Google Slides
We can use any online or offline voice over tool to do a voice over on Google Slides. Today for this tutorial, I am using a Google Chrome extension “Screencastify”. It’s a video/audio recorder for free. I will not teach you how to download, install, and set up this app, it’s pretty easy, if you want to learn it. You can learn from this article. Here, I have explained each step to download, install, signup, and set up the screencastify plugin to your chrome or chrome-based browser.
Let’s move on to the method to do a voice over on Google Slides.
How to record Voice over on Google Slides – Using Screencastify Extension
In this first method, we will learn how to do a voice over on Google Slides using the screencastify extension. The tool is very easy to use and allows you to enable or disable the microphone and camera at any time. It also gives you a drawing and writing tool while recording your presentation with the voice to highlight key points, cross out some irrelevant things, and do any kind of non-verbal communication with your audience. Let’s move on to see the steps required to do a voice over on Google Slides using the screencastify extension.
Note: a drawback of this tool is that you cannot choose a null screen to record only voice over, you have to select one of the three available screen options to start a voice recording.
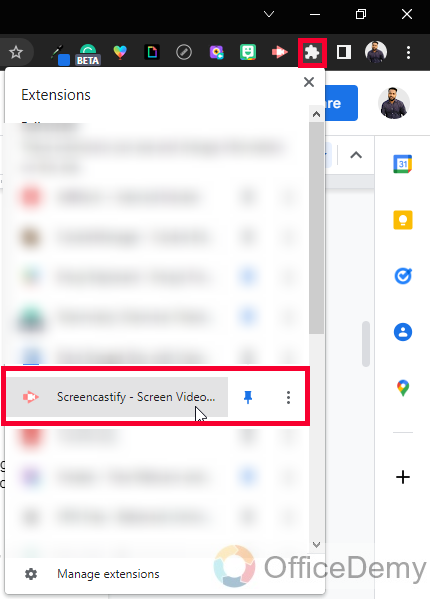
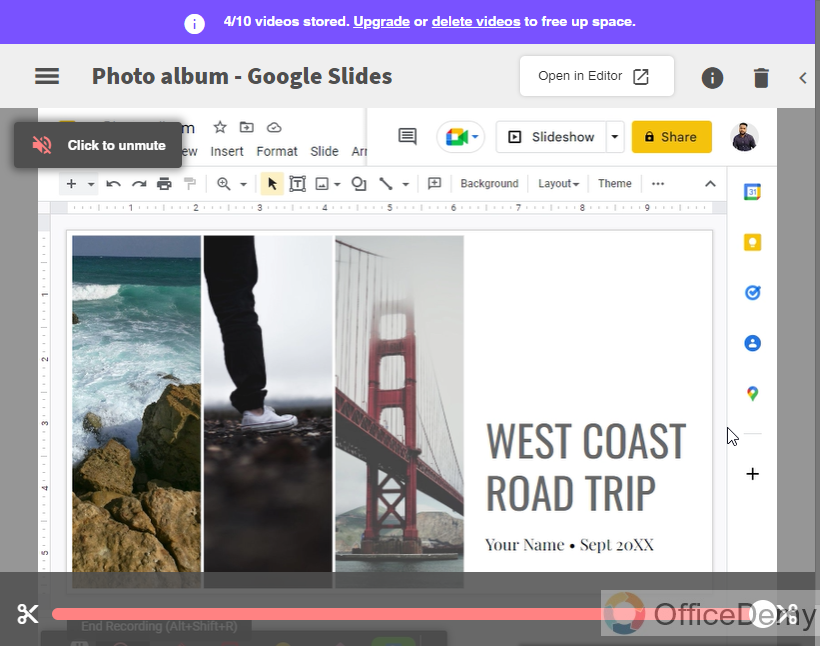
Step 1
After you have added screencastify to chrome, you can access it from the plugins section
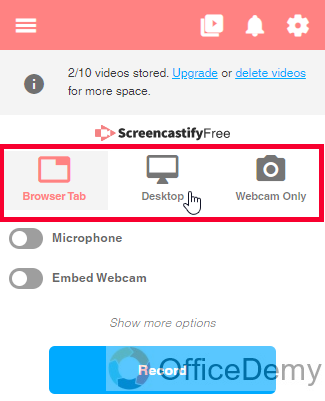
Step 2
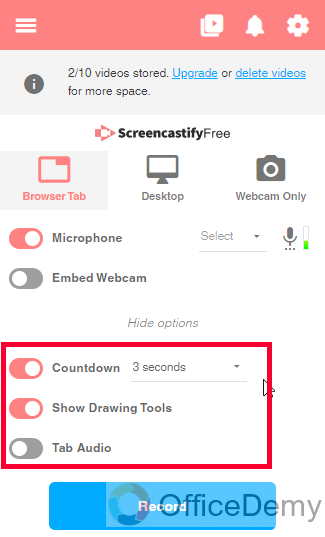
Open it, and choose the type of screen you want to record along with the voice
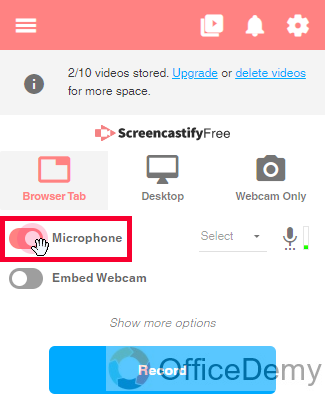
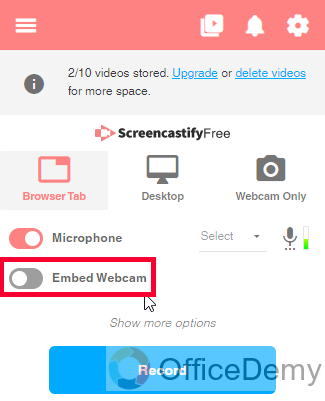
Step 3
Below, enable the microphone and make sure your camera is toggled off (if you dont want to record yourself) or toggled on (if you want to record yourself)
Step 4
Additional tools
Step 5
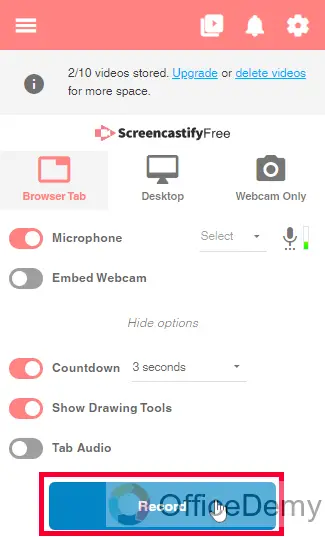
Click on the Record button and after the counter, your recording will be started.
Step 6
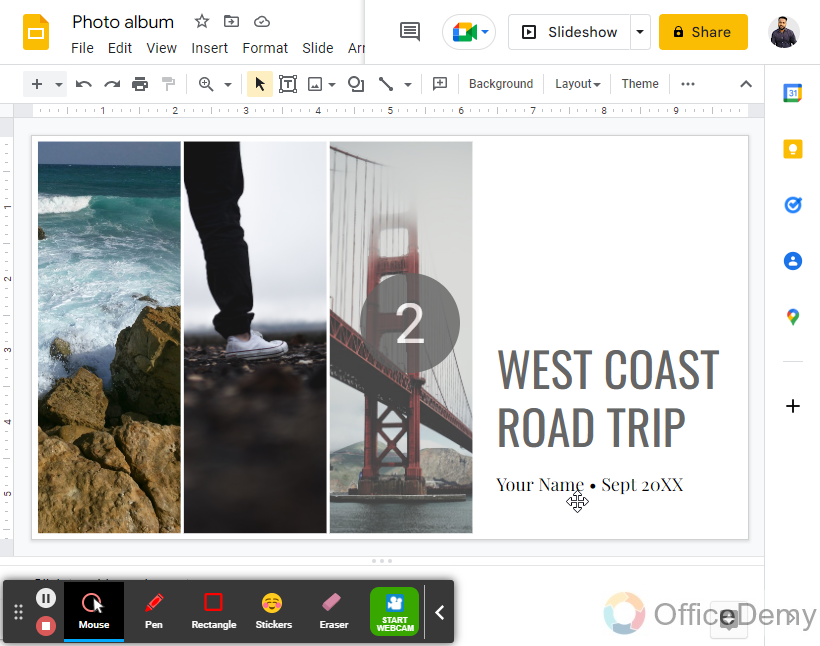
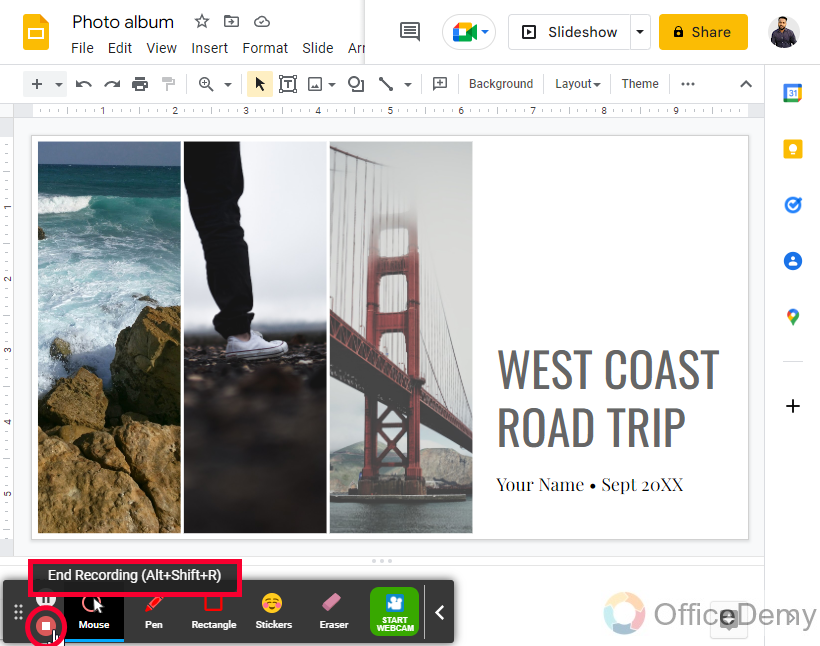
After you’re done with the recording you can click on the stop recording icon on the left corner of the recording toolbar
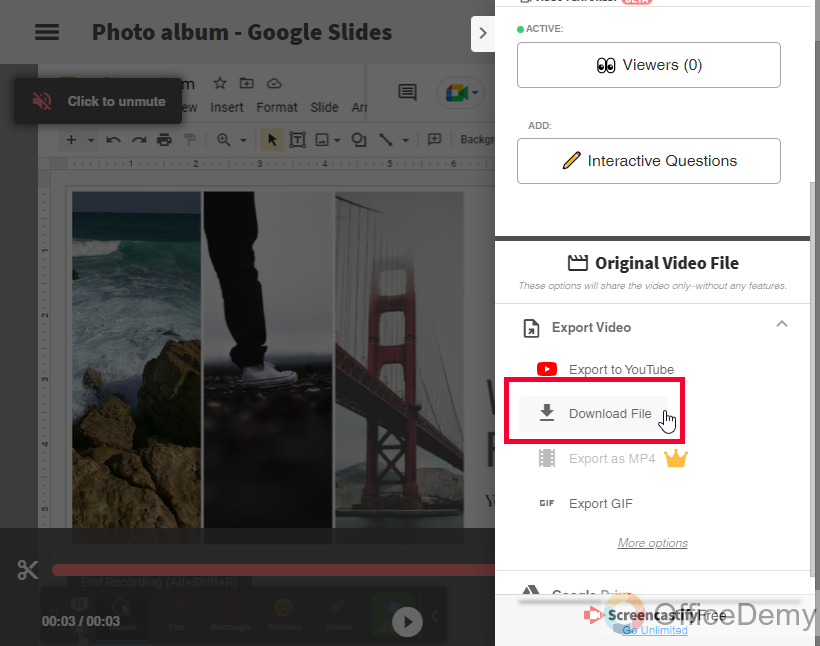
Step 7
The recorded file will go into the dashboard of your screencastify account, you can edit this recording or you can download it along with the video.
This is how to do a voice over on Google Slides using the Screencastify extension. But here is a limitation, the voice over is added to your video but it’s in the video format and the video is an external part. This means if you now want to share this presentation you need to share the video file instead of your Google Slides file, but what if you need to submit this presentation only in the presentation format along with the voice over integrated with the presentation? Well, I have got a way to do that.
In the next section, we will do that.
How to Integrate Recorded Voice over on Google Slides
In this section, we will learn how to do a voice over on Google Slides and then integrate it into the presentation internally, so that when we share the presentation the voice over is built-in inside it. Doing this will require continuing from the previous method. Since we have already done a voice over but it is in our video recording file.
The recording is synced with our presentation because we have done it while the presentation was on screen. Now what we need is to break our audio file into different parts and keep each file for each slide. This can be done using the built-in editor of screencastify or you can do this with any video editing tool you prefer. Even before splitting the video, we need to convert this recording into audio format, then cut, and then insert audio into Google Slides, each chunk of the video will cover each slide so when a slide comes the audio starts playing, and when the slide is changed the audio is gone with it, and now the next audio is playing.
Don’t worry the above procedure is very easy, I will show you everything in the below steps.
Step 1
Download the recording from the screencastify dashboard.
Step 2
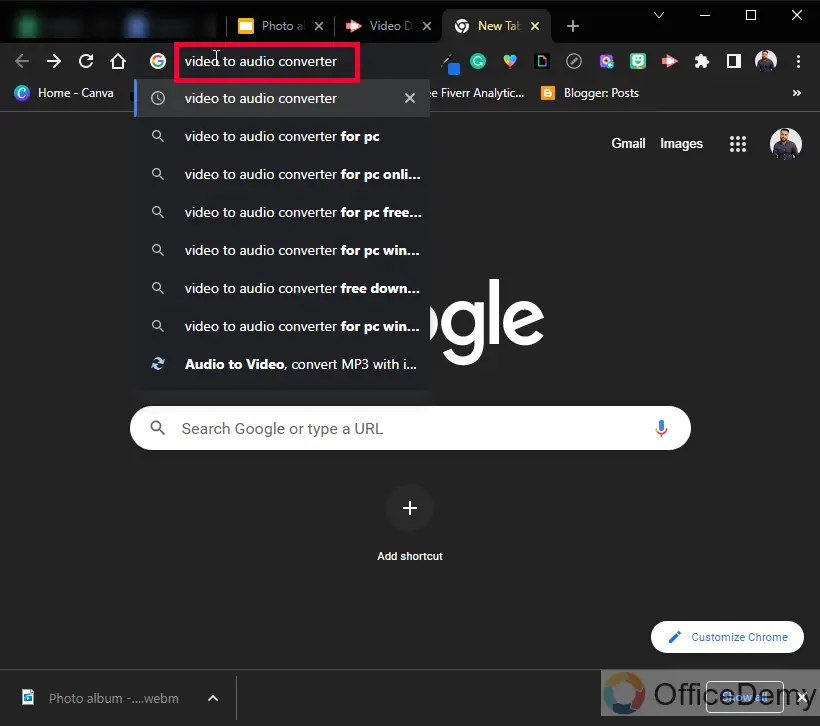
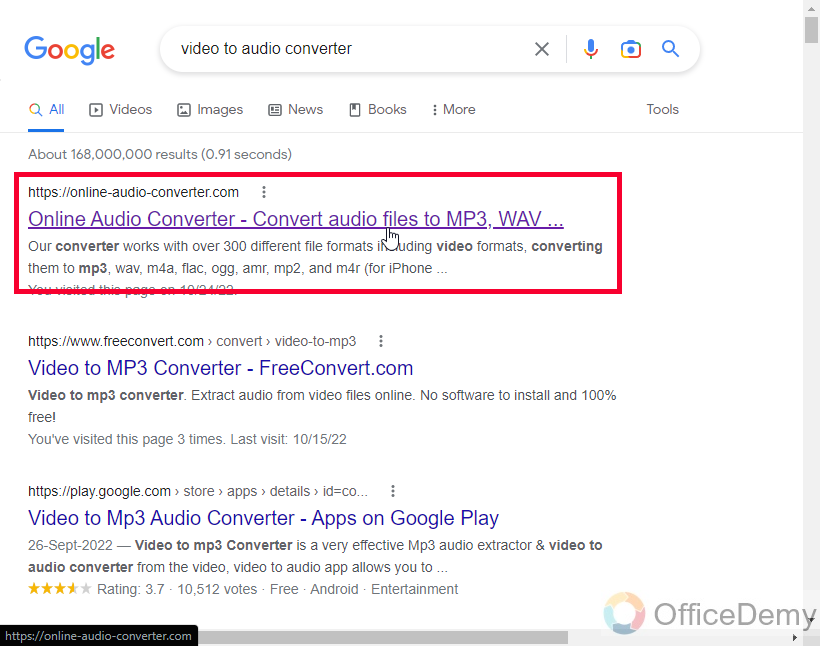
Go to the web, search for Video to Audio converter, and open any website
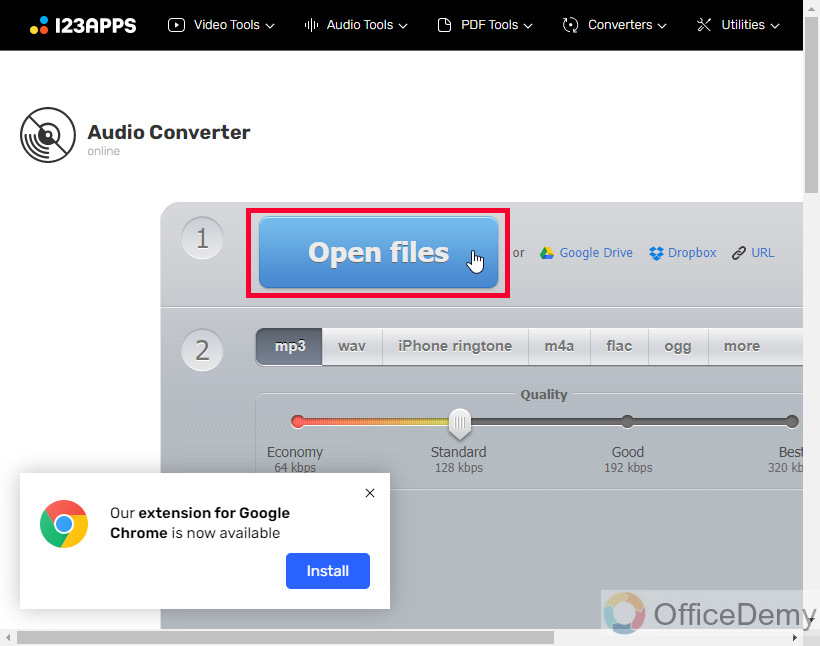
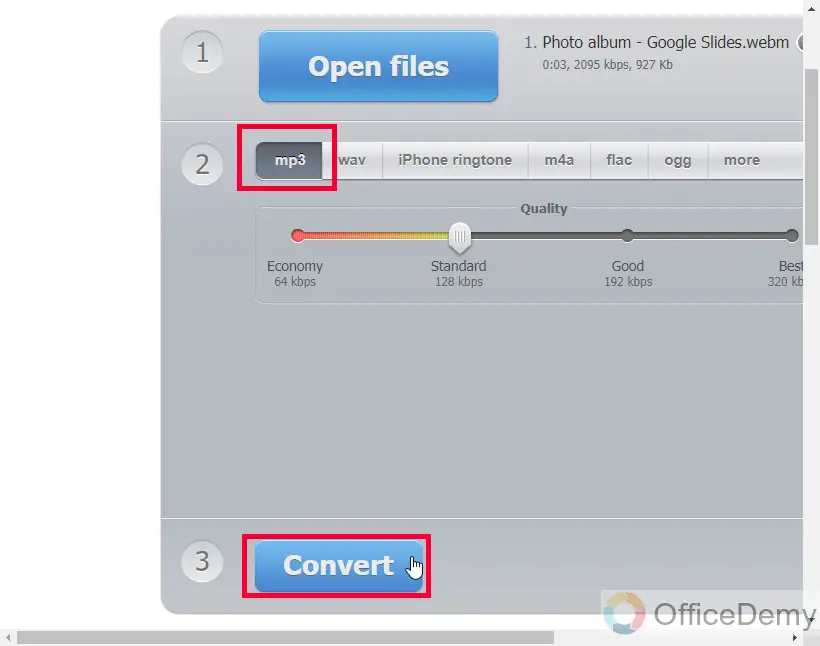
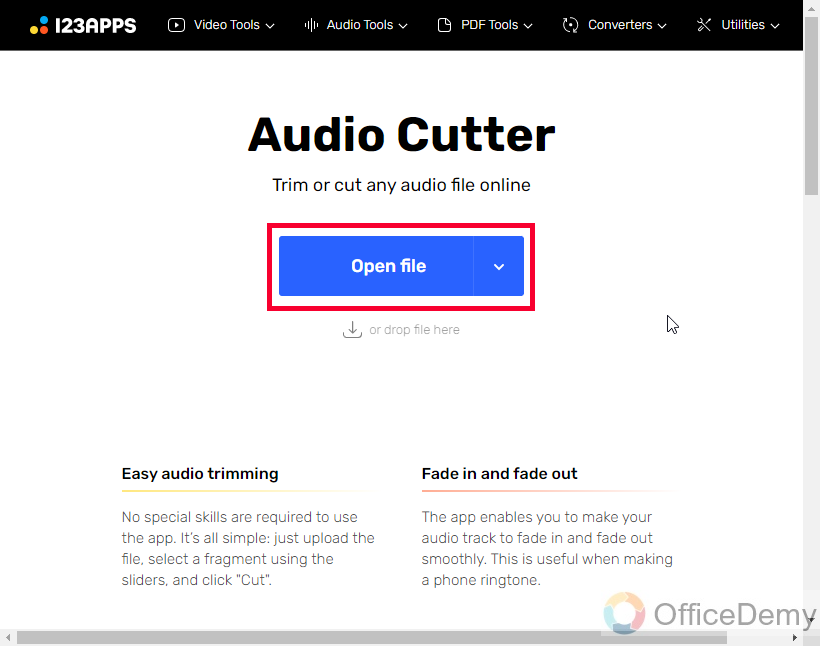
Step 3
Add your video file here, and click on the Convert button
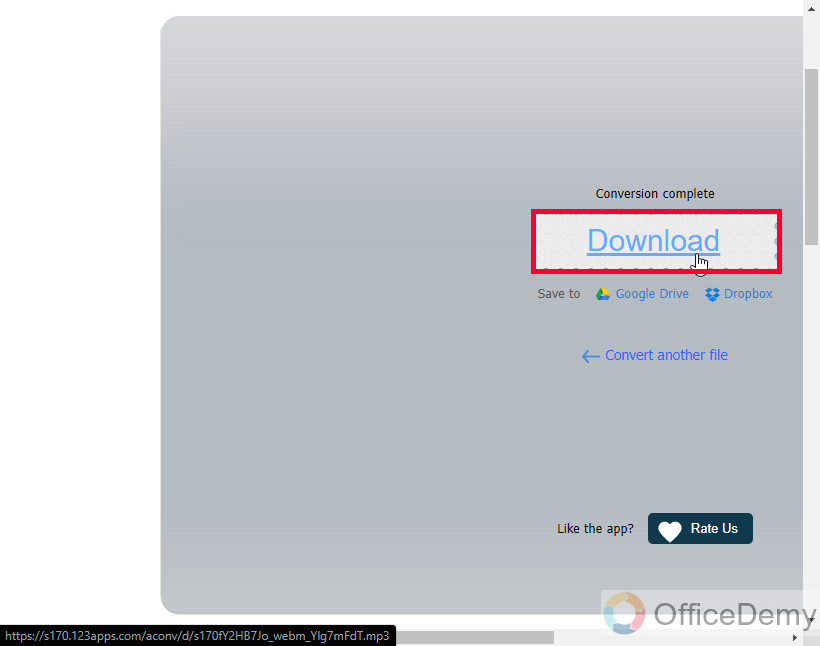
Step 4
Once, the conversion is done, click on the Download button to get your file in the audio format
Step 5
Now you have your audio file, which means your voice over in your hand, you need to break it into smaller chunks so that you can have a separate audio file for your every slide
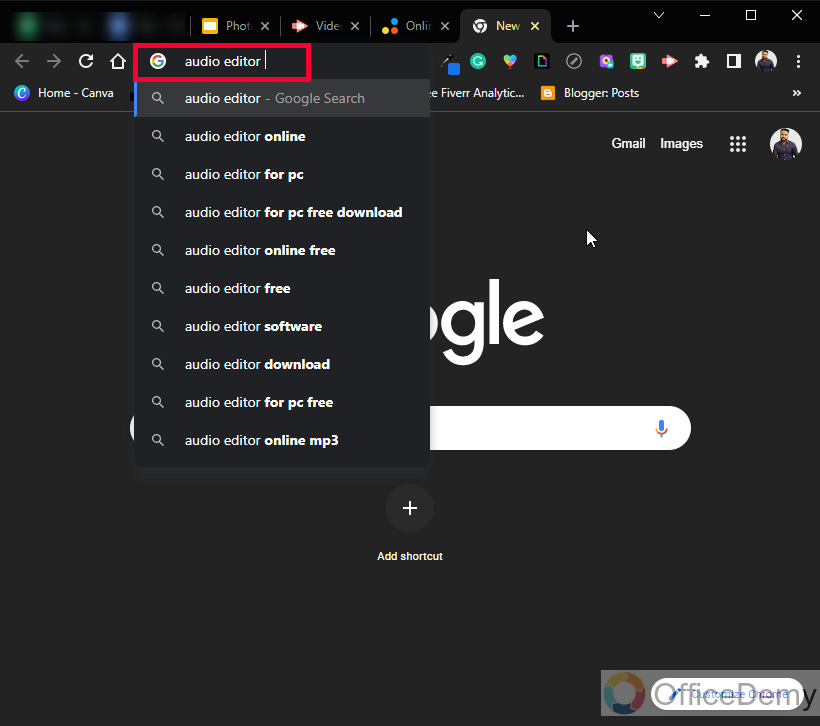
Step 6
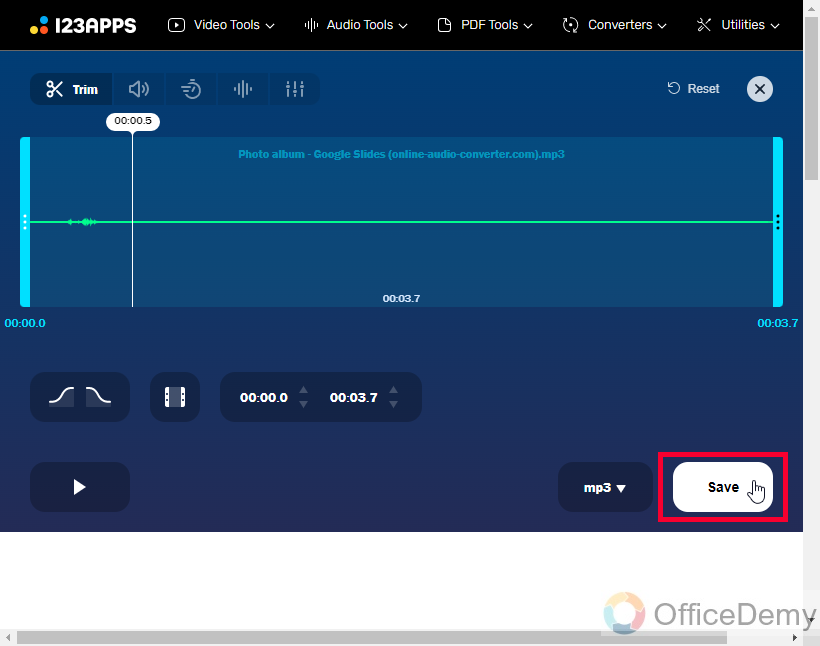
Find any audio editor online, and upload your file there, in the editing timeline break down the audio by listening to your voice (you will get the idea to add a cut in your audio by listening to the voice)
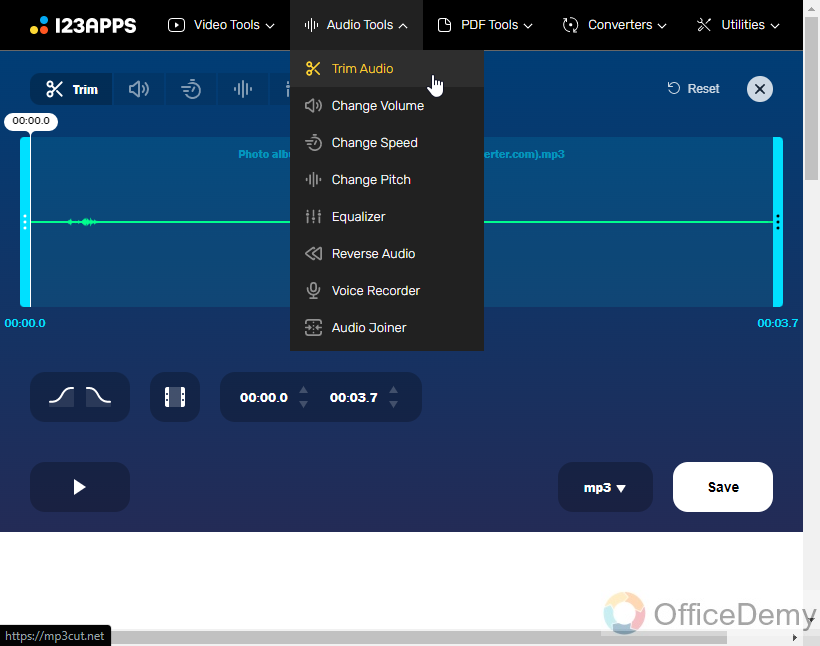
After splitting your audio file, download all the chunks
Pro Tip: Rename your audio files with slide names or numbers to make sure you add the right audio file to your slide.
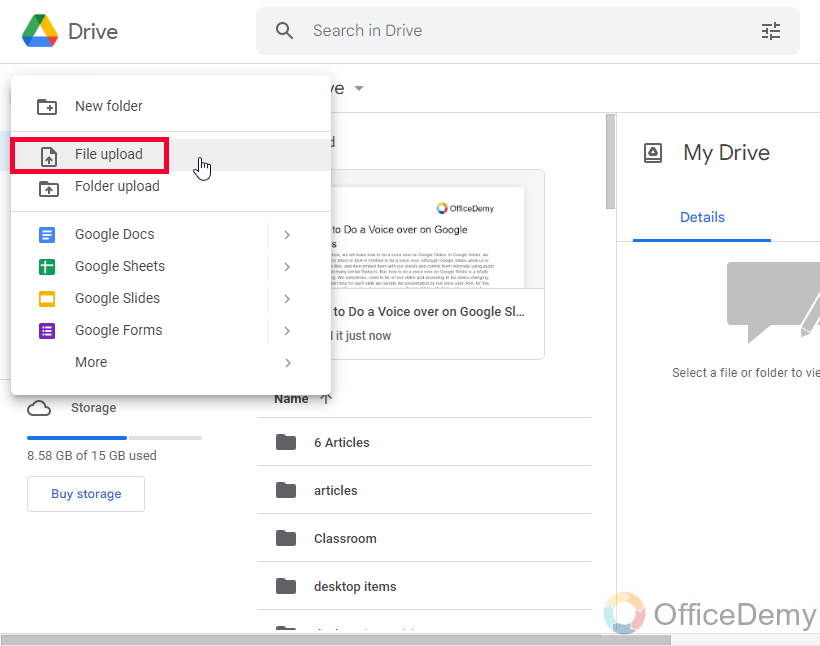
Step 7
Upload all the audio files to your Google Drive
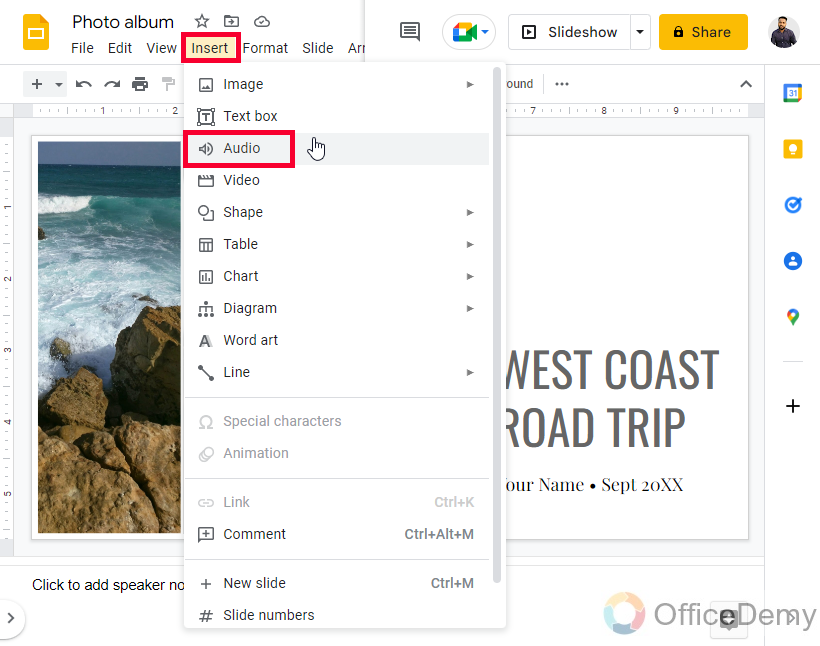
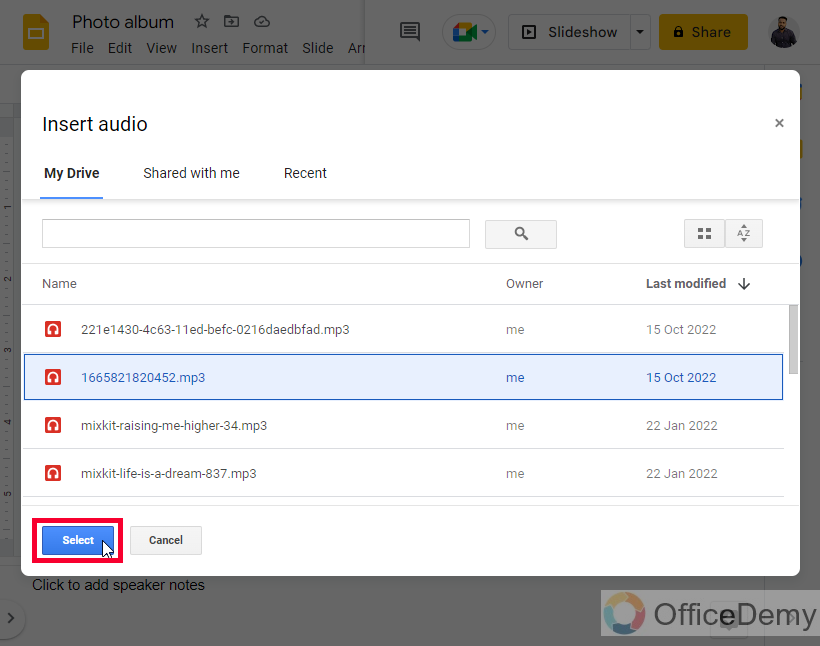
Step 8
Now open Google Slides, go to insert > Audio, select the file for this specific slide and then click on the Select button
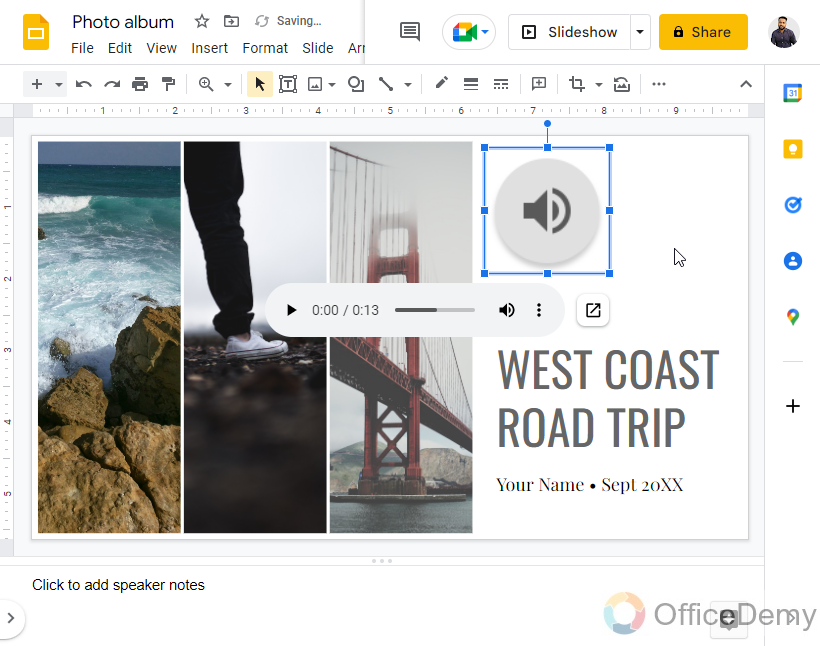
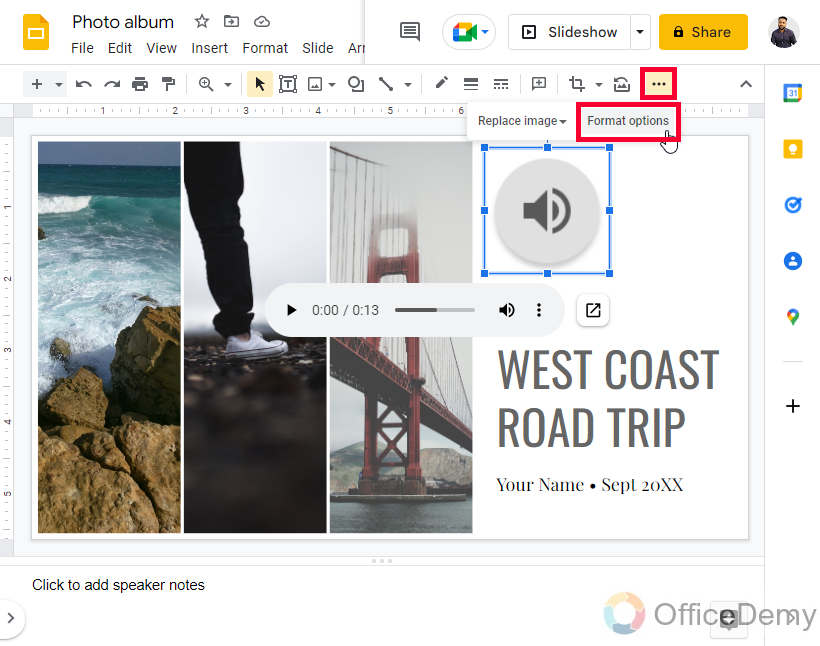
Step 9
An audio file is added, now to make it synced with the current slide, select the file, and go to Format options in the toolbar
Step 10
In the Audio playback dropdown, select “Automatically” from the Start playing radio button (it will make your audio file automatically play when this slide is opened)

You have so many other options as well to format your audio.
Now play your slide and you will see how nicely you have added a voice over to your Google Slides file.
I hope you find this article helpful.
Frequently Asked Questions
What happens if I don’t split my audio file before integrate to Google Slides?
It will create problems at the time of the presentation, imagine if anyone asked questions, then you need to stop and answer them first. And, imagine your audio is not stopped in the presentation. So that’s why it’s a best practice to break your audio file and keep them in smaller chunks to distinguish them as per each slide. When you use smaller video chunks you can stop audio and can resume easily. so, your presentation and voice over will not be unsynchronized at any point.
Conclusion
That was all about how to do a voice over on Google Slides. I tried to use a simple but useful free extension in this tutorial to keep it easy for everyone. I explained to you the complete method to add voice over on Google Slides, and I also emphasized the way you need to add them so they remain properly synced when presenting the presentation in front of a real audience. That’s all from today’s guide. I will see you soon with another helpful tutorial. Thank you.


