
To View Section Break in Microsoft Word
- Click “Home” and then the “Paragraph button” (¶) to reveal hidden formatting symbols, including section breaks.
OR
- Press Ctrl+H or click “Replace” in the “Home” tab.
- Click “More,” select “Special,” and choose “section break“.
- Click “Find next” to locate and edit section breaks.
OR
- Press CTRL+F to open the navigation pane.
- Type ^b to find the first section break and the down arrow to find others.
- Close the navigation pane when finished.
What is Section Break & How to Find Section Break in Word
A section break creates a section that can be formatted independently from the rest of your document. A section break splits your long document into new sections where you can add different formats and layouts according to its demand. Such as you can create sections with different headers, footers, and layout. You can add as many sections as you want and add as many formats as you want. You can use the section break to control the layout within a single page, or to control the layout within separate sections through your entire document.
Sometimes your document may require frequent modification or editing, and you need to find the section breaks in your created document. If you have a long document with lots of sections, it may be difficult to find where one section ends, and another begins. I am going to discuss three ways that will help you find section breaks easily in your word document.
How to View Section Break in Word
View Section Break Using Pilcrow (¶)
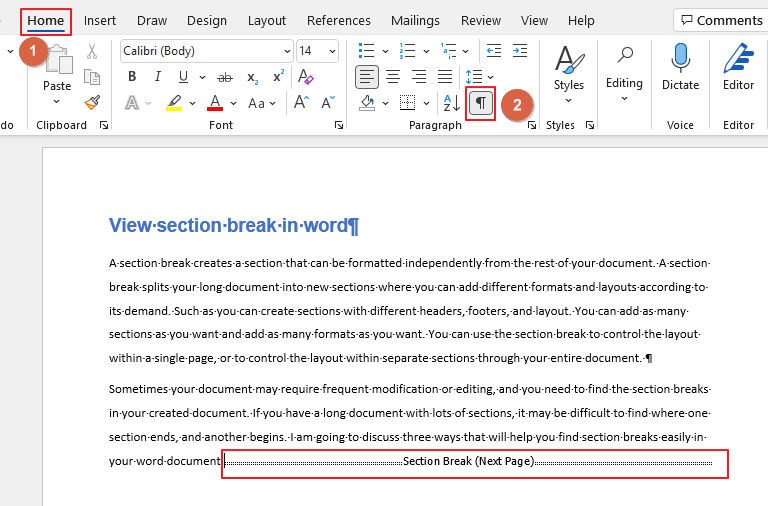
To edit and modifying your document, you may need to see page and section breaks. To view existing page and section breaks in Word, click on the “Home tab”, then click on the “Paragraph button” or “Pilcrow Button” (¶). As all the section breaks are hidden in your document by default, this “Pilcrow” (¶) button will expose paragraph marks and other hidden formatting symbols. Example below,
This is how you can find out where are the section breaks and edit or modify anytime.
View Section Break Using Find and Replace Option
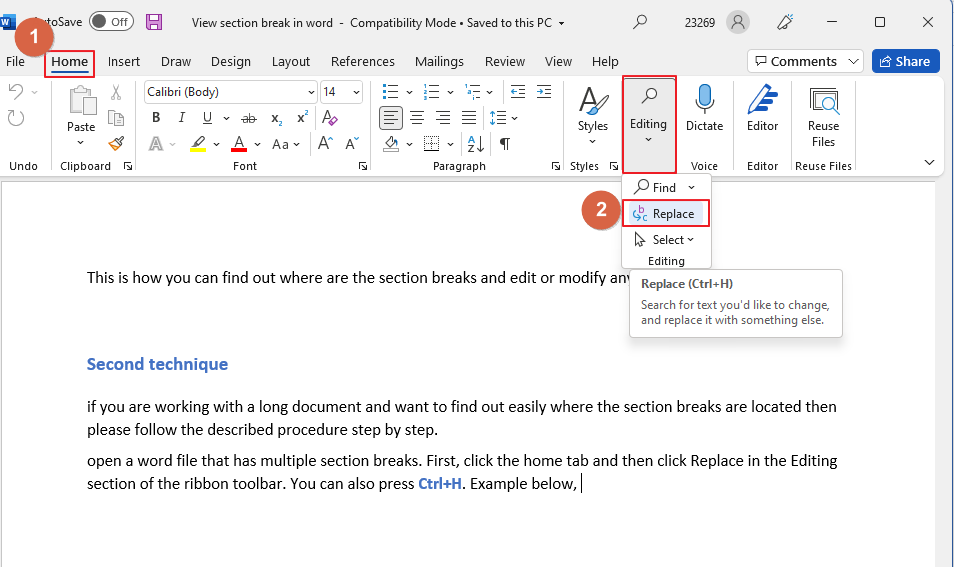
If you are working with a long document and want to find out easily where the section breaks are located then please follow the described procedure step by step.
Open a word file that has multiple section breaks. First, click the home tab and then click Replace in the Editing section of the ribbon toolbar. You can also press Ctrl+H. Example below,
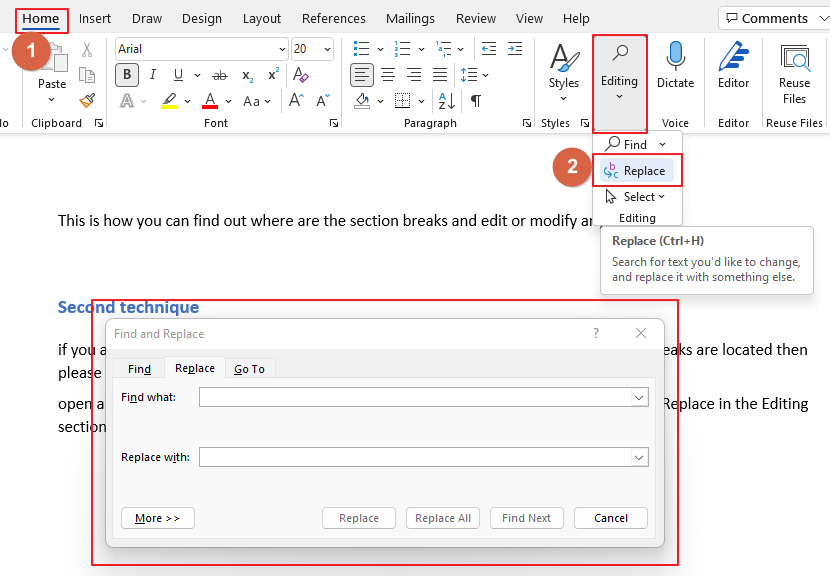
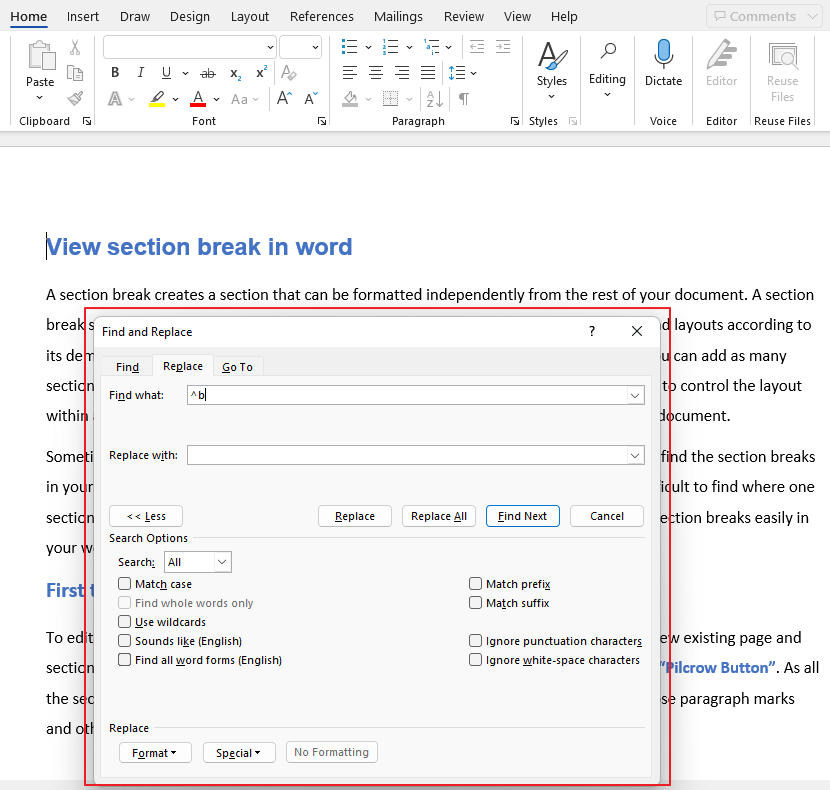
Click on “Replace”. The Replace tab of the Find and Replace dialog box is displayed. Example below,
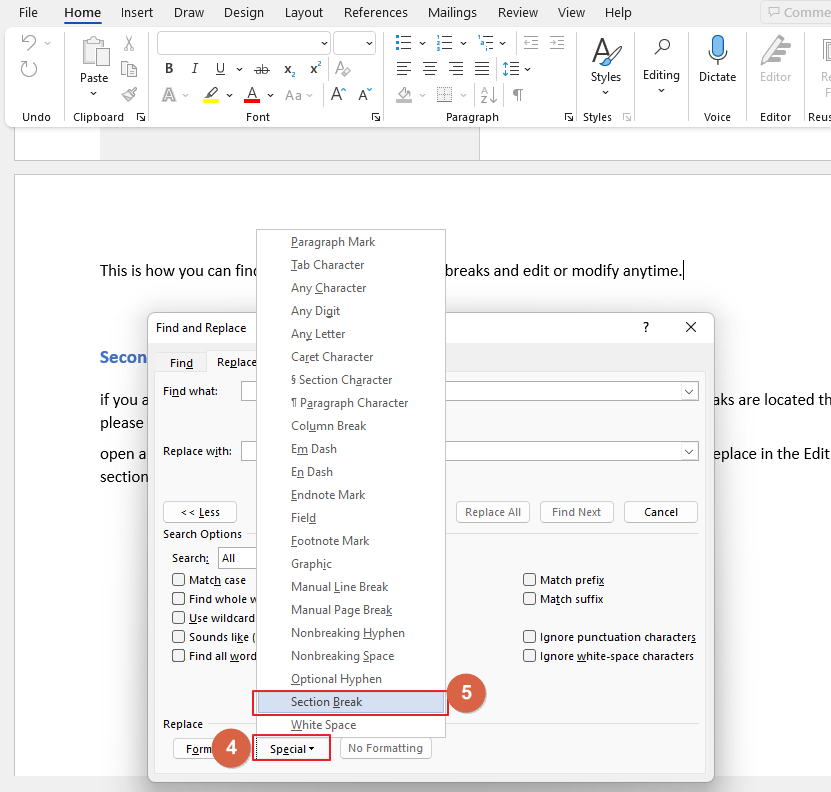
Now click on “More” > Click on “Special” a pop-up menu appears, click on “section break”. Example below,
Now, the character ^b is automatically inserted into the Find what edit box. If the section break character isn’t visible, that’s okay—simply type ^b in the box yourself. Now click “Find next” to start searching for section breaks in your document. Example below,
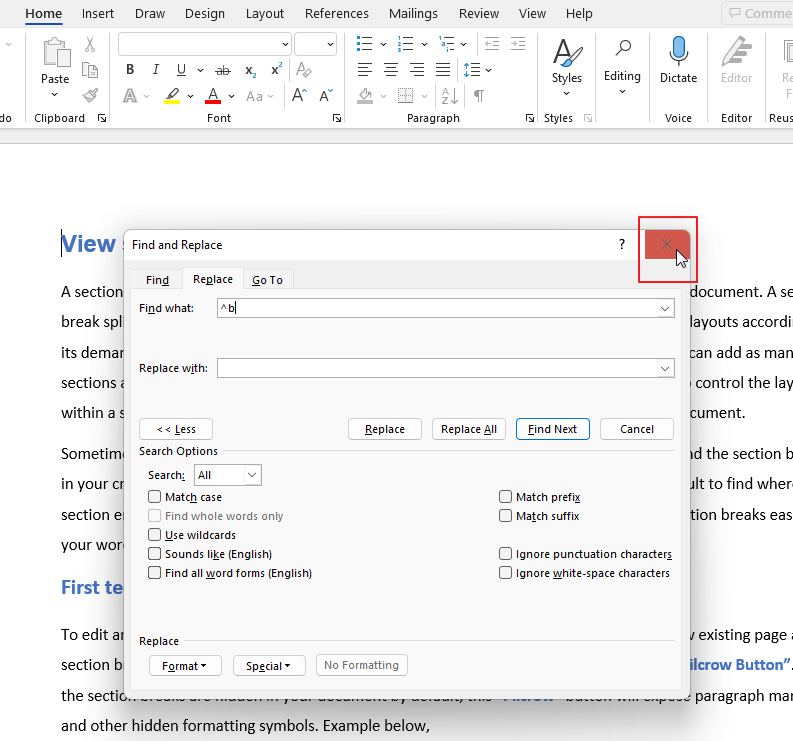
Now when the section break is found, it is highlighted in your document. While the “Find and Replace” dialog box is still open, you can make changes on your document. You can delete the section break or change the formatting within the section simply by clicking in the document. When you’re done with your editing and modifying, click the “Close” button in the upper-right corner of the “Find and Replace” dialog box. Example below,
P.S: When you need to find a specific character or formatting option in your document, such as a section break, using the “Find and Replace” dialog box is an easy way to locate exactly what you’re looking for. You can use this dialog box to find section breaks, page breaks, and more.
View Section Break Using Navigation Pane
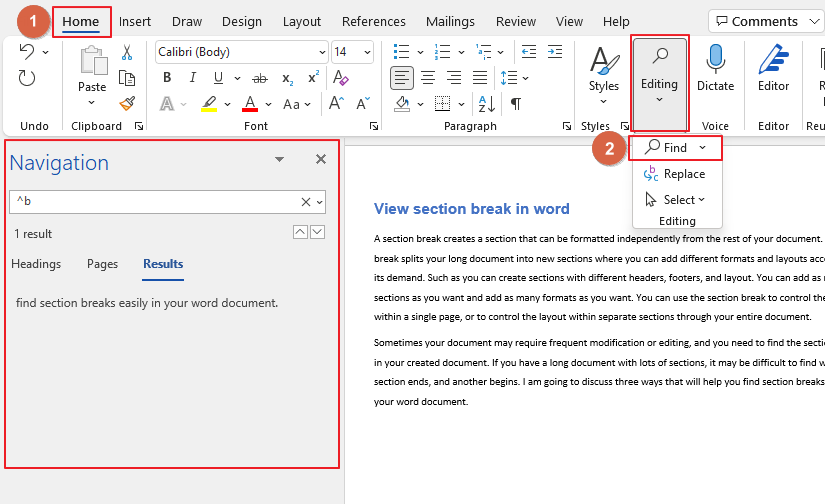
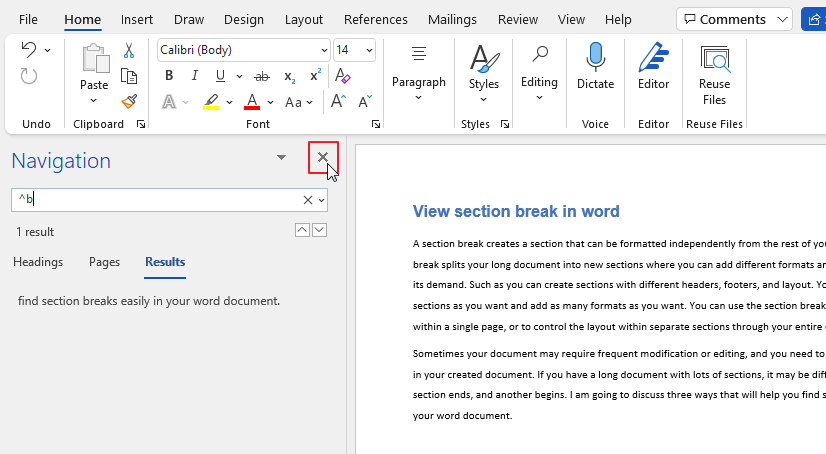
You can use “Navigation pane” to find out where the section breaks are located. To use “Navigation pane”, click on “Home” tab > click on “Find”. (Or you can simply press CTRL+F). Now type, ^b in the search bar of the navigation pane. As soon as you type ^b in the search box, the very first section break if found and highlighted. Example below,
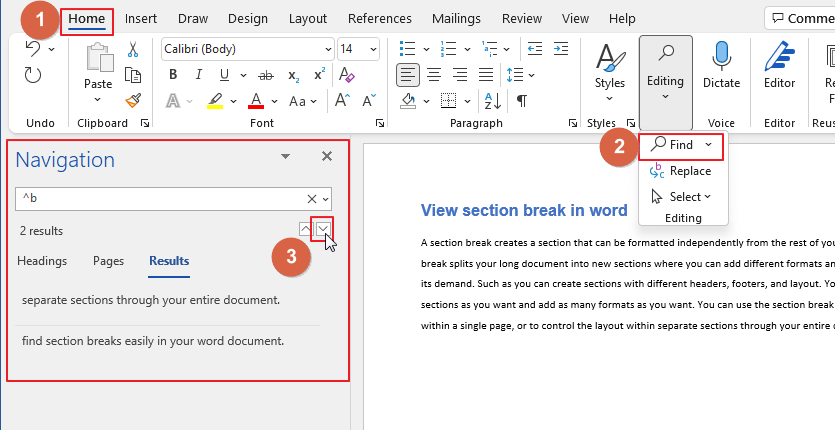
You can make any changes you want here. When you are done and want to move on to the next section, press the down arrow. So that the next section break is found and highlighted to work. Example below,
When you are done with editing, Click on “Close” at the top right corner of the navigation pane. Example below,
You are done.
Supported Microsoft Word Versions
- Word for Microsoft 365 & Word for Microsoft 365 for Mac
- Word for the web Word 2021 & Word 2021 for Mac
- Word 2019 & Word 2019 for Mac
- Word 2016 & Word 2016 for Mac
- Word 2013 & Word 2010
Conclusion
Word includes several features that allow you to search for section breaks. You can use this feature to make changes to the formatting of all sections at once.
As you have gone through the entire article, you must have mastered all the techniques discussed above. Hope you had a good time in this section. don’t forget to check other sections here in OfficeDemy.com to get solutions of your problems quickly and easily.


