
To Indent Bullet Points in Google Docs
- Place your Cursor at the bullet text start.
- Go to “Format“.
- Select “Align and indent” > Adjust indent.
OR
- Place cursor at bullet text start.
- Use toolbar indent buttons.
OR
- Place cursor.
- Press the “Tab” key to indent right.
OR
- Select bullet points.
- Use rulers’ blue arrows.
- Right to increase indent.
- The line shows a new indent.
- Left to decrease indent.
In this article, you will learn how to indent bullet points in Google Docs in different ways and styles. You will see that it’s quite easy to indent bullet points in Google Docs as it follows a very simple procedure. You don’t really need any technical skills either. Read this article completely and it will help you to understand the method to indent bullet points in Google Docs. So, get ready to learn and practically apply this feature to format your document as well.
Google Docs is a well-known, multifunctional, and versatile tool to create, edit and share impactful documents online. The numerous incredible features that are provided in Google Docs really help you to complete tasks a lot easier. Your document will become a lot more interesting when you indent bullet points because indent bullets give the document a professional look. By indenting the bullets, you may adjust your text according to your desire. This feature of indenting bullet points is very essential to format your document in a professional way. We can highlight the key points by indenting bullet points that are easy to find and read rather than finding that information within the lines of a paragraph.
Importance of Indenting Bullet Points in Google Docs
Everyone would like to read the bullet points as they are short and concise and on the other hand paragraphs are long and contain detailed explanations and it costs a lot of time to read. Bullet points not only help you to make your document specific but also improves the overall readability of your document. Moreover, you can use different designs and styles to make your bullet points more impactful.
Bullet points help you to provide a structure to your document that your audience can follow while reading. They are easy to spot and the information they contain is also easy to remember. We indent bullet points for the following beneficial purposes:
- To create lists
- To simplify long sentences
- To give readers step-by-step instructions
- To highlight important pieces of information etc.
If your document is not well arranged or indented it may be weird to the reader this is why indenting text, paragraphs, and bullet points are very necessary. All these advantages indicate the importance and significance to indent bullet points in your document. In the very next section, you will find step by step procedure of how to indent bullet points in Google Docs. So, let’s get started!
How to Indent Bullet Points in Google Docs
There are several ways to indent bullet points in Google docs. We will learn all of them step-by-step. But as we are talking about indenting bullet points so first, we will have to know how to insert bullet points in google docs so that we may learn how to indent them. Although it is so easy to indent bullet points and we have so many ways of indenting bullet points. But we will learn the following today
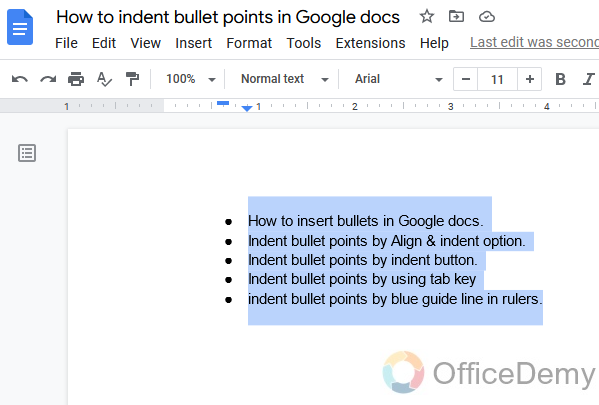
- How to insert bullets in Google docs.
- Indent bullet points by Align & indent option.
- Indent bullet points by the indent button.
- Indent bullet points by using the tab key.
- Indent bullet points by blue guide line in rulers.
Also, there are some more ways to indent your bullet points but these above methods are common and easy to learn, now it’s up to your which method you prefer. All of them work similarly.
How to Insert Bullets in Google Docs
To indent bullet points, we should first learn how to insert bullets in your document. There is not any rocket science to insert bullets in your document even if you may insert them with just one click. Let’s see how it has practically done
Step 1
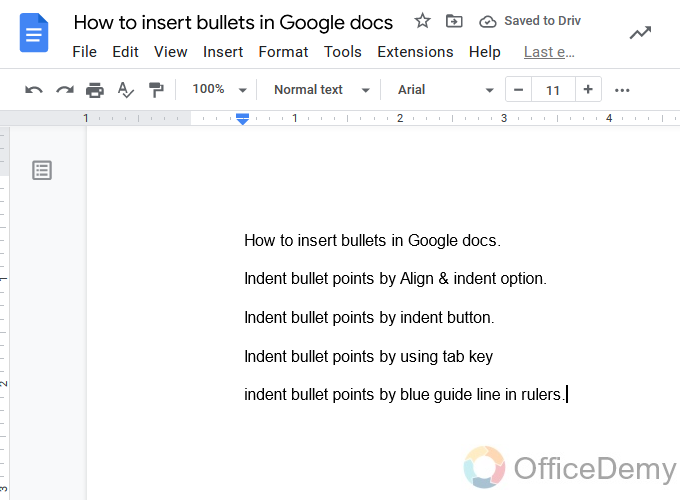
Open “Google docs” and take a blank page.
Step 2
On the blank page encoded the text on which you want to add bullets.
Step 3
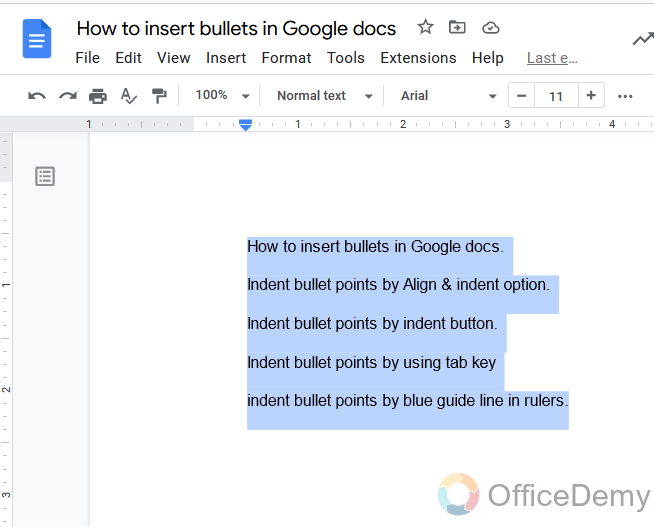
Select the text you want to insert bullets.
Step 4
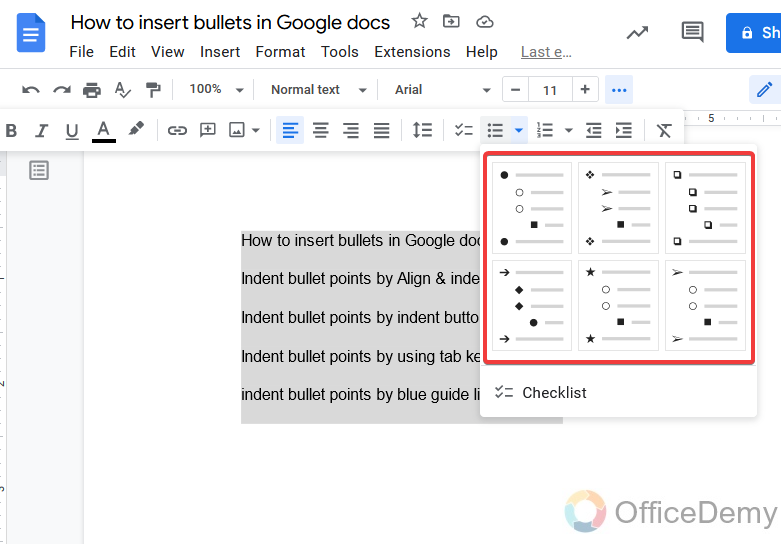
Now you will see the bullet button at your front in the toolbar.

Step 5
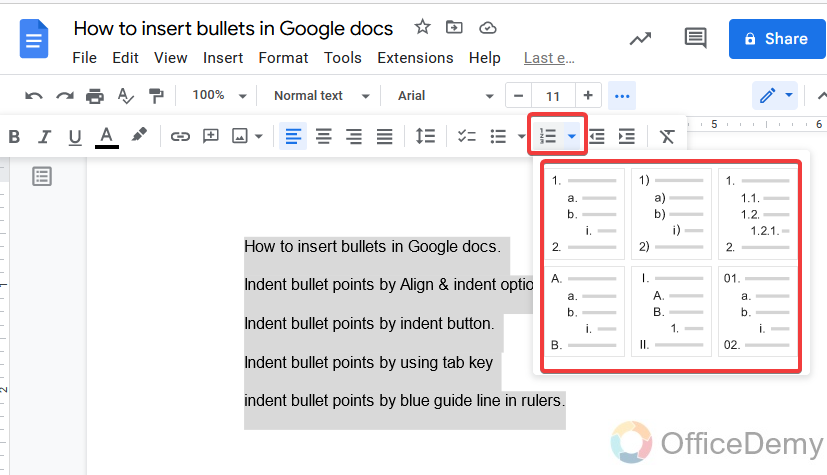
When you open it you will have a different design of bullets in the dialogue box, select any of them.
Step 6
In just the right of the bullet button, you may see a number list button as well which you may use as bullets if needed.
Step 7
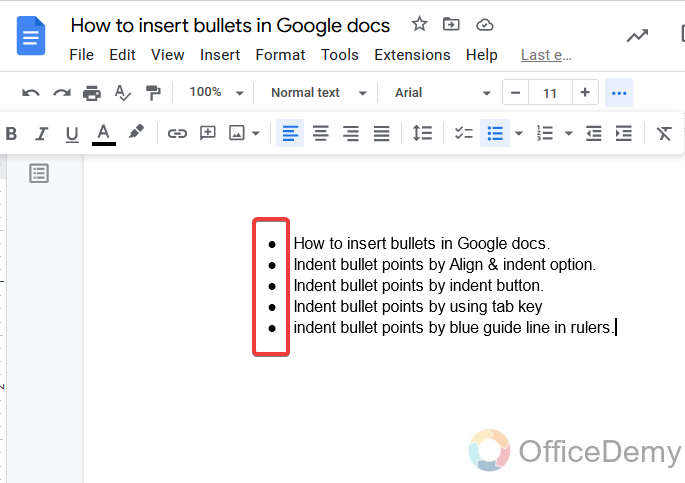
As you may see below, with just one click we have inserted the bullets into our text.
Note: You may also insert a bullet before encoding the text, and can write your points after inserting the bullets, it will automatically be added by pressing the enter button.
How to Indent Bullet Points in Google Docs – using Align & indent option
As we have inserted the bullets into our text, now let’s see how to indent bullet points. There are so many ways to indent bullet points. In this section, we are going to learn to indent bullet points by the “Align & Indent” option.
Step 1
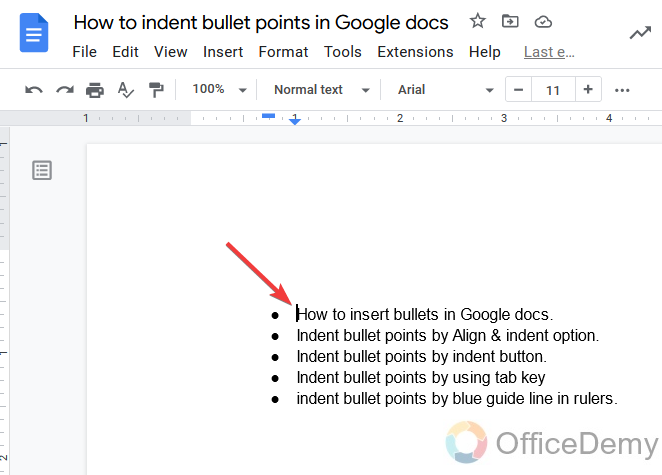
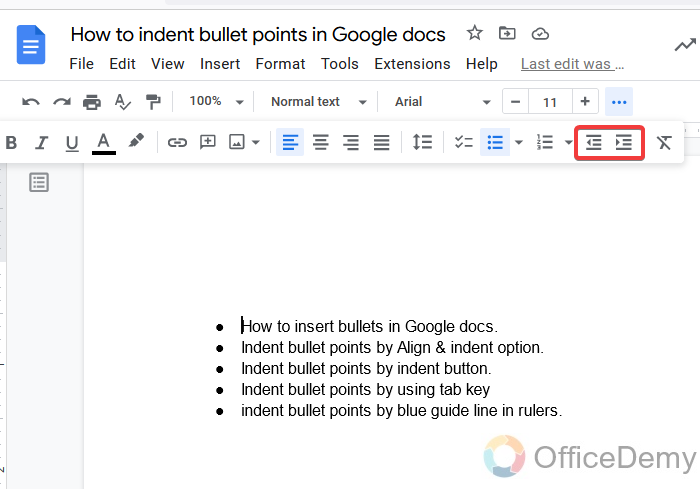
This is our sample data including bullet points in it, First place your cursor on the first bullet point at the start of the text, as you may see in the figure

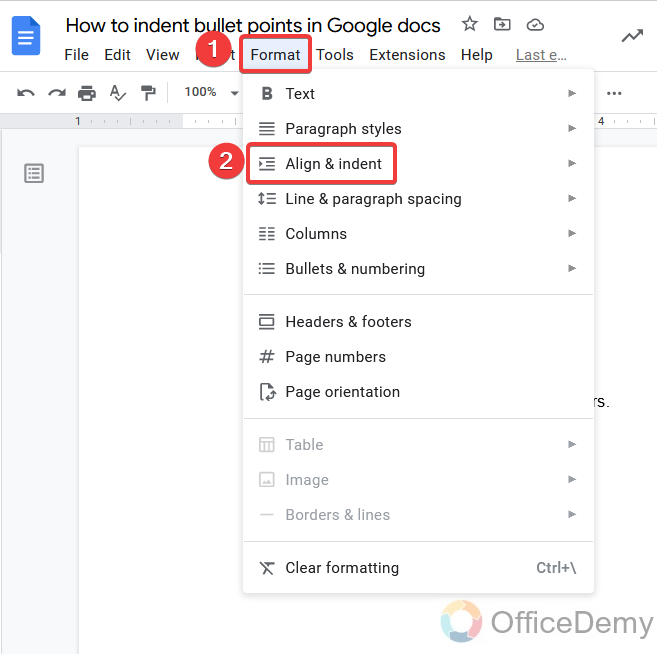
Step 2
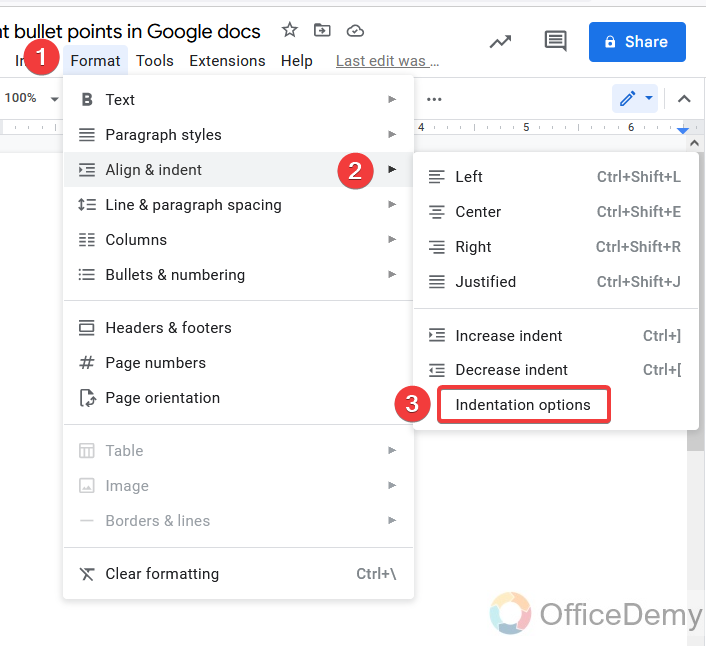
Now to find the enclosed button go to the “Format” tab in the menu bar where you will find the “Align and indent” option in the drop-down menu.
Step 3
As you open the “Align and indent” option, you will see several align options and then indent customization options from where you may increase and decrease indent.
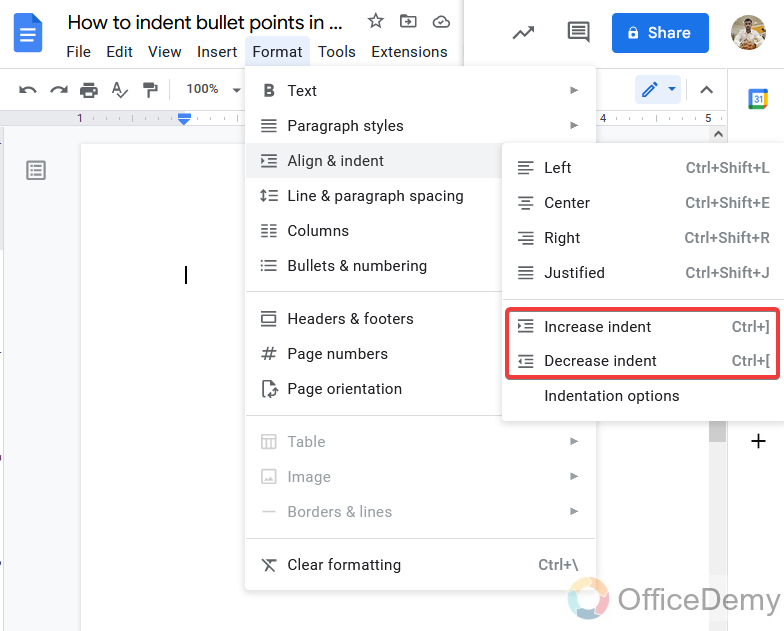
Note: Yes, you may also use the shortcut key as shown in the above picture to increase and decrease indentation.
Step 4
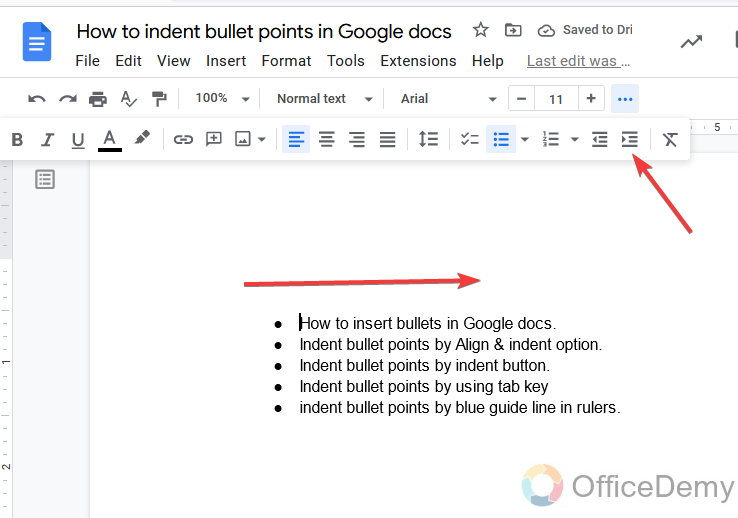
If you increase the indent, bullet points will move to the right side.
Step 5
And If you decrease the indent, bullet points will move to the left side.
Step 6
Let me tell you about the 3rd customization option of the indentation.
Step 7
Here you will find a pop-up window where you can customize the size of the indentation to your desire. Just write the size in inches which you want and then press the apply button.

How to Indent Bullet Points in Google Docs – using Indent button
The above method was quite easy to indent your bullet points but was a little long method. Fortunately, there are indent buttons present in the toolbar of google docs from where you can indent bullet points in just a few clicks. Let’s see how it works.
Step 1
Before indenting the bullet points, you must move the cursor to the first bullet point at the start of the text. Otherwise, it will indent the text only where you locate your cursor. Although you may spot the cursor if you want to indent a specific bullet point.
Step 2
After placing the cursor, Now in the toolbar, there are both indent buttons that are present increase and decrease.
Step 3
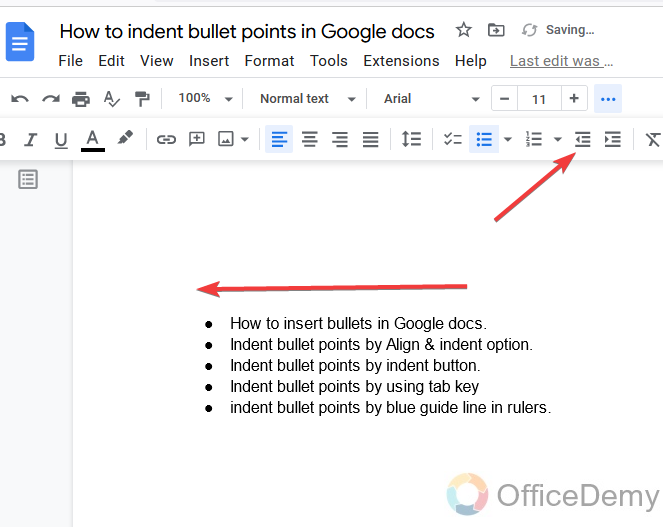
Here as well, if you increase the indent, bullet points will move to the right side of the page.
Step 4
And similarly, If you decrease the indent, bullet points will move to the left side.
How to Indent Bullet Points in Google Docs – Using Shortcut Key
We have learned two methods of indenting bullet points and both were pretty easy but if you are still tired of both methods then do not worry this is there is one easiest and quickest way to indent bullet points by using the tab button. Yes, you may indent bullet points by just pressing the “Tab Button” on your keyboard. Let me show you how it may be done in a jiffy.
Step 1
As usual, we must place our cursor as we did before.

Step 2
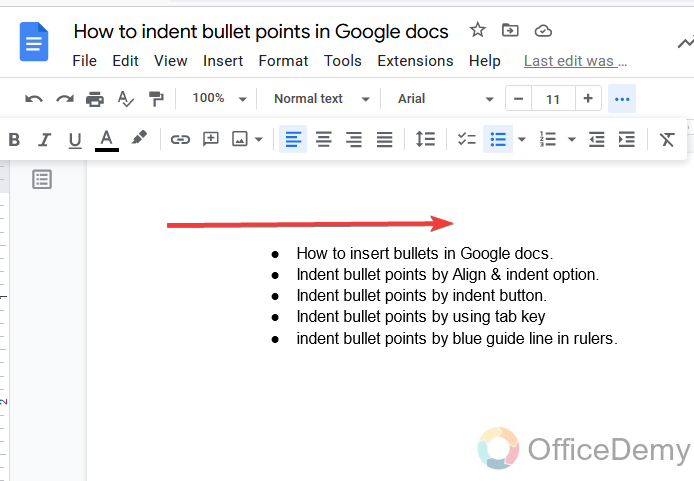
Now just press the “Tab” button on your keyboard.

Step 3
You will see that your bullet points will be indented on the right side of the page.
As we saw that we indent bullet points by just pressing one button. But there is one drawback of this method as well, that you may indent bullet points only right to the page by pressing the “Tab” button. You may not decrease the indent of bullet points or move to the left side.
How to Indent Bullet Points in Google Docs – using Blue Guide Line in Rulers
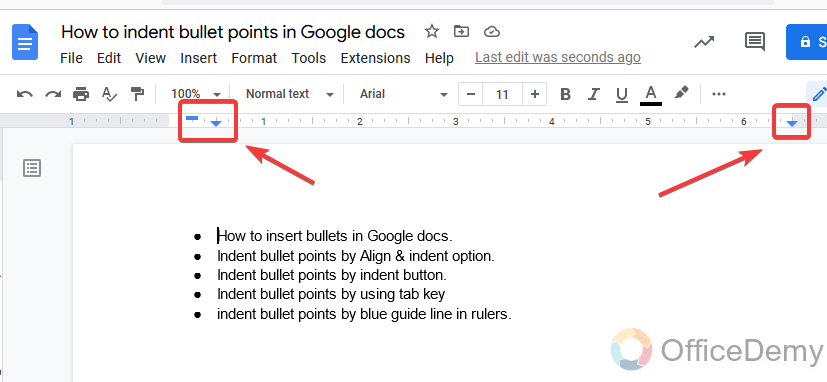
One thing you have noted in all the above methods of indent bullet points is that when we increase or decrease the indentation, it moves in a specific range or distance, or size. If you want to indent bullet points according to your desired distance then this method is brought to resolve this problem. In this method, you may customize the indent bullet points by using the blue arrows present in the rulers. Let’s see how it works.
Step 1
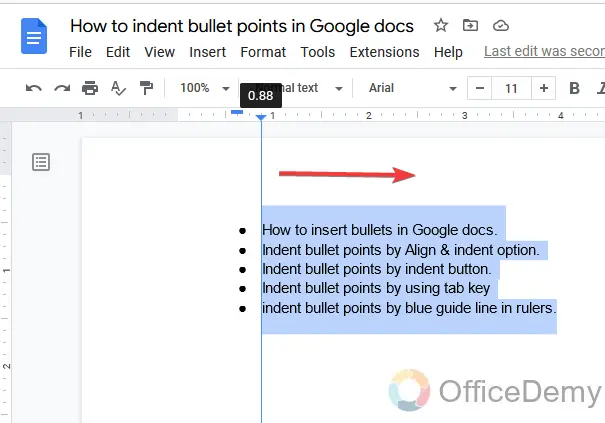
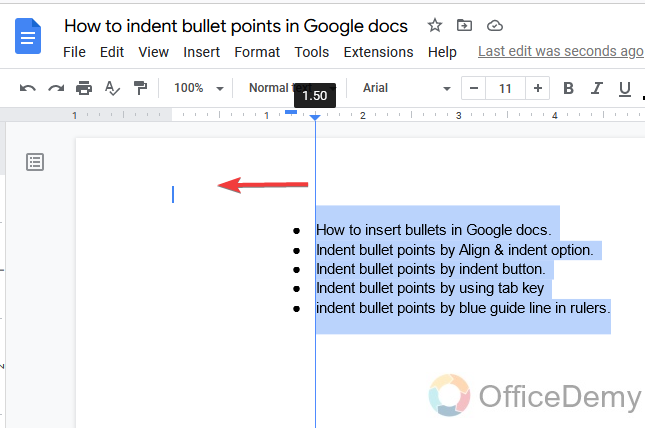
In this method, you will have to select all the bullet points to indent.
Step 2
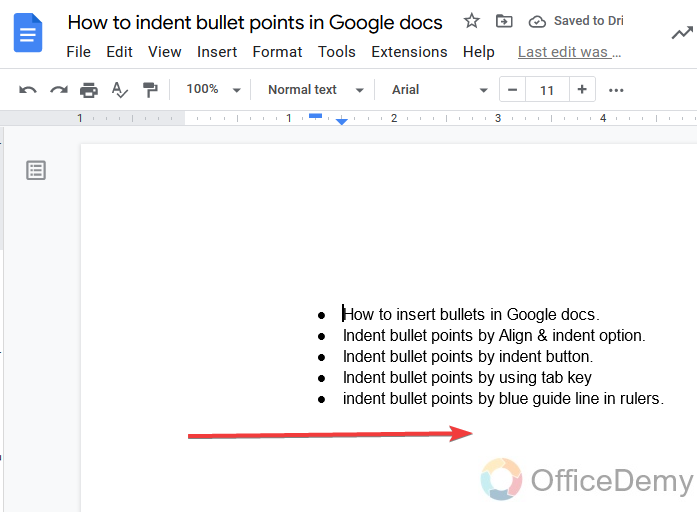
As you may see the blue arrow in the ruler, you may move them right or left in consonance with your desired distance to indent bullet points.
Step 3
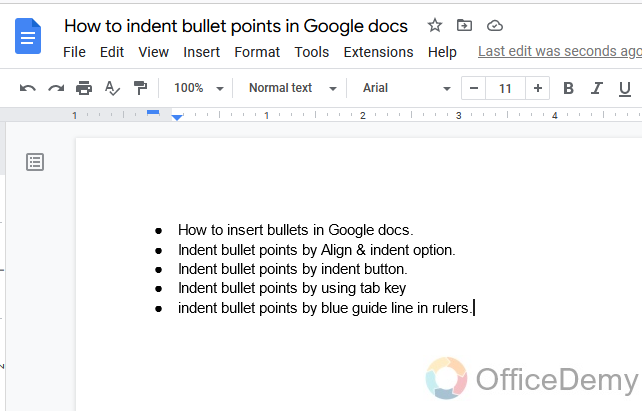
When you click on the blue arrow a blue line will appear on the page, you may indent bullet points by this blue line with the help of a moving cursor.
Step 4
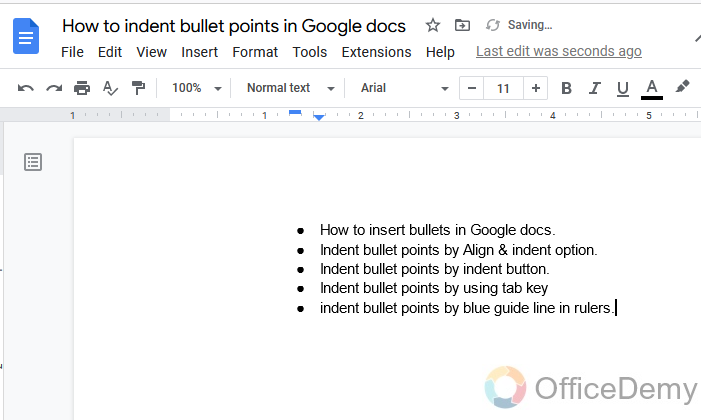
As the result is in front of you.
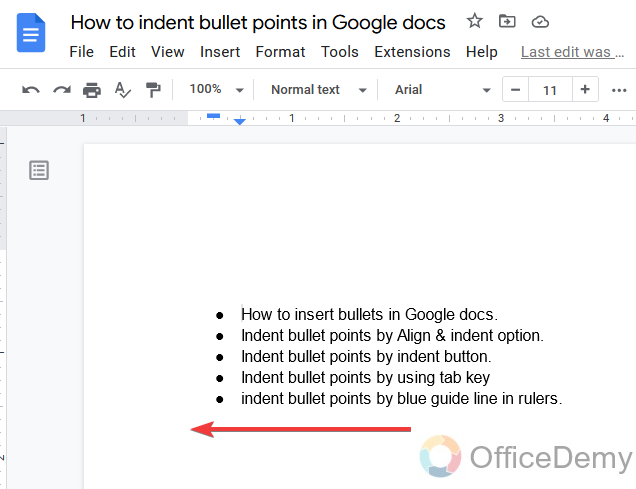
Step 5
Similarly, you may decrease the indent by moving the blue arrow back.
Step 6
As you may see, bullet points.
Conclusion
This is our first priority to make our document professionally, for this, it is necessary to adjust your text alignment and indent bullet points in a proper manner. Indenting bullet points adds structure to your document by allowing you to separate information and provide an ideal presentation. Hope you have understood all the above tutorials as we tried all the easiest ways to indent bullet points. We will keep trying our best thankfully regards Office demy.


