
To Indent on Microsoft Word
Using Increase/Decrease Indent:
- Write your text.
- Select the text.
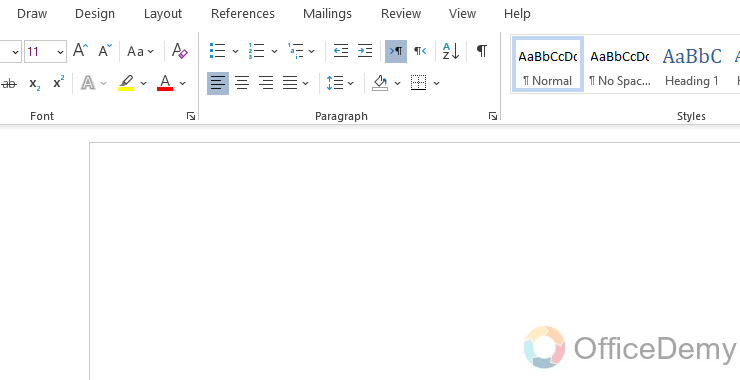
- Go to the “Home” tab.
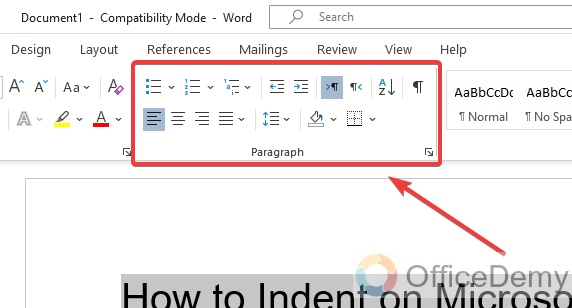
- Find the “Paragraph” section.
- Click “Increase Indent” (right-pointing arrow) to indent right, or “Decrease Indent” (left-pointing arrow) to reduce the indent.
Using Ruler:
- Click the “View” tab.
- Check the “Ruler” box to make it visible.
- Adjust the right-side ruler pin to indent right and the left-side pin to the indent left.
Using Paragraph Configuration:
- Select the text you want to indent.
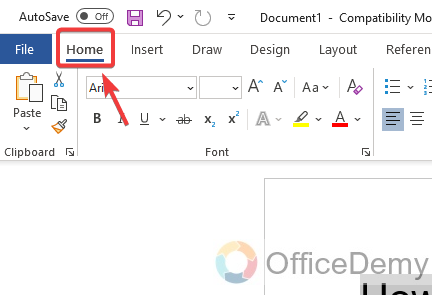
- Go to the “Home” tab.
- Click the tiny arrow in the “Paragraph” group to open the Paragraph dialog box.
- In the “Indents and Spacing” tab, choose “Hanging” or “First line” under “Special“.
- Specify the indentation amount in the “By” field.
- Click “OK” to apply the settings.
One of the most popularly used word processors worldwide is Microsoft Word. You can quickly and easily create documents with a professional appearance using this strong tool. Paragraph indentation is one of the formatting options available in Microsoft Word. We’ll demonstrate how to indent text in Microsoft Word in this article.
Hi, and welcome back to our most awaited series of Microsoft word tutorials. Today we are going to learn how to indent on Microsoft word.
An essential formatting method used in documents to help separate paragraphs and make them easier to read is indentation. A report, essay, or another type of document can look more polished and well-organized with the use of proper indentation. One of the most widely utilized word processors in the world is Microsoft Word which provides users with a variety of choices for indenting paragraphs. To create visually attractive and well-organized content, we will look at how to add left and hanging indents to your document using Microsoft Word in this article.
Importance of using Indent on Microsoft Word
Learning how to correctly indent your text in Microsoft Word is most important for generating or creating documents that are easy to understand, well-organized, and appealing. Text document blocks can be broken up with indentation, which also creates text simpler to comprehend and serves to highlight key information.
Furthermore, learning how to properly indent can help you avoid formatting errors while also making sure that your document cooperates with the required style guide. Writing styles and guidelines, such as APA or MLA, frequently require proper indentation. You can create documents that are expert, simple to read, and visually appealing by learning how to use the various indentation tools available in Microsoft Word, such as the Increase and Decrease Indent buttons and the ruler.
Academic papers, reports, and proposal templates all frequently use indentation as a formatting tool. Your document can look more organized and professional by using proper indentation. Readers may find it simpler to understand your document’s structure if you use indentation.
The overall readability of your document can be improved by indenting paragraphs so that readers can quickly identify where one paragraph ends and another one begins. Text in your document can be aligned with other elements using indentation. For instance, you can use indentation to ensure that the text aligns with the corresponding items in a table or list of items. For example, the APA or MLA writing styles frequently demand indentation.
How to Indent on Microsoft Word
Microsoft Word’s indentation feature is highly essential for document formatting. You can choose where your text will be on the left or right margins. In formal documents like academic papers, reports, and other written correspondence, indentation is frequently used to give your document a polished and well-organized appearance. A step-by-step guide on how to indent in Microsoft Word is given below.
Step 1
Launch Word on your computer and start a new document
Step 2
Write your document or text in a new word document
Step 3
By dragging and clicking with the cursor over the writing you would like to indent, either by locating your cursor at the start of the sentence or holding down the Shift key while you use the arrow buttons to choose the text you can select the text.

Step 4
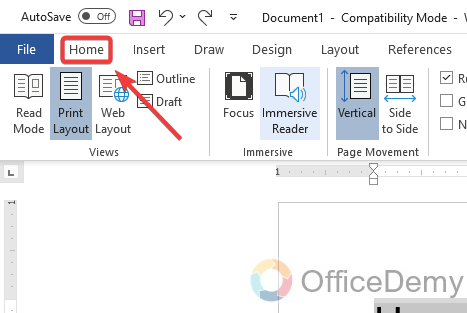
Click on the home tab will show up at the right corner of the screen, The tools for formatting your text can be found here
Step 5
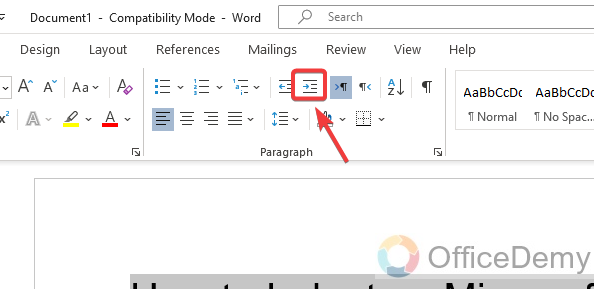
Find the Paragraph section, which is generally in the home tab’s midpoint. It has several formatting options, such as indentation, spacing, and alignment.
Step 6
Click the Increase Indent button, which looks like a right-pointing arrow with a horizontal line next to it, to indent your text. This button is located in the home tab’s Paragraph section. Your text will move ahead to the right a very little bit each time you click on this button.
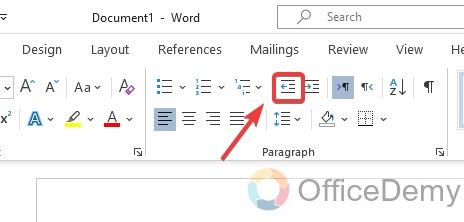
Step 7
Click the Decrease Indent button, which is symbolized by a left-pointing arrow with a horizontal line next to it, to reduce the indentation. This button is located in the home tab’s Paragraph section. Your text will back to the left each time you click this button.
You can easily indent your text and give your document a polished, organized appearance by following these easy steps.
Make Indent on Microsoft Word – Using the Ruler
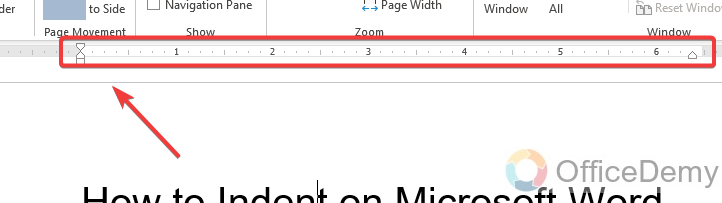
You can also use the ruler to indent your text. The ruler is located at the top of the document window
To use this method, follow below given steps
Make sure the ruler is visible first
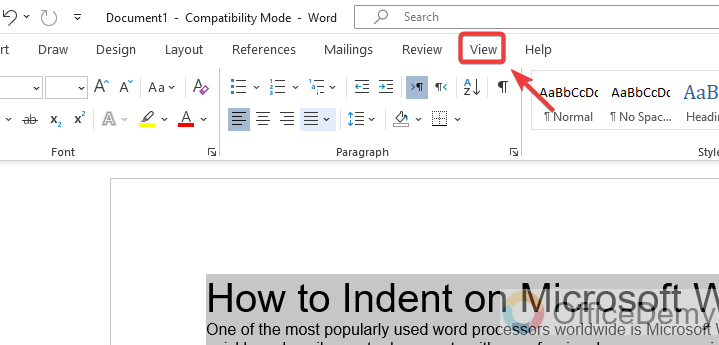
Step 1
Click on the View tab will show up at the left corner of the main menu
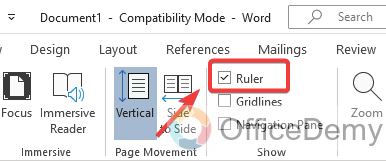
Step 2
Check the Ruler box to visible the ruler at the top of the document window
Step 3
You will get a ruler at the top of the document window, now you can use it easily to indent your text and give your document a polished, organized appearance
Step 4
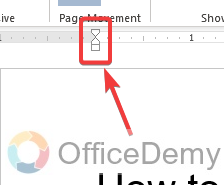
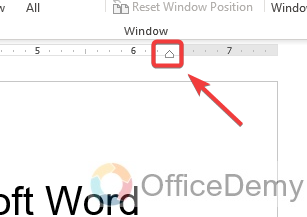
Use right side ruler pin to move the text on the right side
Step 5
Use left side ruler pin to move the text on the left side
This is how we can indent text by Using the Ruler
Make Indent on Microsoft Word – Using Word’s indentation configuration
Follow the below steps for more authority over the indentation of your paragraphs.
Step 1
Select the paragraph or text you want to indent
Step 2
Go to the Home tab
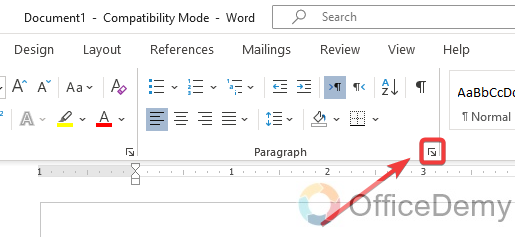
Step 3
In the Paragraph group, in the lower right corner, click the tiny arrow. For opening the paragraph’s dialogue box.
Step 4
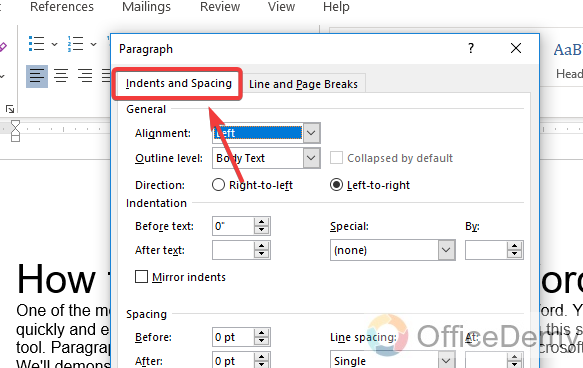
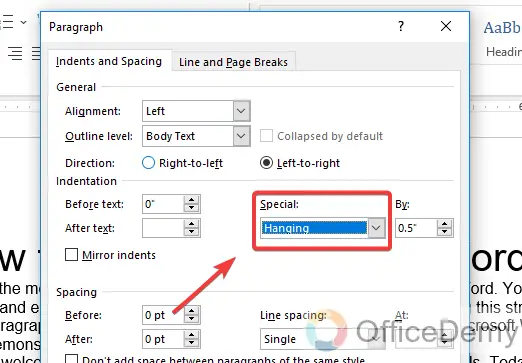
Go to the Indents and Spacing tab in the Paragraph dialogue box.
Step 5
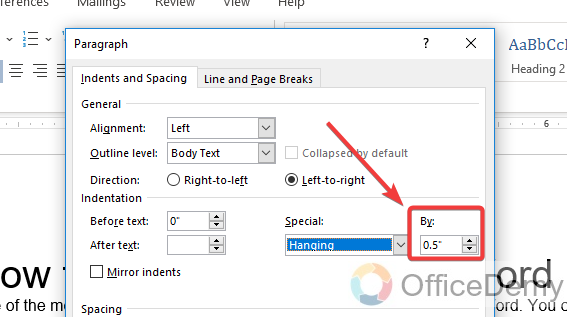
There are two options available under the Indentation section one is Special, and 2nd is By
Step 6
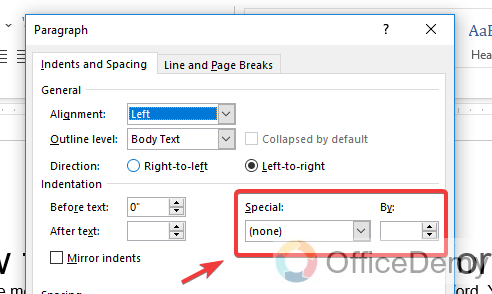
Select Hanging or First line in the Special field you want to indent
Step 7
The amount of indentation you desire can be specified by entering a number in the By fields
Step 8
To apply the indentation settings, click OK.

Frequently Asked Questions
Why is Word’s indent feature used?
By enabling you to divide information, the indenting text gives your document structure. You can set tabs and indents using the horizontal ruler and tab selector, whether you want to move a single line or an entire paragraph.
What benefits does indent offer?
Instead, indenting aids in better describing a program’s structure to human readers. It is particularly used to make the connection between code inside and outside of control flow constructs like conditions and loops clear.
What is a proper Indent?
The first line of every paragraph of text should be indented 0.5 inches from the left margin.
Conclusion
So, today we learn how to indent on Microsoft word. We hope you liked the above guide and learned how to indent on Microsoft word. It is easy to indent on Microsoft word, The indentation feature in Microsoft Word is essential for document formatting. You can decide how close to the left or right margins your text will be. Indentation is frequently used in formal documents like academic papers, reports, and other written correspondence to give your document a polished and well-organized appearance.
I am hopeful that you learned something new from this guide and that it is worth your time. I will see you very soon with another helpful guide. Keep learning with Office Demy. Thank you!


