
To Do MLA Format on Microsoft Word
Manual Method:
- Set 1-inch margins.
- 12-point Times New Roman font.
- Double-spacing.
- Create a first-line paragraph indent.
- Add a header with your name and page numbers.
- First page: include name, course info, date, and centred title > For citations, create a hanging indent.
Template Method:
- Search “MLA” format.
- Select “MLA Style Paper” template.
- Input data.
- Template ensures 12-point Times New Roman font and double spacing.
- Include name, instructor, course, date, and title.
- Follow specific instructor guidelines.
Hello, welcome back! So, today we’re going to learn How to Do MLA Format on Microsoft Word. As we know The Modern Language Association (MLA) style serves as a widely adopted format and citation system within the realm of academic writing, particularly in the humanities and liberal arts disciplines. Whether you are a student engaged in crafting a research paper, an educator in the process of developing course materials, or a professional striving to produce documents that conform to MLA standards, it is imperative to have a firm grasp of how to correctly structure your documents.
Microsoft Word stands out as one of the most employed word processing tools, equipped with features that facilitate the precise formatting of your documents by MLA guidelines. Nevertheless, numerous users often encounter challenges when navigating the intricacies of MLA formatting within the Word application.
Why do we need to Do MLA Format on Microsoft Word?
Using MLA format in Microsoft Word is crucial for academic and research writing, especially in fields like humanities and liberal arts. This approach serves several vital purposes.
Firstly, it upholds academic integrity by establishing a uniform system for citations, ensuring that sources are properly credited. Secondly, it fosters clarity and consistency in document formatting, making it easier for readers to follow your work.
Additionally, it aids in organizing references through the creation of a “Works Cited” page, allowing readers to access your sources easily. Adhering to MLA guidelines not only safeguards against plagiarism but also showcases your professionalism and meticulousness as a writer.
Moreover, it improves accessibility for all readers, ensuring that your work is more inclusive and comprehensible to a wider audience. In essence, the use of MLA format in Microsoft Word is an indispensable tool for crafting effective and reputable scholarly documents.
How to Do MLA Format on Microsoft Word
In this step-by-step guide, we’ll take you through the process of formatting your papers and essays according to MLA style using Microsoft Word. We’ll start with setting up your document and go on to guide you through the proper citation of sources. Throughout this guide, we’ll offer practical tips and insights at each step. By the time you finish reading, you’ll be well-equipped with the knowledge and skills to confidently create documents that adhere to MLA guidelines, saving you time and ensuring your work meets rigorous academic standards. So, let’s get started!
How to Do MLA Format on Microsoft Word – Manually
We will address each requirement step by step, so let’s begin from the top and progress downward.
Here are some basic MLA guidelines.
- Use 1-inch margins on all sides
- Use a legible font like Times New Roman
- Use 12-size font
- Use double-spacing throughout the entire document
- Use indentation at the beginning of each paragraph
- Include a header that displays your surname and page numbers on the top right-hand side
- The first page should include your name, paper information, and date
- The title of your paper should be centered on the first page
- The end of the paper should include a Works Cited page with MLA citations
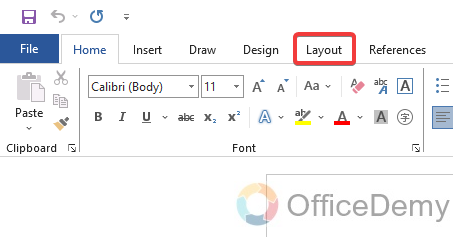
Step 1
Click on the Layout tab.
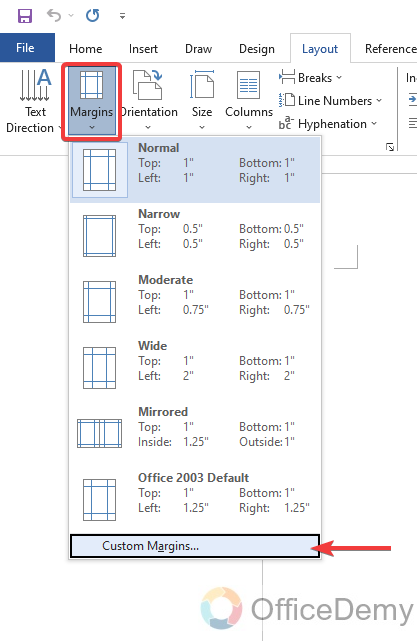
Step 2
Select Margins then click Custom Margins.
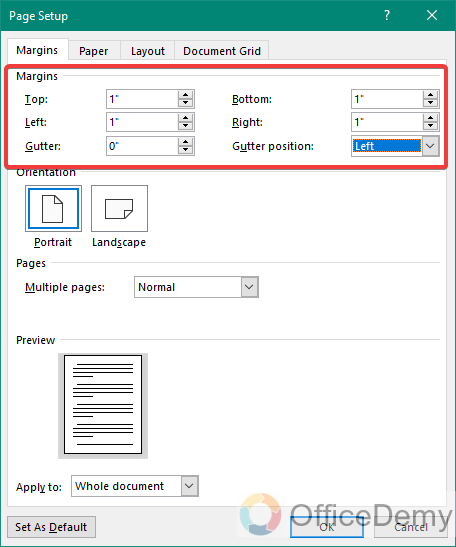
Step 3
For the Top, Bottom, Right, and Left margins, type 1 and press Enter.
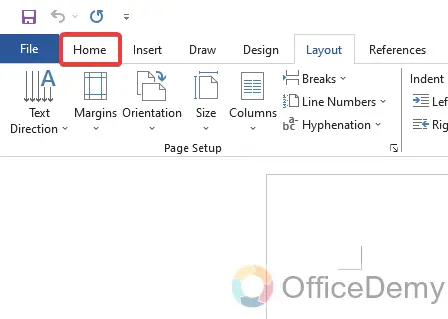
Step 4
Select the Home tab.
Step 5
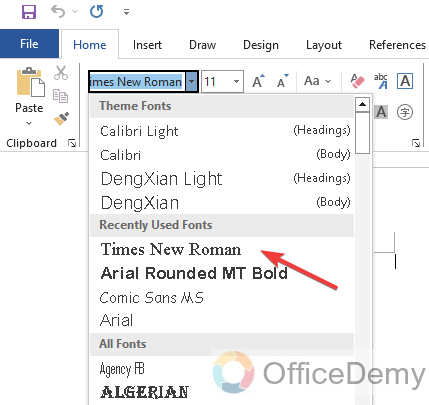
Click the font drop-down menu and select the Times New Roman font (or a similar font like Calibri).
Step 6
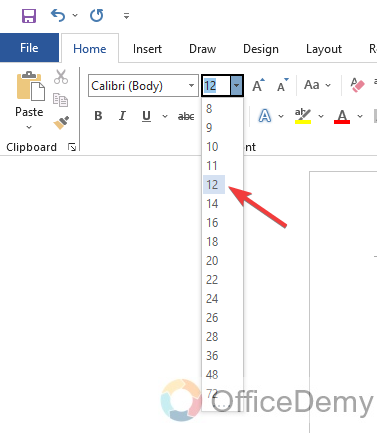
Click the font size drop-down menu and select 12.
Step 7
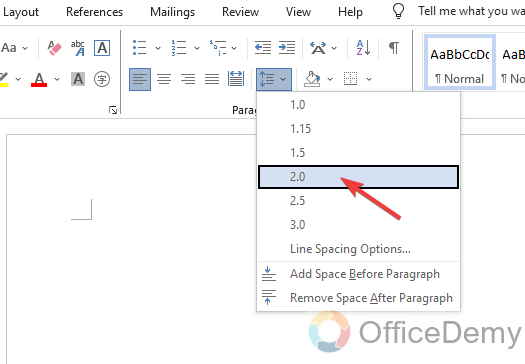
Select the spacing drop-down menu. This icon looks like blue up and down arrows beside four horizontal lines. Click 2.0
Step 8
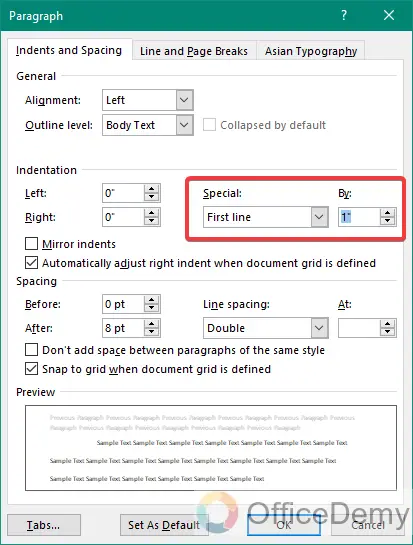
Right-click the document and select Paragraph.

Step 9
Make sure the Indents and Spacing tab is selected. Click the drop-down menu beneath Special and select First Line. Then, click the field beneath By and type 1 cm.
Step 10
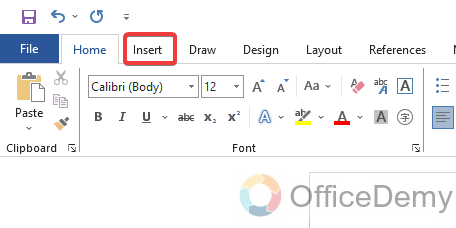
Click the Insert tab.
Step 11
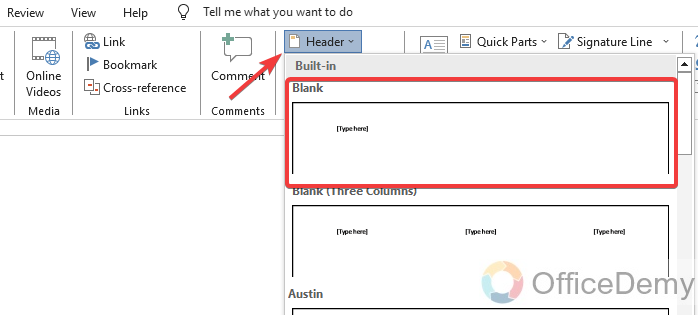
In the Header & Footer section, select Header and click Blank (the top option).
Step 12
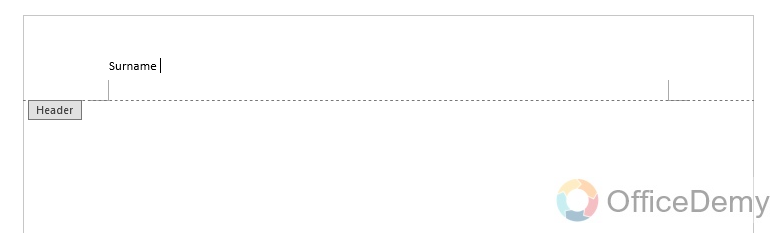
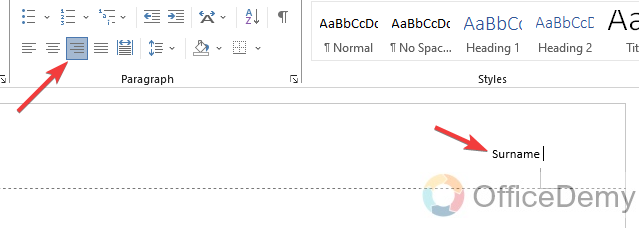
In the header, type your name and press the spacebar once. Then click the home tab. Select Align Text Right in the Paragraph section.
Step 13
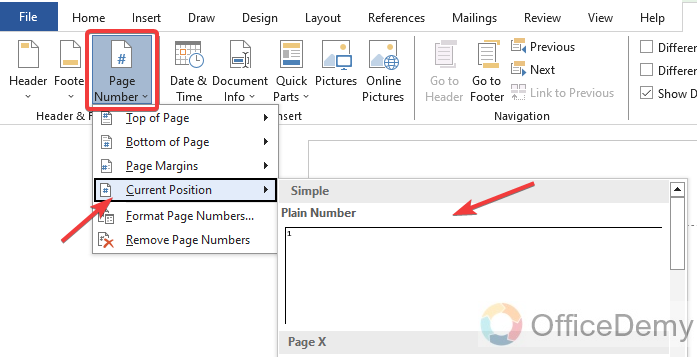
To set page numbers, click in the header after your name. Select the Header and Footer tab.
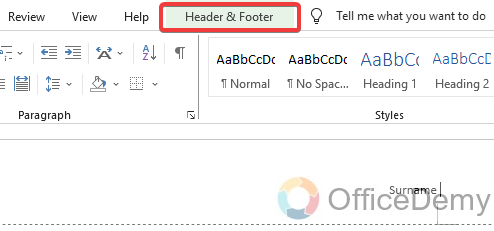
Step 14
Select Page Number, click Current Position, and select Plain Number.
Step 15
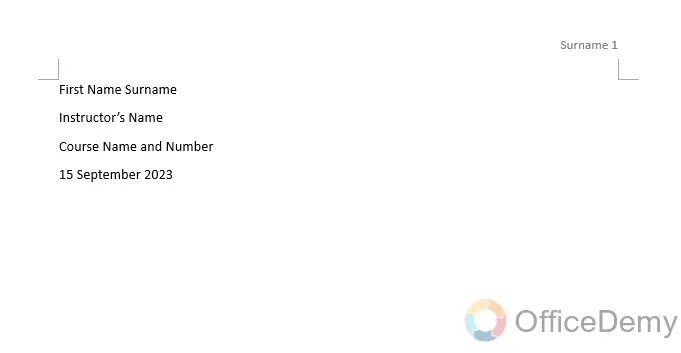
Now that you have your formatting in place, let’s get that essential information onto the first page of your document. This typically includes your full name, the course name, the course number, your instructor’s name, and the date, which should be written in the day, month, and year format. It’s these details that give your document a proper introduction.
Step 16
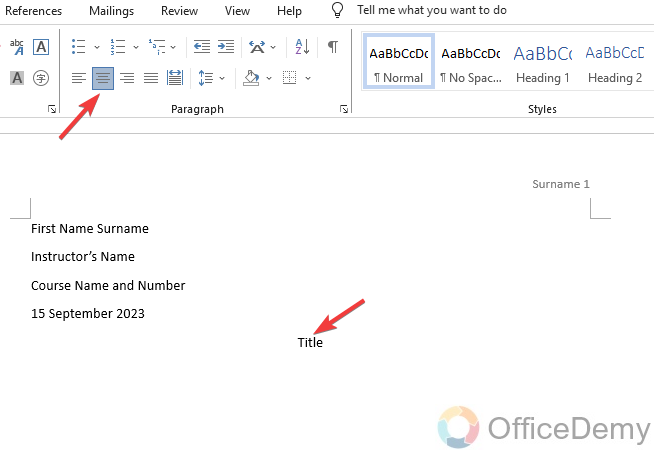
After the date, click the Enter key, type your document, or research paper’s title, and center the text by pressing Align Text Center in the Home tab.
Step 17
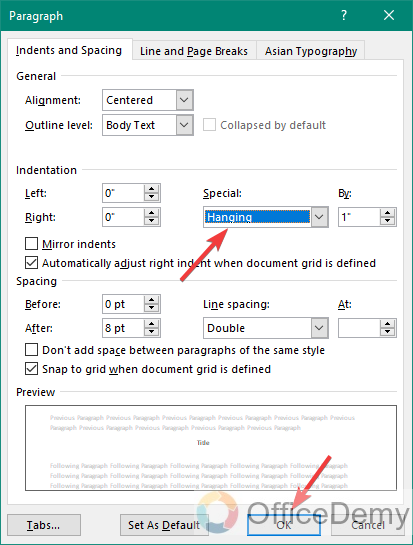
If you include citations in your document, these also need to conform to the MLA handbook. select your citation list, right-click your document, and select Paragraph. In the Indentation section, select the drop-down box underneath Special, select Hanging, and click OK.
Now that you’ve successfully formatted your MLA paper according to the guidelines, it’s time to start writing. With this formatting guide, you should have no difficulty meeting the MLA requirements. Be sure to thoroughly review your document before submitting it to ensure everything is in order!
How to Do MLA Format on Microsoft Word – Using Microsoft Word template
Microsoft Word offers readily available MLA templates that writers can effortlessly utilize. Just load the template, and Word will automatically format your content by MLA guidelines.
Step 1
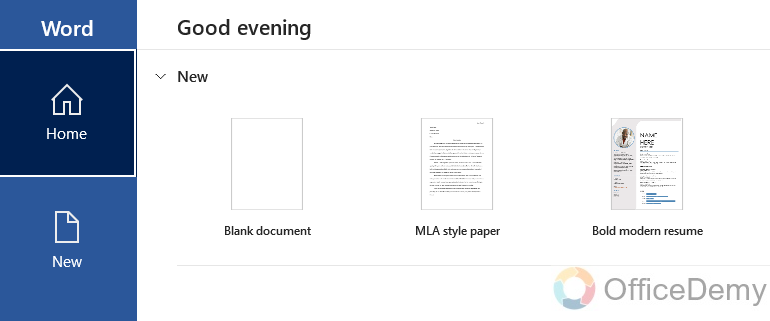
Open Microsoft Word.
Step 2
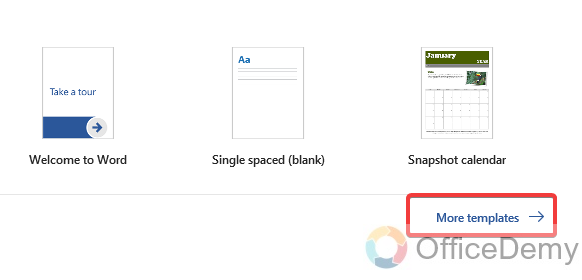
Click on More Templates.
Step 3
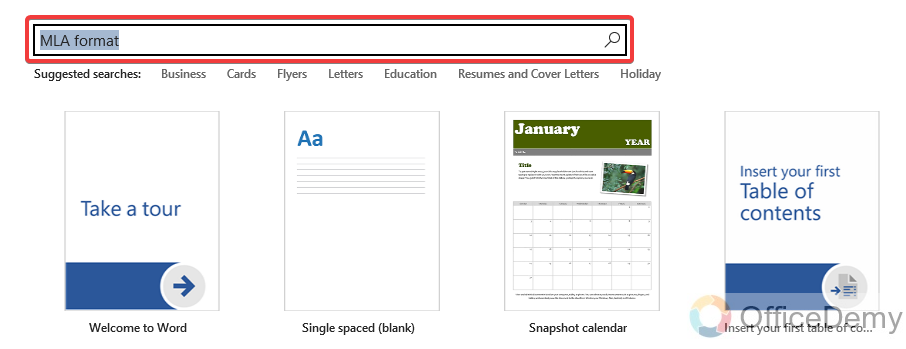
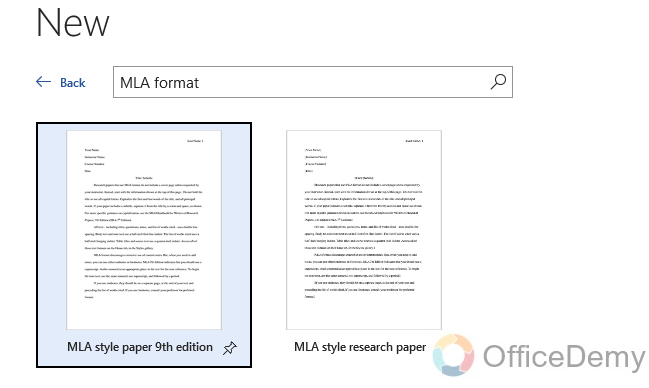
In the search field, type “MLA format“
Step 4
Select the MLA Style Paper template.
Step 5
Click on “Create”, Microsoft Word will then generate a generic essay paper in MLA format.
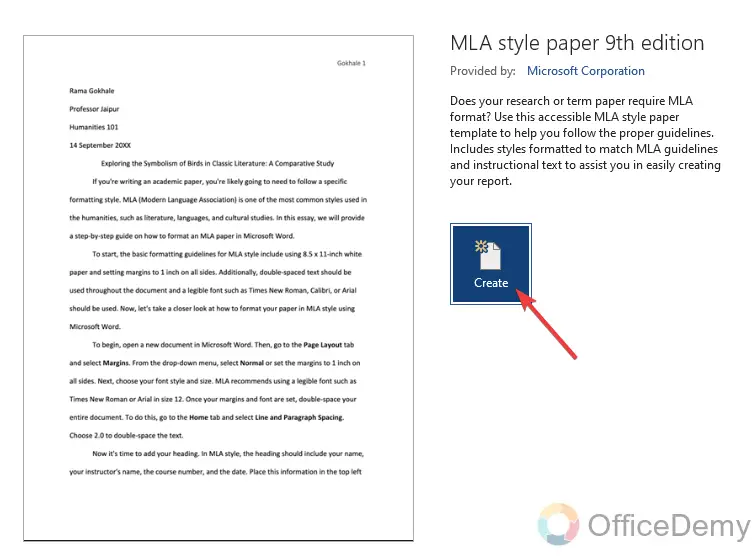
Step 6
Enter important data relevant to your essay or article. (Student name, instructor name, course, and date)

Once you’ve got all your preparations in order, it’s time to start writing your essay. You could also opt to manually configure this formatting and save it as an MLA paper template. It’s important to remember, however, that certain instructors may have specific instructions. It’s good practice to consistently consult your writing handbook for guidelines and ensure you adhere to them.
Frequently Asked Questions
Is there a specific font size and style required for MLA format in Microsoft Word?
Certainly, in MLA format, it’s important to use a 12-point Times New Roman font throughout your entire document, including the Works Cited page.
Do I need to include a cover page in MLA format?
In general, MLA format doesn’t typically call for a separate cover page. Instead, you should include your name, your instructor’s name, the course name, and the date in the upper-left corner of the first page. After that, you can add the title of your paper.
What is the recommended line spacing for MLA format in Microsoft Word?
By MLA formatting guidelines, it is essential to maintain double-spacing throughout your entire document, including the Works Cited page.
How can I generate a hanging indent in my Works Cited page using Microsoft Word?
To set up a hanging indent in your Works Cited page, first, highlight the text you wish to format. Next, right-click on the selected text, and from the context menu, click on “Paragraph” Within the “Paragraph” settings, navigate to the “Special” section, and choose “Hanging” from the dropdown menu. Finally, adjust the indentation value to 0.5 inches.
How do I format in-text citations in MLA style using Microsoft Word?
To format in-text citations following MLA style, you can include a citation by navigating to the “References” tab, then click on “Insert Citation” and choose the source from your list. Word will take care of the formatting, ensuring it aligns with MLA guidelines automatically.
Can I customize the citation style in Microsoft Word for MLA?
Yes! You have the option to personalize the citation style in Microsoft Word for MLA. Here’s how you can do it:
- Navigate to the “References” tab.
- Click on “Citation Styles“
- Choose “More Styles“
- From this point, you can either adjust the existing MLA style or craft your very own custom citation style.
Conclusion
In summary, both academics and professionals need to grasp the art of how to do MLA format on Microsoft Word. This article has offered an extensive walkthrough, encompassing aspects such as page setup, header customization, text formatting, and proper citation of sources. Thanks for reading!


