
To Insert Shapes in Google Docs
- Click “Insert” > “Drawing” > “New“.
- Choose “Shapes“.
- Pick the desired shape and drag it to the required size.
- Release the mouse button to insert the shape.
In this article, you will learn how to insert shapes in google docs. So let’s start with the introduction.
Google docs provide a user with many interesting and useful tools and features to design a presentation or a document. The “Google drawing” tool is one of them which is used to insert different types of shapes in google docs to make a presentation or document look better and more professional.
There are different shapes such as squares, circles, flow charts, arrows, stars, callouts, and many other useful shapes, available in google docs to add to the document. These all shapes are customizable so you can edit them to add text or change the background color etc. You will keep these shapes to create flow charts and other diagrams to create a visual appearance in your document.
For example, if you want to add a circle to your document then go to the shapes table and pick the circle from the variety of shapes. Hold and drag the mouse to the required size to draw the circle shape in your document.
Benefits of Inserting Shapes in Google Docs
There are a large number of uses of shapes in google docs. If you know how to use these shapes in google docs, you can create a professional and neat document. Here are some major benefits of these shapes in google docs: These shapes
- Ensure consistency in your professional documents.
- Save your time, that may be wasted if you draw them
- Give your documents a professional look
- Are customizable to fit the user’s requirements
- play a significant role to organize the data properly
- Are useful to differentiate the useful points in the Google docs
How to Insert Shapes in Google Docs
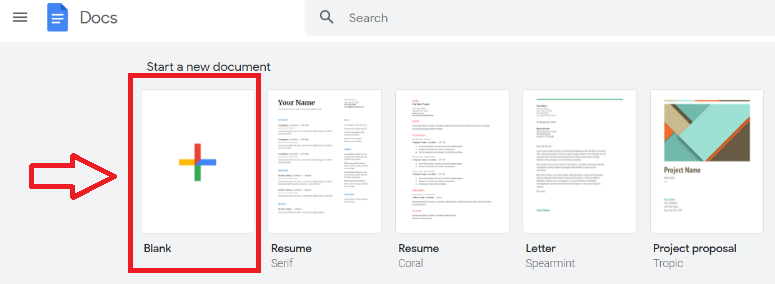
Step 1:
First of all open the document in Google docs, in which you want to insert the shape, on your computer.
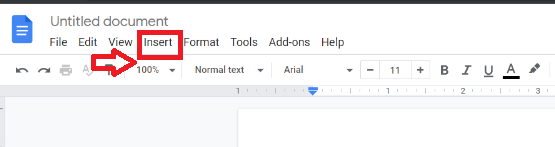
Step 2:
Click on the “insert” option available under the title of the document.
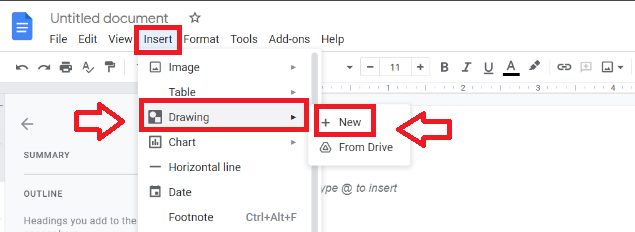
Step 3:
Move towards the “Drawing” section and choose the “New” option from the list.
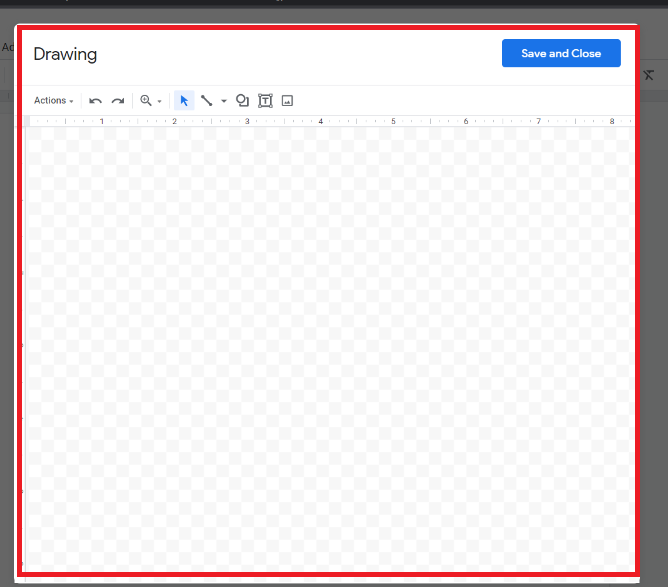
Step 4:
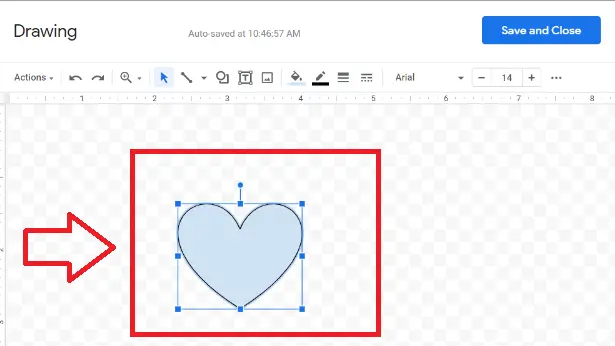
A blank Drawing dialogue pop-up will appear on the screen.
Step 5:
Click on the sign shown below to open the drop-down menu.
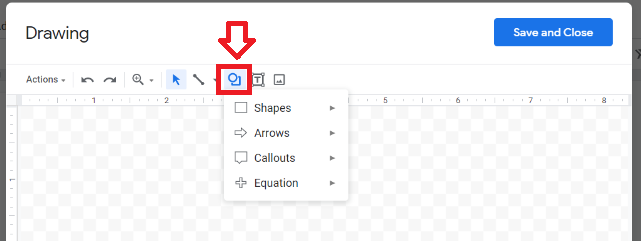
Step 6:
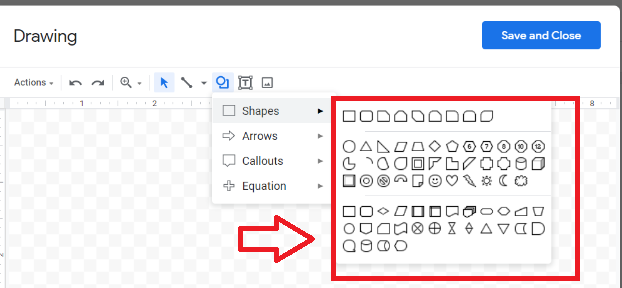
Click on the “shapes” option to open a table of different shapes.
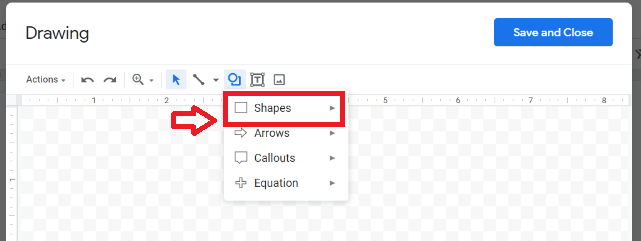
Step 7:
Choose a specific shape from the table.
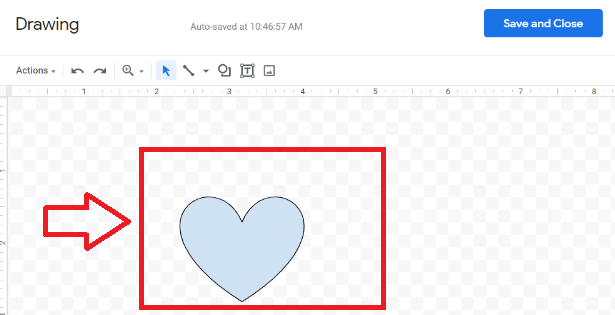
Step 8:
Click and drag the selected shape according to your required size. When the desired size is obtained release the mouse button. Your selected shape will appear on the screen.
How to Resize and Customize the Inserted Shape in Google Docs
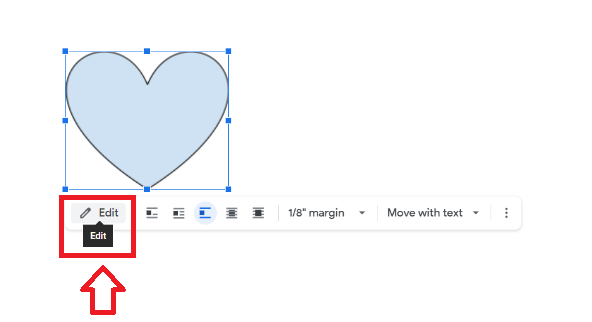
Now, you can also make other changes to the selected shape according to the requirements.
Step 1:
To resize the shape click on the resizing handle available at the corners of the shape, to resize your selected shape.
Step 2:
If you want to edit the shape again then reopen it, by clicking on the “edit” option available below the shape.
Step 3:
Click on the sign of vertical 3 dots to open up more options.
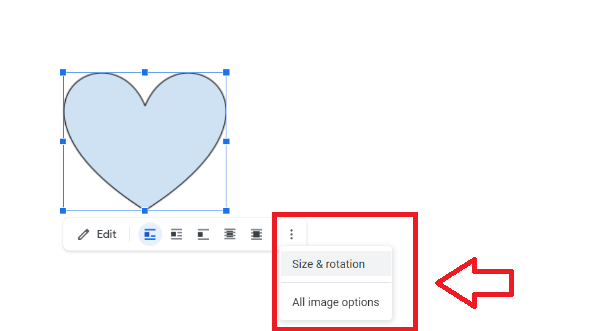
Step 4:
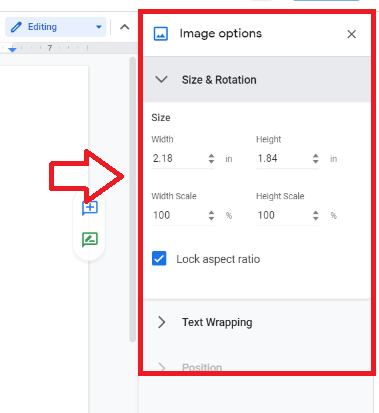
A list of different options for rotation and size will appear. Use these options according to your requirements and edit the shape.
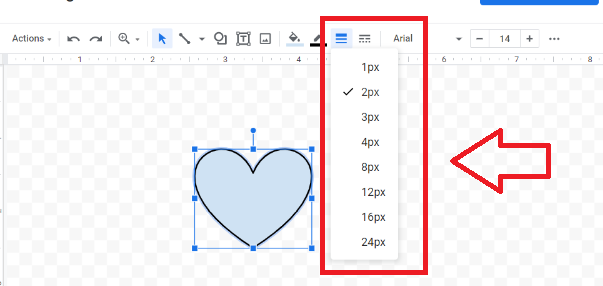
Step 5:
Click on the sign shown in the picture, to change the width of the border of the selected shape.
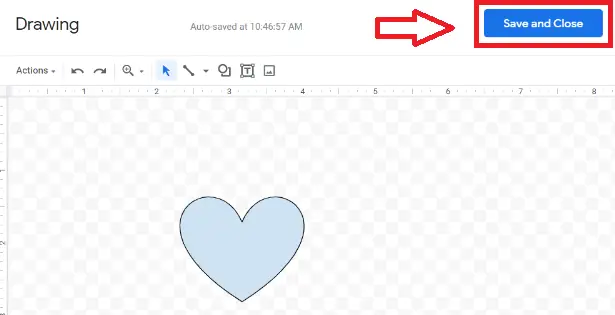
Step 6:
When the changes have been made, click on the “save and close” button, available in the right top corner.
This shape will appear in your documents, on your google docs browser window.
Notes
- You can also use the special characters and tables to add shapes in your Google docs.
- You can also use some shortcut keys to insert shapes in google docs for example press (CTRL+SHIFT+C) to copy the shape’s attributes.
Conclusion
Google Docs provides a variety of shapes, arrows, callouts, and equation shapes. They can be resized, reordered, and customized with text. To create a shape, select a shape style. Then click, hold, and drag the mouse into the drawing area to create the shape of the desired size. The drawing tool present in Google docs offers different kinds of utilities and benefits to the user by providing approaches to inserting different types of shapes in Google docs. If you follow all the easy steps given above then you can better understand how to insert shapes in Google docs.
Now it’s your turn to revise that how to insert shapes in the Google docs to make your document look neat and clean.


