
To Speech to Text on Google Docs
- Open the document you want to use voice typing.
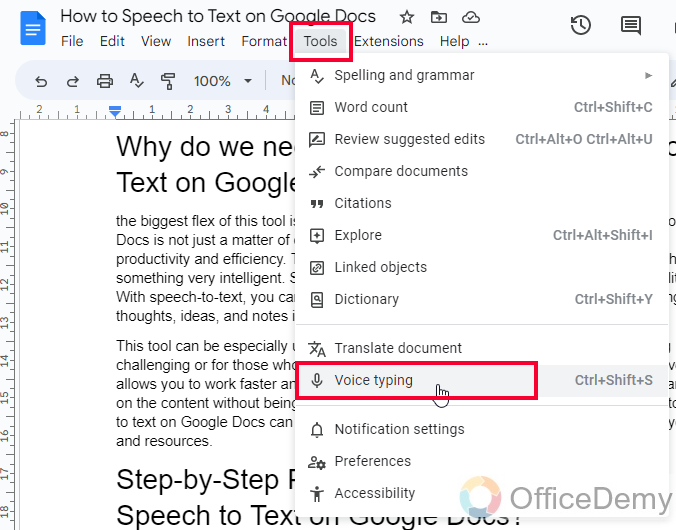
- Go to the “Tools” menu > Click on “Voice Typing“.
- Double-click on it to turn it red, indicating that it’s ready to listen.
- Begin speaking, and Google Docs will transcribe your words in real-time.
Hi. Welcome back to our Google Docs series of tutorials. Today, we will learn how to speak to text in Google Docs. In today’s fast-paced world, time is of the essence, and typing can be a tedious and time-consuming task.
Fortunately, speech-to-text technology has come a long way, and now it is possible to dictate your thoughts and have them automatically transcribed into text. This technology has proven to be a game-changer for people with disabilities, busy professionals, and anyone who wants to increase their productivity.
In this article, we will guide you through the process of using Google Docs’ speech-to-text feature, which allows you to dictate your ideas and thoughts and convert them into written text in real time. So, let’s get started and learn how to use this handy tool
Advantages of using Speech to Text on Google Docs
The biggest flex of this tool is time-saving, learning how to use the speech-to-text tool on Google Docs is not just a matter of convenience; it can also have a significant impact on your productivity and efficiency. This tool allows you to edit the content just by your voice, this is something very intelligent. So, now you can sit around and talk about your document literally. With speech-to-text, you can save a considerable amount of time and effort by dictating your thoughts, ideas, and notes instead of typing them manually.
This tool can be especially useful for people with physical disabilities that make typing challenging or for those who need to multitask and have their hands occupied. Moreover, it allows you to work faster and more efficiently, as you can easily get your ideas down and focus on the content without being slowed down by typing or editing.
In short, learning how to speech to text on Google Docs can help you work smarter, not harder, and make the most of your time and resources.
How to Speech to Text on Google Docs?
Since the speech-to-text tool is natively available in Google Docs. We will see how to access it, and then we will write some content without using the keyboard right, and the most interesting part, we will see the errors in the content generated by speech and give some more commands to remove those errors. Wow, amazing, let’s get into it and learn this tool.
Speech to Text on Google Docs – Access the Voice Typing
In this section, we will learn how to speech to text on Google Docs, and for this, we will need to access the voice typing functionality inside Google Docs software. So, let’s see how we can access it and how we can get started with it.
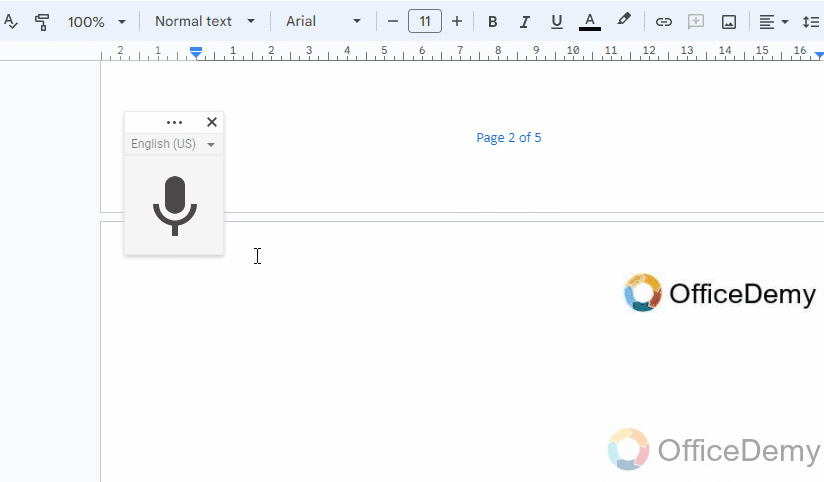
Step 1
Open the document you want to command with voice typing in Google Docs
Step 2
Go to the Tools menu, then click on “Voice Typing”
Or simply press the “Ctrl + Shift + S” to get this tool into your screen
Step 3
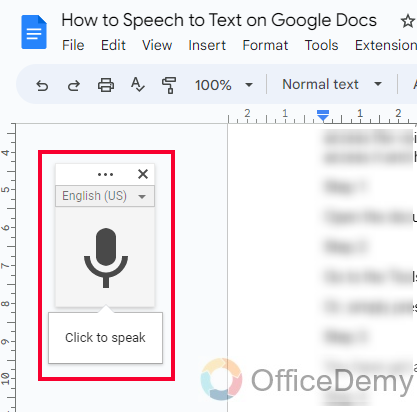
You have got a microphone icon on the left-hand side of your document.
Step 4
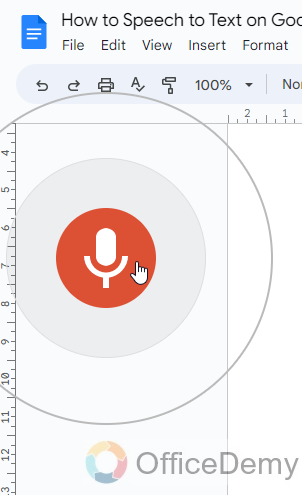
You need to click on it twice, and it will turn red, which means it’s now listening to your voice commands.
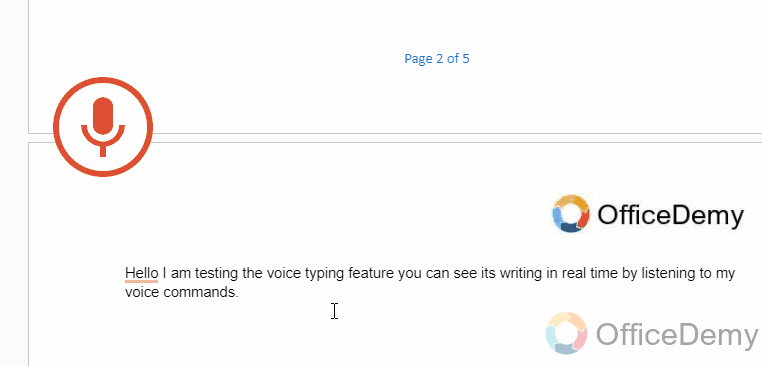
Step 5
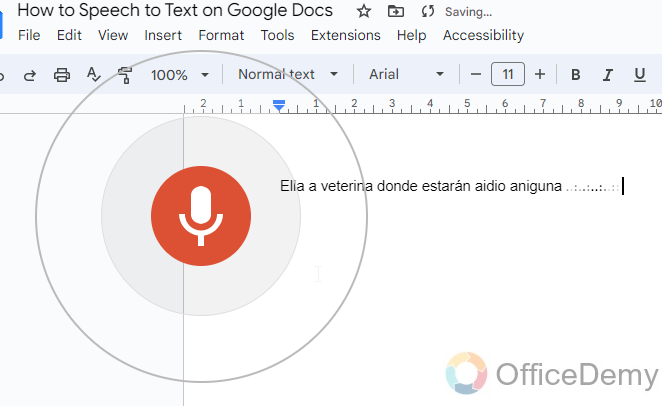
Start speaking and you will see the real-time typing of your words on your document. Wow.
Step 6
When you are done, just click on the microphone icon once, and it will be changed to black color, and now it will stop listening.
So, this is how we can access voice typing in Google Docs.
You have seen how to speech to text on Google Docs.
But this voice command may also leave some errors, this can be because of different speaking styles, poor microphone quality, and some other reasons. It’s highly important to recheck your content after you created it using voice typing, but still, this tool will help with that.
Speech to Text on Google Docs – Making Corrections
In this section, we will learn how to speech to text on Google Docs, and we will see what we are going to do after giving voice commands and generating some content with it. As I told you, this content is not 100% accurate, so we will see how to edit it and make perfectly written. Follow the below steps to understand how to do it, and how we can use this tool to give commands to make changes in our content without using the keyboard.
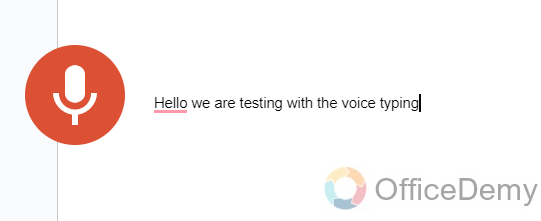
Step 1
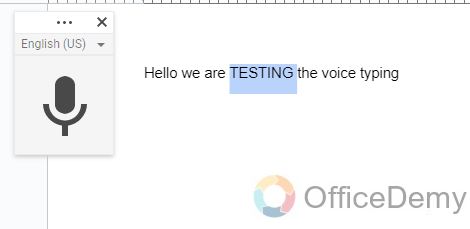
As you created the content with your voice, there will be some words with blue underlines showing some errors
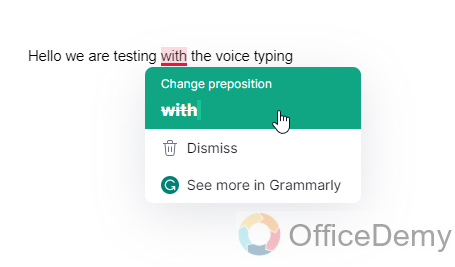
Step 2
When you mouse over those highlighted words, they will show some suggestions to correct the words, you can correct them from the suggestions.
Step 3
If you have some major changes in your content like you want to remove a couple of lines or some words, then you can use voice commands.
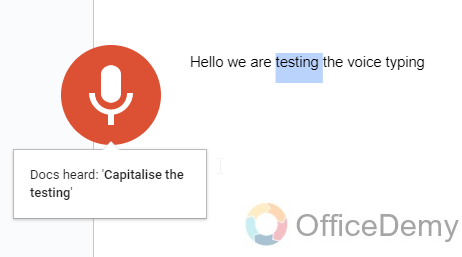
Simply turn on the microphone and speak your instruction to Google Docs like the below example.
Example of a voice command: Select “I am busy this morning” from the text and remove it.
Step 4
Google Docs will find out the phrase you said, it will select it, and then it will delete it as per your guidelines.
Note: You can also command Google Docs to accept the suggestions for specific words that are highlighted for errors.
This way you can avoid the keyboard and can only work with your voice and a few mouse clicks. This is amazing, isn’t it?
So, this is how we can correct and edit our content generated by voice in Google Docs. I showed you how to use speech to text on Google Docs, and then the editing part of it to make the content accurate and efficient.
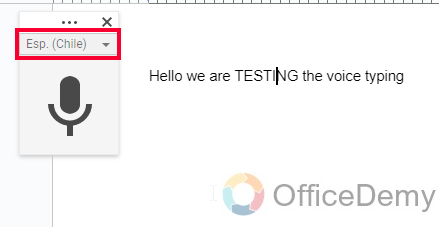
Speech to Text on Google Docs – Change Language
Yeah, I know you are thinking about this feature. Yes, you can change the language of the voice typing tool to any language without any installation or downloading process.
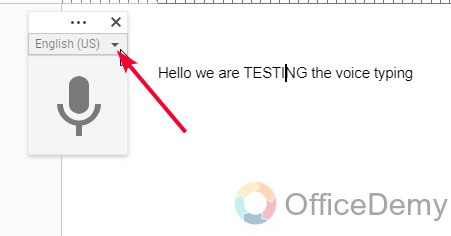
Step 1
Click on the language dropdown, present inside the voice command box on your left
Step 2
Here is a big list of the languages you can select to give your voice commands.
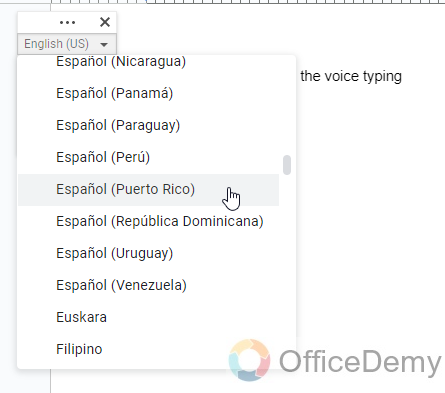
Step 3
Select any language, and now you will see the selected language on the voice command box on your left
Step 4
Now, start speaking in that language and you will see the content will now be written in that language.
Amazing!
Things To Remember
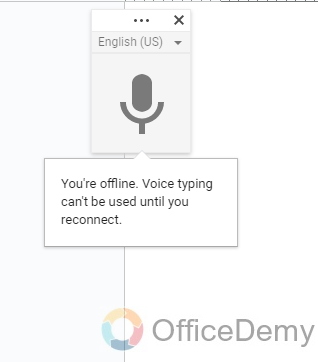
- Make sure you have a reliable internet connection and a working microphone
- .
- To start speech-to-text on Google Docs, click on the microphone icon on the toolbar or use the keyboard shortcut Ctrl+Shift+S (Windows) or Command+Shift+S (Mac).
- Speak clearly and at a steady pace, and use punctuation commands like “period,” “comma,” “exclamation mark,” etc.
- You can also use voice commands to edit and format your text, such as “select all,” “bold,” “underline,” etc.
- To end speech-to-text, click on the microphone icon again or use the keyboard shortcut Ctrl+Shift+S (Windows) or Command+Shift+S (Mac).
- Remember to proofread and edit your text after using speech-to-text, as it may not always be 100% accurate.
Frequently Asked Questions
Is the Plagiarism Checker on Google Docs Accurate and Reliable?
The reliability and accuracy of the plagiarism checker for google docs have been questioned. Users have reported mixed results, with some finding it useful for detecting copied content, while others have encountered false positives or missed plagiarized material. It is advised to cross-check with other plagiarism detection tools to ensure thorough analysis for academic or professional writing.
Can I Use Word Art in Google Docs for Speech to Text Purposes?
Google Docs does not have a specific feature called word art in google docs. However, you can use the speech-to-text functionality available in Google Docs to convert your spoken words into written text. This feature is useful for dictation purposes, making it easier to transcribe spoken thoughts into written documents.
Conclusion
This was all about how to speech to text on Google Docs. This tool requires spending time with you, and after some interaction, you will explore some more features of it by yourself. This is a tool that cannot be 100% trustable, so it’s highly recommended to always double-check your content after you generated it with voice typing.
I hope you find this article helpful and that you learned a great tool of Google Docs. Thank you and keep learning with Office Demy.


