
To Make Folders in Outlook
- Launch Outlook.
- Right-click “Folders” in the Navigation Pane.
- Select “New Folder“.
- Name the folder and choose its location.
OR
- Open Outlook.
- Select the “Folder” tab in the Ribbon.
- Click “New Folder“.
- Fill in the folder’s details.
- Choose the location and click “OK“.
OR
- Locate the folder where you want to create a subfolder.
- Right-click the folder and choose “New Folder“.
- Name the subfolder.
- The subfolder is created within the selected folder.
Learn more in the Article below!
Hello. In this article, we are going to learn how to make Folders in Outlook. In today’s digital era, effective email management is crucial for productivity and organization.
Outlook provides a powerful solution with its folder feature, allowing users to streamline their inboxes and categorize emails effortlessly.
In this article, I am going to guide you through the process of creating folders in Outlook, empowering you to take control of your digital workspace and optimize your email management.
Why we Make Folders in Outlook?
Learning how to make folders in Outlook is essential for efficient email management and improved productivity. By creating folders, you gain the ability to organize your emails based on specific criteria, such as projects, clients, or topics.
This organization allows for quicker retrieval of important emails and reduces the time spent searching through a cluttered inbox. With Outlook folders, you can prioritize and focus on critical messages, ensuring that nothing gets overlooked or lost in the digital chaos.
So, these are very common and obvious reasons to learn how to make folders in Outlook.
How to Make Folders in Outlook?
There are various methods to make folders in Outlook. We will learn all the methods that work in Outlook App, and a few of them in Outlook Web. So, let’s get started with the first method.
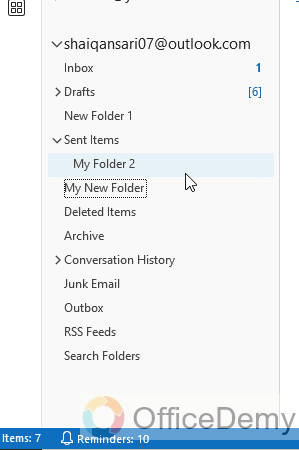
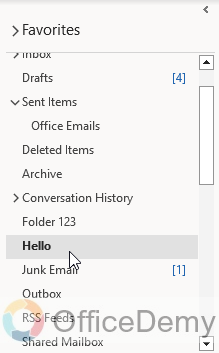
Make Folders in Outlook – Using the Navigation Pane
In this section, we will learn how to make folders in Outlook, and we will see the most simple and direct method to do it. Let’s see the step-by-step procedure below.
Step 1
Launch the Outlook app on your device.
Step 2
Locate the Navigation Pane on the left side of the Outlook window.
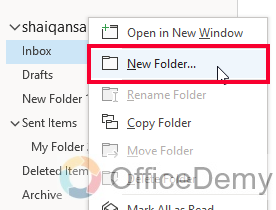
Step 3
Right-click on the “Folders” section in the Navigation Pane, and from the context menu, select “New Folder.”
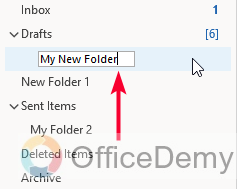
Step 4
Enter a name for your folder in the blank field, and press Enter key to save the Folder.
Step 5
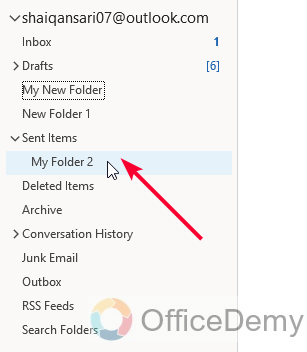
Now you can change the location for the new folder. You can hold and drag it up or down to place it below or above the existing folders.
Step 6
Your new folder will now appear in the Navigation Pane.
I hope you find this method easy and useful.
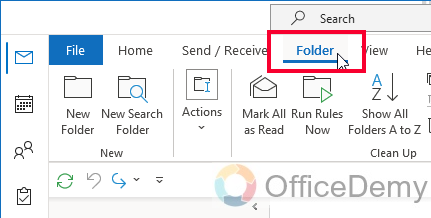
Make Folders in Outlook – Using the Main Ribbon
In this section, we will learn another method to make folders in Outlook. This method uses the main menu ribbon, and there is a dedicated Folder tab that gives us some more in-depth options to configure the folders at the time of creation. Let’s see how this method works.
Step 1
Open the Outlook app
Select the “Folder” tab from the Ribbon at the top of the Outlook window.
Step 2
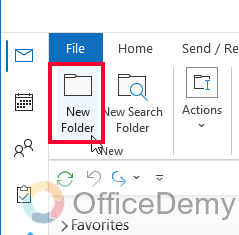
Click on the “New Folder” button in the Ribbon.
Step 3
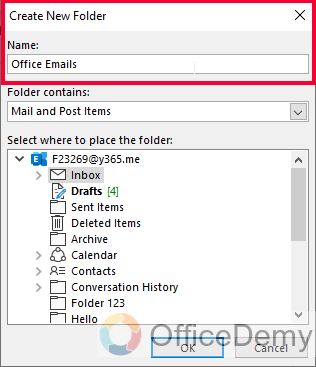
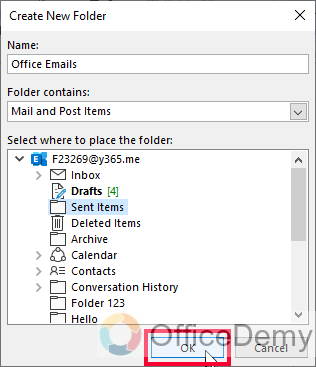
In the “Create New Folder” dialog box, enter a name for the folder in the “Name” field.
Step 4
Choose what type of content/data you want to keep in this folder.

Step 5
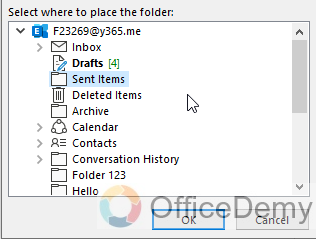
Choose the location for the new folder (under an existing folder or at the same level as the mailbox).
Step 6
Click “OK” to create the folder.
Step 7
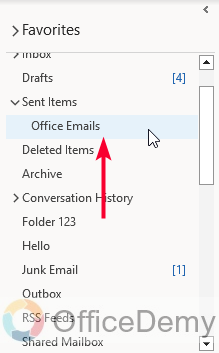
The newly created folder will be displayed in the Navigation Pane, ready for you to organize your emails.
So this was another good method to make folders in Outlook.
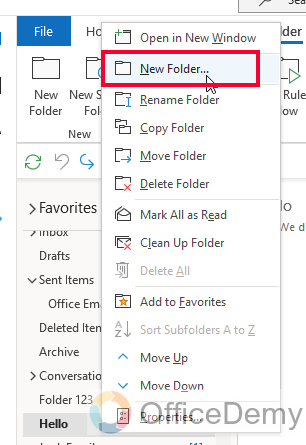
Make Folders in Outlook – Creating a Sub-Folder
In this section, we will learn how to make folders in Outlook and then how to create sub-folders. For example, if you made a folder for office emails, now you can further create sub-folders inside it to separate the most important, less important, and not-important emails there. This kind of structure can save you a lot of time, and you will never miss out on any important emails.
Step 1
Launch the Outlook app.
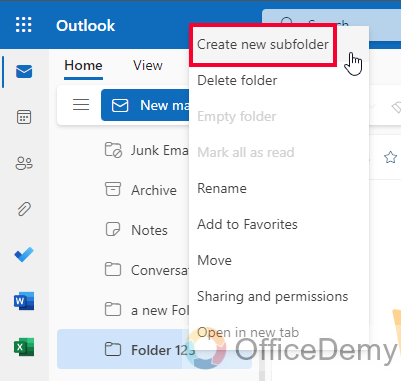
Locate the folder in which you want to create a subfolder.
Step 2
Right-click on the folder and select “New Folder” from the context menu.
Step 3
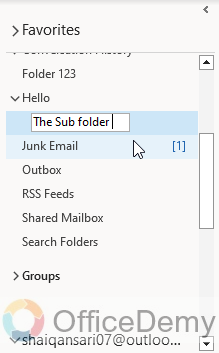
Enter a name for the subfolder and press Enter key to create the subfolder.
Step 4
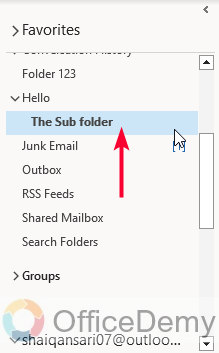
The subfolder will now appear within the selected folder in the Navigation Pane.
You saw how easy it is to make a subfolder inside any Folder in Outlook
So, these were three easy and useful methods to make folders in Outlook. But you saw all the methods I mentioned work in Outlook Desktop App, although many users use the Outlook Web version. So, in the below sections, let’s see some more methods that work in the Outlook web version.
Make Folders in Outlook – Web Version
In this section, we will learn how to make folders in the Outlook web version, this method works for all web versions after 2010. So, make sure you don’t have a very old version of Outlook. Follow the simple steps below to get started.
Step 1
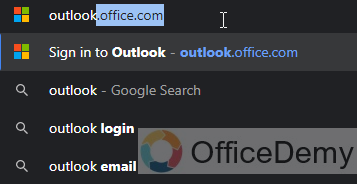
Open your web browser and navigate to the Outlook web version (outlook.office.com)
Step 2
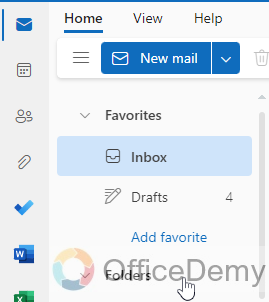
On the left side of the Outlook window, locate the “Folders” Button.
Step 3
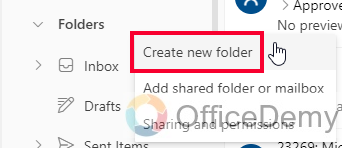
Right-click on the “Folders” button and from the context menu, select “Create new folder”
Step 4
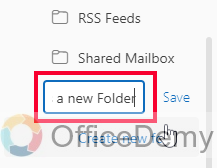
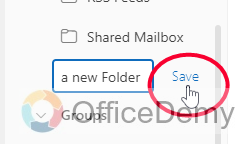
Enter a name for your folder in the given field.
Step 5
Click on the Save button next to the Folder to save it.
Step 6
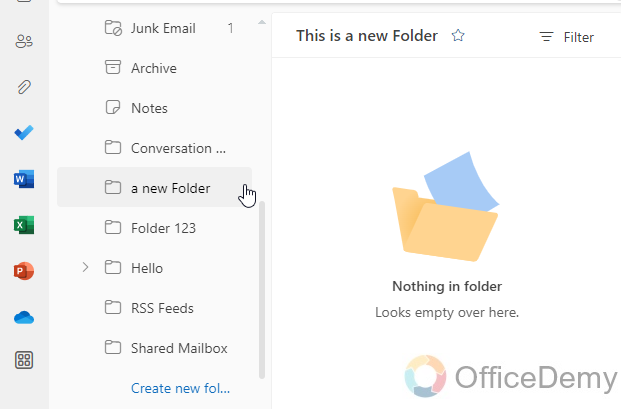
The newly created folder will now appear in the Folder Pane for you to organize your emails.
Yes! This was a very similar method to the Outlook app version, but the interface is different. You don’t have a Folder tab here in the web version, so this is the only method you can use in Outlook Web to make folders in Outlook.
For the subfolders, the method is also the same, you just need to click on the actual folder inside which you want a sub-folder, instead of the general “Folders” button.
Make Folders in Outlook – Web Subfolders
The method is nearly the same as the App method, so I will quickly cover it in fewer steps. Let’s see how to make sub-folders in the Outlook web version.
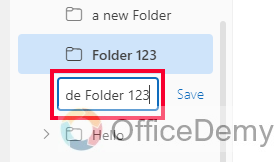
Step 1
Select the Folder for which you need a sub-folder
Step 2
Right-click on it and select “Create a new subfolder” from the list.
Step 3
Name your folder and click on the Save button.
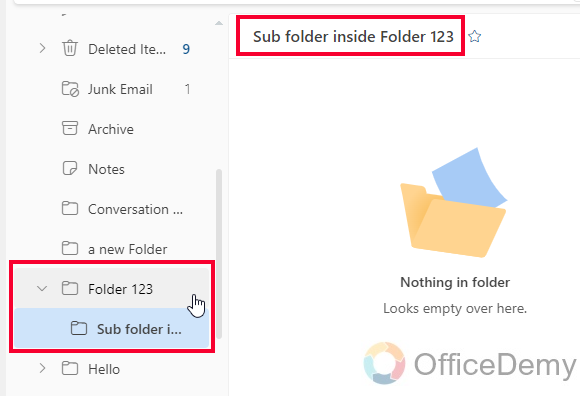
Step 4
You can see your new subfolder within the main folder is now visible.
That’s all from how to make Folders in Outlook.
Frequently Asked Questions
How to create a folder in Outlook for Windows?
Right-click on the “Folders” section in the Navigation Pane, select “New Folder,” enter a name for the folder, choose the location, and click “OK.”
How to make a folder in Outlook on Mac?
In the Outlook app for Mac, go to the “Folders” tab in the Ribbon, click on “New Folder,” enter a name for the folder, choose the location, and click “Save.”
How to create a folder in Outlook for iPhone or Android?
Open the Outlook app on your iPhone or Android device, go to the folder list, tap on the three horizontal lines icon, select “New Folder,” enter a name for the folder, choose the location, and tap “Save” or “Create”
How to create a subfolder in Outlook?
Right-click on an existing folder, select “New Folder,” enter a name for the subfolder, choose the location within the parent folder, and click “Save” or “OK”
Conclusion
That’s all from today’s topic. We saw various methods to learn how to make folders in Outlook. Thanks for reading. Keep learning with Office Demy.


