
To Sort Emails by Date Range in Outlook
- Open a “Mailbox“.
- Tap on “Filter“.
- Select “Date“
OR
- Go to “Search bar“.
- Tap on “Filter” > Select two “Date Ranges“.
- Emails are sorted between selected dates.
OR
- Open the “Inbox“.
- Tap on “Filter“.
- Select “By Date“
In this article, we will learn how to sort emails by date range in Outlook. Outlook is an email client designed for sending/Receiving and managing emails. It’s a very popular email service among the users. It’s designed to manage massive amounts of email with multiple accounts. It also connects with Outlook Calendar where you can schedule meetings, invite collaborators from the Outlook contacts to meetings, and set up events.
While finding an email in a certain date range in this massive number of emails can be very useful so we made a tutorial on it, how to sort emails by date range in Outlook.
When to Sort Emails by Date Range in Outlook?
If you are dealing with a large number of emails daily, then finding a specific email between specific dates becomes very hard to find. Let’s suppose you are running an account for a business and are suddenly ordered to arrange hundreds of emails by date range then you should learn how to sort emails by Outlook.
How to Sort Emails by Date Range in Outlook?
There are various ways to sort emails by date range in Outlook.
- Sort emails by date range in Outlook Web
- Sort emails by date range in Outlook desktop
- Sort emails by date range in Outlook by the search bar
- Sort emails by date range in Outlook by Advance find
Sort Emails by Date Range in Outlook – On the Web
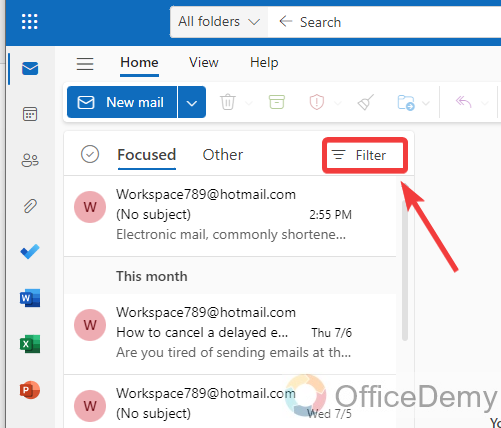
Step 1
Go to the Outlook web page and log in to your account, you will be directed to the following home page. If you look in front of you, you will see a “Filter” option through which you can sort your emails by date range.
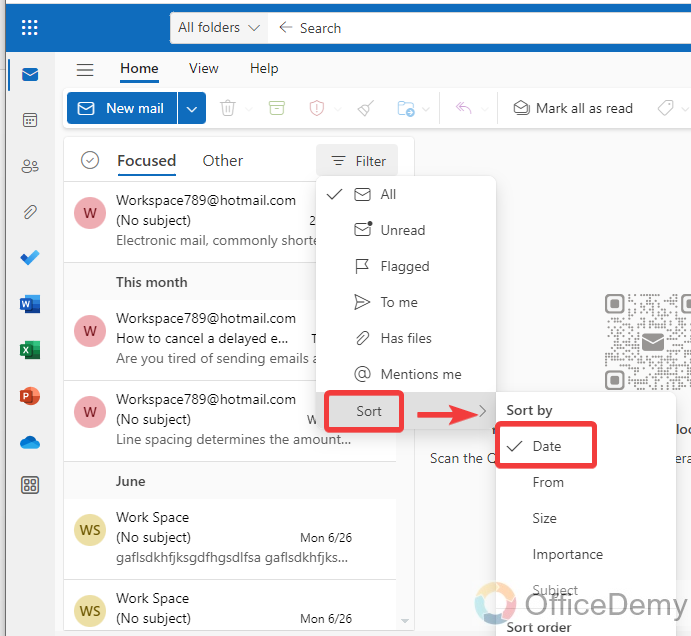
Step 2
When you click on this button, a drop-down menu will open where you will see a “Sort” button at last. Clicking on this Sort button will give you another drop menu. As we are sorting emails by Date range, so here we will select “Date” to sort emails.
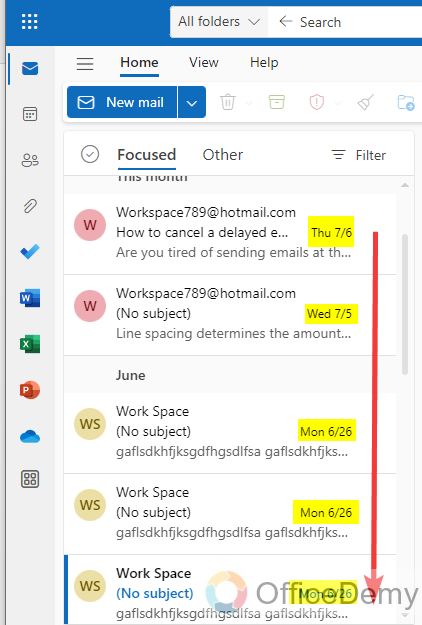
Step 3
As you select the “Date” option to sort your emails, your emails will be sorted in the date range as can be seen in the following example.
With the help of this sorting method, all your emails will be sorted from beginning to end. But if you want to sort your emails between specific dates then follow the following instructions.
Step 4
Look at the right end of the search bar of Outlook, there is also a “Filter” button located as directed below. Click on it to open it.
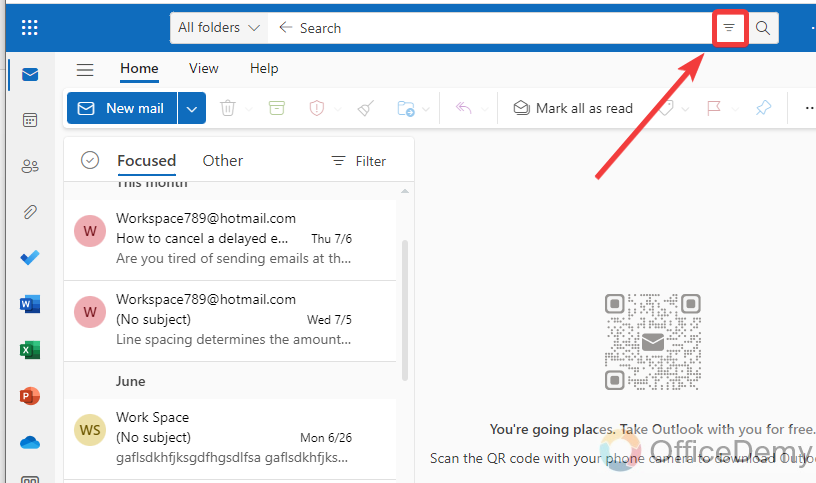
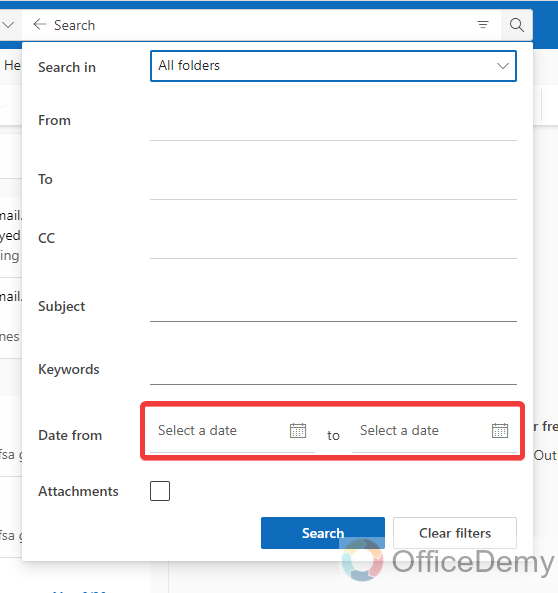
Step 5
When you click on this Filter button, you will see an Advance search window in front of you. In this window, you will also see the “Date from” option. With this option, you can sort your emails within specific dates by selecting the following highlighted field.
Step 6
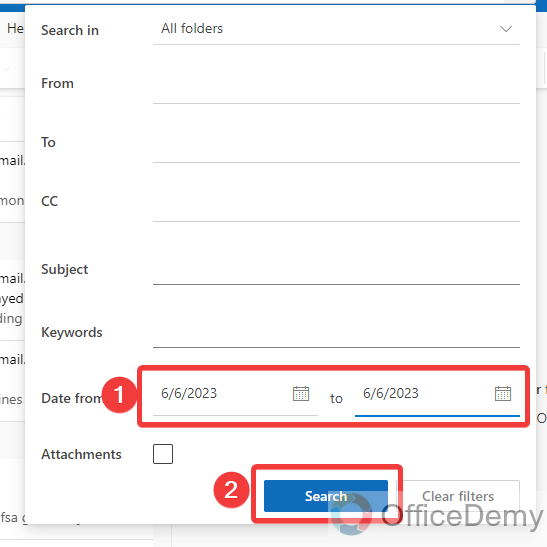
In these fields, give the start and end dates for which you want to sort your emails as I have given below, and then simply click on the “Search” button.
Step 7
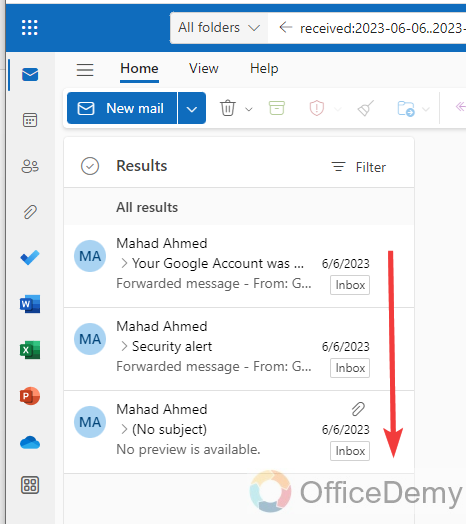
You will see all emails that you have received between the given dates.
Sort Emails by Date Range in Outlook – Desktop App
Step 1
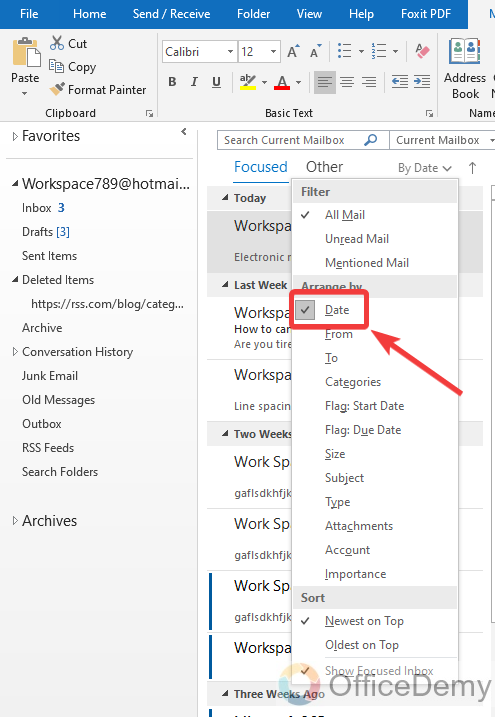
If you are on the Outlook desktop version, then you will see the following section on your screen, the folder list at your extreme list, and email description at your right, and all conversations in the center. If you keep an eye on this conversation section, you will see an “Arrange by” option just above these conversations as highlighted below.
Step 2
When you click on this option, you will see different kinds of criteria to arrange your emails with. As we must arrange emails by date, so here I have selected the “Date” option.
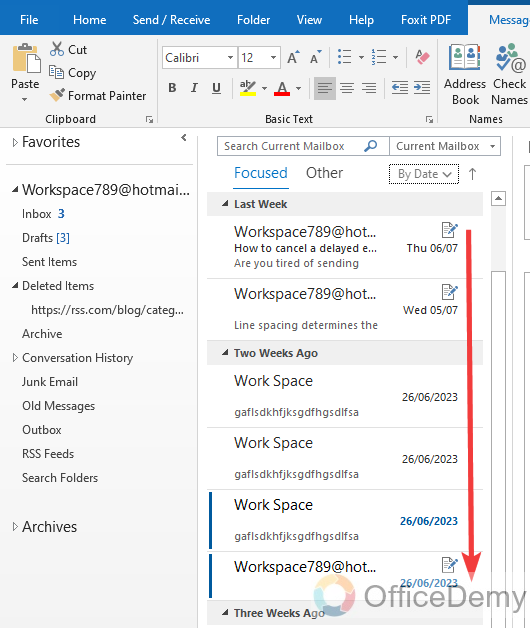
Step 3
Just clicking on the “Date” option will sort your emails by date range as you can see in the following picture.
Sort Emails by Date Range in Outlook – Using the search bar
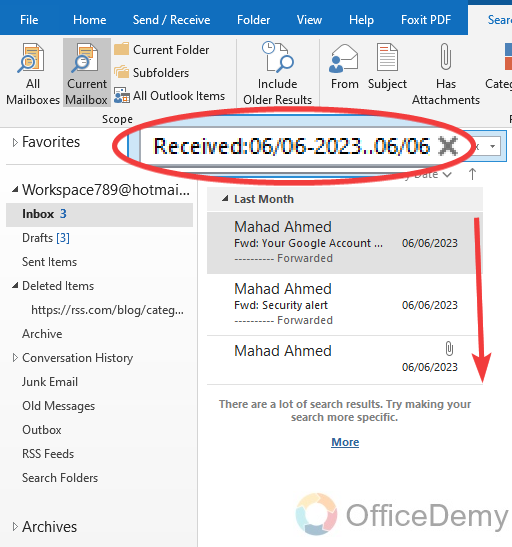
You can also use the search bar to sort your emails by date range. But you will have to know about the pattern of writing searching criteria. If you want to sort your emails by date range, then you will have to write “Received: start date..end date“.
Double dots will separate the dates and no space will be given between the formats.
You will get your results as highlighted below.
Sort Emails by Date Range in Outlook – Using Advance find
Step 1
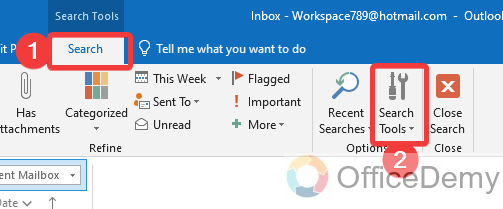
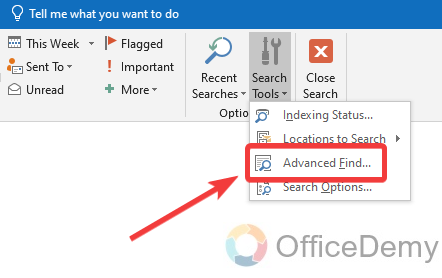
Go into the “Search” tab of the menu bar, you will find “Search tool” in the ribbon as highlighted in the following screenshot.
Step 2
When you click on the “Search Tools” option, a small drop-down will open where you will find an “Advanced Find” option. Click on it to open it.
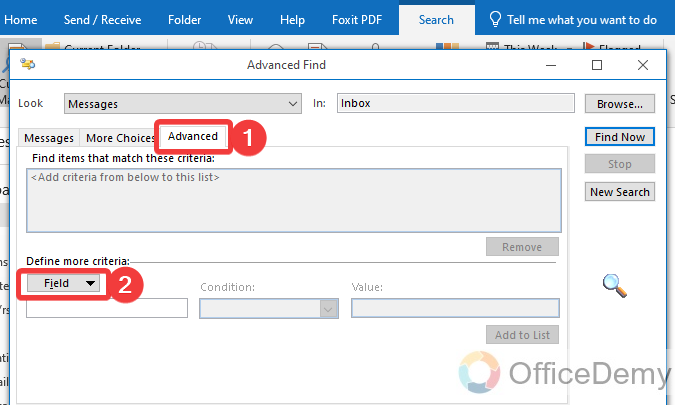
Step 3
This advanced find option will give you a small new window where you will see so many options to find any email. Go into the “Advanced” tab then click on the “Field option” to give the criteria for sorting emails.
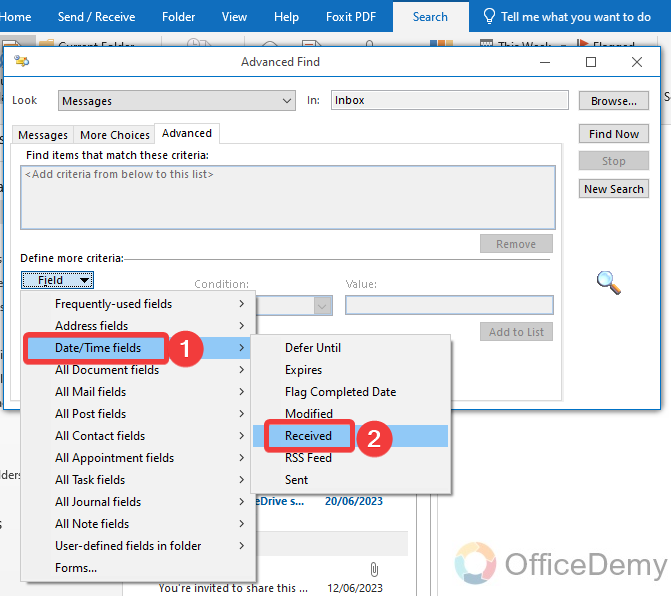
Step 4
When you click on this “Field” button, a drop-down menu will open where we will select the “Date/Time fields” as we need to sort emails by date range and then will click on the “Received” option from the next drop-down menu.
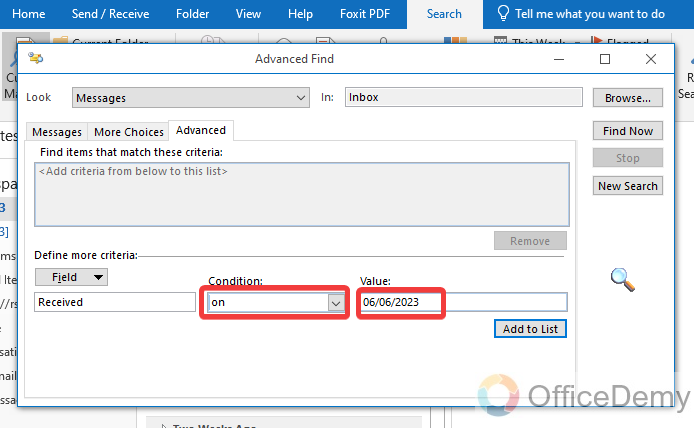
Step 5
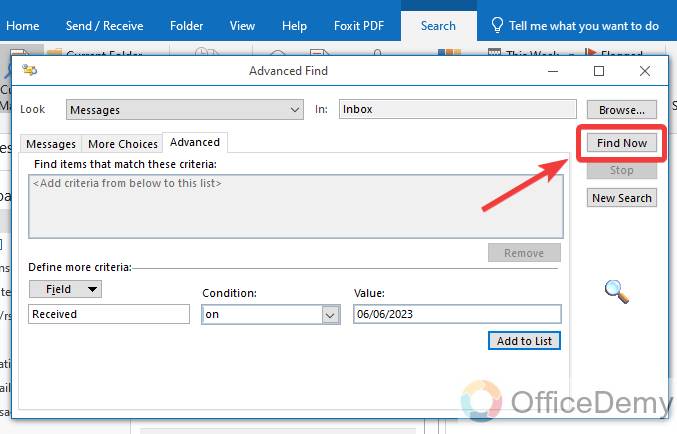
After selecting the field, then select the “On” condition to give the date range. Then write the date in the following highlighted dialogue box for which you want to sort your email.
Step 6
Once you have done with all criteria, then click on the “Find Now” button as directed in the following picture.
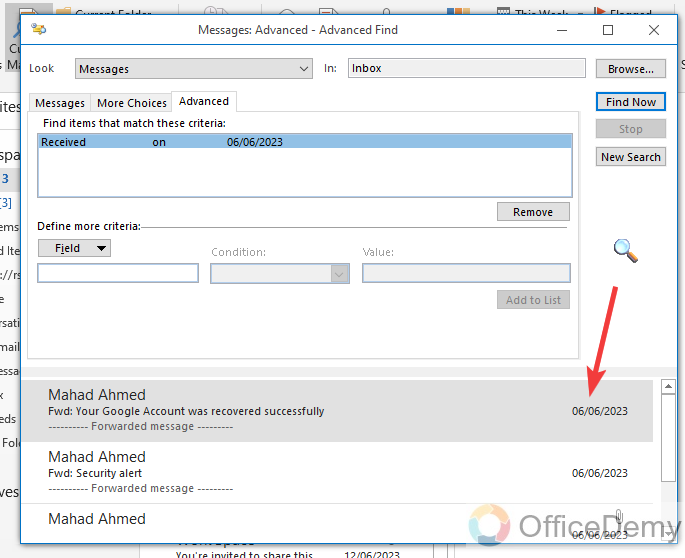
Step 7
As you click on the “Find Now” button, you will see all the emails of the selected date.
In this way, you can sort emails for a specific date.
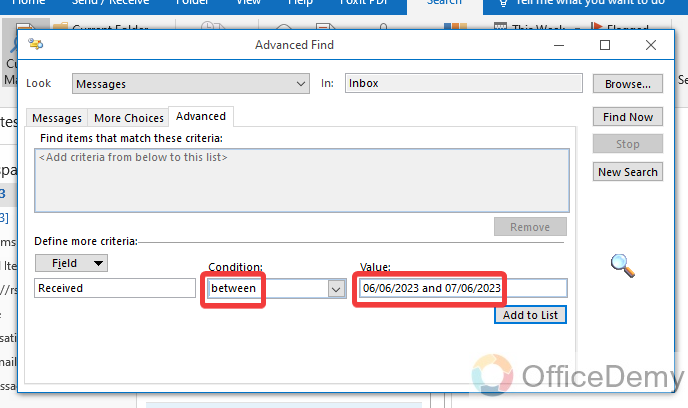
If you want to sort your emails between any date range, then you can also sort your emails between the dates from the following instructions.
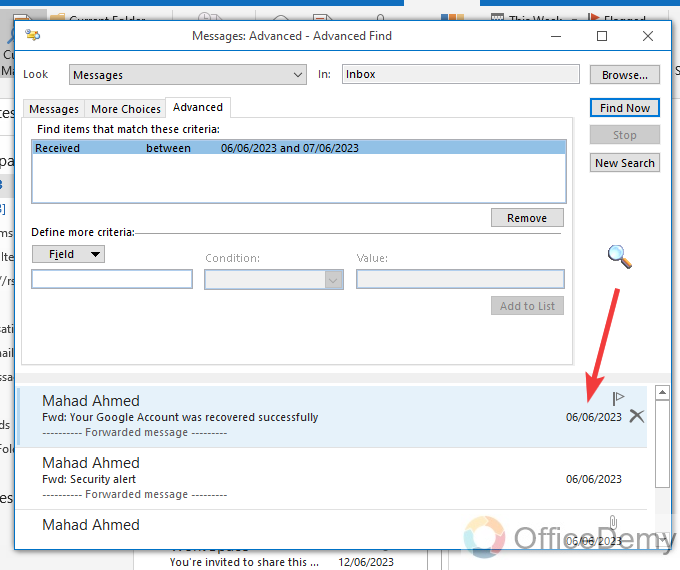
Step 8
The whole procedure will remain the same as above, just change the condition “On” to “Between” and then write the start and end dates in the following highlighted pattern.
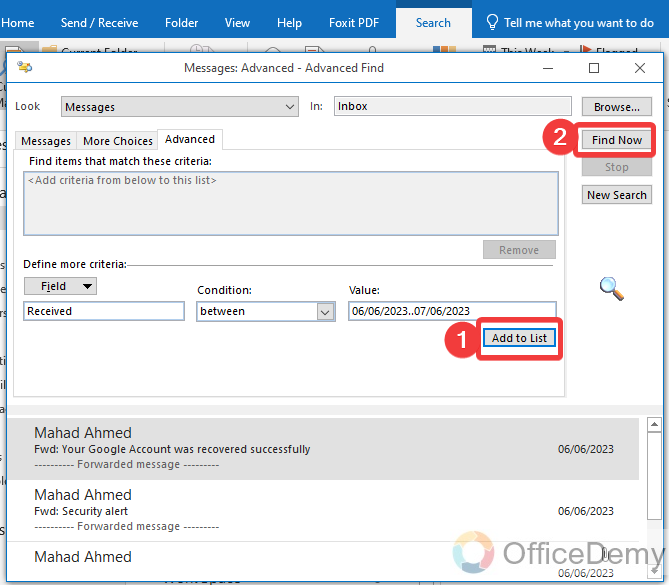
Step 9
After inserting the conditions and values, click on the “Find Now” button to find your emails in the given date range. You can also click on the “Add to List” button to save this criterion in the advanced find.
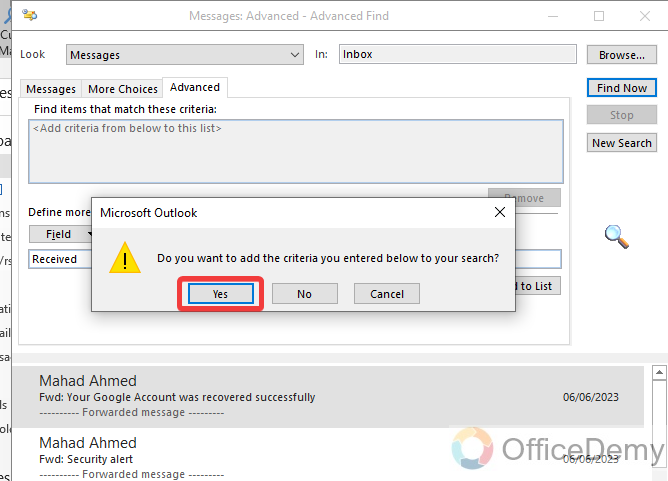
Step 10
When you click on the “Add to List” button you will get a pop-up message to confirm adding it to the list, click on the “Yes” button.
Step 11
Here’s the result as we want to sort our emails according to the given date ranges.
Frequently Asked Questions
Q: Why am I not able to see the search tab in Outlook?
A: To arrange your emails by date range search tab is so important as it has an advanced file tool in it. If you don’t find the search tab in the menu bar of Outlook, then nothing to worry follow the following steps to enable the search tab in the menu bar.
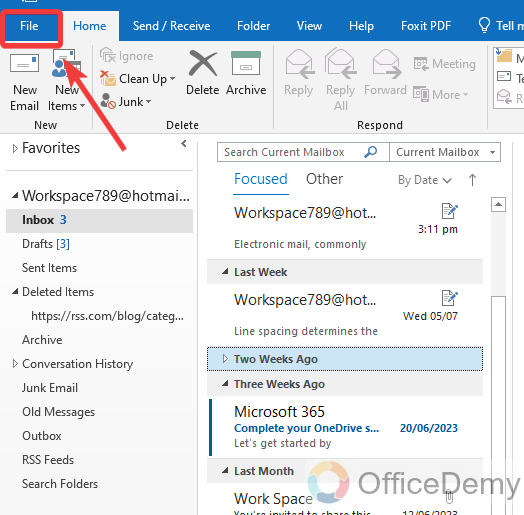
Step 1
Go to the File tab of the menu bar as directed in the following screenshot.
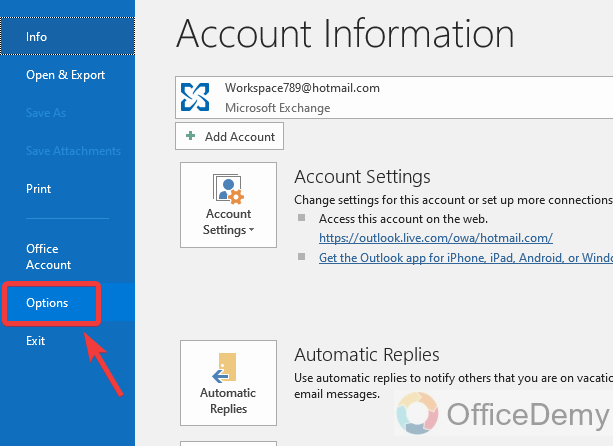
Step 2
In the file tab window click on the “Options” tab located at the left blue panel.
Step 3
When you click on the options tab, a new window will open, click on the “Customize Ribbon” from the main menu and then select the “Tool Tabs” from the following highlighted drop-listed menu.
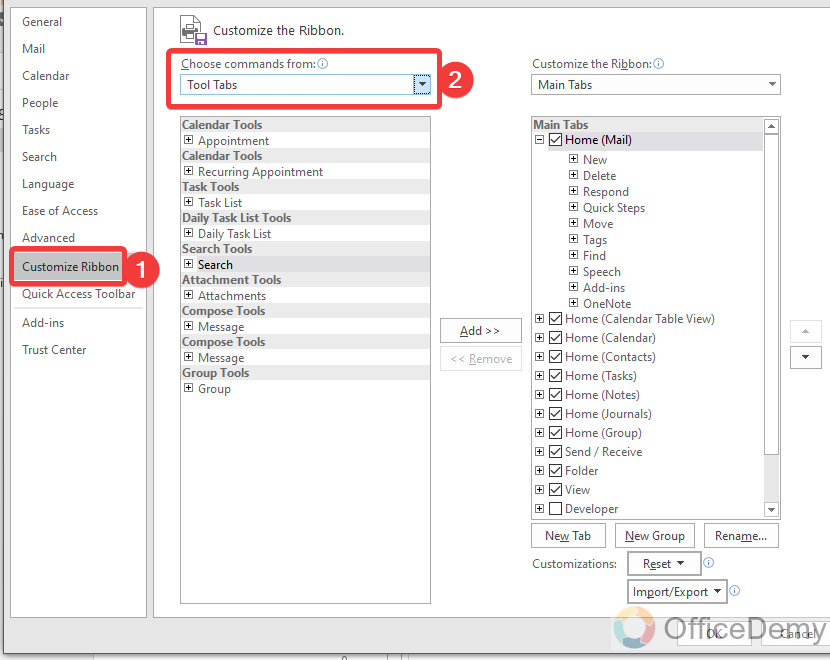
Step 4
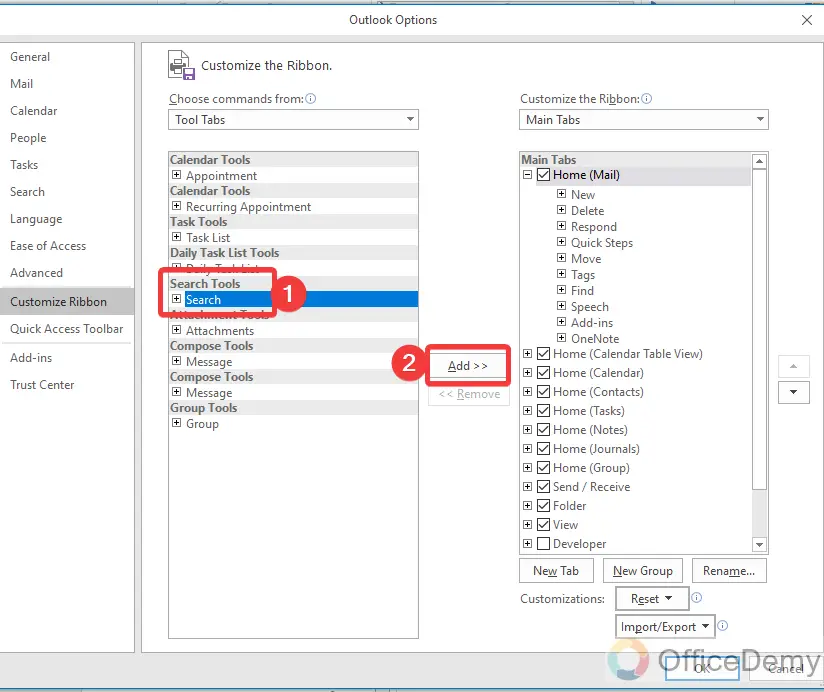
In the tool tabs find the search tab from the list and select it, then click on the “Add” button to add this tab in the menu bar of your Outlook.
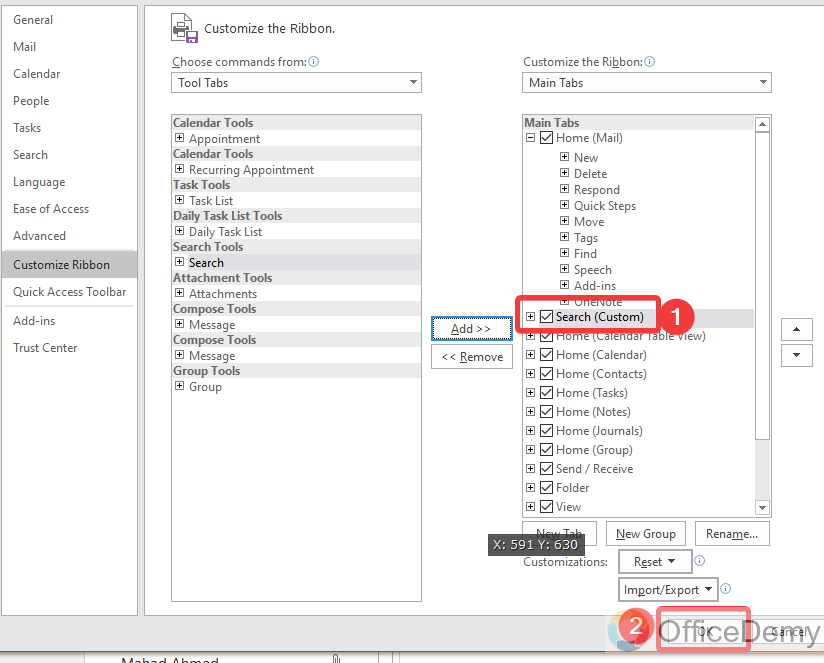
Step 5
As you can see in the following picture, the search tab has been added to your active main menu tabs, now just click on the “OK” button to save these changes.
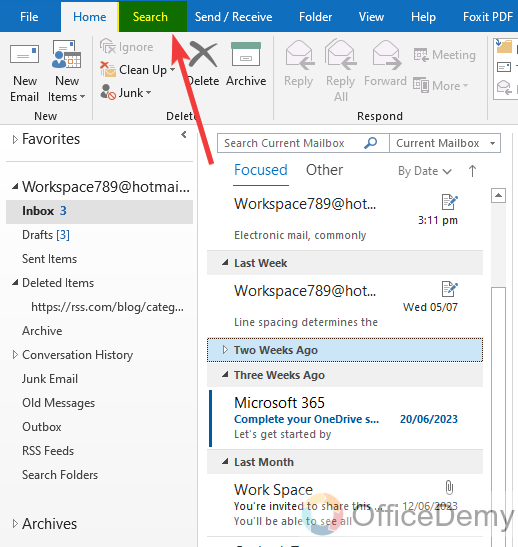
Step 6
The result is in front of you as can be seen in the following picture, a search tab has been added to the menu bar of your Outlook.
Conclusion
That’s all about how to sort emails by date range in Outlook. I hope it would clear to you how to sort emails by date range in Outlook. For more informative tutorials keep supporting us.


