
To Make OneNote Read-Only
- Open File Explorer.
- Open the Documents folder.
- Open the OneNote notebooks folder.
- Find the notebook and right-click on it.
- Click on the Properties option.
- Check mark Read-only option.
- Click on the Apply button then the OK button.
OR
- Open the OneNote web version.
- Open notebook.
- Click on the access button along with the Share button.
- Click on the “View only” option.
Today, we are here with the description of a useful feature of Microsoft OneNote “Read-only”. Nobody would want someone to make unnecessary changes to their notebook for Microsoft OneNote has introduced this feature through which you can disable all editing tools and can allow the user just to Read the document. So, wait for what let’s get started learning how to make OneNote Read-only.
Benefits of Making OneNote Read-Only
Making OneNote Read-only can prevent you from unwanted changes, especially when you are working with multiple users on a single exchange. You may also need to make OneNote Read only while sharing your OneNote with others.
When you are presenting your OneNote with hundreds of users (Students or staff etc.) you can enable Read Only mode to prevent accidental changes. If you also want to make your OneNote Read-only then read the following article on how to make OneNote Read-only.
How to Make OneNote Read-Only
In this tutorial on how to make OneNote Read-only, we will learn three different methods of making OneNote Read-only which are below.
- Make OneNote Read-only via the property dialogue box
- Make OneNote Read-only by sharing access
- Make OneNote Read-only by view-only option
1. Make OneNote Read-only via the property dialogue box
If you are using Microsoft OneNote on the desktop version of Windows or Mac, unfortunately, you will not see any direct access option through which you can make your OneNote Read-only. But this can be done by the notebook’s property dialogue box. If you are not getting my word, then go through the following steps to learn how to make OneNote Read-only via the property dialogue box.
Step 1
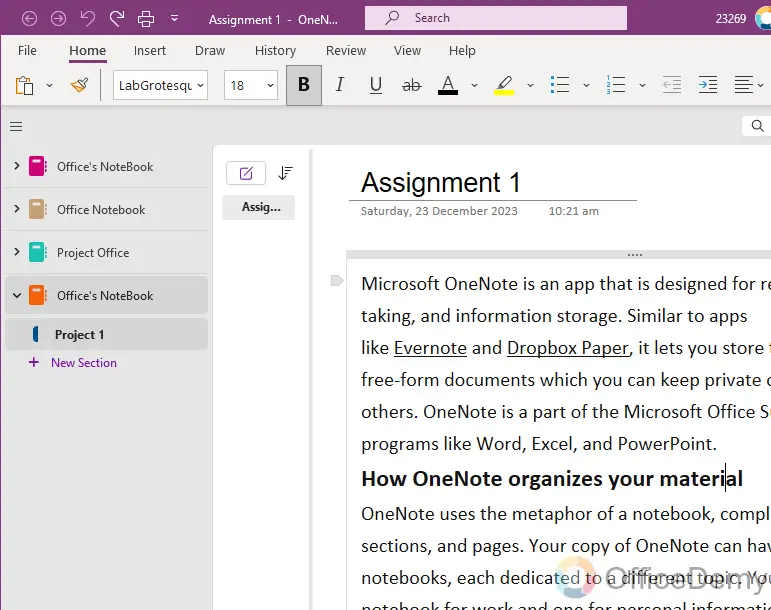
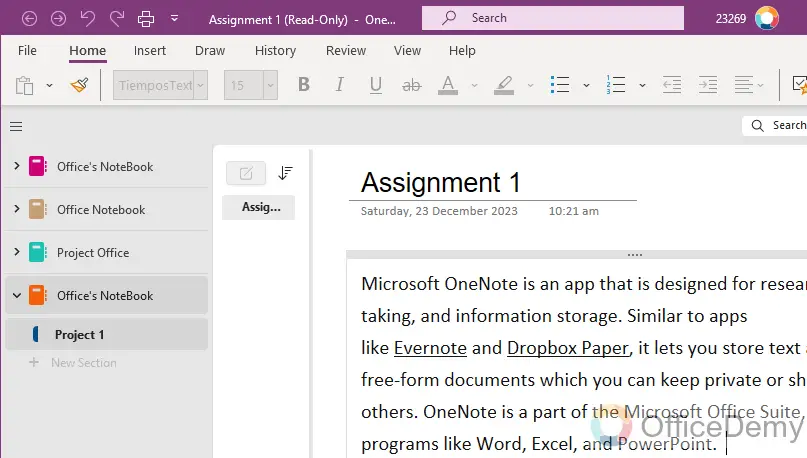
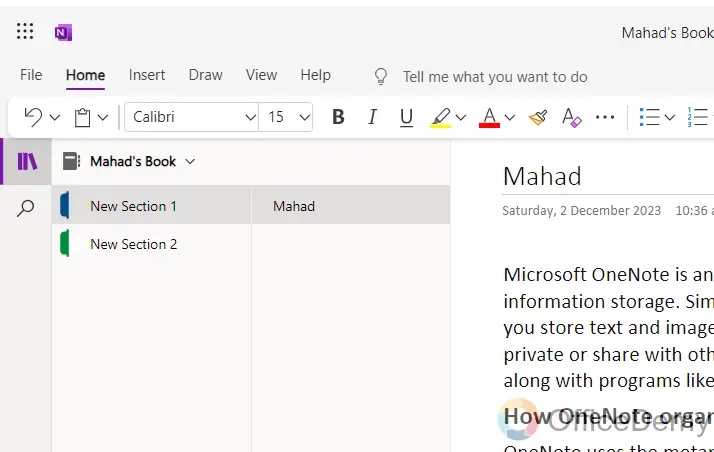
Right now, if you see the following picture, you will see all options and tools are enabled to edit your notebook. Let’s see how we can make this notebook Read-only in OneNote.
Step 2
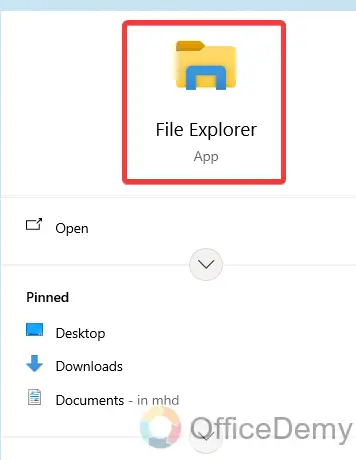
First, open File Explorer on your device. You can open “This PC” from your desktop or you can also search for the “File Explorer” from the start menu of Windows and then click on it to open.
Step 3
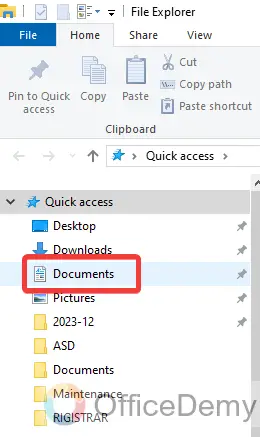
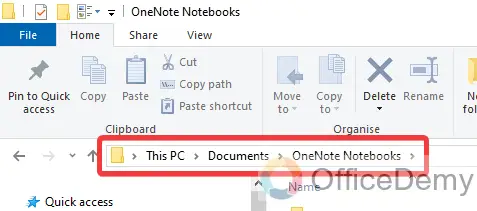
As we know, by default Microsoft OneNote stores notebooks and their pages in the “Documents” folder of Windows so here we will open the “Documents” folder from the side folder tree panel as highlighted below.
Step 4
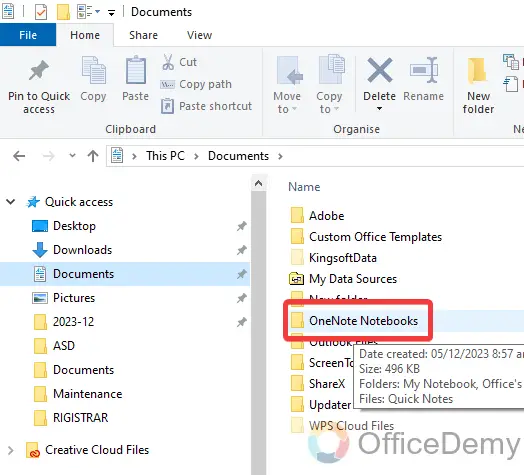
In this Documents folder, you will see several folders in which you will also find a “OneNote Notebooks” folder where you will see all your saved notebooks and pages. Double-click on it to open it.
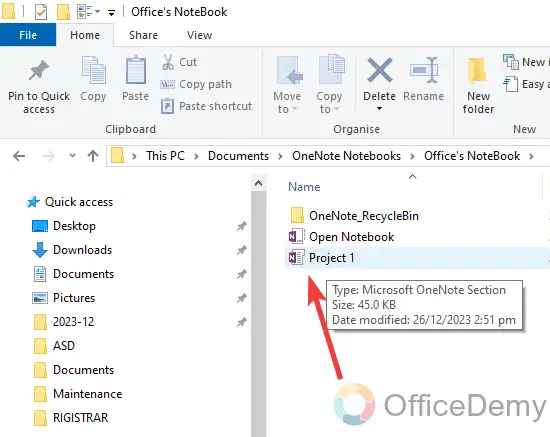
Step 5
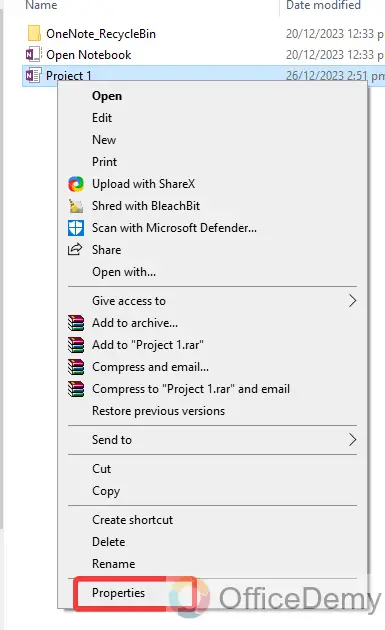
Now, in this folder find the notebook that you want to make read-only in OneNote. As in the above example we were making “Project 1” read-only so here we have found our notebook now.
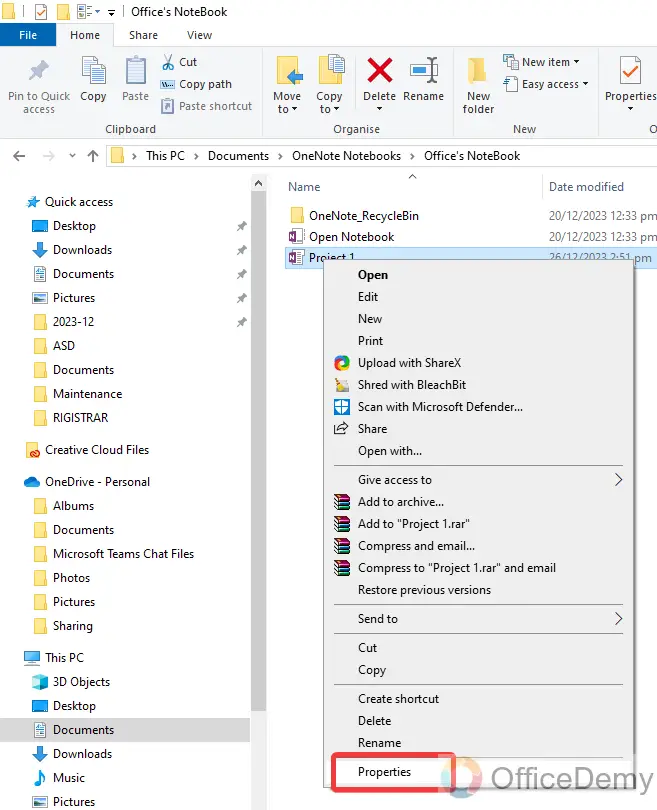
Step 6
Press right-click on this notebook, and a small drop-down menu will open where you will see a “Properties” option at last through which you can open the property dialogue box for the notebook.
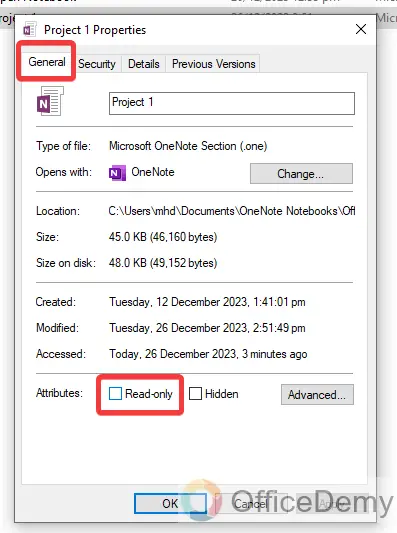
Step 7
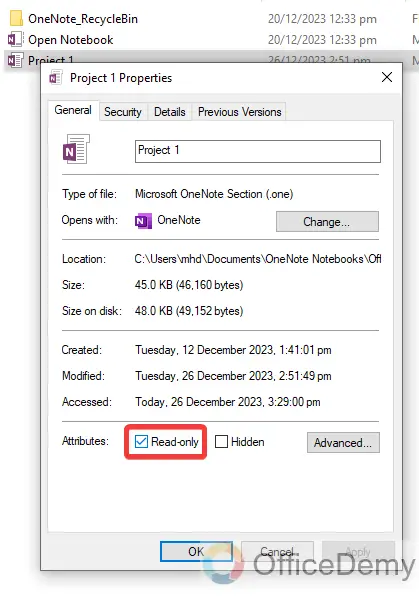
Once opened the property dialogue box, here you will see some tabs in front of you at the top, go into the “General” tab where you will see an unchecked “Read-only” option as highlighted in the following picture. Check marks this option to make this file “Read-only” in OneNote.
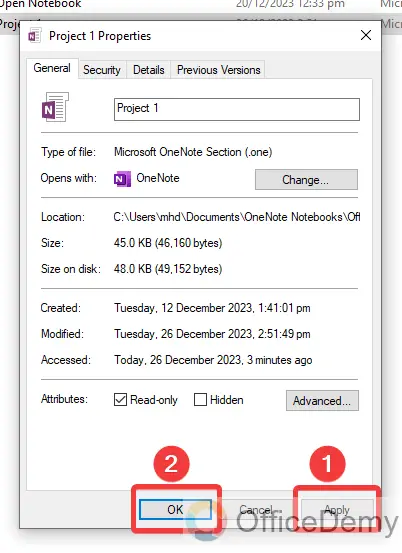
Step 8
After checking the mark option, must click on the “Apply” button and then click on the “Ok” button to save these changes.
Step 9
Now, come back to Microsoft OneNote, here you can see the result now, all editing options and tools are disabled now which means you can’t edit the notebook you can view or read only the file.
In this way, you can make your OneNote Read-only.
2. Make OneNote Read-only by sharing access
When we share a OneNote Notebook, while sharing a file Microsoft OneNote asks for sharing access to the user where you can make the notebook read-only. Let me show you practically in the following steps.,
Step 1
First, open the notebook that you want to make Read-only in OneNote as I have opened below.

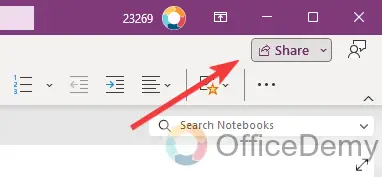
Step 2
After opening the notebook, look at the right top corner of the window where you will see a “Share” button as directed below. Click on it to share the notebook.
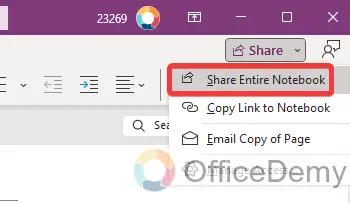
Step 3
Clicking on this Share button will open a small drop-listed menu where it will ask you to share the entire notebook, copy the link, and email the page. As we are making the entire notebook Read-only, so here is the “Share Entire Notebook” option.
Step 4
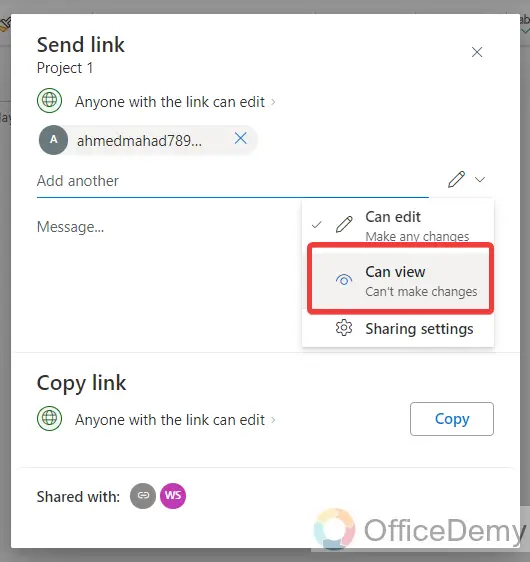
A small pop-up will open in front of you where you will write the email address of the person with whom you are sharing a file. Here you will also see a “Pencil” icon through which you can set access to the file.
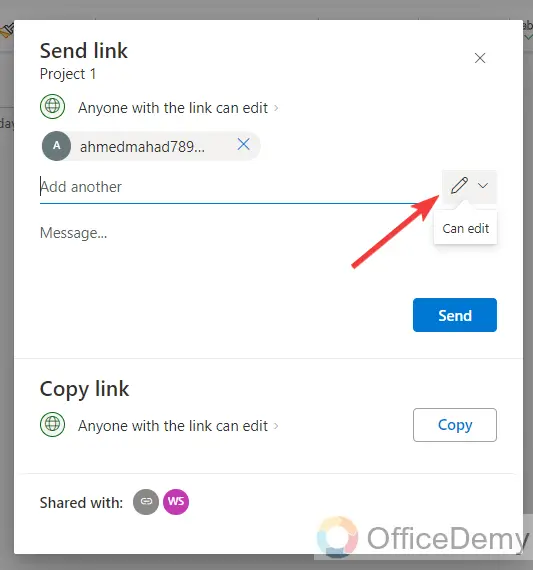
Step 5
When you click on this pencil icon, it will open a small drop listed option, select “Can view” only access to the file.
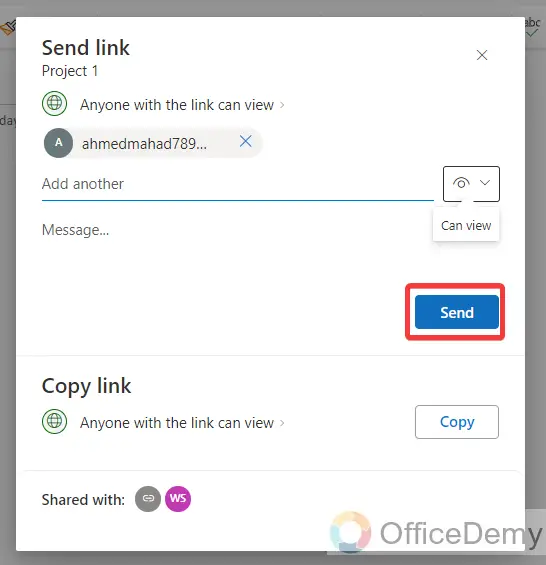
Step 6
Now, click on the “Send” button after setting up access, it will share your file with “Can View” rights that will make your OneNote file Read-only.
3. Make OneNote Read-only by view-only option
In the web version of Microsoft OneNote, there is an option through which you can make your OneNote Read-only. But this option is only available on the web version of Microsoft OneNote.
Step 1
Open Microsoft OneNote on the web in any browser of the device and then open the notebook that you want to make Read-only.
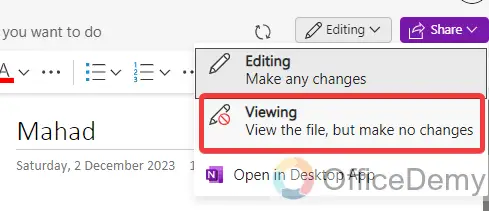
Step 2
After opening the notebook, look at the right top corner of the window, you will see a button along the Share button as can be seen below that is currently set to Editing mode. Click on it to change it.
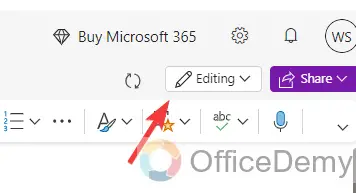
Step 3
When you click on this button, a small drop-listed menu will open where you will see a “Viewing” option. Click on it to make OneNote Read-only.
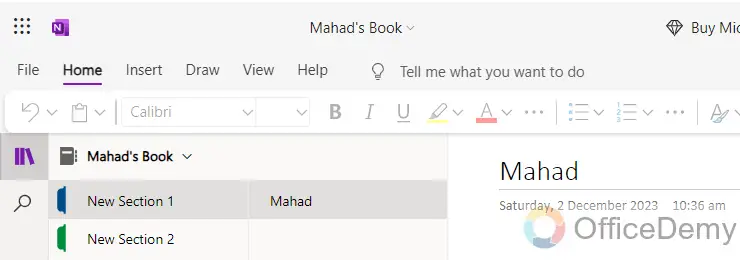
Step 4
Here you can see the result in the following picture by seeing the disabled tools in the ribbon, now file has been made Read-only in OneNote.
Frequently Asked Questions
How to disable Read-only in OneNote?
If you have made your notebook Read-only in OneNote but now if you need to edit your notebook in OneNote then you can also disable this Read-only mode in OneNote.
Step 1
First, open File Explorer in your windows and go into the Documents folder to locate your notebook if you want to disable read-only mode.
Step 2
Right-click on that notebook to open the drop-down menu, then click on the “Properties” option from the drop-down menu.
Step 3
Once the dialogue box is properly opened, you will see the checked Read-only option here. Click on it to uncheck this option.
Step 4
Now, click on the “Apply” button to apply these changes then click on the “OK” button to save these changes. Read-only mode has been disabled now, you can edit your notebook in OneNote.

Conclusion
In the above guide on how to make OneNote Read-only, we have covered different scenarios to make OneNote Read-only now, it’s up to you which scenario you may need no worries because you know all of them now. Hope it will be beneficial for you.

