
To Mark an Email as Urgent in Outlook
- Go to “New Message“.
- From the “Tag” group, select “Important“.
OR
- Go to “New Message“.
- Click “!” in the message toolbar.
- Select message importance (High) from the given options.
OR
- Go to Settings > “Mail” > “Rules“.
- Click “Add New Rule“.
- Set conditions and criteria> Click “Save“
Welcome back, fellows. Today, I will teach you how to mark an email as urgent in Outlook. Although emails are being most useful communication resource, marking them as urgent features make it more favorable to complete any daily task on an urgent basis. Whenever you want to get a quick response from the receiver, Outlook has a built-in feature to mark your email as urgent.
Our today’s topic is how to mark an email as urgent in Outlook.
Importance of Marking an Email as Urgent in Outlook
Emails are always the best source of communication and are most widely used worldwide. It’s common to have hundreds of emails dealing at a time and it becomes difficult to pay attention to a specific email.
Therefore, you may need to mark your email as urgent in Outlook to make your email a high priority. So, we have brought to you how to mark an email as urgent in Outlook.
How to Mark an Email as Urgent in Outlook?
In this article, we will learn how to mark an email as urgent in Outlook’s versions and also will learn one more method of marking an email as urgent by creating a rule in Outlook.
- Mark an email as urgent in Outlook desktop
- Mark an email as urgent in Outlook Web
- Mark an email as urgent in Outlook by creating a rule
Mark an Email as Urgent in Outlook – Outlook Desktop
Microsoft Outlook’s desktop is most famous due to its unlimited features and mostly used version among others Outlook versions. This is why I am explaining how to mark an email as urgent in Outlook’s desktop version first.
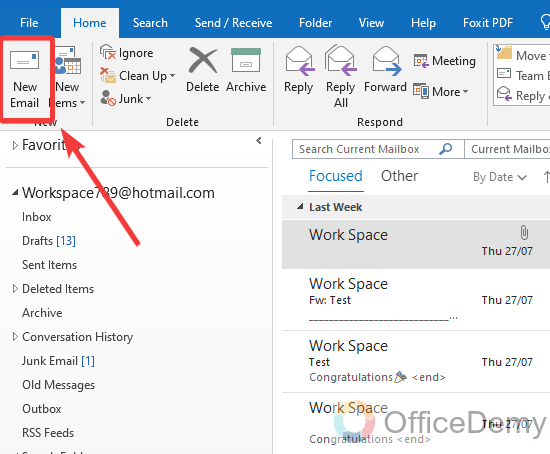
Step 1
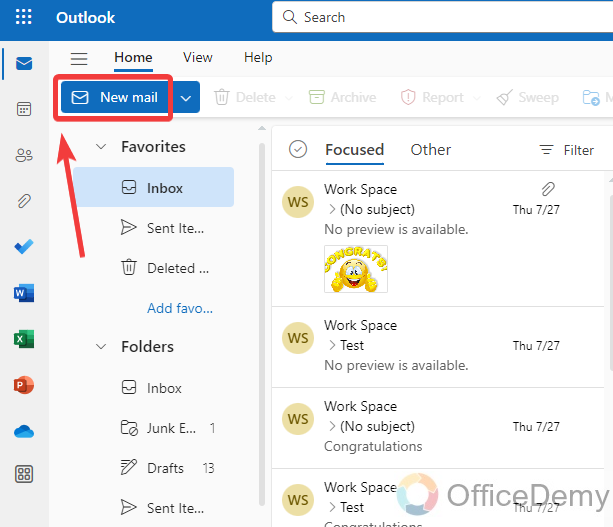
If you need to send any urgent email in Outlook, create an email by clicking on the “New Email” button as directed in the following picture.
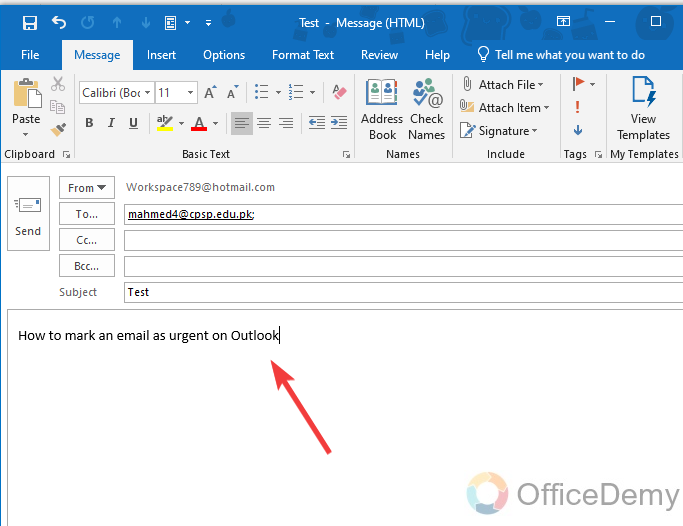
Step 2
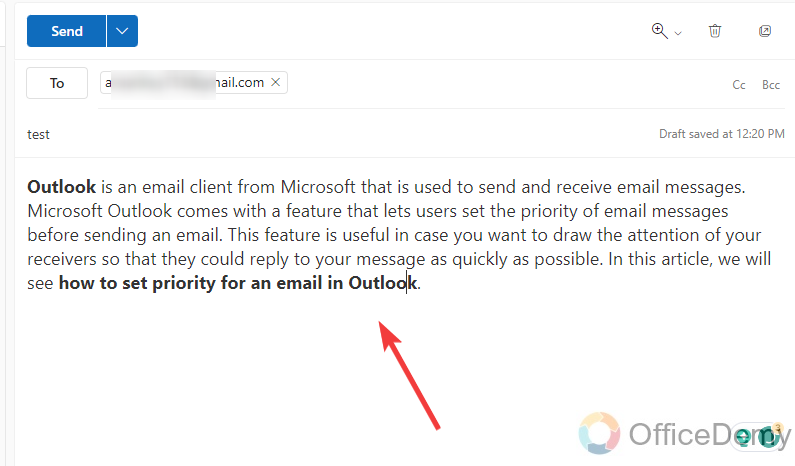
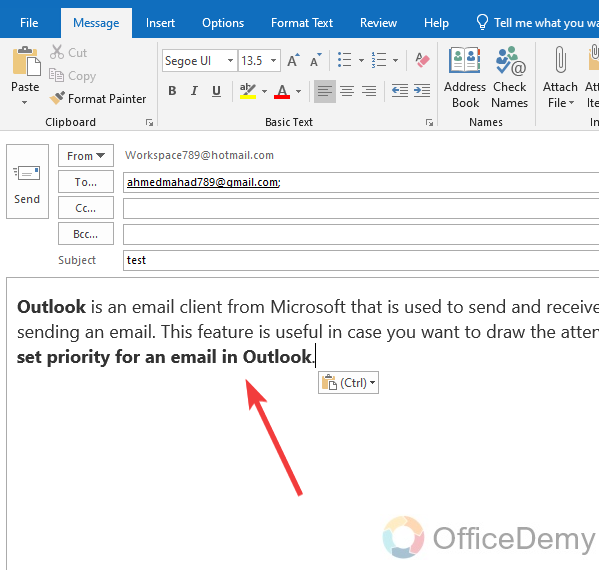
When you click on the “New Email” button in Outlook, a new separate window will open to create a new email. First, complete your email whatever you want to enter in your email.
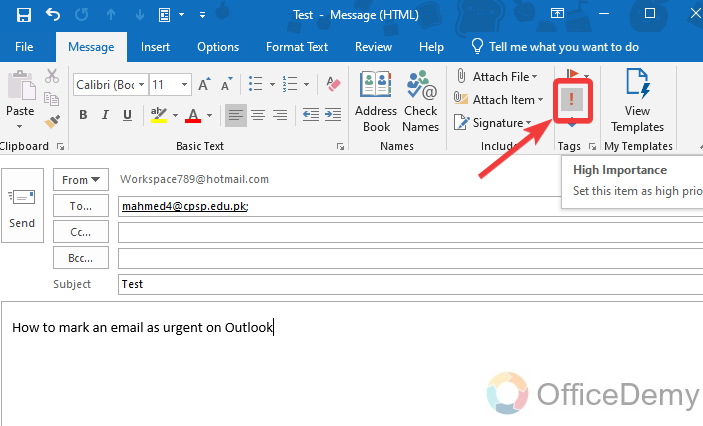
Step 3
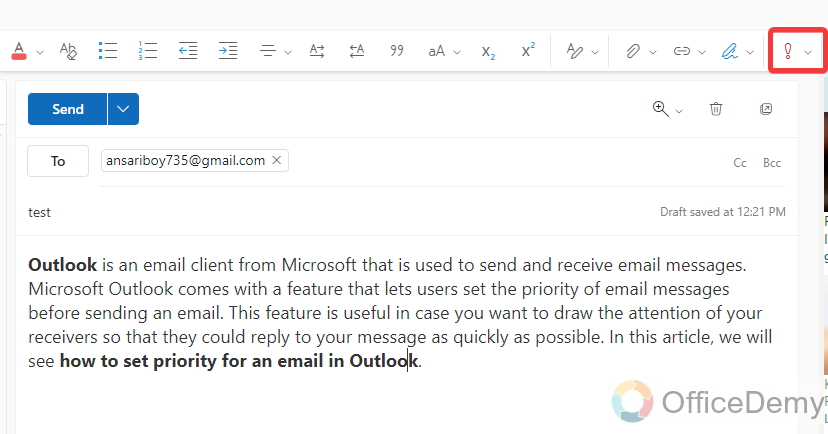
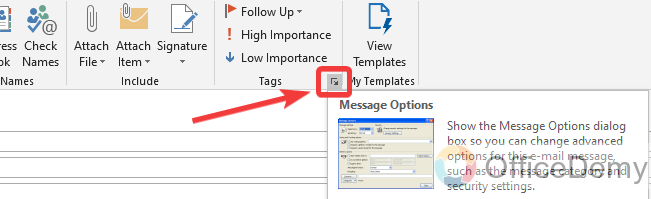
Once you have completed your email, mark it as urgent before sending it. To mark your email as urgent, keep an eye on the ribbon, you will find an option with an exclamation mark in the “Tags” section as highlighted in the following picture. Click on this option to mark your email as urgent.
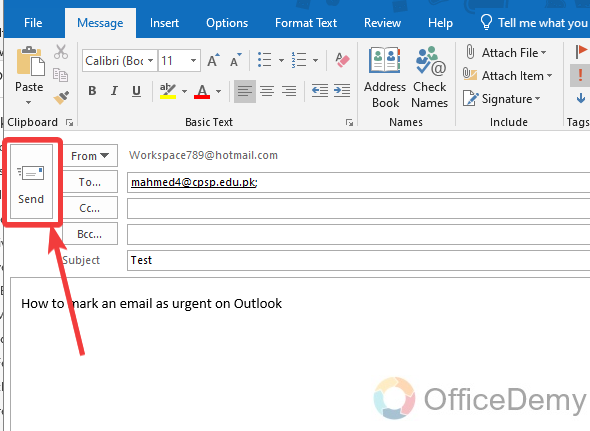
Step 4
Once you have marked your email as urgent, now you can send your email by pressing the “Send” button.
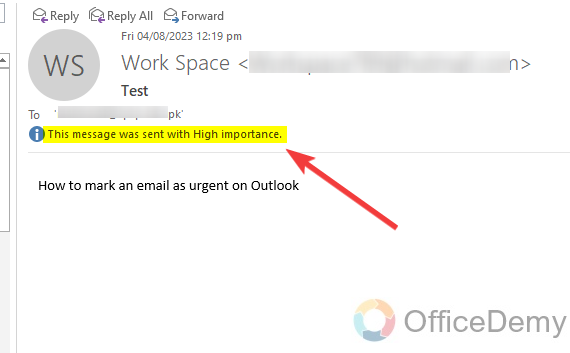
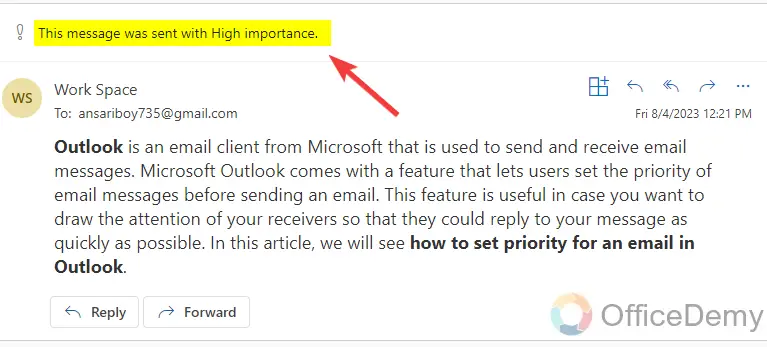
Step 5
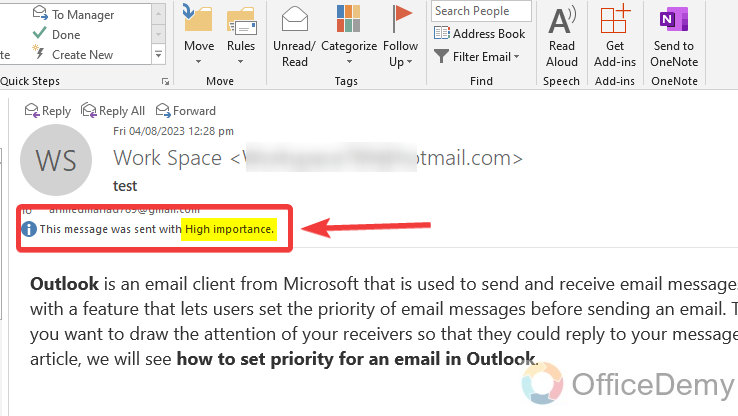
If you see your sent email in the sent items, you can see the message along the email as highlighted in the following picture “This message was sent with high importance” which indicates to the recipient that this email has been sent on an urgent basis.
Mark an Email as Urgent in Outlook – Outlook Web
Whereas Outlook desktop is popular among users, Outlook Online is also touching its high due to its efficiency. If you want to mark your email as urgent in Outlook Web, follow the following guide.
Step 1
Once you have logged in to your account on Outlook Web, click on the “New Email” button to create a new urgent email.
Step 2
After clicking on the new email button, enter the material that you want to add to your urgent email in the composing email section.
Step 3
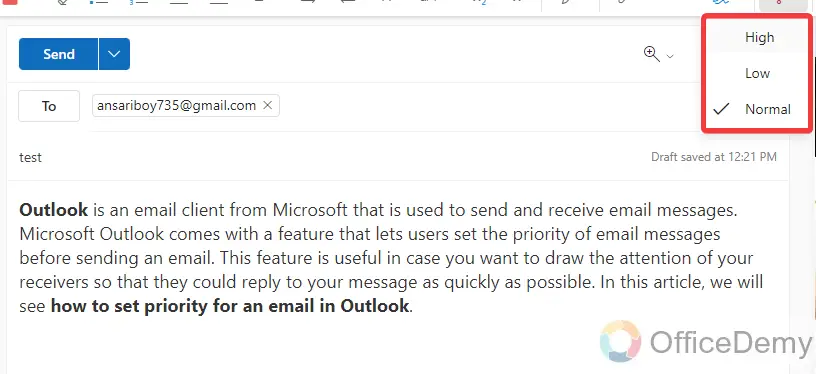
Once you have completed creating an email and are ready to send it, now mark it as an urgent email before sending it. To mark it as an urgent email, same as in the desktop version click on that exclamation mark as highlighted in the following picture.
Step 4
When you click on this exclamation mark, a small drop-down menu will open, where you have to select the importance level of your email.
Step 5
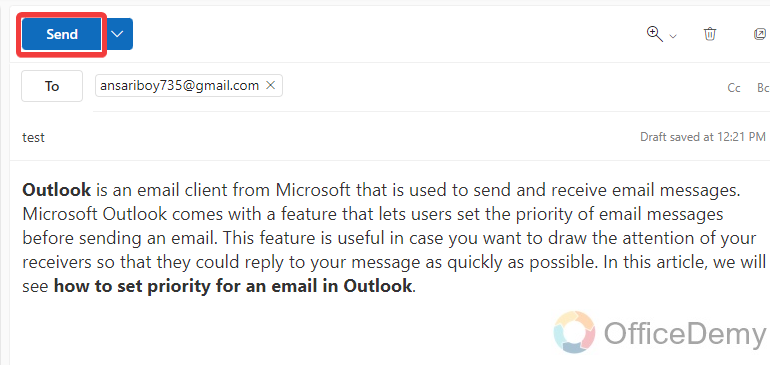
Once you have completed creating an email and marking it as urgent then just simply click the on “Send” button to send an email as urgent.
Step 6
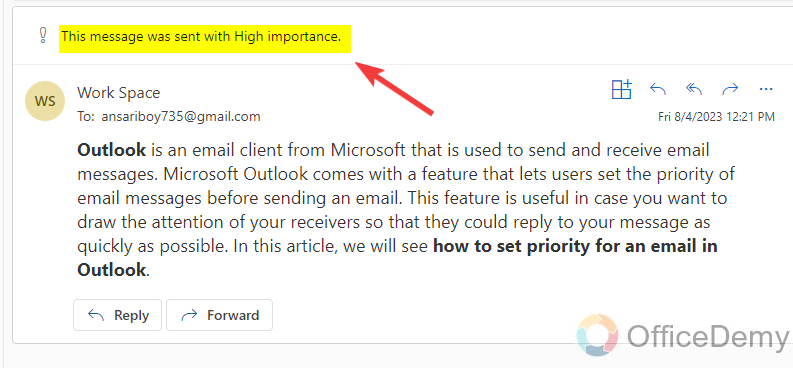
You can also verify your email by seeing this notification alert along with the email as highlighted in the following picture “This message was sent with high importance” That means that the email has been sent on an urgent basis.
Mark an Email as Urgent in Outlook – By Creating a Rule
This method of marking an email as urgent in Outlook may be helpful when you need to always send an important email or urgent email. Then you can create a rule for the desired person then Outlook will automatically mark that email as important.
Step 1
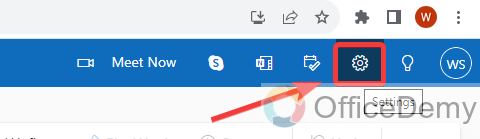
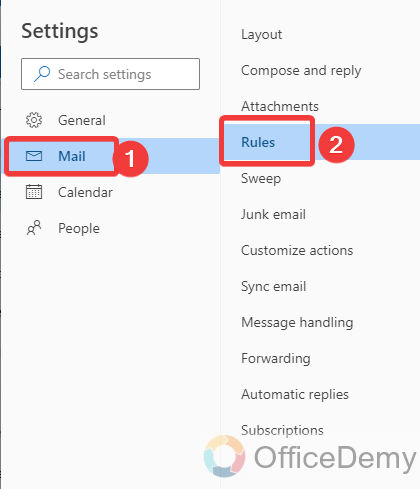
To create a rule in Outlook, go into the Outlook settings, to open Outlook settings click on the following highlighted gear icon placed on the right corner of the window.
Step 2
When you click on that gear icon, a new window will appear in front of you where you will see all Outlook settings. Go into the “Mail” menu from the main menu and then click on the “Rule” tab to create a new rule in Outlook.
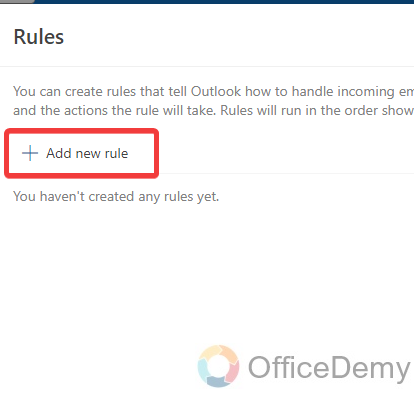
Step 3
Clicking on the “Rules” menu from the sub menu, the following window will appear in the description section, click on “Add new rule” to create a new rule in Outlook.
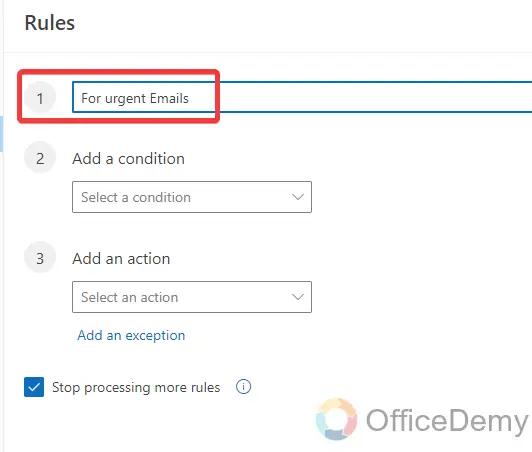
Step 4
To create a new one in Outlook, you will have required the following fields to complete in which the first thing will be to give the name to your new rule to recognize it.
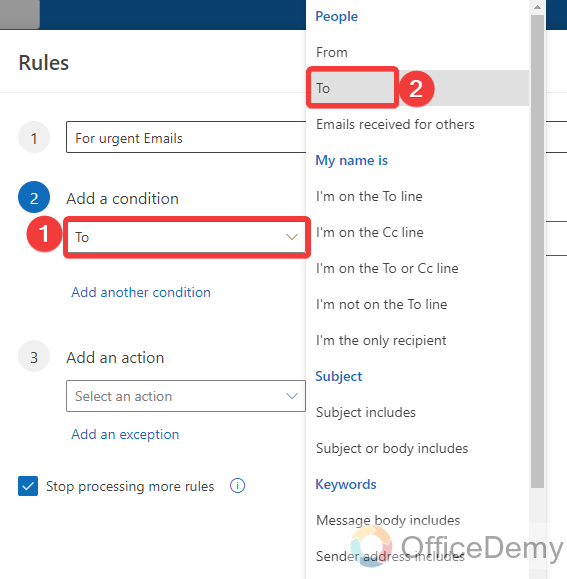
Step 5
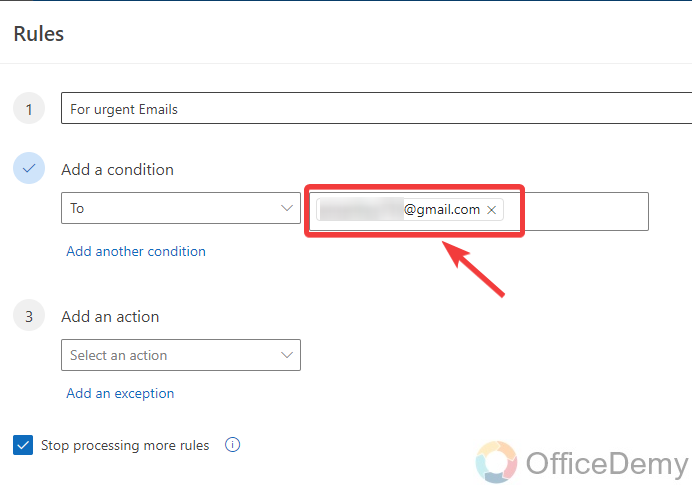
In the second step, Outlook will ask you to add a condition for which type of email you want to create a rule so here we will select “To” as we are creating this rule to send an urgent message.
Step 6
When you select the “To” condition for emailing then another field box will appear to ask to whom you want to send your email while creating this rule. Give the email address in this box that you want to send an urgent email to in Outlook.
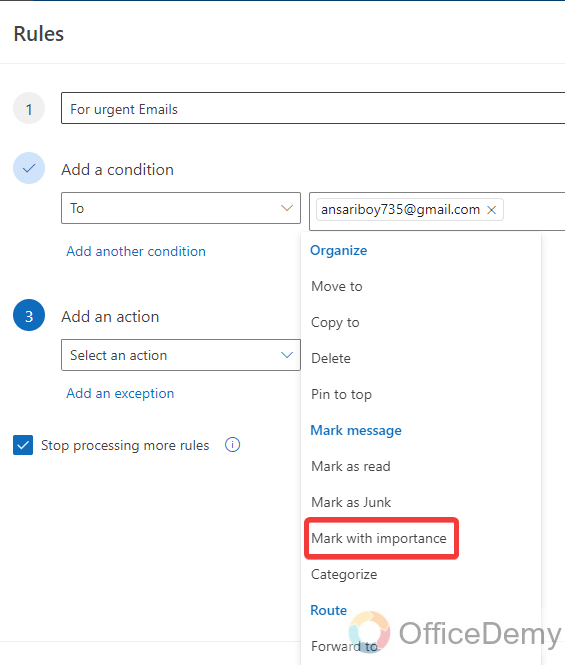
Step 7
In the next step, now it’s time to select the action that you want to perform with this rule. As we need to send an urgent message, here we will select “Mark with importance” as highlighted below.
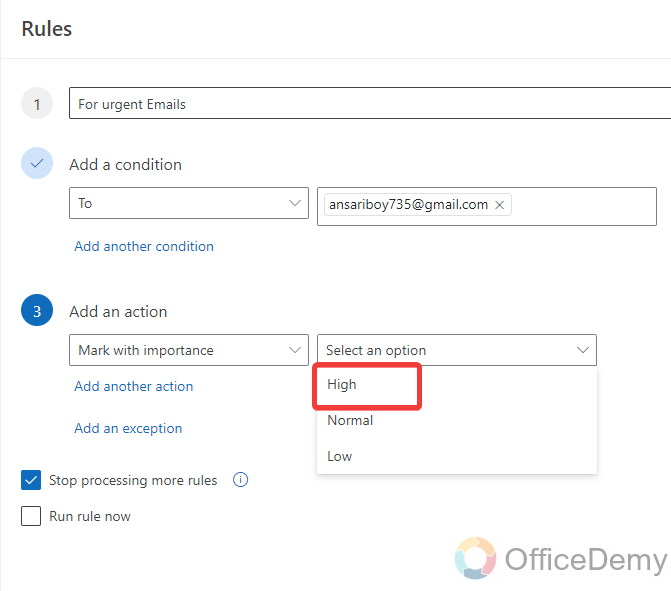
Step 8
When you select the “Mark with importance” option then you will also have to select the importance level of your email. Now it’s up to you to choose according to your email priority.
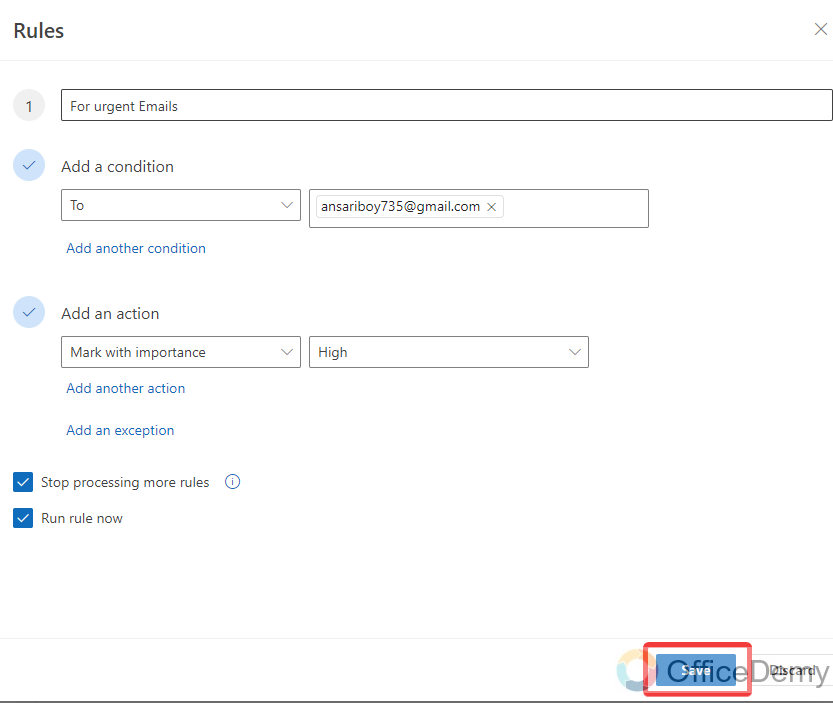
Step 9
You are almost all done with creating a new rule, you are just one click to go, click on the “Save” button to save this rule.
Step 10
Now, whenever you send emails to the specified person, all that emails would send as urgent. As you can also see in the following picture email is sent on an urgent basis
Frequently Asked Questions
Q: How to send an urgent, important email on an Outlook desktop?
A: Although in the Outlook web version, ask when we send an urgent email that you want to send your email with high importance or low importance but in the Outlook desktop version, we don’t see such type of option so if you want to change the level of importance while sending an urgent email then the following steps can help you.
Step 1
Let’s suppose the email has been created and is ready to send. Before sending this email, you want to mark it as urgent with high importance in Outlook desktop.
Step 2
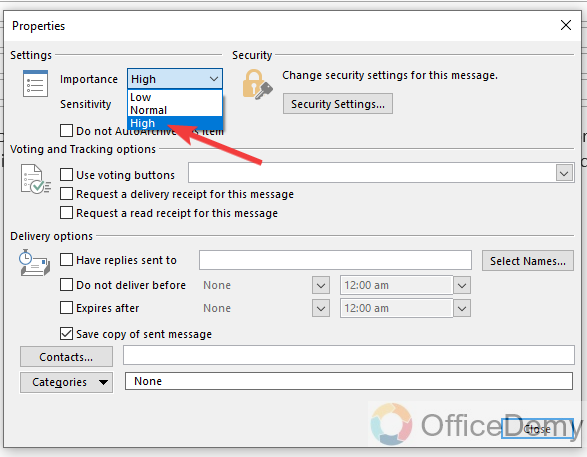
In this “Tags” section there is a small arrow as highlighted in the following picture. Click on it to open the dialogue box for more customization.
Step 3
On this dialogue box, at the very first you will see the “importance” option with a drop-listed menu along it as can be seen in the following picture.
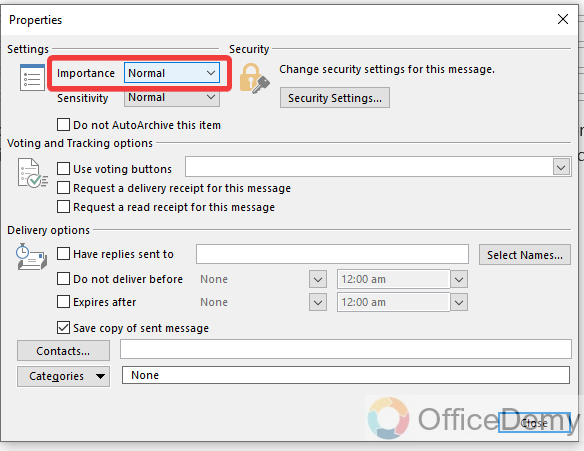
Step 4
If you want to make it with high importance, then select the “High” option from the list.
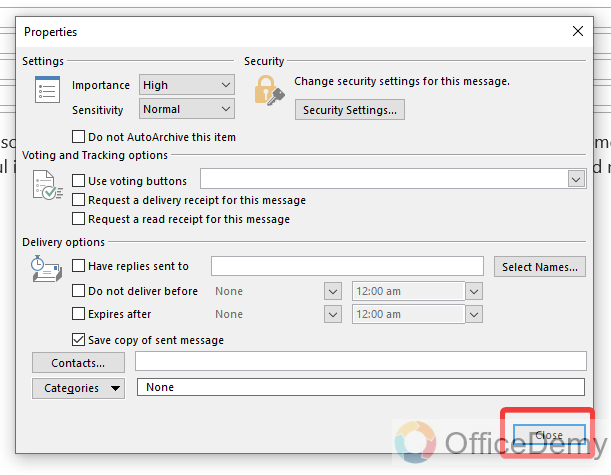
Step 5
Now click on the “Close” button to save these changes.
Step 6
As you can see the result in the following example, now you can send your urgent emails of high importance.
Conclusion
That’s all about how to mark an email as urgent in Outlook. Now, no more wait for an email response, mark your emails as urgent or important by reading the above article on how to mark an email as urgent in Outlook.


