
To Print Addresses on Envelopes from Google Sheets
- Create a list of addresses in Google Sheets.
- Get the “Create & Print Labels” add-on.
- Select merge fields.
- Select envelope template.
- Create labels.
- Print the document.
Today we will learn how to print addresses on envelopes from Google Sheets. With Google Sheets, you can print addresses on envelopes very quickly and easily, without having to worry about the cost or hassle of buying special equipment. With just a few clicks, you can have a professional-looking envelope ready to go to the destination in no time. Today’s topic is also on how to print addresses on envelopes from Google Sheets through which you can learn to print a long list of addresses on envelopes from Google Sheets.
Benefits of Printing Addresses on Envelopes from Google Sheets
Day by day the whole world is forwarding ahead, so the ratio of official and business activities is also increasing and for these activities, the envelopes are the most useful source of communication and sending hardcopy mails. When you have large numbers of envelopes to send then it becomes very difficult and time costly to print addresses on envelopes manually or one-by-one. But with the help of this guide, you can print hundreds of addresses on envelopes within just a few seconds.
So go through the following article on how to print addresses on envelopes from Google Sheets to find the solution.
How to Print Addresses on Envelopes from Google Sheets
Unfortunately, Google Sheets has no direct option to print addresses on envelopes, but you may make it possible by installing add-ons. Below are the steps to print addresses on envelopes in Google Sheets.
Step 1
To print addresses on envelopes in Google Sheets, firstly you must have basic contact information regarding addresses. If you already have an address list in your Google Sheets, then it is good but if you don’t then worry you can create an address list within a few steps. In the following example to create an address list, I am including headings of First Name, Last Name, Address, City, Zip Code, and Phone as highlighted below.
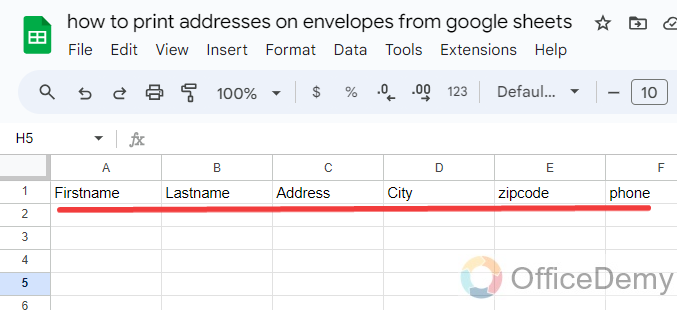
Note: Make sure that you do not make any kind of additional formatting on these headings so that add-ons may work properly that are going to be used to print addresses.
Step 2
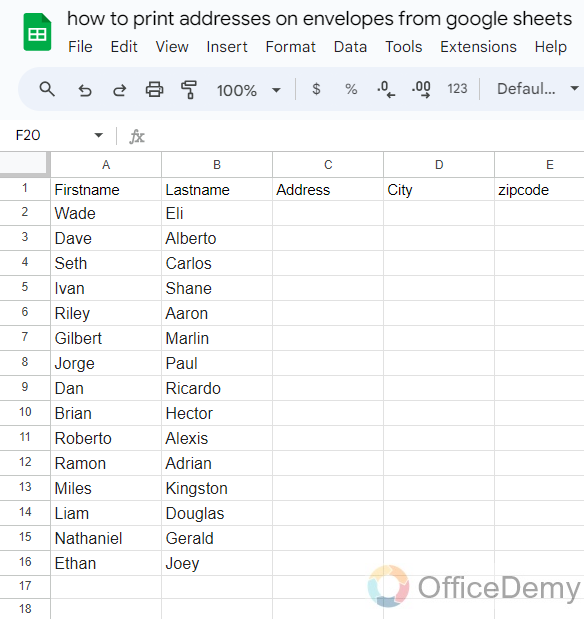
Let’s start to put data in these headings. As you can see in the following picture, I have added First Names and Last Names according to my data.
Step 3
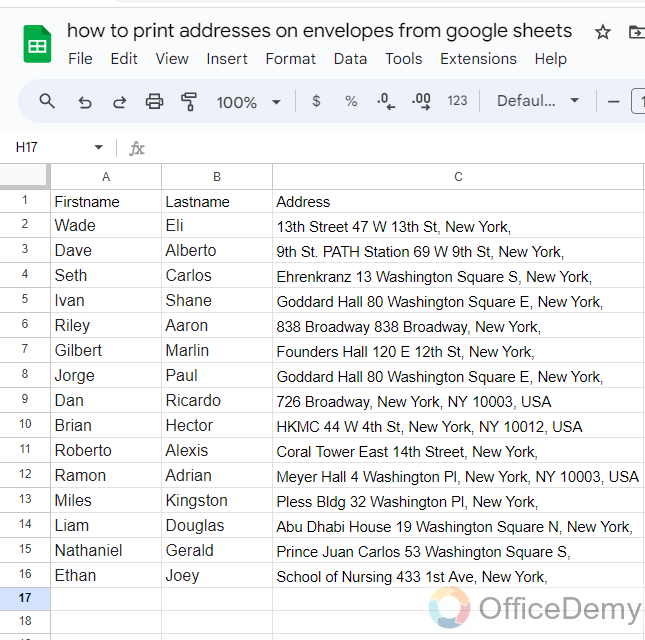
In the same way, in the next step write down the Addresses of the persons accordingly as written below.
Step 4
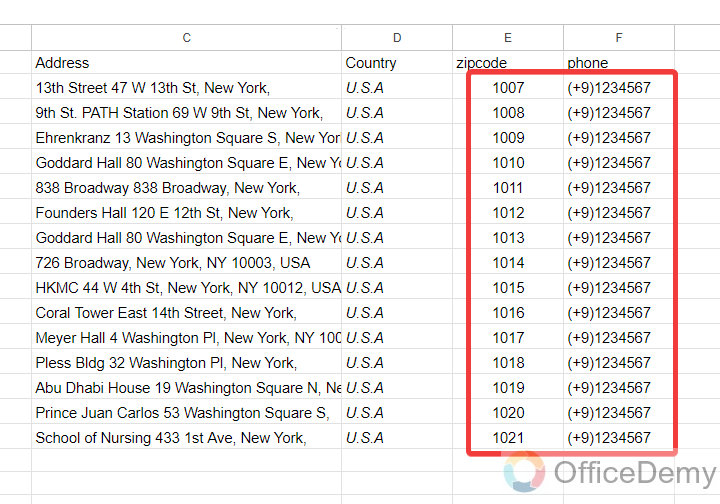
As we all know the post address is incomplete by Zip code and Contact number so here we will also add Zip Codes and Contact numbers for the person who is going to receive envelopes.
Step 5
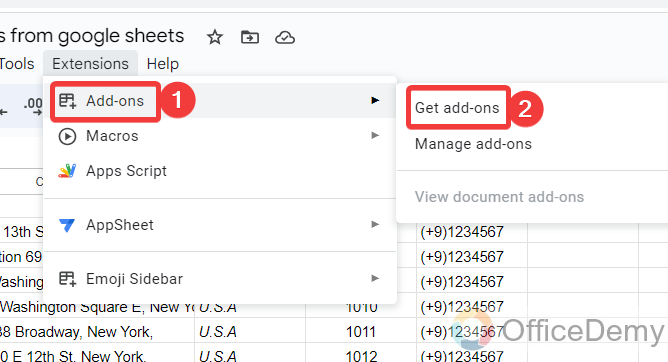
We are almost done with creating an address list, if you want to add anything else to your address list then you can add it. Once you have completed go into the “Extensions” tab from the menu bar of Google Sheets.

Step 6
When you click on the “Extensions” tab, a drop-down menu will open, click here on “add-ons” then click on “Get add-ons” from another expanded menu as directed in the following screenshot.
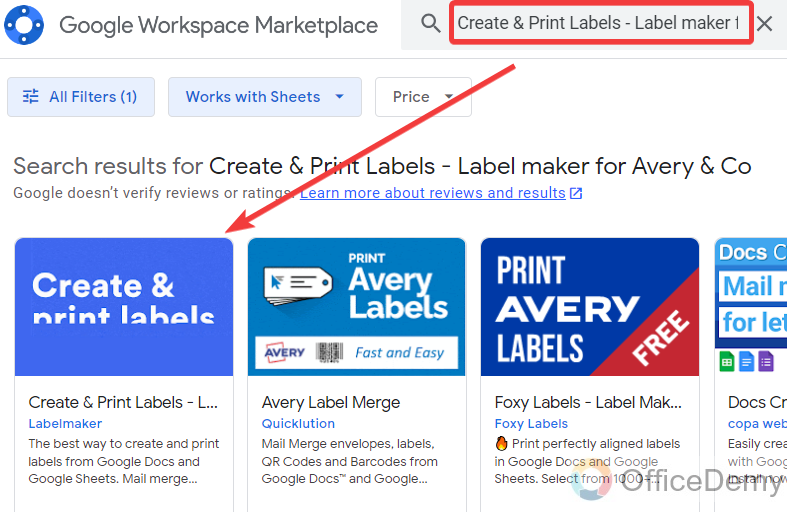
Step 7
As you click on the “Get add-ons” option from the drop-down menu, a new separate window will open in front of you, Search here for the “Create and Print Labels” add-ons from the search bar as can be seen in the following picture.
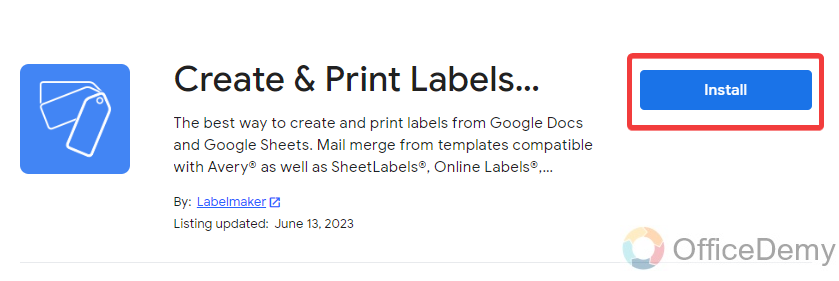
Step 8
Once you have found the “Create and Print Labels” tool, click on it to open it. An install button will be displayed in front of you click on this “Install” button to add this add-on to your Google Sheets.
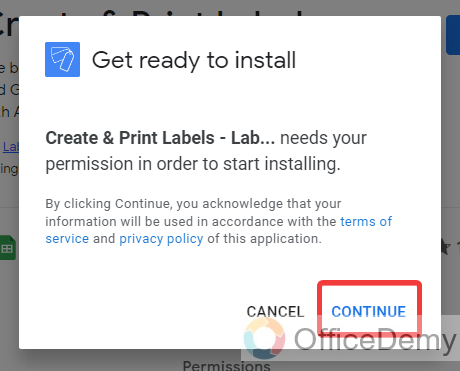
Step 9
When you click on the “Install” button, a small pop-up will appear in front of you to tell you that it will require your account permission first to install this add-on to your Google Sheets. If you agree, then click on the “Continue” button as highlighted in the following picture.
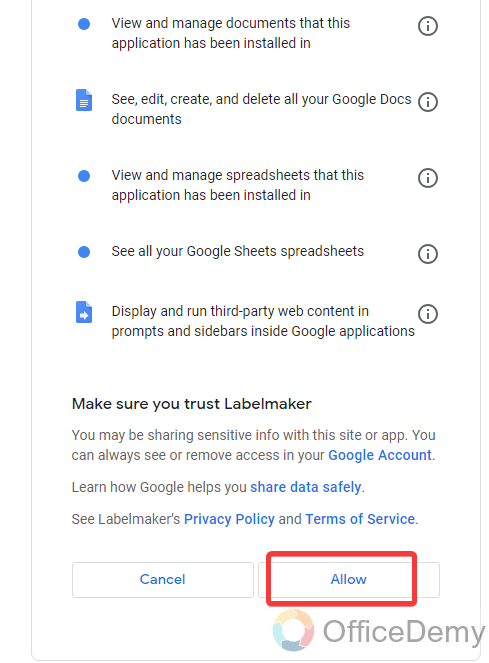
Step 10
Clicking on the “Continue” button will lead you to allow for account permission from the following pop-up. If you want to give permission, then click on the “Allow” button to continue the installation of add-ons on your device.
Step 11
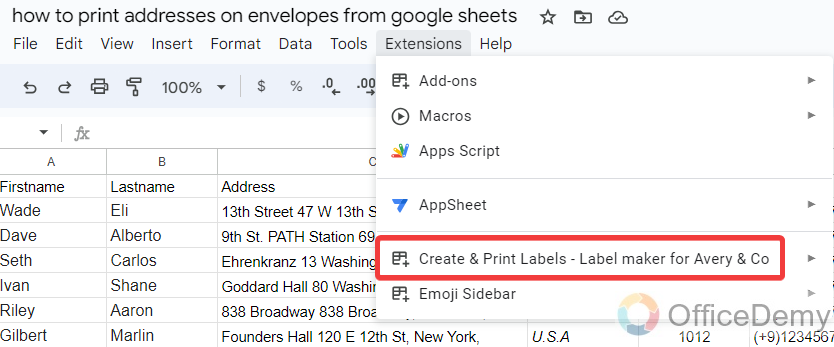
Once installation has been completed you can access your add-ons in the “Extensions” tab. When you click on the “Extensions” tab you will find your “Create and Print Labels” add-ons in the drop-down menu as can be seen in the following picture.
Step 12
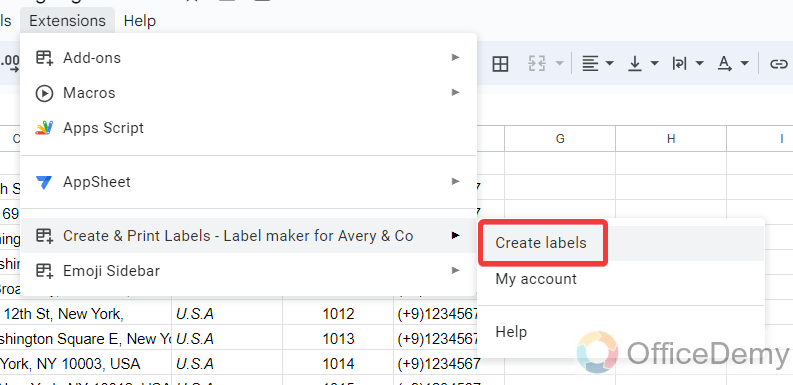
When you click on this “Create and Print Labels” option, another menu will expand where you will see a “Create Labels” option, click on it to create address labels for envelopes.
Step 13
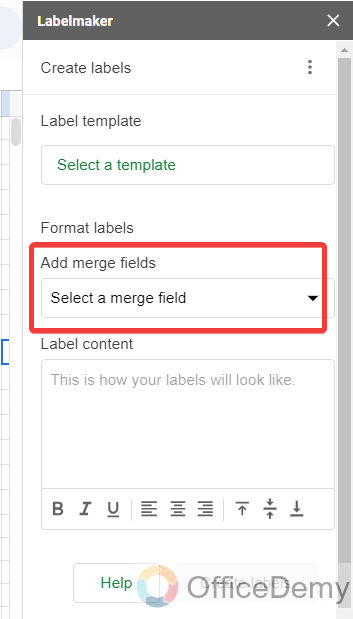
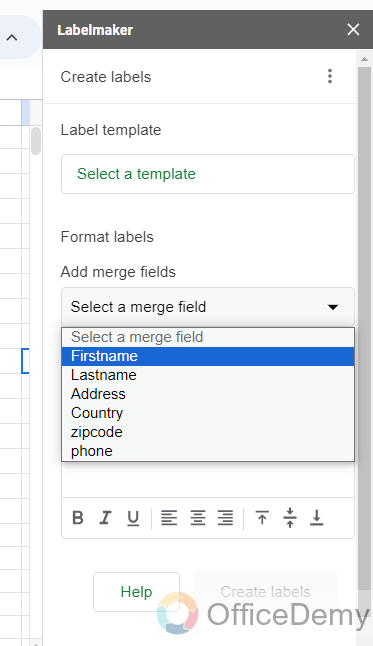
A pane menu will open on the right side of the window when you click on the “Create Labels” button. On this label maker panel click on the “Add merge fields” option as highlighted in the following picture.
Step 14
When you click on the “Add merge fields” option, a drop-down menu will open that will ask you to add which fields to print addresses on the envelope. As you can see in the following picture here are all the merger fields that we created in our addresses list. Select them to add in a merger field.
Step 15
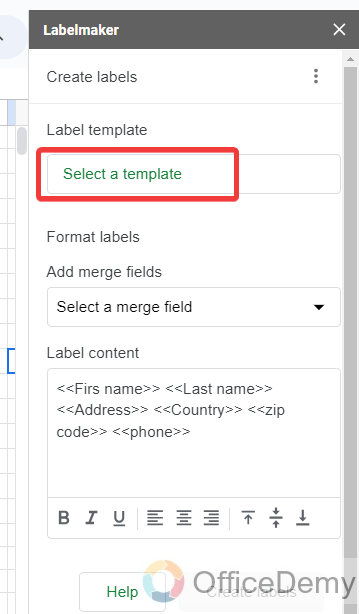
After adding merger fields, we will have to select the template in which you want to create our address labels. To select a template, click on the “Select a template” option from the label maker panel.
Step 16
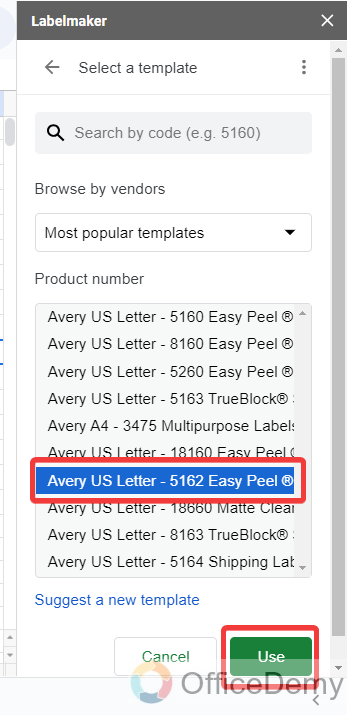
As we need to print addresses on envelopes here to create labels on envelope templates, I am going to choose the “Avery US letter – 5162 Easy Peel” template. If you know any other better template to print addresses on envelopes, then you can choose from the following.
Step 17
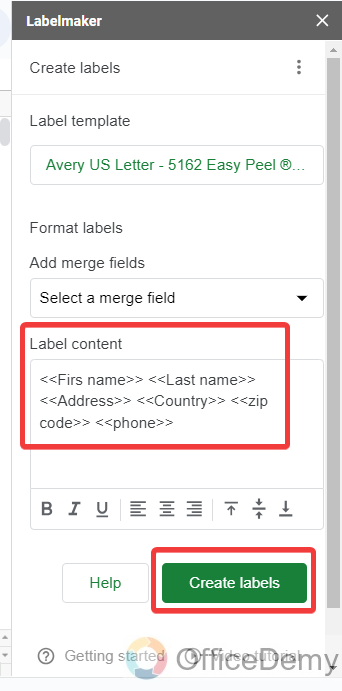
If you want to add or remove any merge field, then you can do it from the following dialogue box otherwise click on the “Create Labels” button as highlighted in the following picture to create address labels.
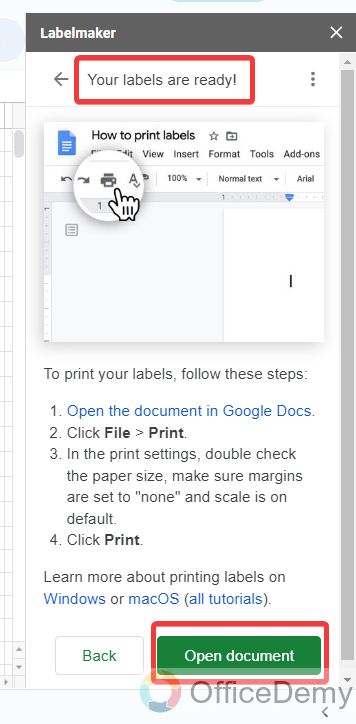
Step 18
As you click on the “Create labels” button, it will take a few seconds to create labels then you will get the following notification as you can see below “Your labels are ready“. Click on “Open document” to see and print your address labels.
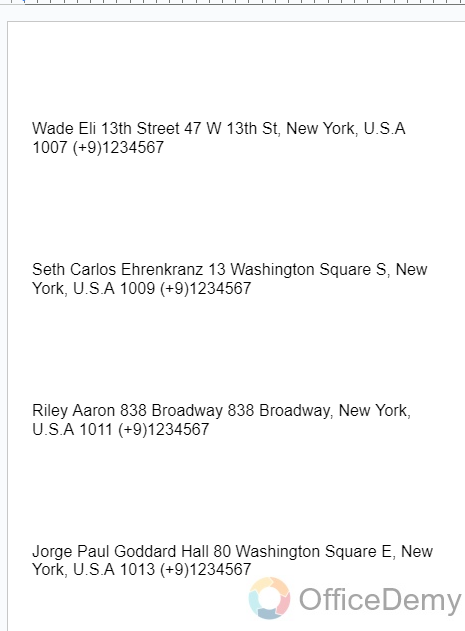
Step 19
As you can see from the result in the following picture the data, we have put in our Google Sheets has been merged as address labels in an envelope format. Now you can easily print them in your envelopes.
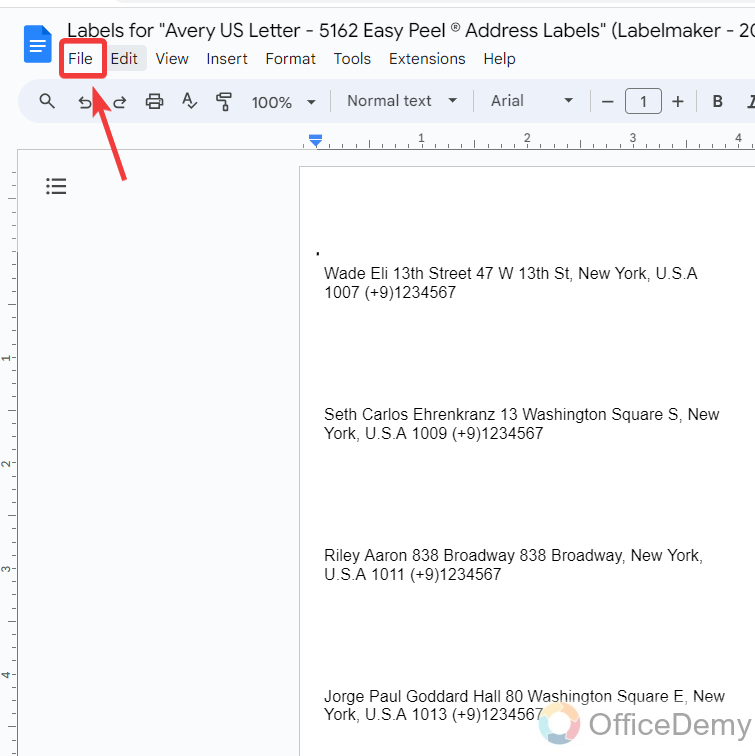
Step 20
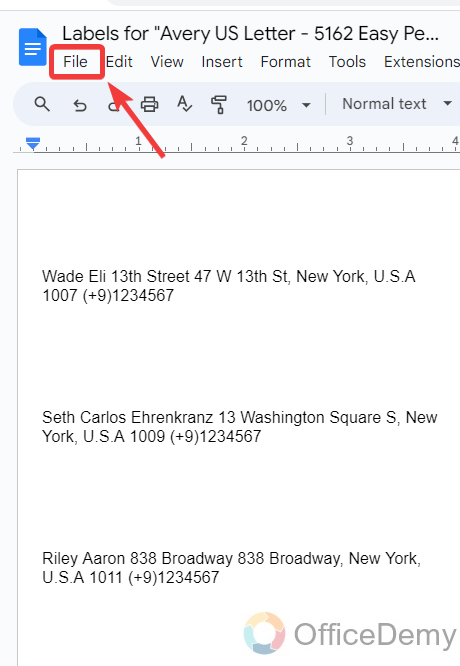
To print addresses on envelopes, go into the “File” tab of the menu bar located at the right top corner of the window.
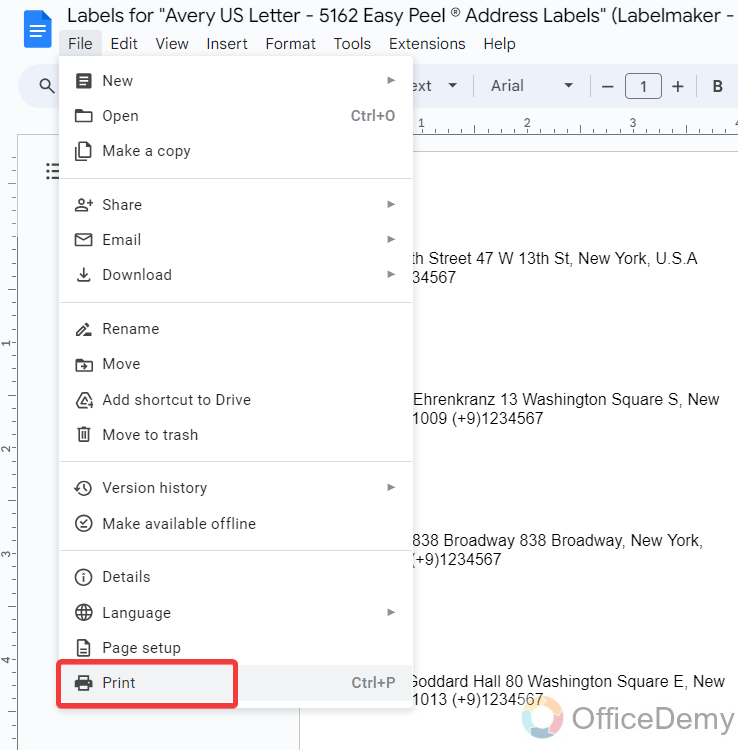
Step 21
A drop-down menu will open when you click on the “File” tab of the menu bar. On this menu, you will see a “Print” button as highlighted in the following picture.
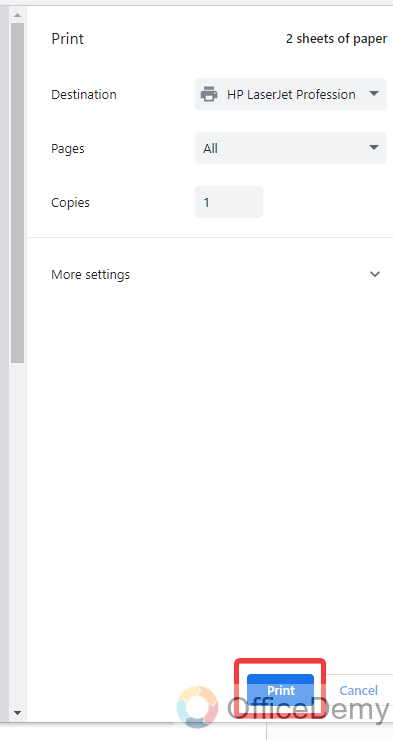
Step 22
Clicking on the “Print” button will direct you to a print window. If you don’t have to make changes to the print setting, then simply click on the “Print” button.
Frequently Asked Questions
How to download address labels in PDF?
Creating labels of large numbers of addresses in Google Sheets is very easy, once you have created these labels you may need to download the template, so the following are the steps to download address labels created by Google Sheets.
Step 1
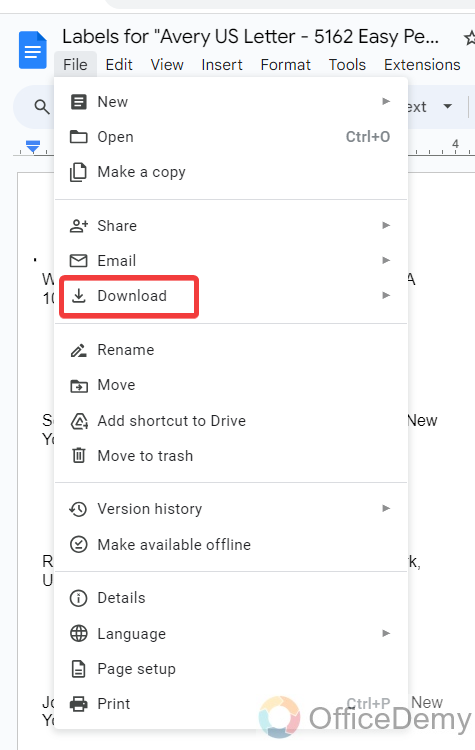
Once your labels have been created, go into the “File” tab of the menu bar as highlighted below.
Step 2
Click on the “Download” button from the drop-down menu.
Step 3
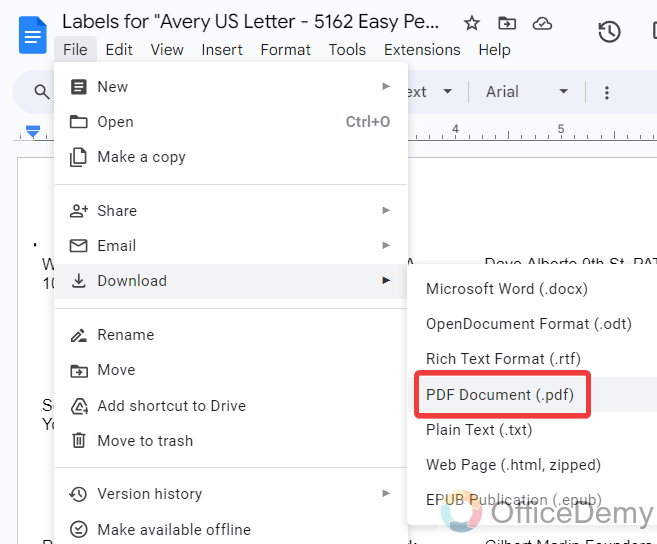
When you click on the “Download” button, another drop-down will expand where you will see different kinds of file formats to download. Click on “PDF format” to download your address label in PDF.
Conclusion
It’s awful that we can’t directly print addresses on envelope size in Google Sheets but still, there is a way that we have learned in the above article on how to print addresses on envelopes from Google Sheets, hope you would delight to find this way of printing addresses on envelopes from Google Sheets.


