
To Curve Text in Microsoft Word
- Go to the “Insert” click “Text Box“.
- Enter text > Right-click the text box border and choose “Format Shape“.
- Select “No fill” and “No line“.
- Click the “Shape Format” tab, choose “Text Effects“.
- Select a curve style.
- Adjust the curve using the yellow dot.
OR
- Highlight your text.
- Go to the “Insert” > “WordArt“.
- Choose a text style.
- With the text selected, go to the “Shape Format” tab and select “Text Effects“.
- Pick a curve style and adjust it with the yellow circle.
Hello, welcome back! So, today we’re going to learn how to curve text in Microsoft Word. As we know, Microsoft Word has traditionally served as the primary application for document creation and formatting. However, it might surprise you to learn that it offers a diverse range of advanced text manipulation tools.
One such feature that can infuse creativity and captivation into your documents is the ability to curve text. Whether you’re crafting a flyer, designing a distinctive invitation, or simply seeking to break free from the rigidity of straight lines, the art of curving text in Microsoft Word can empower you to achieve a polished and visually alluring outcome.
What is the usage of Curve Text in Microsoft Word?
Curving text in Microsoft Word is important because it makes your documents look cooler and more professional. It lets you get creative with your design, and it can grab people’s attention. Plus, it’s easy to use, saves time, keeps things looking consistent, and makes your documents better overall for communicating your ideas. Professionals can leverage Microsoft Word to harness various features, including content management, formatting tools, and various effects, to craft polished and impactful documents.
Among these effects, the incorporation of curved text stands out as a creative way to enhance the visual appeal of relevant documents and content. In this article, we will guide you through the process of curving text in Word while offering valuable tips to ensure the optimal utilization of curved text within crucial documents.
How to Curve Text in Microsoft Word
Today we have brought various methods to Curve text in Microsoft Word. Curving text in Microsoft Word is a consistent process across different versions of the software. You can achieve this by making use of the Text Box and Text Effects functionalities. So, let’s see those methods one by one and learn how to curve text in Microsoft Word.
Curve Text in Microsoft Word – Using Text Box
Step 1
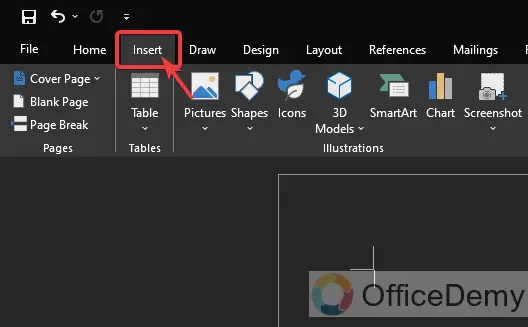
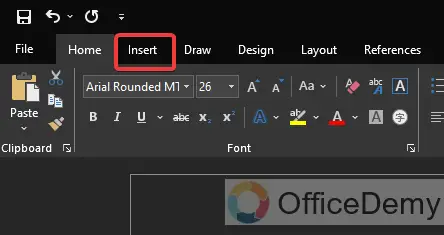
Go to the “Insert” tab on the Ribbon.
Step 2
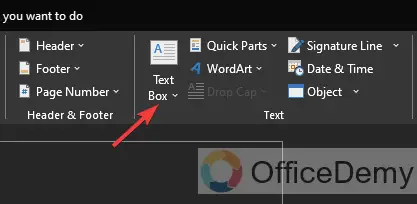
Click the “Text Box” button in the “Text” section.
Step 3
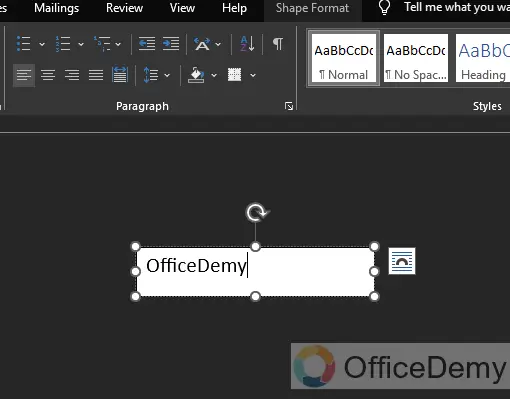
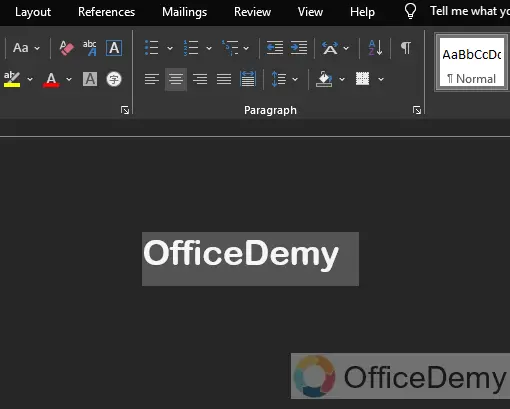
Select and delete the existing text, then type the text you want to curve.
Step 4
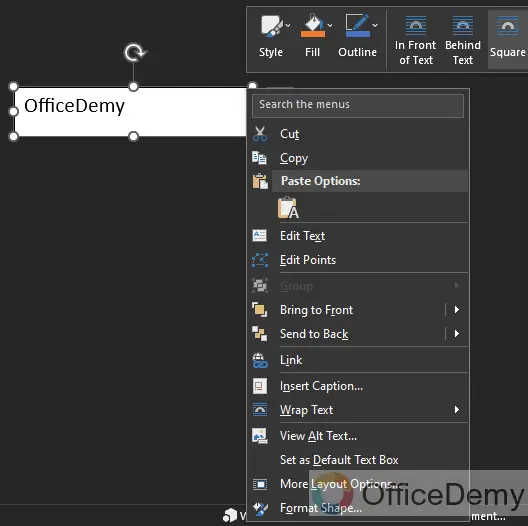
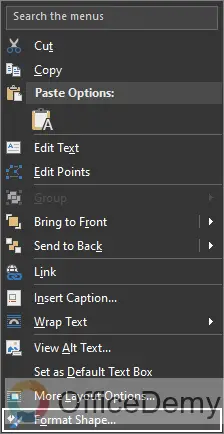
Right-click on the text box border.
Step 5
In the pop-up menu, click “Format Shape”
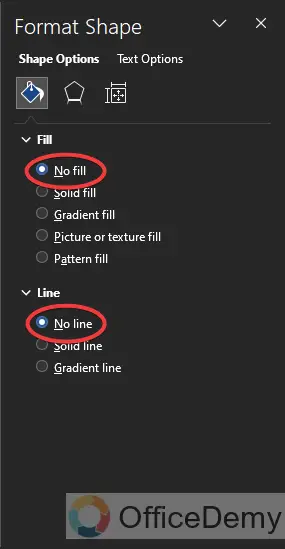
Step 6
Check “No fill” and “No line” in the “Format Shape” sidebar.
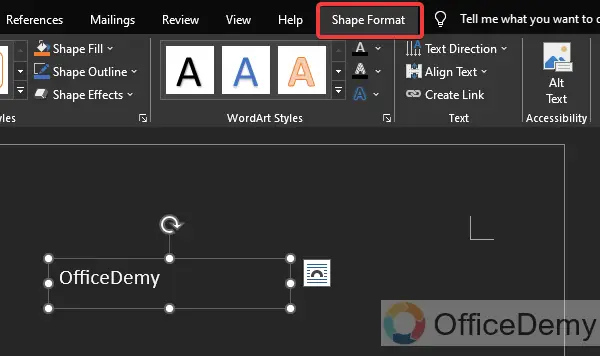
Step 7
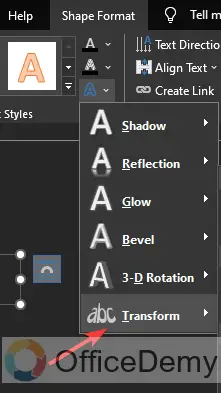
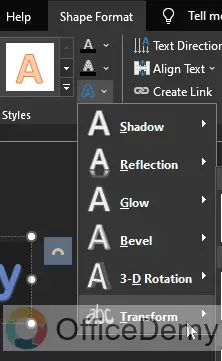
Click on the “Shape Format” tab in the toolbar.
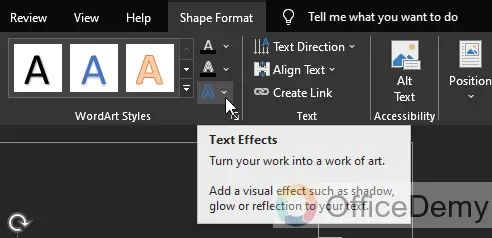
Step 8
Select the “Text Effects” button.
Step 9
Hover your cursor over “Transform”
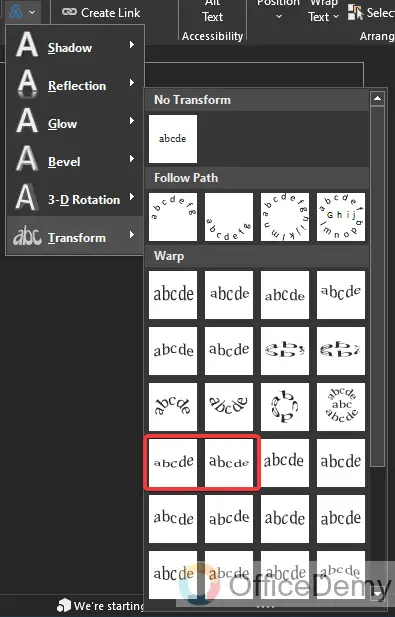
Step 10
In the fourth row of the “Warp” section, choose between “Curve: Up” or “Curve: Down”
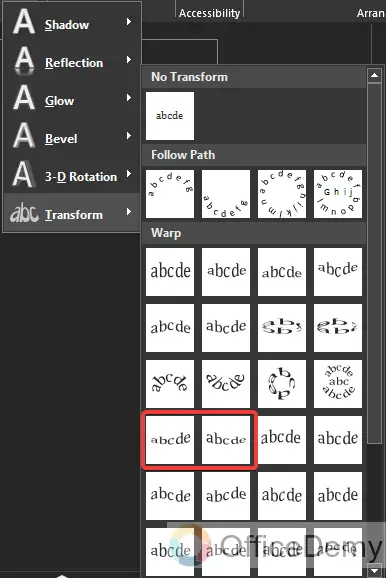
Step 11
Click and drag the “yellow dot” to adjust the curve of your text.

By manipulating the position of the yellow dot, you can fine-tune the curvature of your text. This versatile tool allows you to even flip your text upside down if desired. Achieving your desired text curvature may require some experimentation with the formatting and adjustments, especially when aligning it with another object.
Curve Text in Microsoft Word – Using Word Art
You can also achieve a curved text effect in Microsoft Word by utilizing the WordArt feature. This allows you to select and apply a curved style to the text you’ve entered.
Step 1
Highlight the text you want to curve.
Step 2
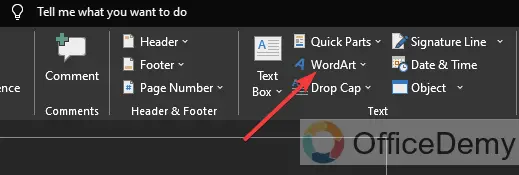
Go to the “Insert” tab on the Ribbon.
Step 3
In the “Text” section, click the “WordArt” button.
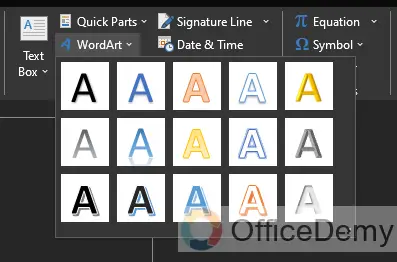
Step 4
Select the style of letters you want.
Step 5
With your text highlighted, click the “Shape Format” tab on the Ribbon.
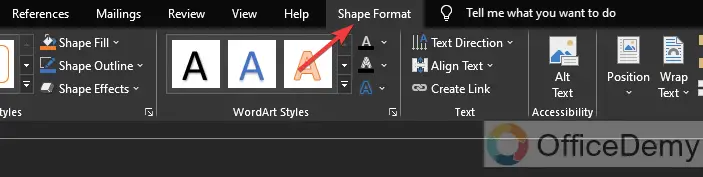
Step 6
Click the “Text Effects” button.
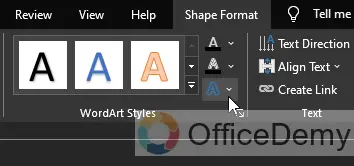
Step 7
Hover your cursor over “Transform”
Step 8
In the fourth row of the “Warp” section, choose between the “Curve: Up” or the “Curve: Down” option.
Step 9
Click and drag the “yellow circle” to adjust the curve of your text.

Frequently Asked Questions
Does curving text work in all versions of Microsoft Word?
Using WordArt to curve text is a feature that’s generally accessible in most versions of Microsoft Word. However, the precise steps and available features might differ slightly depending on the specific version you’re working with.
How do I undo curved text in Word if I change my mind?
To straighten out curved text in Microsoft Word, you can follow these steps: First, click on the WordArt text you want to modify. Next, head over to the “Format” tab located in the top menu, and then click on “Text Effects” Inside the Text Effects menu, look for the “Transform” option and choose “Flat” This action will remove the curvature from your text.
Can I Use the Drawing Tools in Microsoft Word to Create Curved Text?
Yes, you can achieve curved text by drawing on microsoft word. Using the drawing tools, you can create curved or circular shapes and then add text to follow the shape. This feature allows you to design visually engaging documents or create unique headings, logos, or text elements. Experiment with different curves and fonts to achieve the desired effect effortlessly.
Can I change the font size and color of the curved text?
Yes, you have the flexibility to adjust various formatting aspects of curved text in Microsoft Word. To do this, simply navigate to the “Format” tab, where you’ll find a range of options for customizing the font size, color, and other formatting settings for your curved text.
Can I curve text in any font or style?
Yes, you can curve text in Microsoft Word with various fonts and styles.
Can I add curved text to a specific shape or object?
Certainly! You can add curved text to a particular shape or object in Word. To do this, follow these steps:
Begin by inserting the shape or object you want to work with.
Next, insert WordArt, just as you explained earlier.
Now, position the WordArt text box over the shape or object, making sure it aligns as you desire.
Finally, adjust the curvature to your liking. You can experiment until it looks just right for your project.
Can I enhance the curved text with shadows, glow, and 3D effects?
Yes, you can edit the text once you’ve placed it, allowing for various customizations like adding a shadow from different angles, enhancing the text with glowing effects, giving it a three-dimensional appearance, altering the interior and outline colors, rotating the text, and more.
To make these adjustments, simply follow these steps:
- Select the text you wish to edit.
- Go to the “Format” menu.
- Choose “Text Effects“
- From there, you can select and apply your desired enhancements.
Conclusion
In conclusion, learning how to curve text in Microsoft Word can be very useful if you want to make your documents or presentations look cool. Whether you’re trying to add some flair to a project, make a unique logo, or just want your text to follow a curved path, Word has got you covered. By following the easy steps, I talked about in this article, you can become a pro at curving text in Microsoft Word and open a whole world of design possibilities. Don’t forget to play around with different fonts, sizes, and curve shapes to get the look you want for your project. With some practice, you’ll be able to create documents that catch people’s eyes and leave a strong impression. So, give it a try, let your creativity flow, and start curving text in Word today!


