
To Add Different Footer on Each Page
- Click “Insert” > “Headers and Footers” > “Footer“
- Add your footer content.
- Insert section breaks where you want different footers.
- Click the footer area after the section break.
- Uncheck “Link to previous“.
- Add your new footer content.
- Repeat for each page where you want a different footer.
Today’s article is about Google Docs’ different footers on each page.
Google Docs is an online word-processing software offered by Google. It allows writing professional letters, covers, CVs, proposals, etc. Google docs help you share the file content very easily and swiftly.
Footer in google docs appears on the bottom margin of the page. They are usually the same on each page. But sometimes, we need to add different footers on each page to deliver our message more precisely. Footer is generally used to add a logo, a tagline, a business name, etc.
But what if you want to add google docs different footer on each page. This article will teach you a step-by-step guide with pictures to add different footers on each page in google docs.
Why use google docs different footers on each page?
Footers play a very important role while pitching your impression on your clients via a google doc file. Footers sometimes need to be different for different pages, when talking about different aspects of a particular subject matter, the footer area is supposed to be changed accordingly to match the subject. This is why you need to use google docs different footers on each section. you must have been through a book online and seen the chapters and exercise names on the top or bottom, these are the best examples of google doc different footers on each page.
- To match the upfront subject matter
- To showcase different areas to emphasize
- To mention chapters or sections of a book
How to Have Different Footers on Each Page in Google Docs
Step-1: Access Google Docs Footer
Open your file in google docs first, now in front of you, you have the top main menu.
- Click to the Insert tab and Scroll down
- Click on the Headers and Footers
- Click on Footer
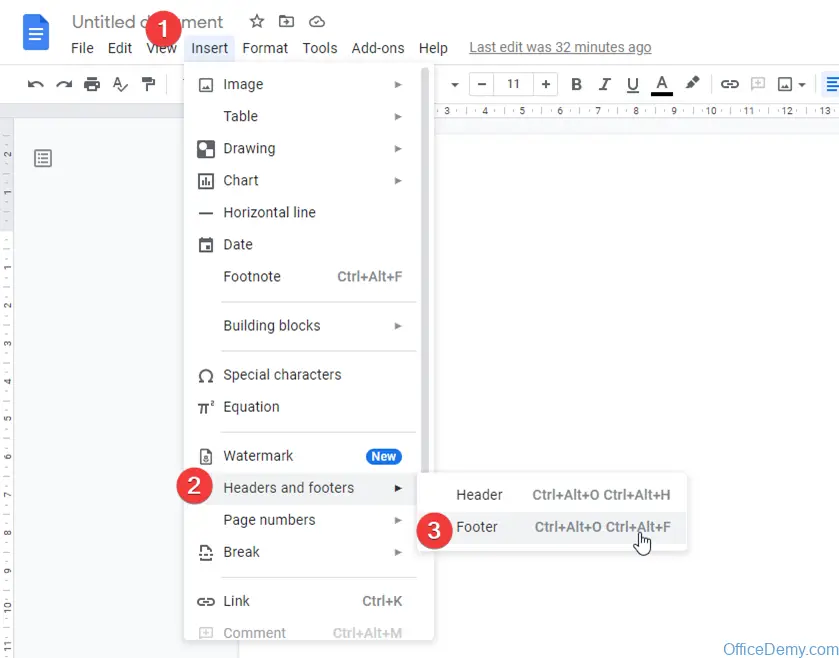
Clicking on the footer will show you a footer area with the blinking cursor, you can write your footer there.
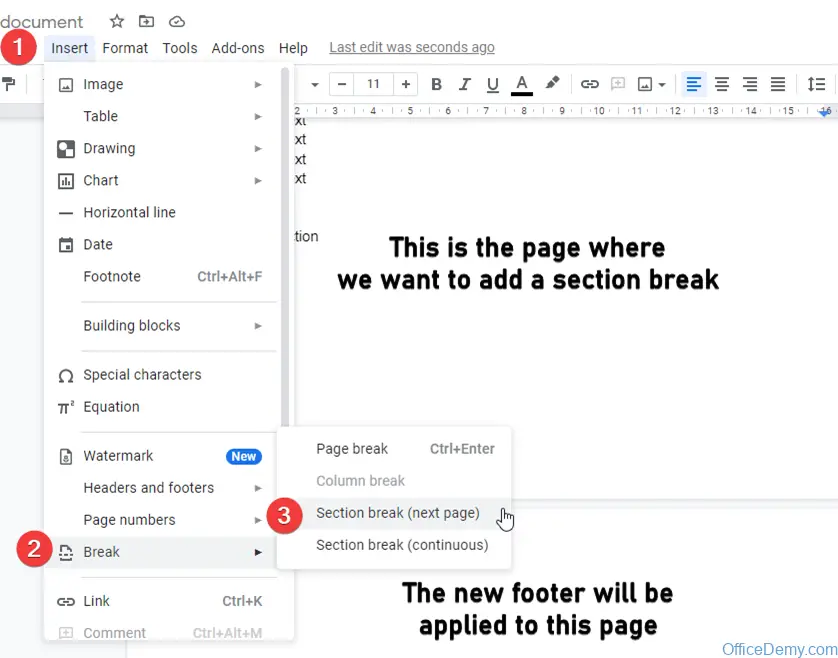
Step-2: Add Section Break in Google Docs
Add a section break if you want to start a new section. It will cut the link between pages and move you to the new section, where you can insert different footers along with all other formatting.
- Add a page break if you want to start a new section.
- It will cut the link between pages and move you to the new section, where you can insert different footers along with all other formatting.
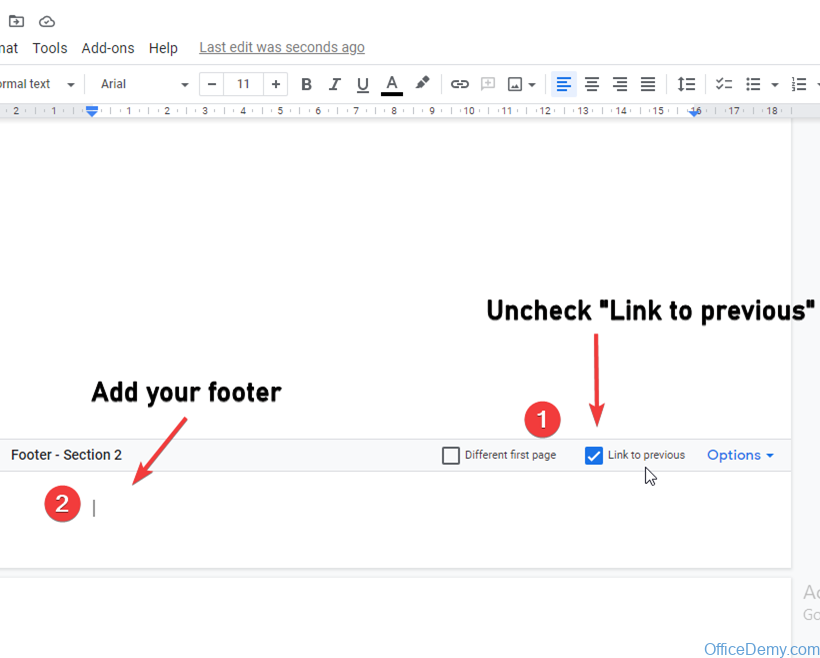
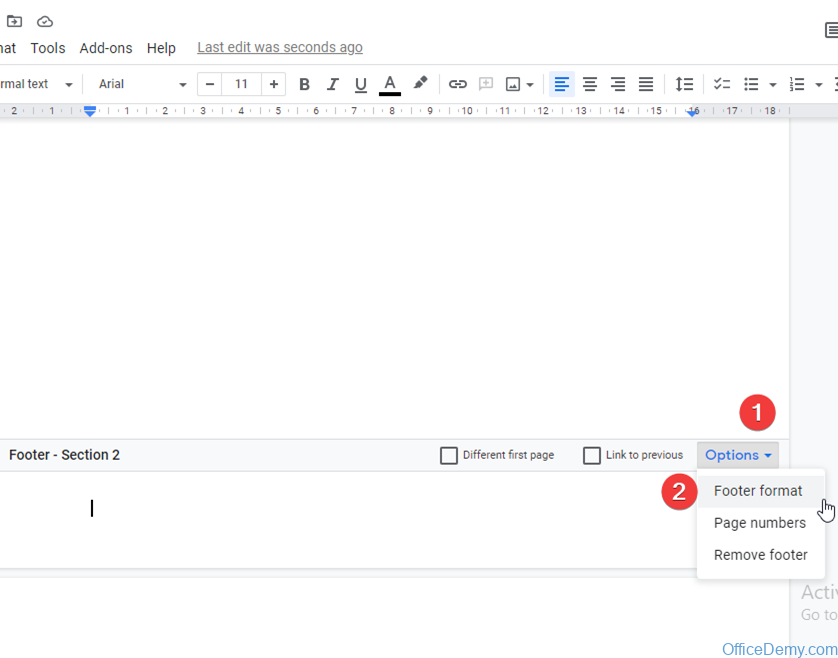
Step-3: Unlink Footer From Previous Section
As you click on it, your cursor will automatically move to the next page. Now click on the footer area of the page where your cursor moved. Uncheck “Link to previous”
Scroll down on the same page and click on the footer area. Uncheck Link to previous here as well. As mentioned before, the header and footer work independently in sections. Then add your footer content.
If you scroll up, you will see that the header and footer are different from the above pages. But the pages below the current page still have the same header and footer. That’s because they are all part of the current section.
You will have to repeat the above steps for all the pages if you want each page to have a different header or footer. Typically, one would want to have different headers or footers for different chapters. Since each chapter has numerous pages, you will have to do this after a bunch of pages.
Sequential Steps to Unlink from previous section:
- Now click on the footer area of the page where your cursor moved and Uncheck “Link to previous“
- Add your new footer for current document section
To recap, you need to place the cursor not on the page where you want to have a different header or footer, but on the previous page of it. And that too after the last word, at the very end of the page.
Notes
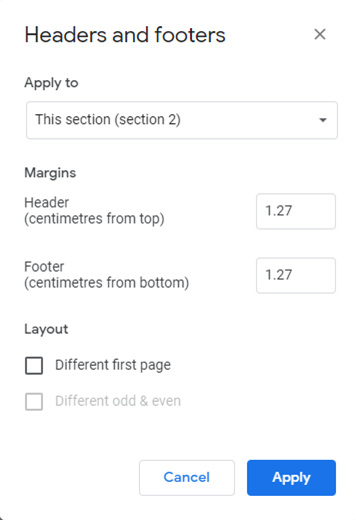
- Always remember to uncheck the “Link to the previous” checkbox when you are breaking a page or section. This checkbox keeps the page connection if checked.
- Always start your header and footer section from page 1, after tabling of contents.
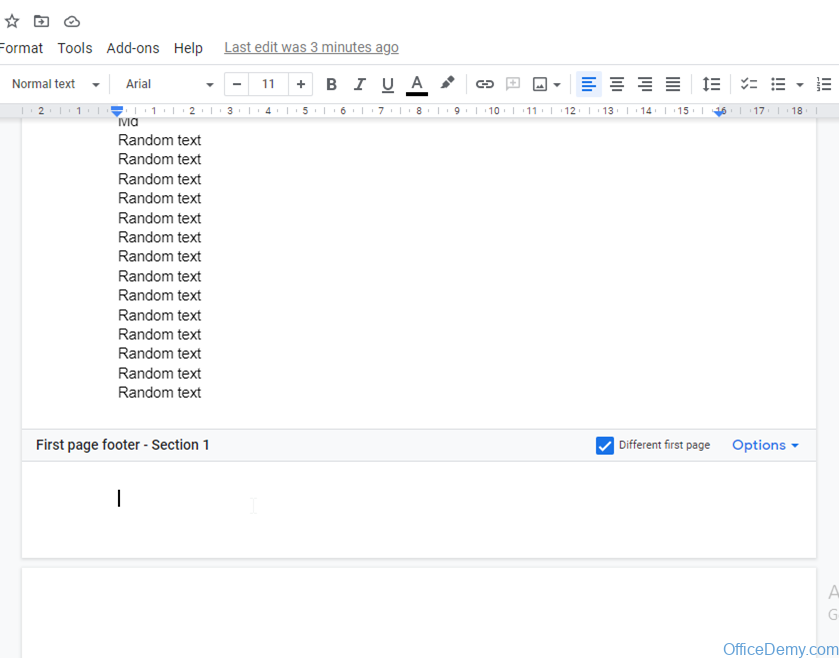
- For a different 1st page header and footer, you can check the checkbox “different 1st page” which is before “link to previous“. It is used for the table of content page, and other pages before the actual content started.
- You can adjust the position by changing margins by clicking the options button next to the “link to previous” checkbox.
Conclusion
In this article, we learned Google docs different footers on each page, it’s pretty simple now you are an expert in this work. When you need to add a page break, where to place your cursor while breaking the page and when to use a different 1st-page checkbox. You have learned everything about it. you only need to do it right and understand the position of the curser because it is a little tricky to understand that the curser needs to be on the previous page when adding a new footer to the next page. But you’ve got this. Do write your experience in the comments and don’t forget to share this quick guide with your friends.


