
To Add Fonts in Microsoft Word
In Windows:
- Open the font manager in the Control Panel.
- Download and save the font as a ZIP file.
- Extract the ZIP file.
- Open the font and go back to the font control panel.
- Drag and drop the font file into the Fonts window.
- It will be automatically added to Microsoft Word.
In Mac:
- Download and unzip the font.
- Ensure you have a font manager like Font Book.
- Open the font file and click “Install Font” to add it to Font Book.
- Move the font to the “Windows Office Compatible” field in Font Book.
- Restart your Mac.
- The font will be available in Microsoft Word and other applications.
Microsoft Word is undoubtedly the most popular app you can use to view and edit documents. It comes with a wide range of advanced features to help you create better, more attractive documents and get your work done quickly. The wide range of inbuilt fonts is another feature which helps make all your documents stand out from the rest. If you happen to run into a situation where you do not find the right font for your document, however, you can always add fonts to Microsoft Word on Windows, Mac, or directly from your browser.
To add fonts to Microsoft Word on Windows or Mac computer, please follow this article.
Free Font Services to a download font for Microsoft Word
If you want to add customized text to your website, you need to download the font of your choice. Make sure that you only download fonts from highly trusted sources, as they are a common method of transmitting viruses. Downloaded files usually come in ZIP format, including TTF and OTF formats.
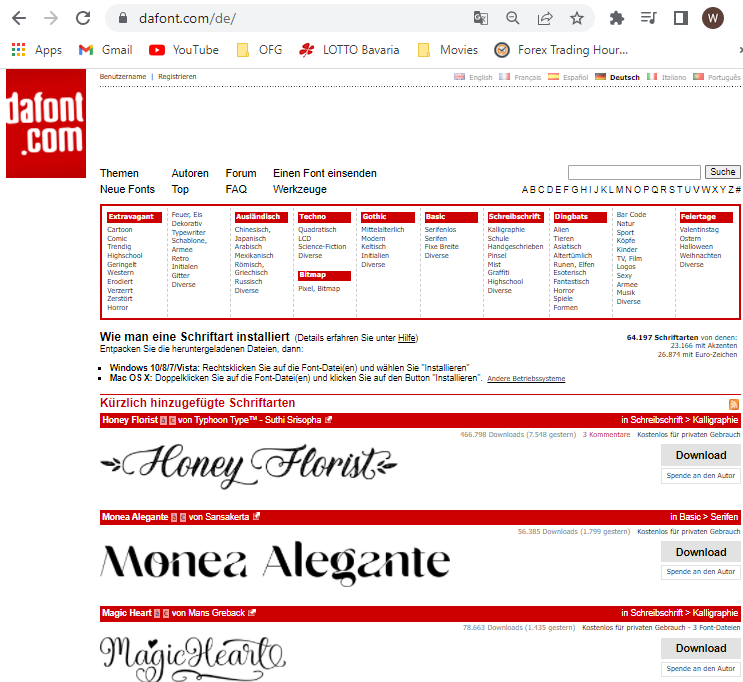
There are many sites that offer hundreds of high quality and unique fonts. Below is a compiled list of the best font websites for both paid and free for personal and commercial use.
- https://www.dafont.com/de/
- https://www.fontspace.com/
- https://www.fontsquirrel.com/
- https://www.1001freefonts.com/
Now you can change the font size and start using it on your website. This way, you’ll be able to tailor the font to match your requirements and get better readability.
How to Add Fonts to Microsoft Word on Window
To add new fonts to Word, download and install the font in Windows, where it will become available to all Office applications. To Download the fonts, please follow these steps,
Step 1: Open the font manager on your desktop by navigating to Start, followed by the “Control Panel”.
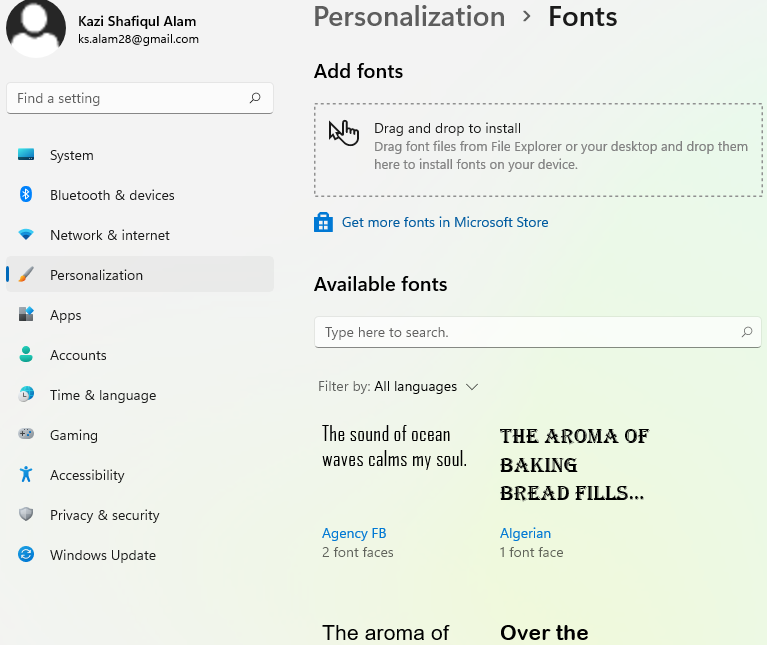
Step 2: Click on Fonts. A list of fonts will appear.
Step 3: choose a font that you would like to add to your Microsoft word. Then Download it.
Step 4: Save the downloaded font file to a folder in your computer. The file you have downloaded will be a ZIP file which should contain a TTF or OTF font file inside.
If it is a ZIP file, it must be extracted. If you are not familiar with the ZIP file extraction process, follow the next process to unzip the ZIP file.
How to Extract a ZIP file
To extract a ZIP file, please follow these steps,
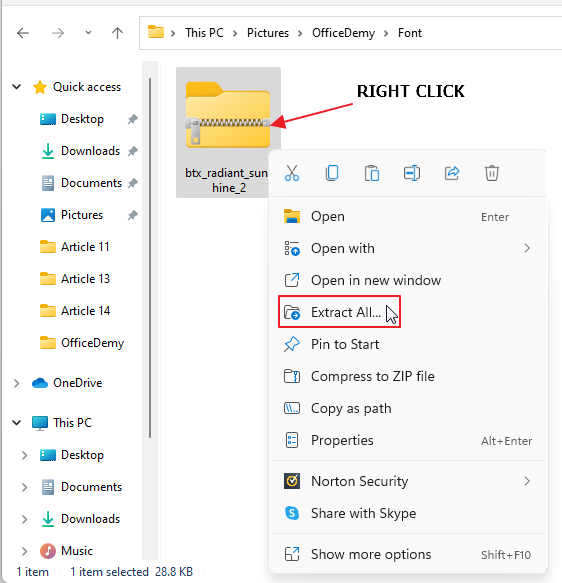
- Go to the ZIP file. Press a right click. A menu will appear. Click on “Extract All”.
- as soon as u click on extract all, your ZIP file will be UNZIPPED.
- Now you can verify the font file. Double click on the UNZIPPED file.
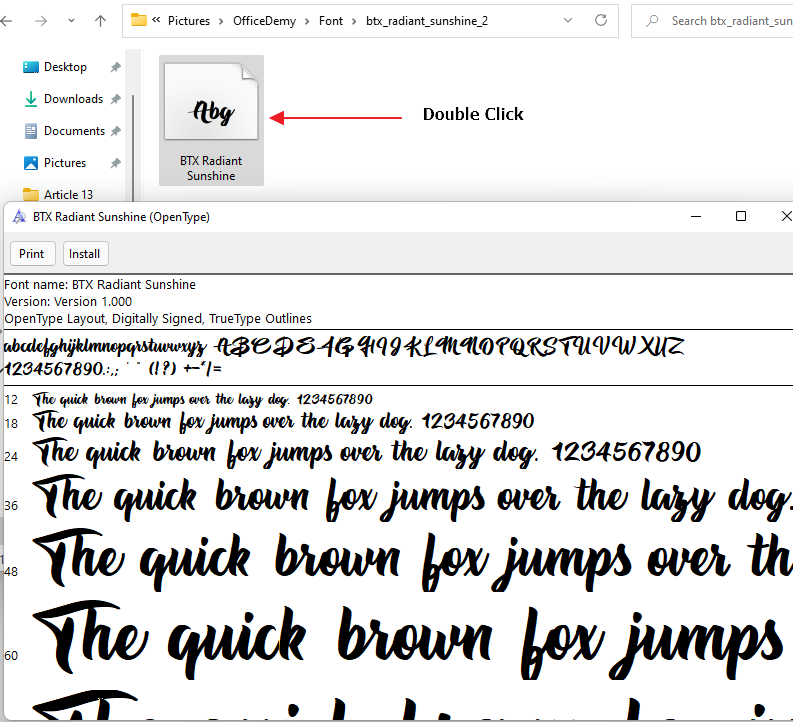

Step 5: Now it’s time to add fonts to Microsoft Word. As the font file is already downloaded, we have to proceed to open the font control panel on windows again.
Step 6: Drag the font file to the Fonts window, then drop it there. If that’s all you wanted to do, close the Fonts window. If you have more fonts to install, repeat the process with each of them. This is how you install your desired fonts to your system.
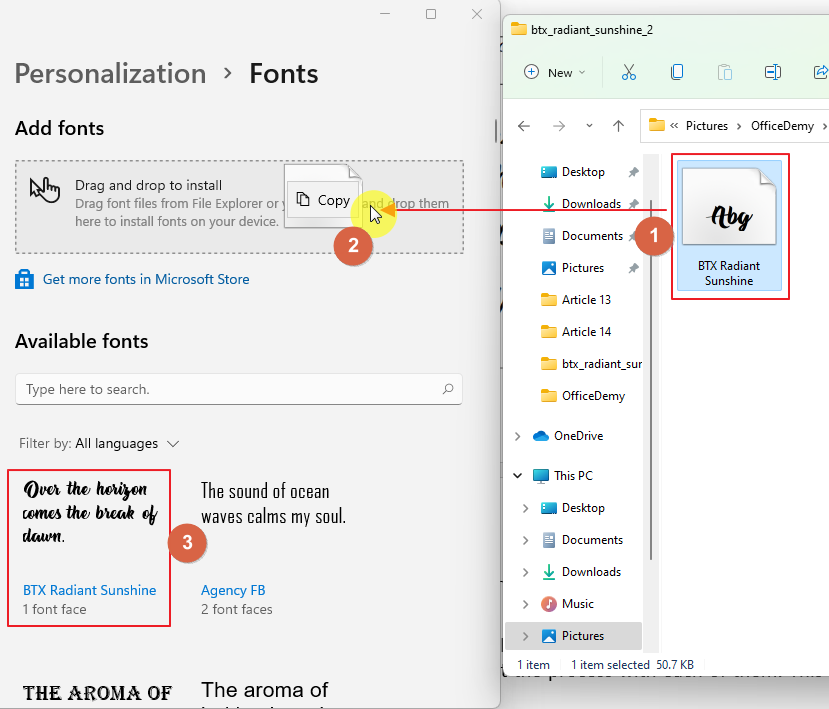
Once the desired fonts are added, it will be installed automatically.
Step 7: By installing a font in Windows, it’ll be automatically added to Microsoft Word. You can use it in the program by selecting it from the font menu.
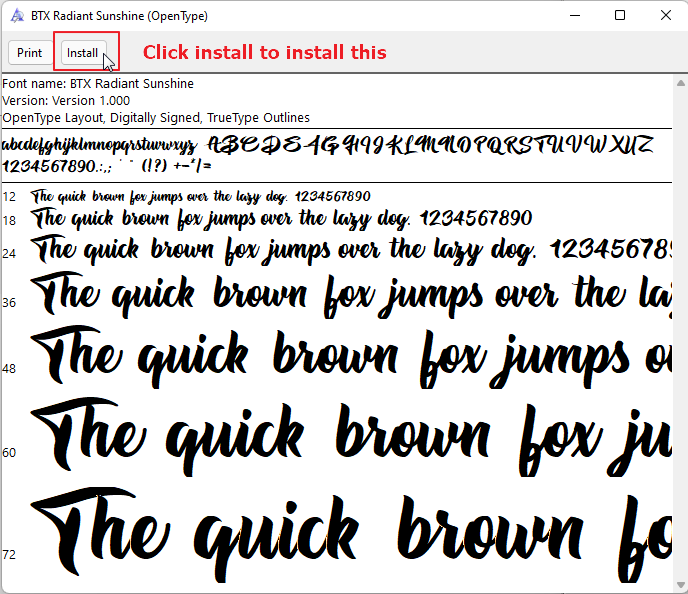
NOTE: If the added fonts don’t work properly, we must install it manually. To do so, open the file, Click on “INSTALL”.
How to Add Fonts to Microsoft Word on Mac
The procedure of adding fonts to MS Word on a Mac operating system is slightly different from that on Windows operating system. The difference is subtle and won’t be hard to understand.
Here’s what you need to do:
Step 1: The first step is to download the font and then unzip it. It is of utmost importance that the font manager is installed prior to downloading any fonts. Most likely, your Mac system will have a font manager pre-installed. If not, you can use Font Book.
Step 2: Once the font Book is installed, select the font file you want to add to the Microsoft Word application. Open it in the font preview window on your Mac.
Step 3: Once you have selected the font that you like, simply click on the ‘Install Font’ button on the bottom preview window. This will send the font to your Font Book software, where it will be saved. You can easily access your font through this menu. You can also delete fonts from your MacBook if you change your mind later.

Step 4: Open font book on your Mac. Now find the installed font that you just added to the manager.
Step 5: Windows Office Compatible is a field in the left side of the Font Book software, where you can add installed fonts.
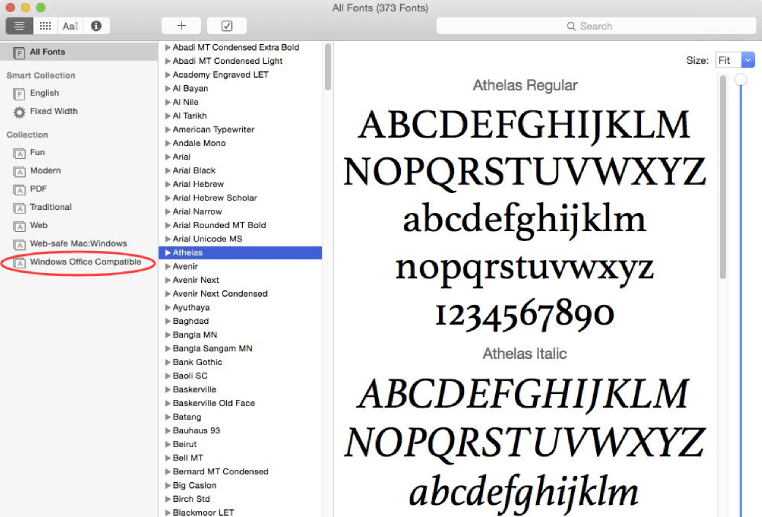
Once you have added the fonts to the Windows Office Compatible field in Font Book, restart you device.
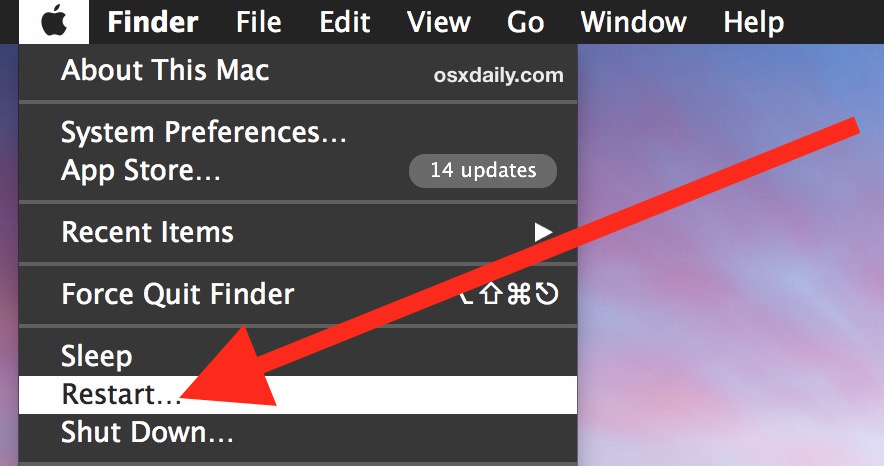
Step 6: On the top right corner of your screen, click on the Apple icon, and then select the Restart option. Once your Mac reopens, you’ll be able to use the color font in Microsoft Word.
Once installed, the font will be available to all applications on your MacBook.
Conclusion
Whether you are looking to enhance the personality of your documents or just want a change in the appearance, adding fonts to Microsoft Word can be an excellent option. Thankfully, Microsoft provides easy ways to add fonts for Windows, MacOS. So don’t be afraid to try something new next time you open your Word!
Hope you have read the entire article and learned a lot. Don’t forget to check our other sections here in OfficeDemy.com.


