
To Add More Elbows to Google Slides
- Select the slide.
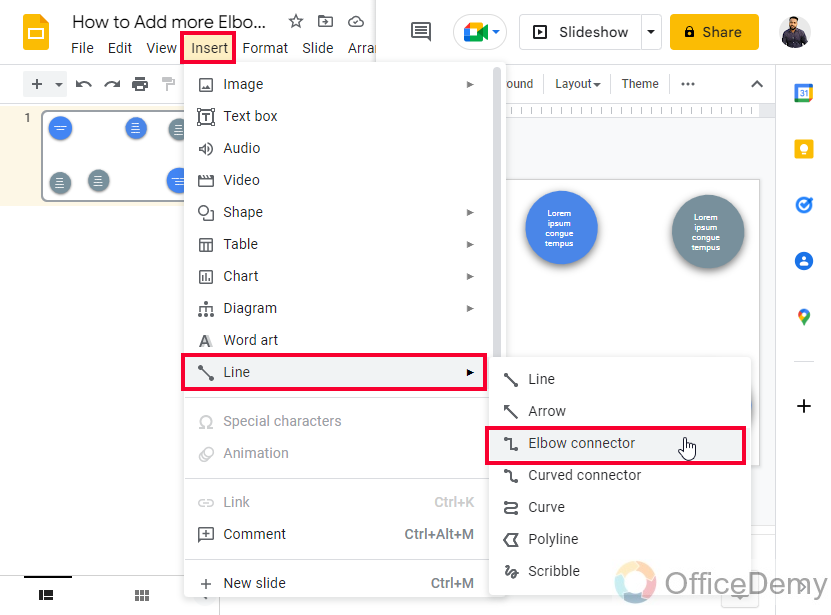
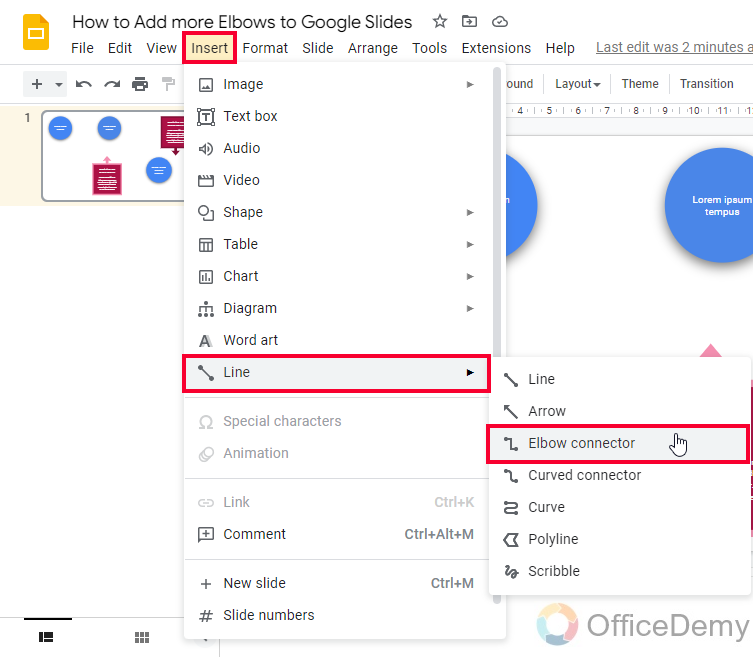
- Click “Insert” > “Line” > “Elbow Connector“.
- Mouse over the first object and click an anchor point to add the first end of the elbow.
- Move the other end of the elbow to the second object and click an anchor point to connect them.
- Elbows automatically find the best route between the objects.
OR
- Select an elbow in your slide.
- Use the toolbar to style the elbow.
- Change line color, and adjust line weight (thickness).
- Select line style (dash, dotted, etc.).
- Choose starting and ending pointers (e.g., arrows or squares).
Hello. Today we will learn how to add more elbows to Google Slides. Elbows are also known as elbow connectors, or connectors in Google Slides, these are some dynamic types of lines in different shapes that can be used to connect two data points. We may have some elements on our Slide like an image, chart, table, icon, heading anything like that, and then we have another element of any type, now to show a relationship between these two what do we commonly do?
We use a line to connect these two elements or data points. But sometimes it looks bad and unprofessional to connect data points with solid or tilted lines. What connectors do is they are dynamic; they change their position and curves based on the point location we tend to connect. They will never spoil the design aspect of our Slide. The most common connector is the elbow connector in Google Slides, and today we are going to learn how to add more elbows to Google Slides.
Why use Elbows in Google Slides?
Google Slides is more than a presentation typing and designing application. It has countless features and we can use many kinds of media files on it. We sometimes have manual bounding of data we tend to present the Slide like a book page, or sometimes like a labeled diagram. Since Google Slides has no limitations to performing different kinds of tasks, it gives us a variety of built-in connectors to make labeled diagrams, charts, relationship models, and much more.
So, when working with such data and images, we just need some lines, some shapes, and some connectors to connect the data points to show the relationship of data points. It’s highly used to develop and create relationship diagrams used in SDLC. So, there can be so many reasons to learn how to add more elbows in Google Slides. We will explore it, and will also see some related connectors and will try to discover some exciting editing and controlling options for the elbows.
How to Add More Elbows to Google Slides
In Google Slides we have various kinds of connectors in which we have an elbow connector it can be added just like others and can be used to connect data points on a single page or Slide. We will see some related data and will apply elbow connectors to it to see how to add them and how they work.
Add Elbows to Google Slides – by Connecting Data Points
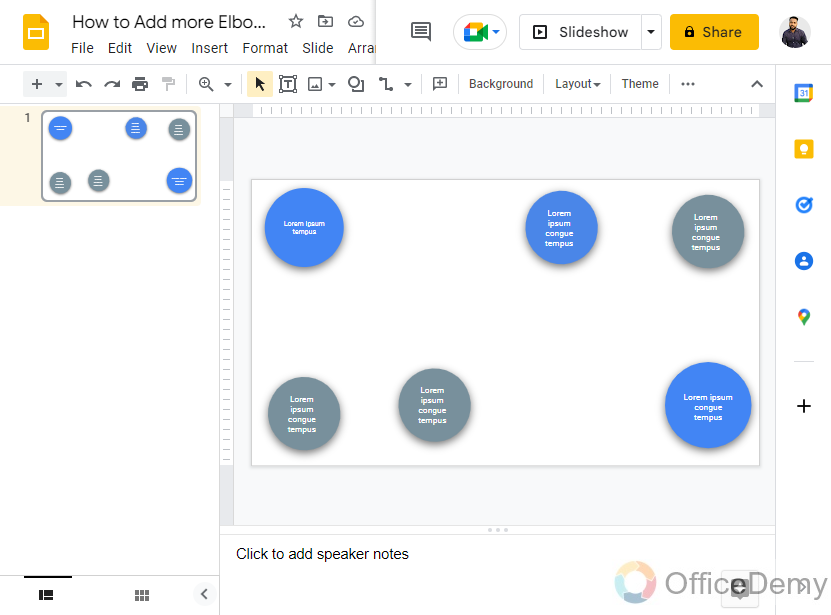
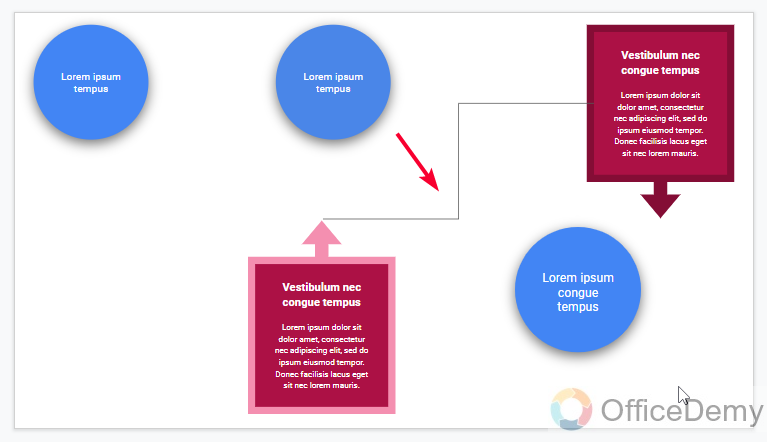
In this section we will learn how to add more elbows to Google Slides to connect two data points, I have sample data points from a relationship diagram and I want to connect them using an elbow. Let’s see how to do this in Google Slides
Step 1
Sample data points to connect using your elbow
Step 2
Click on Insert > Line > Elbow Connector
Step 3
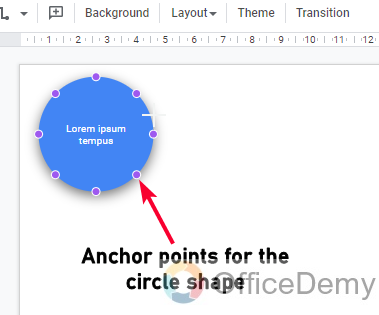
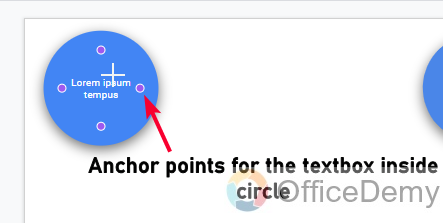
Now you need to mouse over your object and all the anchor points will be visible
Step 4
Click on any anchor point, and your elbow will be added to that
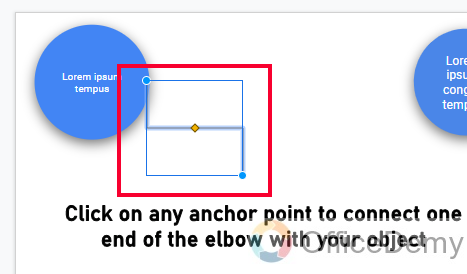
Step 5
Now to connect the other side of the elbow to another object simply Hold the end of the elbow and take it to another object, as you reached the object all the anchor points of that second object will be appeared, click on any anchor point to connect with it.

Step 6
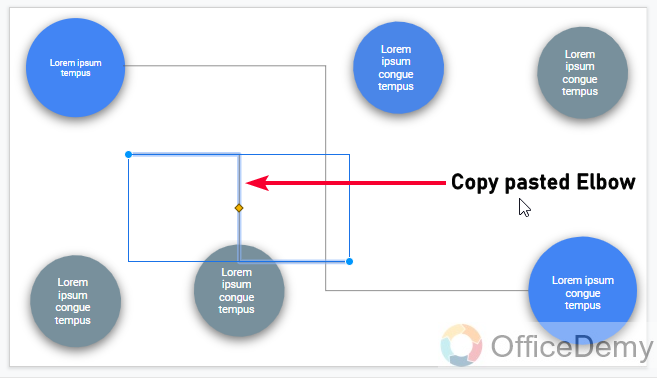
To add more elbows like these you don’t need to insert it, again and again, you can simply copy this as an object and paste it on the page, and then you can hold and move it freely.
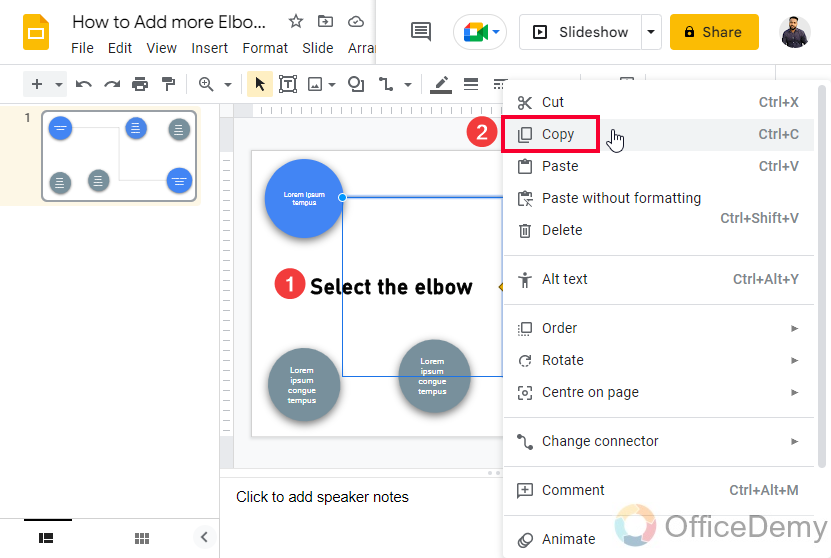
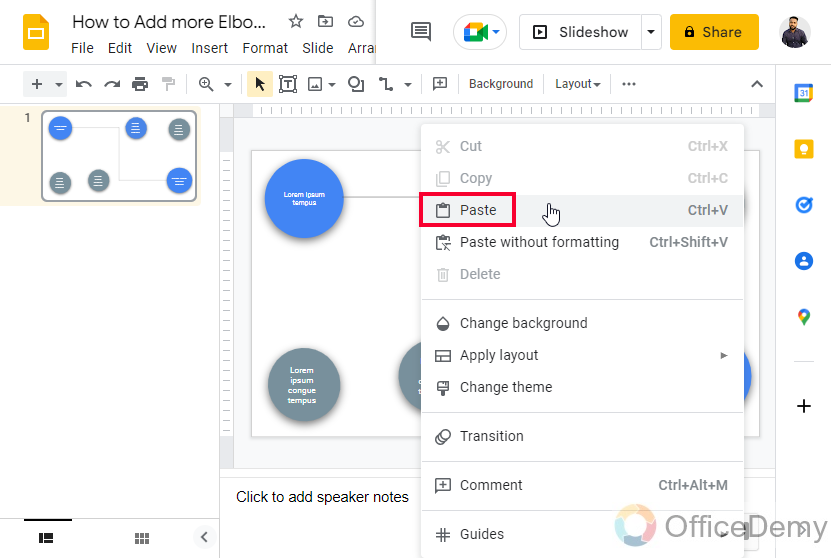
Step 7
To connect a copy-pasted elbow you need to hold it from its one end and then go to the object you want to connect, then do it same for the second end of the elbow.
Add Elbows to Google Slides – using Format Options for Elbows
In this section, we will learn how to add more elbows to Google Slides and then style them using a customization panel for it. It’s useful when we have multiple elbows on our page and we want to keep them unique by styling a group of elbows with the same customization and other groups with others. To make them unique and more understandable for the users, we mostly copy and paste elbows after customization.
Here I have a page with some data points on it, I will add multiple elbows here and will customize them using the built-in features.
Step 1
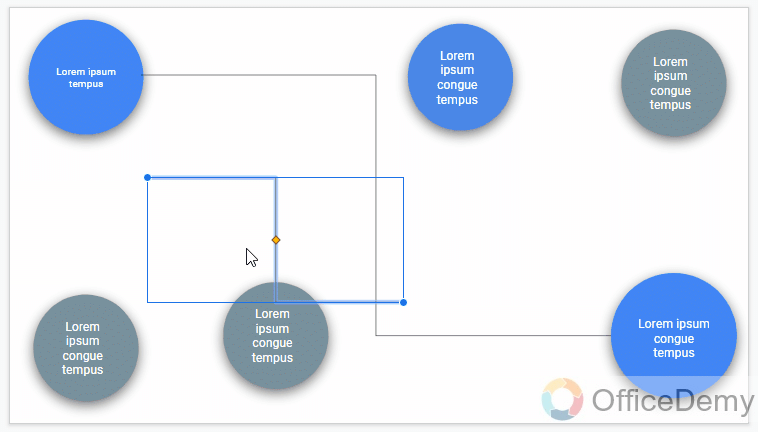
Sample data points on a single page, here I have two different data points which belong to each group
Now I need to connect the same group objects with elbows and I will customize elbows for each group so that they can be easily identified.
Step 2
Go to Insert > Line > Elbow connector
Step 3
Mouse over the object and connect the elbow with an anchor point

Step 4
Now connect the other side with another object’s anchor point
Step 5
Now, click anywhere on the elbow’s body to customize it

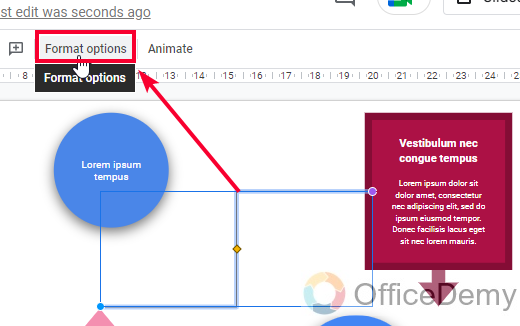
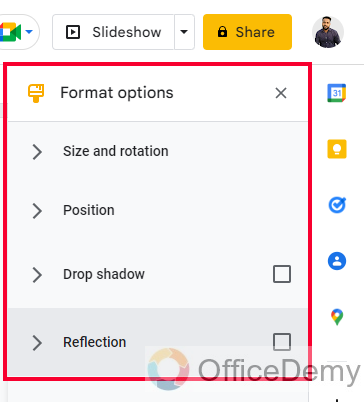
You will see a customization panel on the right-hand side, if not. You can click on the “Format options” button in the toolbar
Step 6
Here you have four dropdowns for customizing your elbows
Step 7
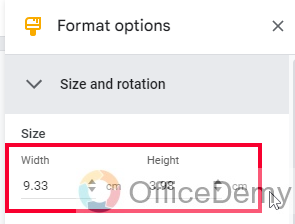
Size and rotation
Here we can control the size and rotation of our elbow connectors.
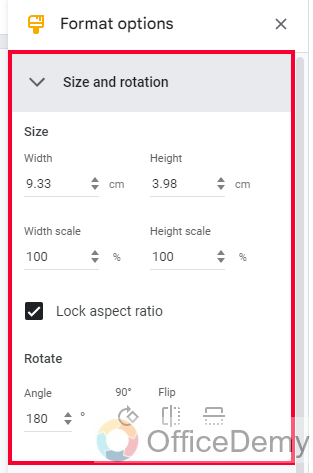
Firstly we have the width and height in cm
Below we have the width and height scale in percentage.
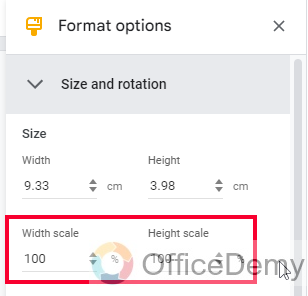
Then you have a checkbox “Lock aspect ratio” Enable it to increase or decrease width and height with equal proportion. (By default, it’s checked)

Below we can define the angle in degrees
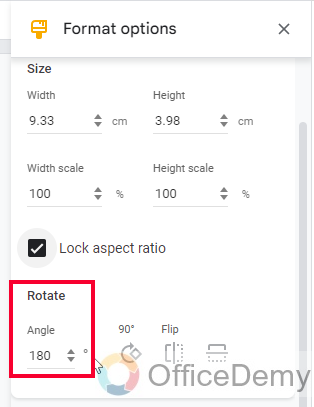
Here we can Rotate the elbow (it does not make sense after connecting with the data point)
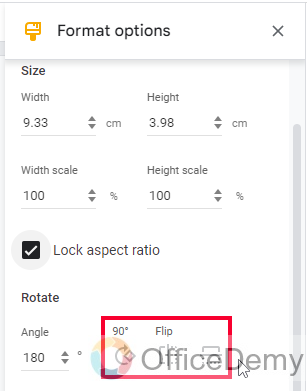
Then here, we can flip our elbow horizontally or vertically (It also should be used before connecting the elbow, after connecting it does not make any sense)
Step 8
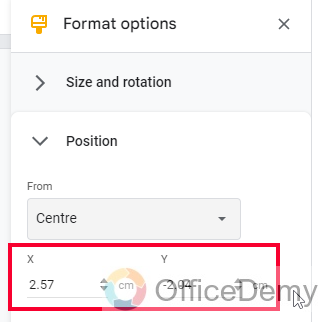
Position
Here can control the position of our elbow
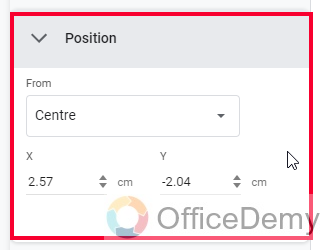
Firstly, we have a drop-down from where we can select the position to control, we have two options “Top left” and “Center”.
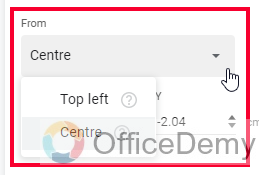
Then below we have the X and Y positions of our elbow in cm, we can move it on both axes
Note that these options for positions also should be used before connecting the elbow
Step 9
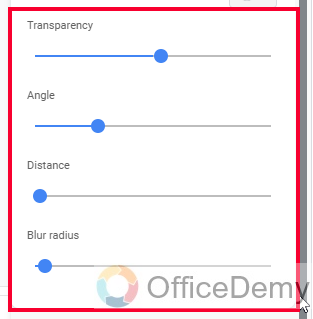
Drop Shadow
It’s a checkbox, and if checked, then we have further options to control the drop shadow
We can select the color for the drop shadow.

Then we can control transparency, Angle, Distance, and finally Radius
Step 10
Reflection
It’s another checkbox and only opens further options if checked.
Here we can control Transparency, Distance, and finally, Size.
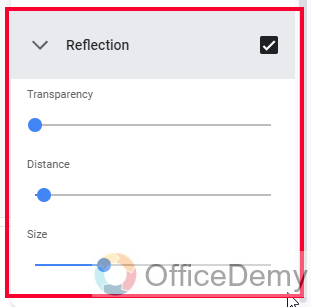
Tip: These options are not used mostly, we don’t need reflection, angle, or other options with our elbows, because we have already connected it to both ends, and now the only thing matters are that the elbow should not interest the data points in an ugly way, and this is auto-controlled by Google Slides and controlled very nicely.
Add Elbows to Google Slides – Styling Elbows
In this section, we will learn how to more elbows to Google Slides and how to style our elbows. In the previous section, we saw format options in which we did not have styling options, here we can style our elbows directly using the toolbar. Let’s see what options we have got
Note that you need to select an elbow and the styling will be made only on that specifically.
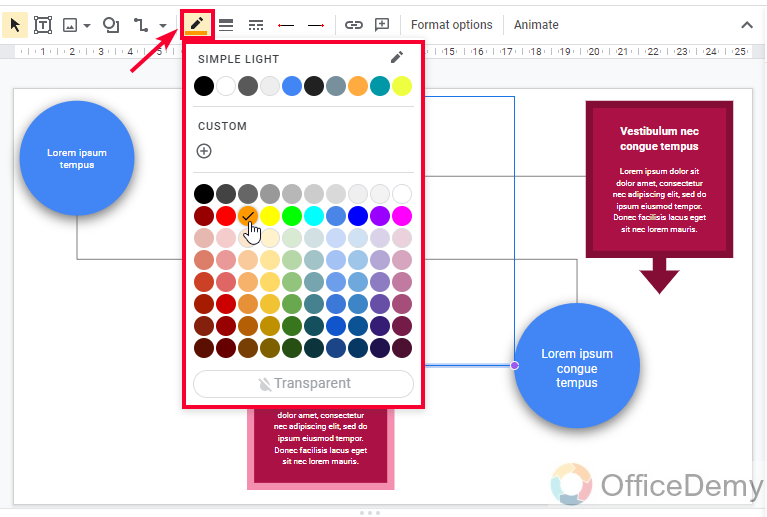
Step 1
Line color
Here we can control the line color of the elbow
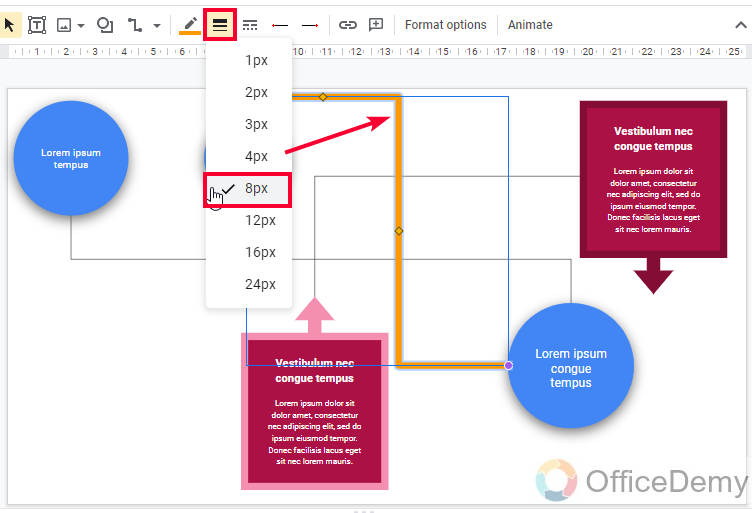
Step 2
Line weight
Here we can control the line weight of the elbow, it can be used to control the thickness or sharpness of the line
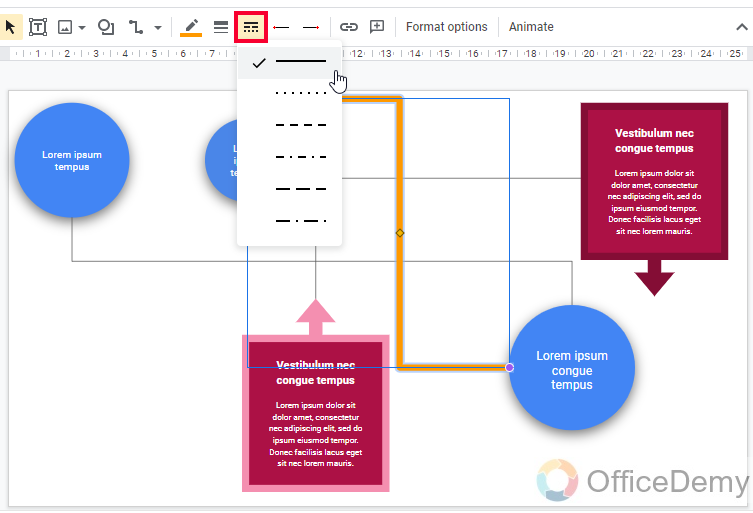
Step 3
Line dash
Here we can select a line style such as dash, dotted, solid, etc.
Step 4
Line start
Here we can select a starting pointer for the line such as an arrow
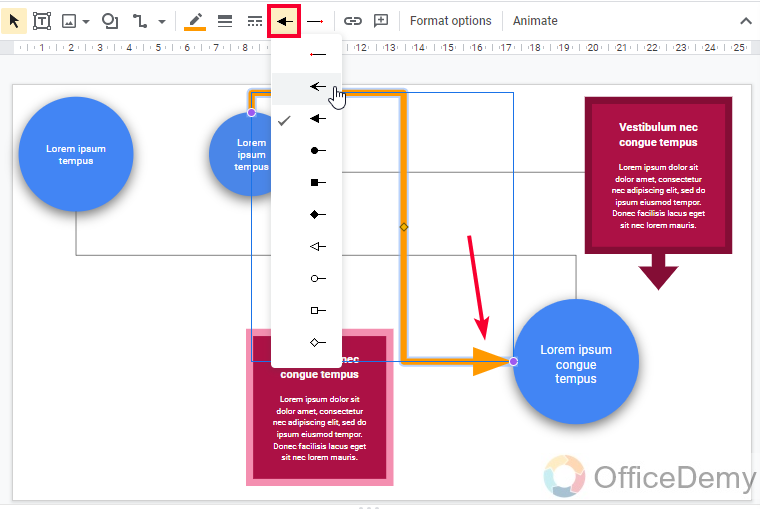
Step 5
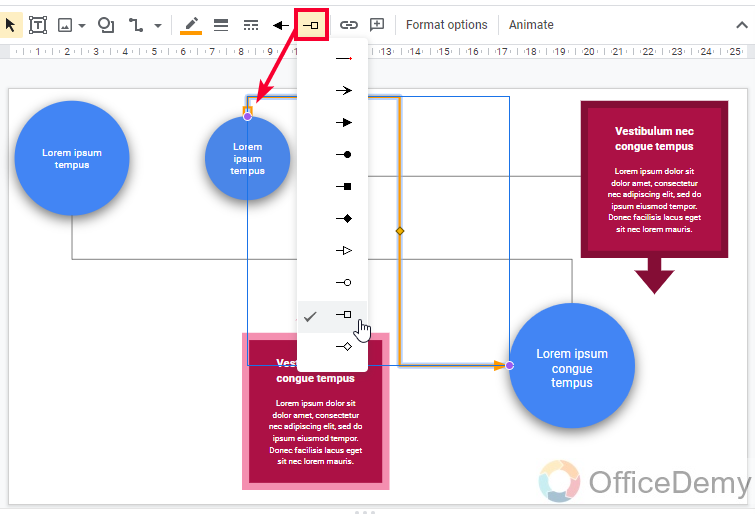
Line end
Here we can select an ending pointer for the line such as a small square.
Step 6
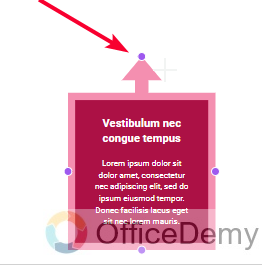
Customized elbows may look like below

Frequently Asked Questions
What are some connectors in Google Slides?
We have various connectors in Google Slides, the most commonly used are elbow connectors, line connectors, and curved connectors, some uncommon and unusually used connectors are scribbles, polylines, and curves. Nevertheless, all the connectors are dynamic and useful based on the user’s requirements.
Why do we need to use elbows in Google Slides?
To connect data points, images, shapes, headings, or any objects we use lines, but lines are not smart enough when we need to connect two objects placed on different axes. So, we have elbows in Google Slides to connect two objects like an elbow-shaped line with auto-adjustment capabilities of the shortest path.
Conclusion
This was all about how to add more elbows to Google Slides, adding more elbows is nothing but to copy paste the existing elbows in Google Slides, the pasted elbows can be used uniquely to connect with different objects and they will take a new dynamic shape based on the position of the objects and their anchor points. I hope you have learned and understood about elbows in Google Slides, for more useful tutorials, please subscribe to our Office Demy Blog. Thank you.


