
To Add WebEx to Outlook
- Visit the official Webex website, download the Windows-compatible version, and install it.
- Launch Webex, go to “Settings” > Select “General” > Check “Show Webex availability in Outlook” and Click “Save“
- Open Outlook, and click “Get Add-ins” In the “Home” tab.
- Search for “Webex,” select “Cisco Webex Scheduler” and click “Add“.
- Open a new meeting or appointment scheduler, and you’ll find the Webex integration in the top bar for scheduling and joining Webex meetings directly from Outlook.
Hi everyone. Working with so many online tools, we often need to connect two or more tools for a better experience and synchronized workflow. Today, we will talk about how to add Webex to Outlook. Adding Webex to Outlook can be a game-changer. Webex is a powerful online collaboration and video conferencing tool that allows teams to connect, share ideas, and collaborate seamlessly. By integrating Webex with Outlook, you can easily schedule and join meetings without leaving your familiar email environment.
In this article, I will guide you through the process of adding Webex to Outlook and explore the benefits it brings.
Importance of adding Webex to Outlook
Webex provides a feature-rich platform for real-time collaboration. With its interactive tools like screen sharing, whiteboarding, and file sharing, team members can work together effectively regardless of their physical location. By integrating Webex with Outlook, you can seamlessly switch between scheduling meetings and conducting them, making collaboration effortless.
Also, adding Webex to Outlook saves you valuable time by eliminating the need to switch between multiple applications. You can schedule and join Webex meetings directly from your Outlook calendar, avoiding the hassle of toggling between different platforms. This streamlined approach allows you to focus on the task at hand, boosting your productivity. When you integrate Webex into Outlook, you can communicate seamlessly with your team members. The integration allows you to send meeting invitations, share meeting details, and receive notifications, all within the familiar Outlook interface.
So these are some good reasons to learn how to add Webex to Outlook.
How to Add Webex to Outlook?
When we talk about integrating Webex with Outlook, involves a few simple steps. Follow the guide below to set up the integration
Get Webex for Free
In this method, we will learn how to add Webex to Outlook, and for this firstly we need to download Webex for free from its official website. It’s offered by Cisco, and we can freely use it for day-to-day tasks. To download and install Webex follow the below steps.
Step 1
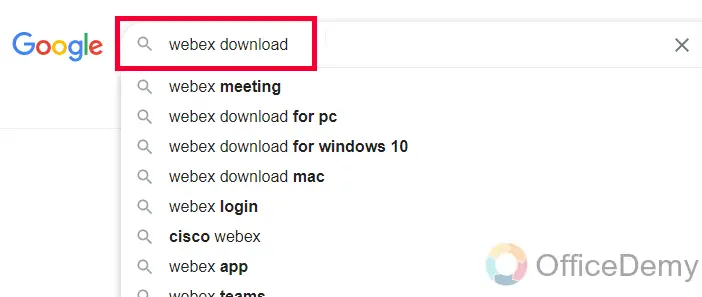
Open your web browser and go to the official Webex website. You can visit it by typing “Download Webex” in your search engine or by going directly to “www.webex.com”

Step 2
Once you’re on the Webex website, locate the “Download” button, which is found in the top menu.

Step 3
Click on the “Download” button, and you should see a list of available Webex applications. Look for the “Download” button next to the option that suits your needs (Check Windows compatibility)
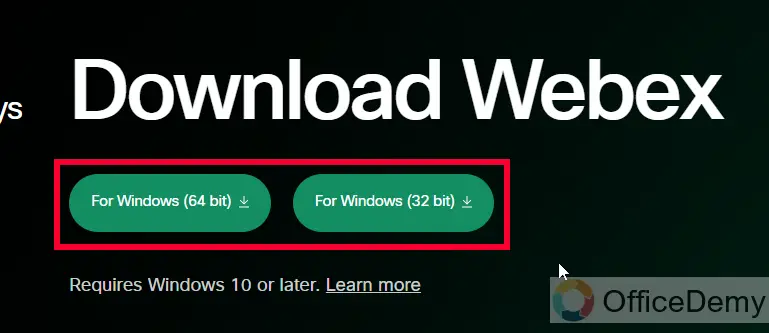
Note: Webex will not work below Windows 10.
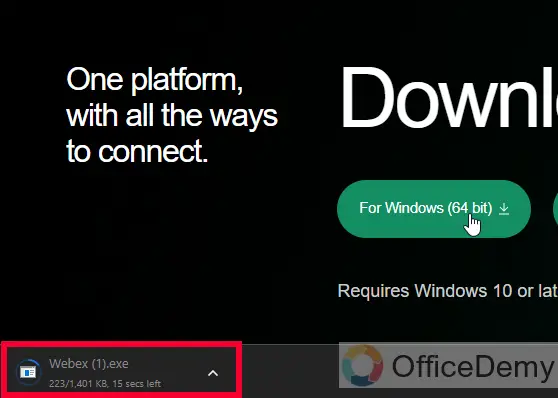
Step 4
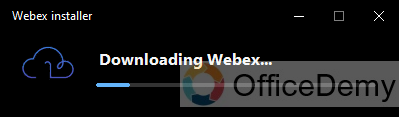
Click the “Download” button, and your browser will start downloading the installation.
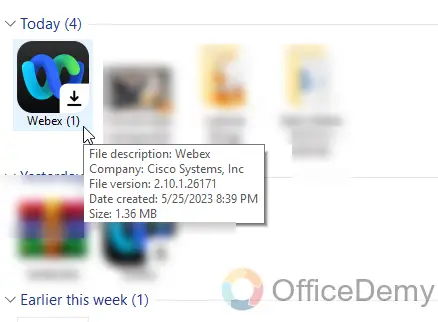
Step 5
Once the download is complete, locate the downloaded file. It’s usually saved in your computer’s “Downloads” folder by default.
Step 6
Double-click on the downloaded file to start the installation process. Windows may ask for permission to run the file, click “Yes” or “Run” to proceed.
The Webex installer will launch. Follow the on-screen instructions to install the application. You may be asked to agree to the terms and conditions and choose an installation location.
Note: Leave the default settings as they are, unless you have a specific preference.
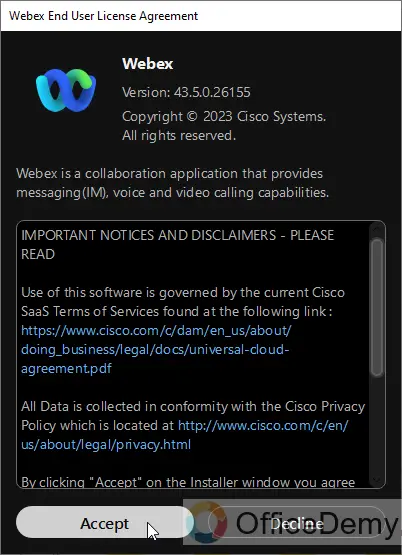
Step 7
Accept the license agreement after reading it and click on the Accept button.
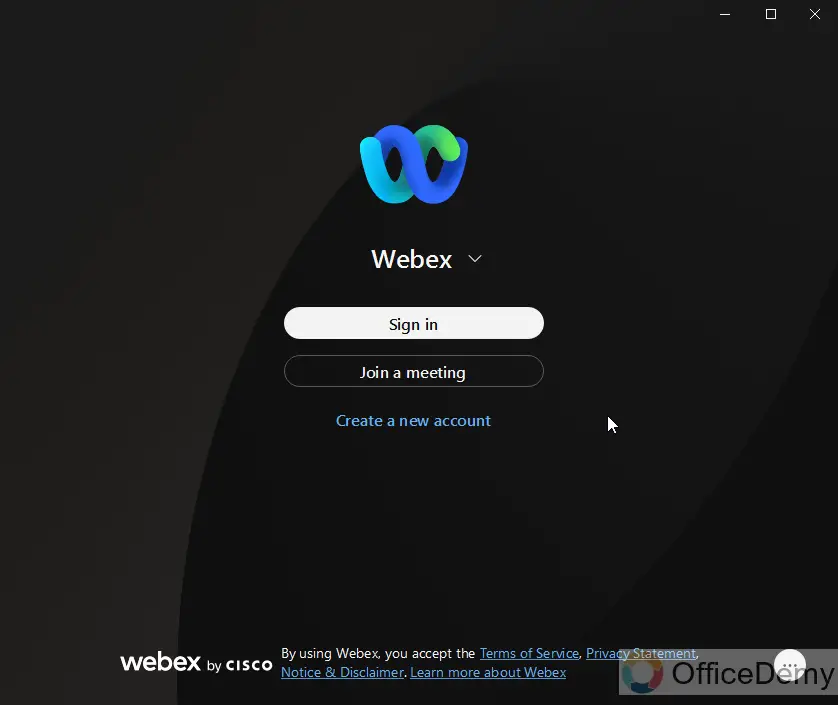
Step 8
Now it will ask for the login or Signup, do what you prefer.
Note: Once the installation and sign-in process is complete, you’ll see a confirmation message. You can now launch Webex Meetings by locating its shortcut on your desktop or by searching for it in the Start menu.
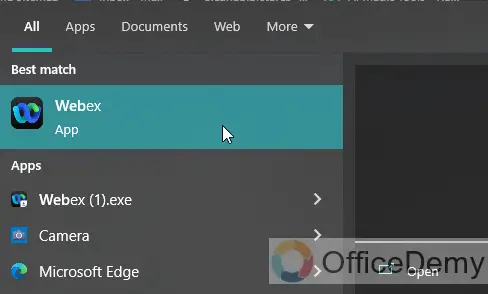
Step 9
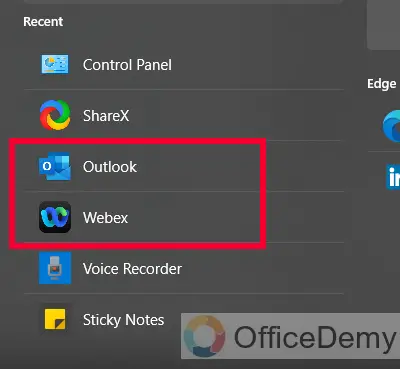
Go to the Start menu and launch Webex to proceed further and then we will connect it with Outlook.
Now we have Webex on our Computer, let’s see how to add Webex to Outlook.
Integrate Webex to Outlook
In this section, we will learn how to add Webex to Outlook, and we will see how to integrate both like a pro using the very simple steps below.
Step 1
Ensure that you have both Webex and Outlook installed on your Windows 10 computer.
Step 2
Launch Webex by clicking on its icon in the Start menu or by searching for “Webex” in the search bar.
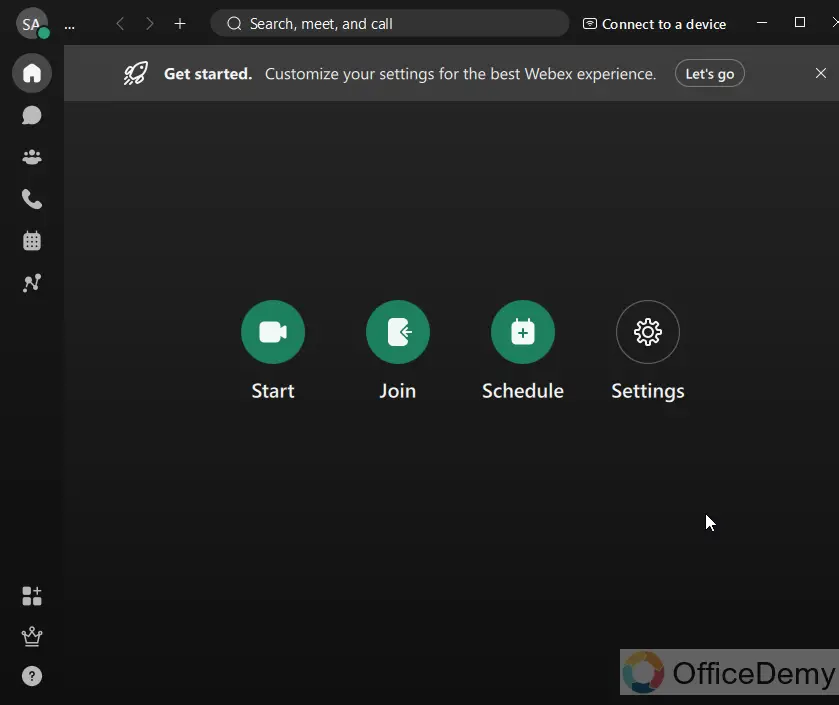
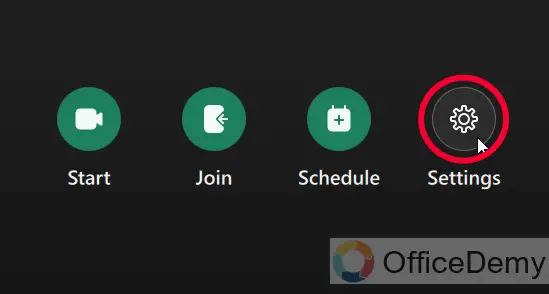
Step 3
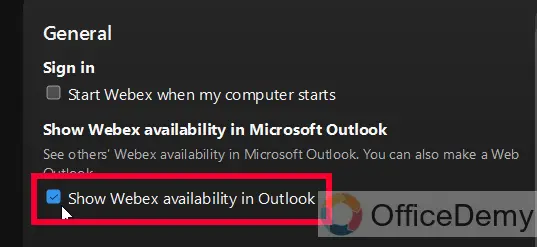
Click on the “Settings” button on the Welcome screen.
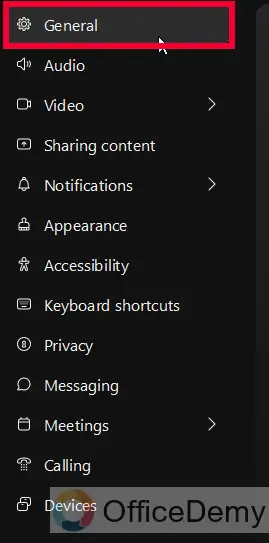
Step 4
Select the General tab from the left sidebar menu
Step 5
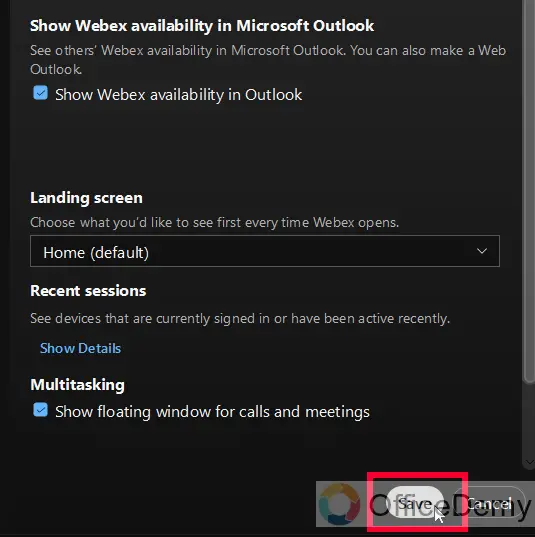
Check on “Show Webex availability in Outlook”
Step 6
Don’t forget to click on the Save button below
If it asks for permission to install additional updates, then click Yes and allow it.
Step 7
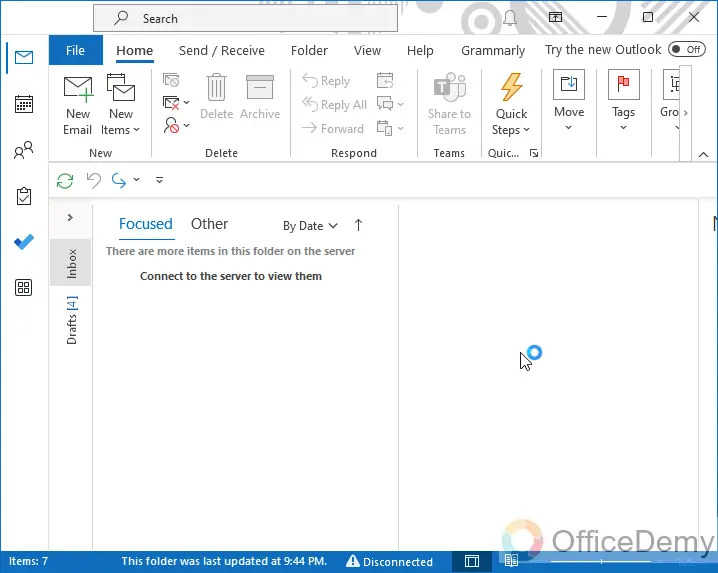
Leave the Webex, and Open the Outlook App.
Step 8
In the Home tab, click on “Get Add-ins”

Step 9
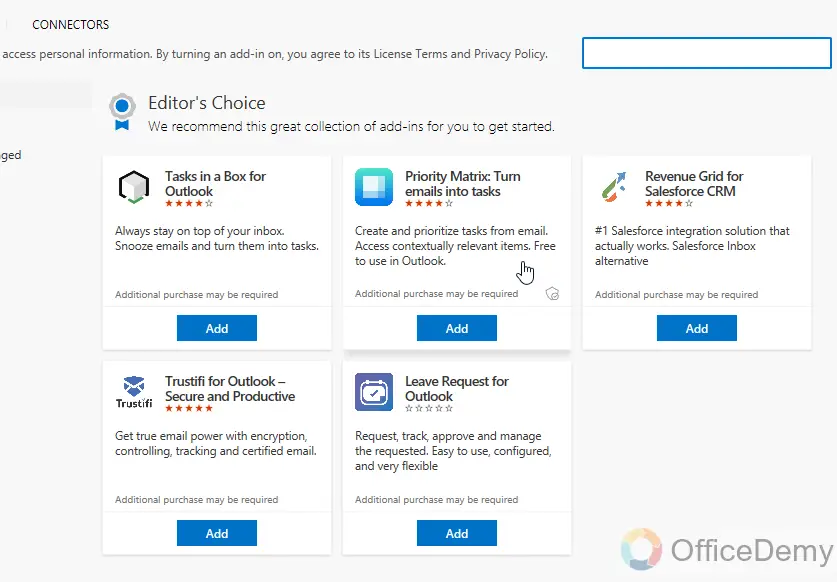
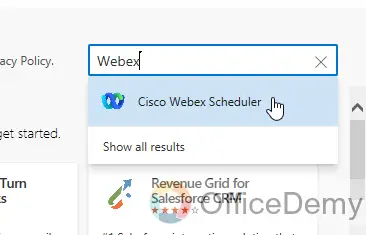
A new Add-ins window will appear, go to the right-sided top search bar.
Step 10
Search “Webex” and select “Cisco Webex Scheduler”
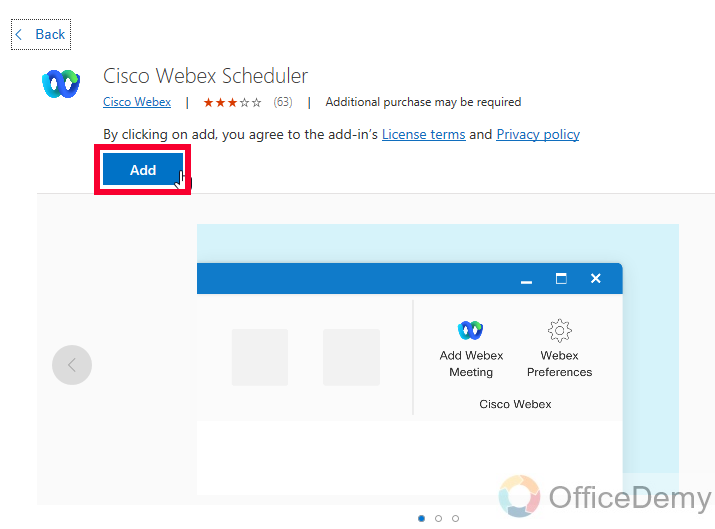
Step 11
Click on the Add button to add this Add-in to your Outlook.
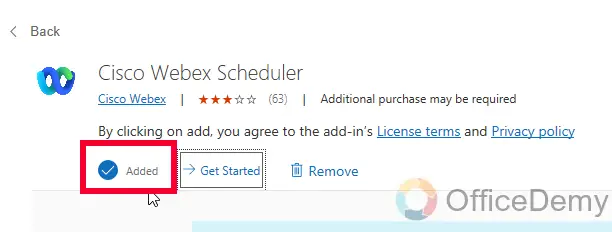
Step 12
Follow the simple on-screen prompts to complete the adding process.
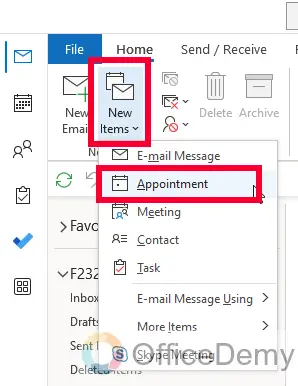
Step 13
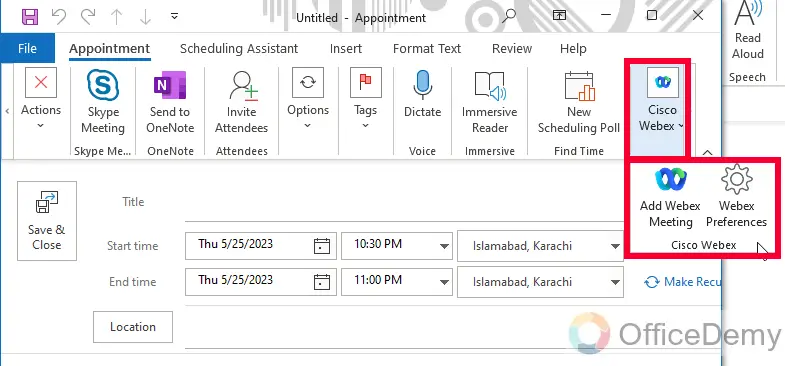
As you are done, open a new meeting, or appointment scheduler from the “Home” tab
Step 14
Now you can see the Webex is added and you can use it from the top bar when scheduling a meeting or appointment.
So this was all about how to add Webex to Outlook. I hope you find this guide helpful.
Things To Remember
- Ensure both Webex and Outlook are installed on your Windows 10 computer.
- You can add Webex to Outlook either from the Webex application or the Webex website.
- Grant necessary permissions when prompted to integrate Webex with Outlook.
- Locate and run the installation file for the integration/add-in.
- Manage add-ins in Outlook to install the Webex integration.
- Close and reopen Outlook to activate the Webex integration.
- Find the Webex add-in within Outlook’s email or appointment window.
- Use the add-in to schedule Webex meetings, add meeting links, and access Webex features within Outlook.
Frequently Asked Questions
Can I integrate Webex with other email clients apart from Outlook?
Yes, Webex provides integration options with other popular email clients, such as Gmail and Microsoft Exchange. Refer to the Webex documentation for specific instructions on integrating Webex with your preferred email client.
Is Webex integration with Outlook available for both Windows and Mac users?
Yes, the Webex plugin is compatible with both Windows and Mac versions of Outlook. Ensure that you download the correct plugin based on your operating system.
Can I schedule Webex meetings on behalf of someone else using Outlook?
Yes, if you have the necessary permissions, you can schedule Webex meetings on behalf of others using your Outlook calendar. Make sure you have the appropriate access rights to their Webex accounts.
What happens if I uninstall the Webex plugin from Outlook?
If you uninstall the Webex plugin from Outlook, the integration will be disabled. You will no longer be able to schedule or join Webex meetings directly from Outlook. To regain integration functionality, reinstall the Webex plugin.
Is Webex integration with Outlook available in all Webex plans?
Webex integration with Outlook is available in most Webex plans, including both free and paid versions. However, it’s always a good idea to review the features and compatibility of your specific Webex plan to ensure the integration is supported.
Conclusion
This was all about how to add Webex to Outlook. We learned the complete method from downloading Webex to installing it, then connecting with Outlook using the free add-in for meetings, and appointment scheduling. I will see you soon with another useful guide. Keep learning with Office Demy. Thank you!


