
To Change Paragraph Spacing in Outlook
- Open an Email.
- Select your paragraph(s).
- Go to Editing tools in the toolbar.
- Use Line spacing to adjust paragraphs.
OR
- Open an Email.
- Select your paragraph(s).
- Go to “Format Text” > Use Line spacing to adjust paragraphs.
Hello and welcome to another Outlook Guide. Today, we will learn how to change paragraph spacing in Outlook. While writing an email in Outlook, you may need to edit and format your text like bold, italic, change font size, change case, add bulletin, change paragraph spacing, and change text alignment.
In this article, we will learn how to change paragraph spacing in Outlook.
Why do we need to Change Paragraph Spacing in Outlook?
By default, Outlook adds a specific space between the paragraphs but in various circumstances, if you need more space between the text then you may need to change paragraph spacing in Outlook.
So, here’s the tutorial on how to change paragraph spacing in Outlook that you can learn deeply.
How to Change Paragraph Spacing in Outlook?
One thing Microsoft is most familiar with is that its features are so easy to access. Changing the paragraph spacing option in Microsoft Outlook can easily be made because you will find different sizes of paragraph spacing in front of you in the Format Text tab. But if you want to make more customization according to your desire then you can also go for detailed options for paragraph spacing. In this tutorial, we will teach you both.
- Changing paragraph spacing by line spacing icon
- Changing paragraph spacing by line spacing dialogue box.
Change Paragraph Spacing in Outlook – By line spacing icon
When you open the Line spacing icon, there are some built-in different Paragraph spacing sizes through which you can change paragraph spacing in Outlook.
Step 1
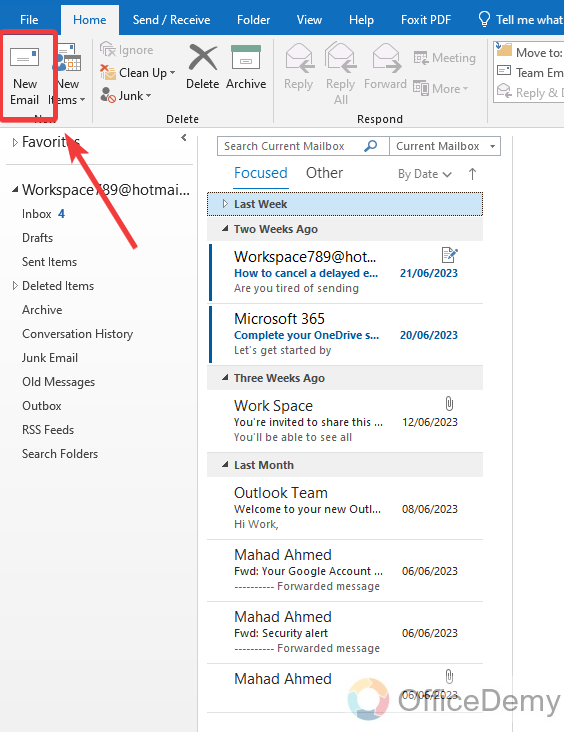
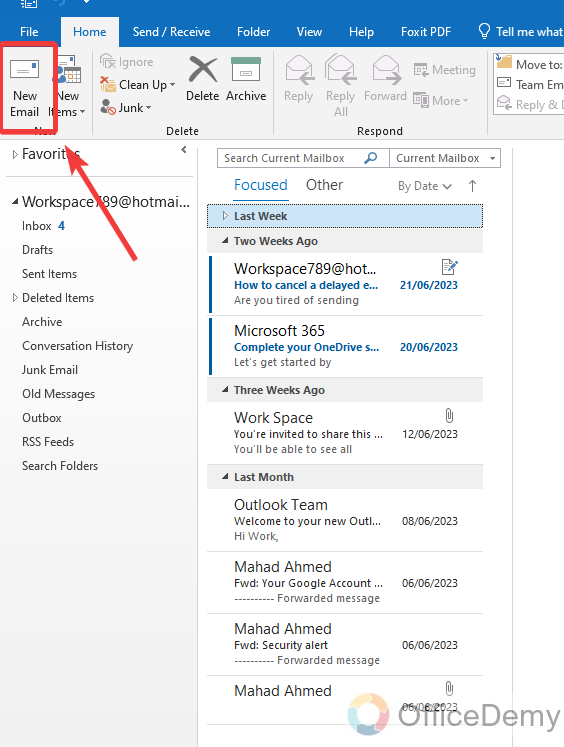
In Outlook, paragraphs are only written when you compose an email. To create a new email in Outlook, look at the left top corner of the window in the Home tab, you will see a “New Email” button through which you can create a new email by clicking on it.
Step 2
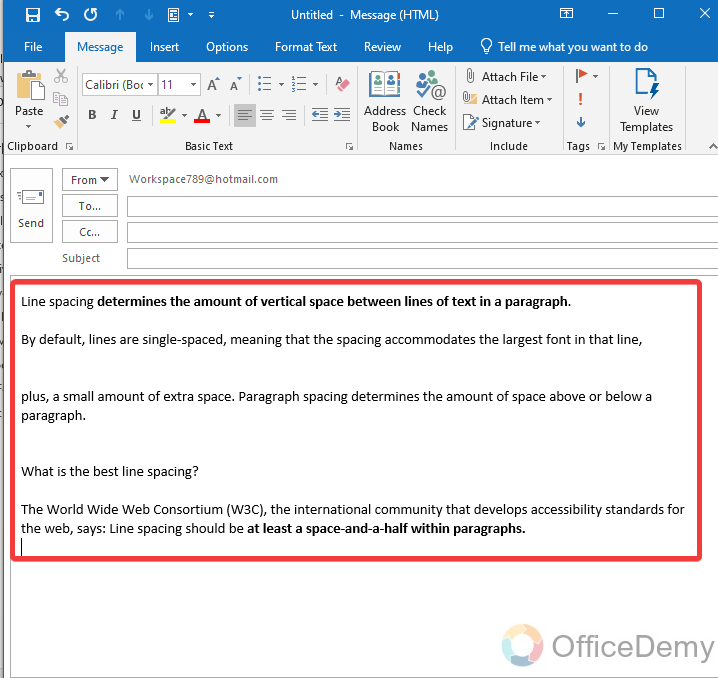
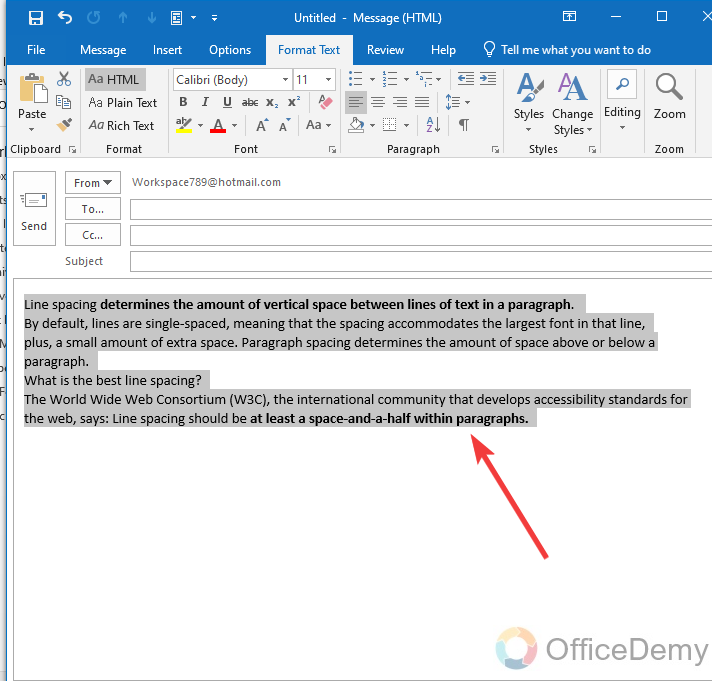
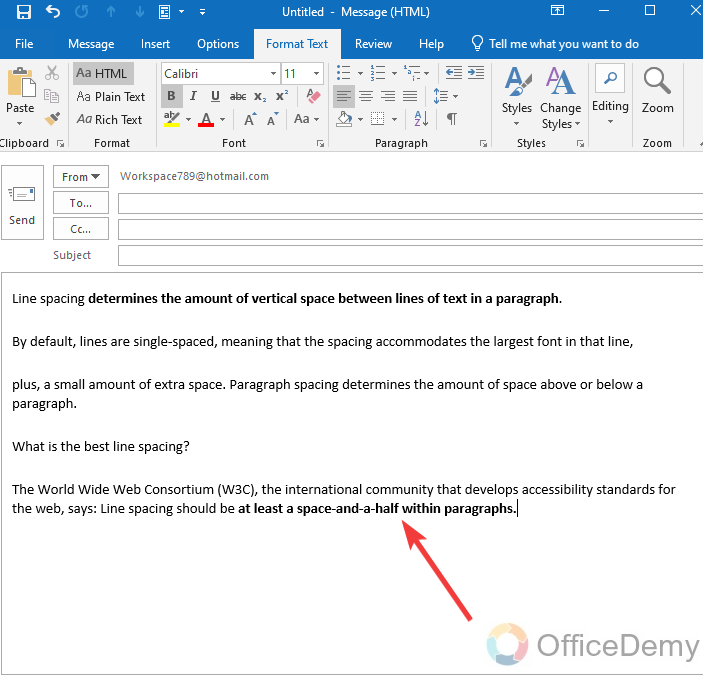
Let’s suppose while composing an email, you see the following paragraph spacing between your text that you want to change.
Step 3
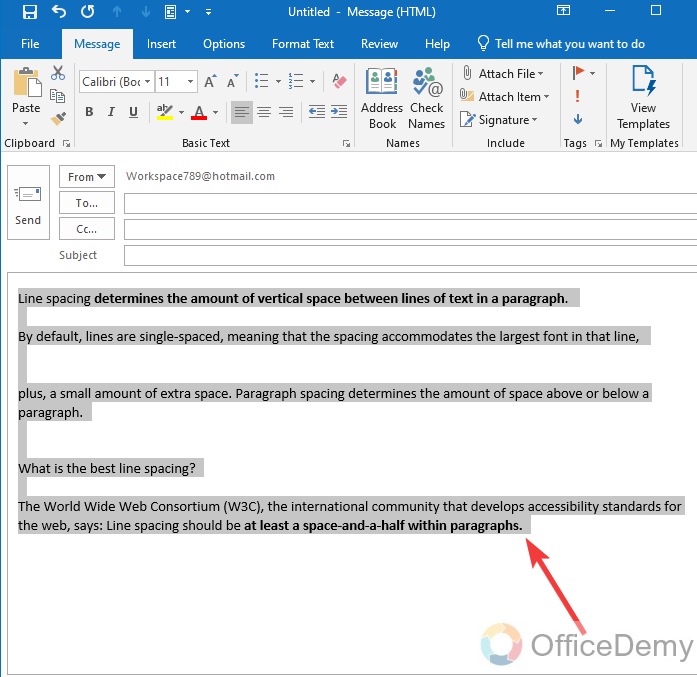
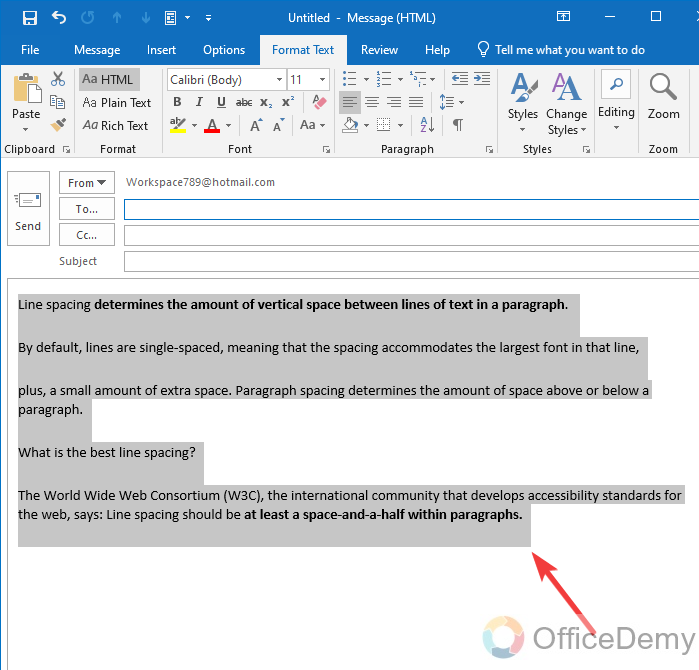
To change the paragraph spacing, first, you will have to select the text that you want to change paragraph spacing, as I have to change the paragraph spacing of the entire email therefore, I have selected all the text containing the following email.
Step 4
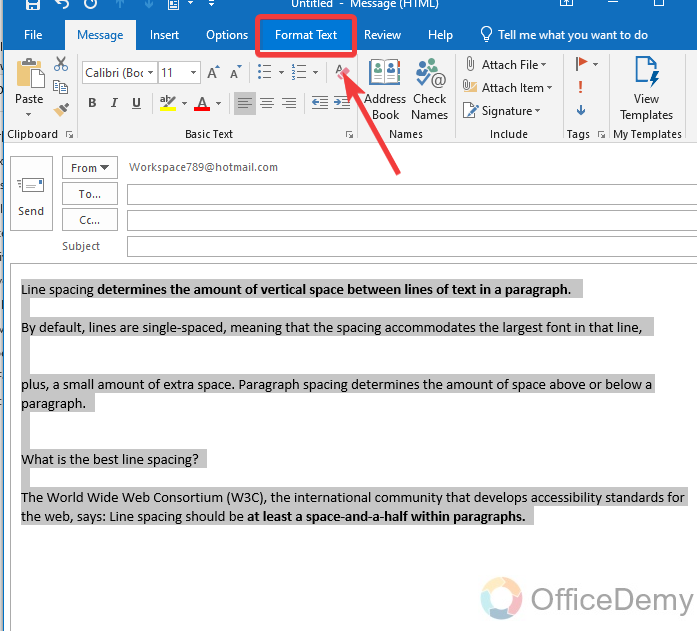
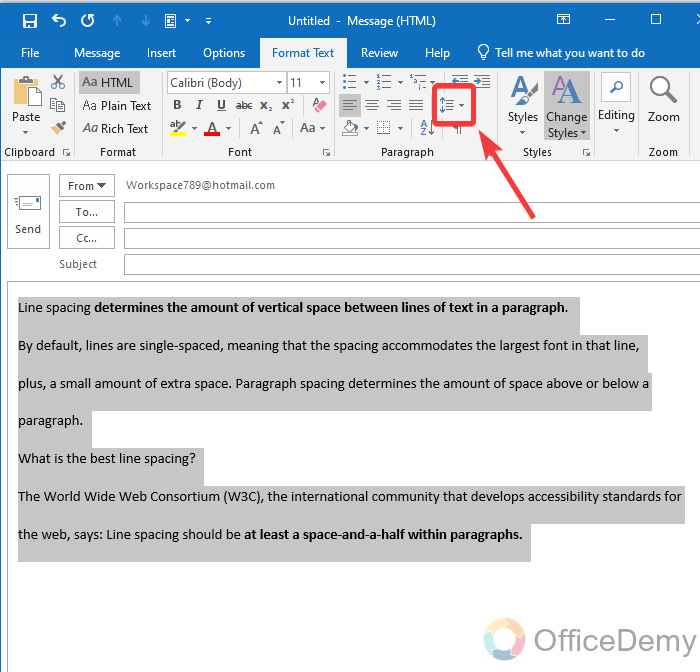
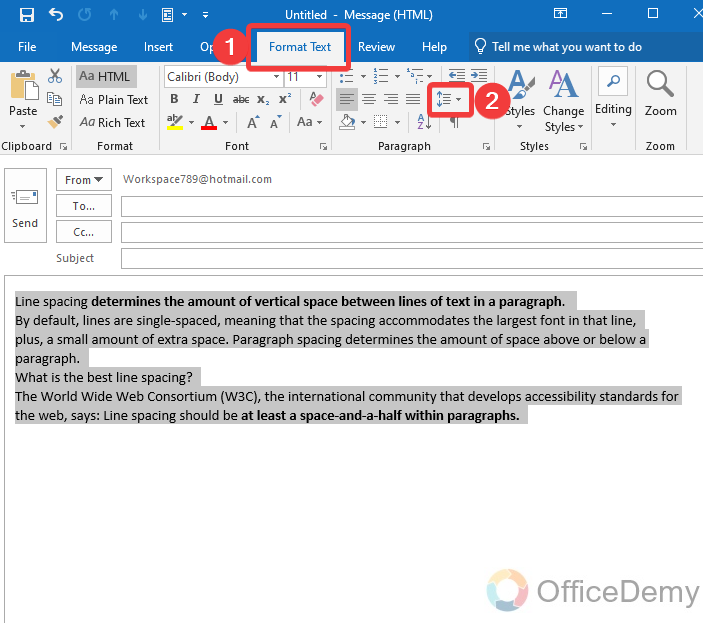
Once you have selected the text to change paragraph spacing then go into the “Format Text” tab from the menu bar as highlighted in the following picture.
Step 5
When you click on the “Format Text” option, you will see a “Line spacing” option in the Paragraph section as directed in the following screenshot.
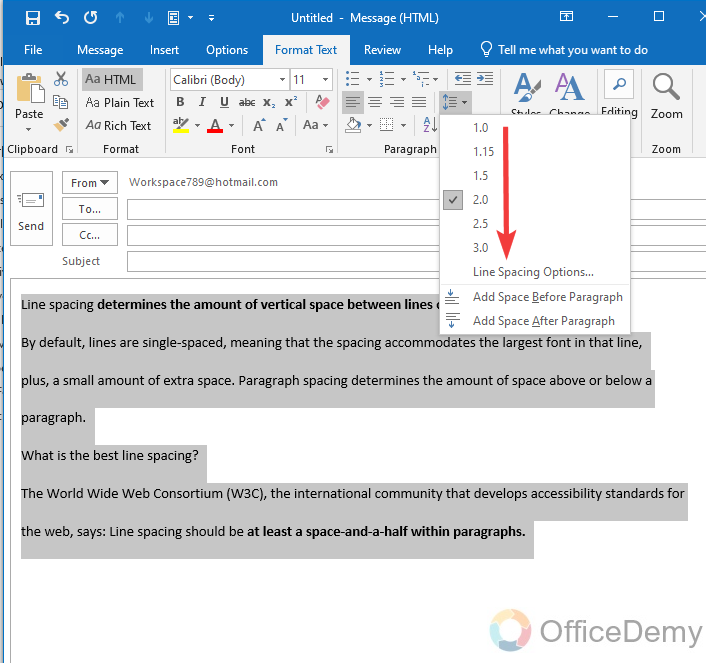
Step 6
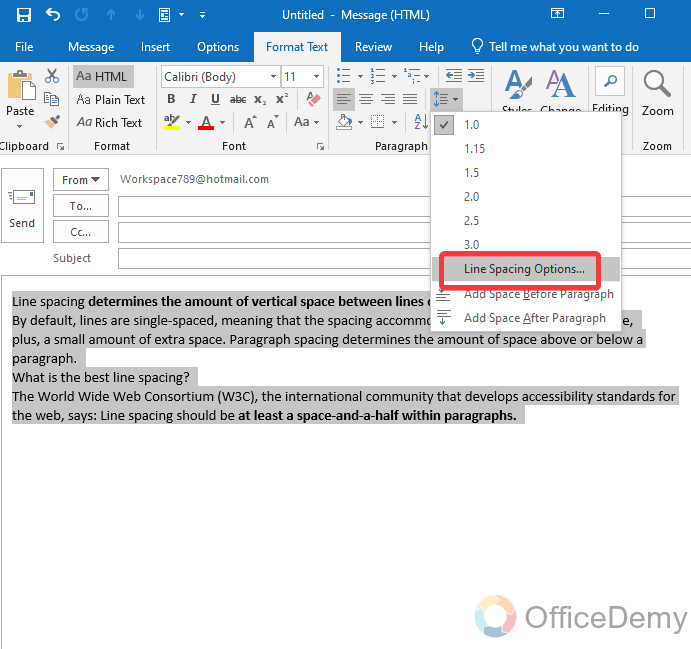
When you click on this line spacing option, a drop-down menu will drag down where you will see different sizes of line spacing or paragraph spacing. As you can see in the following picture “2.0 pt” line spacing is selected for now.
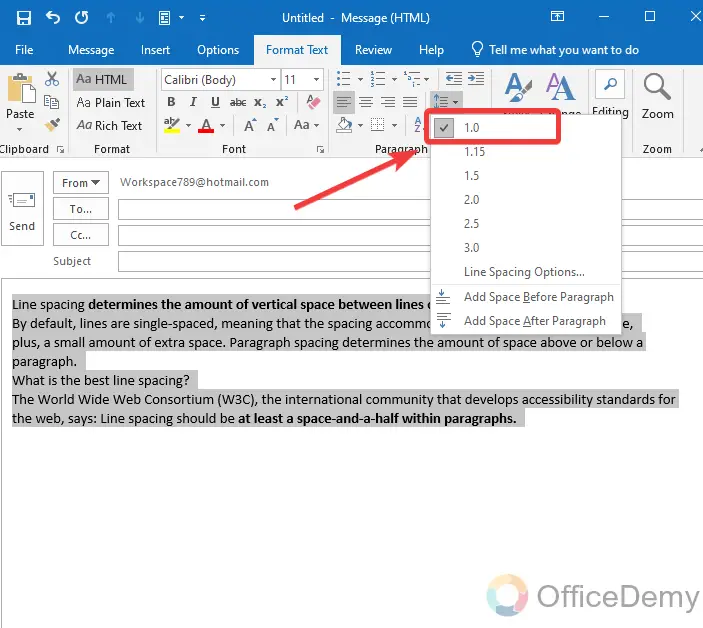
Step 7
To change this paragraph spacing, we will change the size of the 7line spacing, as here I am marking a check on the “1.0 pt” line spacing by clicking on it as can be seen in the following example.
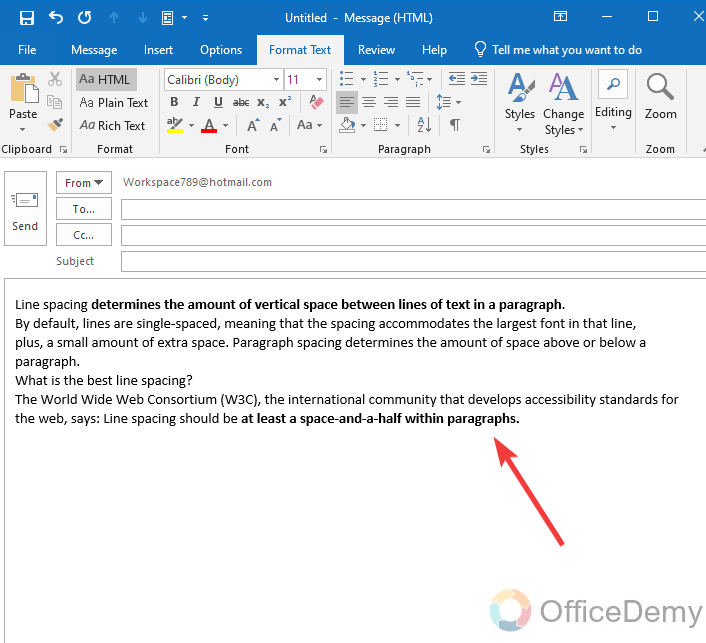
Step 8
Here’s the result, now you can see yourself as paragraph spacing has been changed as required. In this way, you can set any size of paragraph spacing by selecting the text where you want to apply.
In this method, you will be restricted to the given paragraph spacing sizes, if you want to make your paragraph spacing size then go for the following method.
Change Paragraph Spacing in Outlook – By line spacing dialogue box
In this method, you will be able to make more customization while changing paragraph spacing in Outlook.
Step 1
First, we will take the “New Email” window to compose an email by clicking on the “New Email” button located at the top left corner of the window.
Step 2
Once you have got your email window, start composing the email and write whatever you want to write. Once you have done then select the text that you want to change for paragraph spacing as I have selected in the following picture.
Step 3
After selecting the text, go into the “Format Text” tab from the menu bar of the Email window where you will find a “Line spacing” option in the paragraph section as marked in the following screenshot.
Step 4
When you click on this line spacing option, a drop-down menu will drop down where you will see a “Line spacing option“, click on it to open more line spacing options.
Step 5
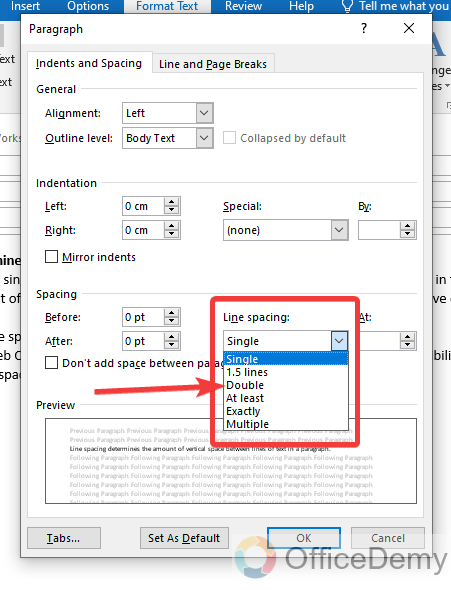
As you click on the “Line spacing option“, a new dialogue box will open in front of you where you will see detailed options regarding paragraphs. In these options, you will also find line spacing options as highlighted in the following picture.
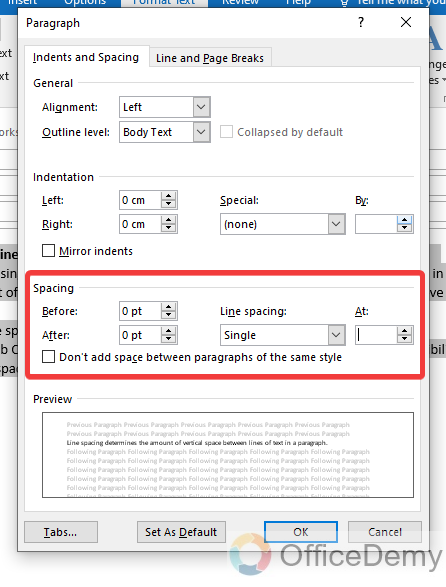
Step 6
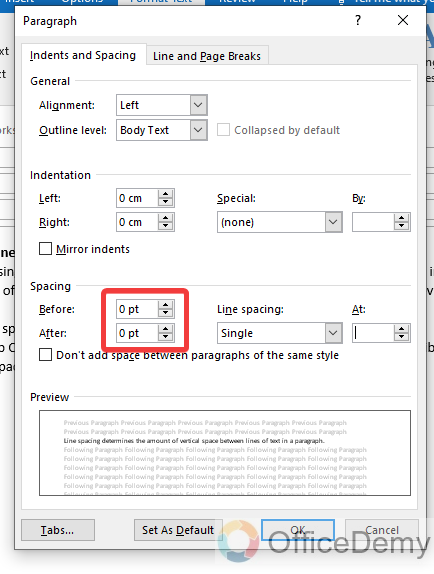
As you can see, the following highlighted box contains two small up and down arrows through which you can increase and decrease the line spacing size whether you want to add it before or after the paragraph.
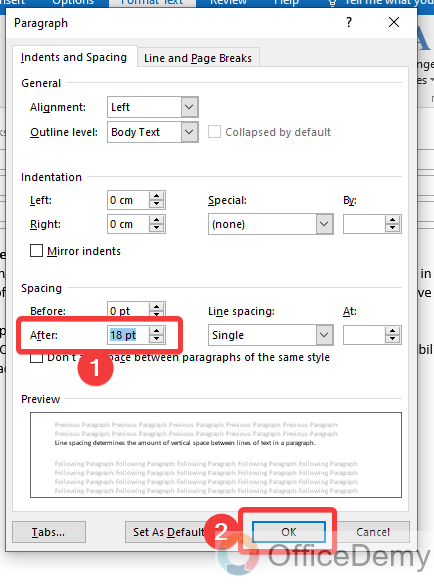
Step 7
As in the following example I am applying “18 pt” line spacing after the paragraph. To apply these changes, click on the “OK” button.
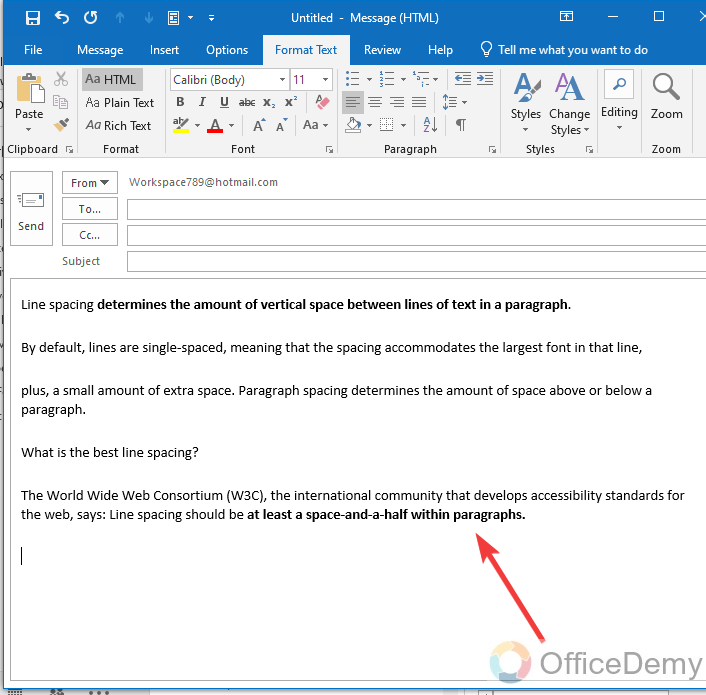
Step 8
You can see the result in the following picture paragraph spacing has been applied to the selected text. In this way, you can customize more paragraph spacing.
Frequently Asked Questions
Q: How to remove paragraph spacing in Outlook?
A: While composing an email, it may be possible that by mistakenly the wrong paragraph spacing is inserted into your text or an additional paragraph spacing then you can also easily remove it.
Step 1
As you can see in the text in the following example that paragraph spacing is applied if you want to remove this paragraph spacing follow the following instructions.
Step 2
To remove this line spacing, first, you will have to select all the text containing paragraph spacing as I have selected below.
Step 3
After selecting the text go into the “Format Text” tab from the menu bar where you will find the line spacing icon in the paragraph section. When you click it a drop-down menu will open where at last you will find a “Remove Space After Paragraph“. Click on it to remove paragraph spacing from your text.
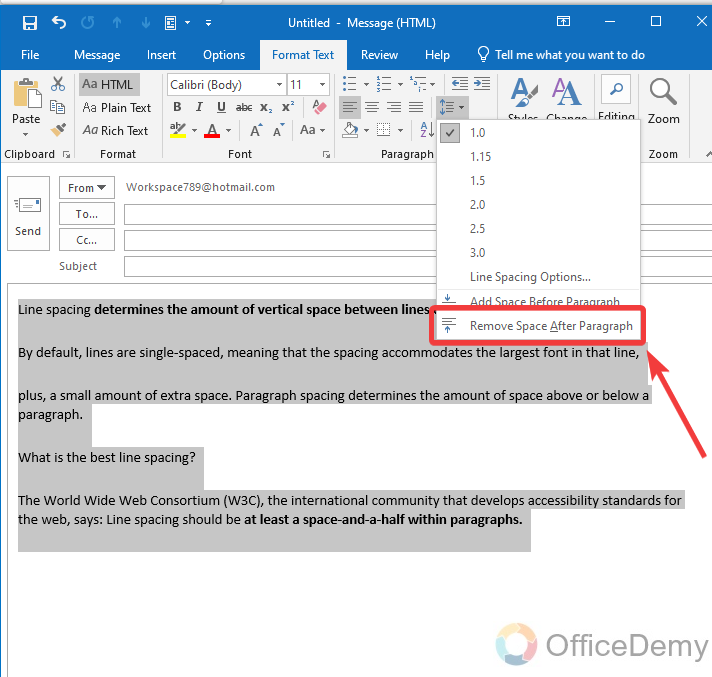
If your text paragraph spacing is applied before the paragraph then you will have to use, “Remove space before paragraph“.
Step 4
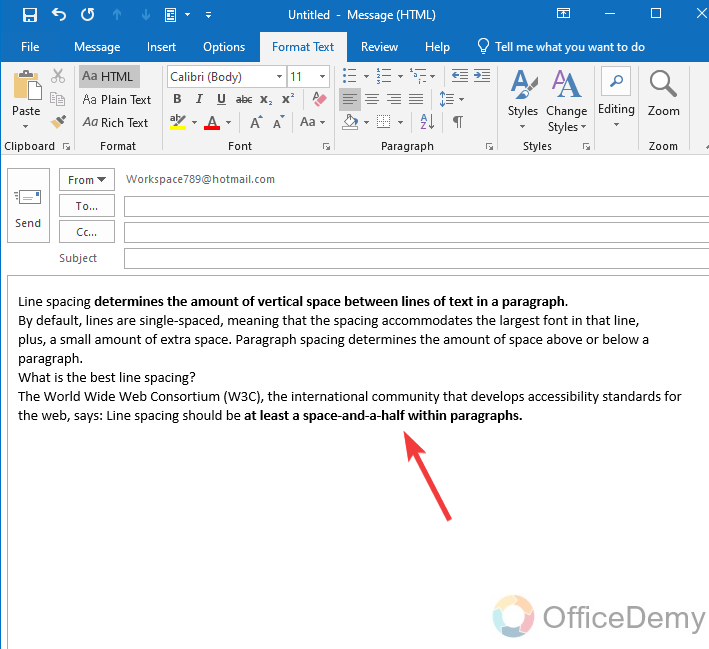
The result is in front of view as can be seen in the following picture that paragraph spacing has been removed as required.
Q: How to insert double-paragraph spacing in Outlook?
A: Let’s suppose you are composing an email and want to apply double-line spacing to your text. Then what will you do? Will you apply single-line spacing again and again? No! fortunately, Microsoft Outlook has already a built-in option for double-paragraph spacing through which you can easily
Step 1
After composing an email, firstly select all the text where you want to apply double paragraph spacing in Outlook.

Step 2
After selecting the text again go into the “Format Text” and then the line spacing icon from the paragraph section, you will have to click on the “Line Spacing” option from the drop-down menu as highlighted in the following picture.
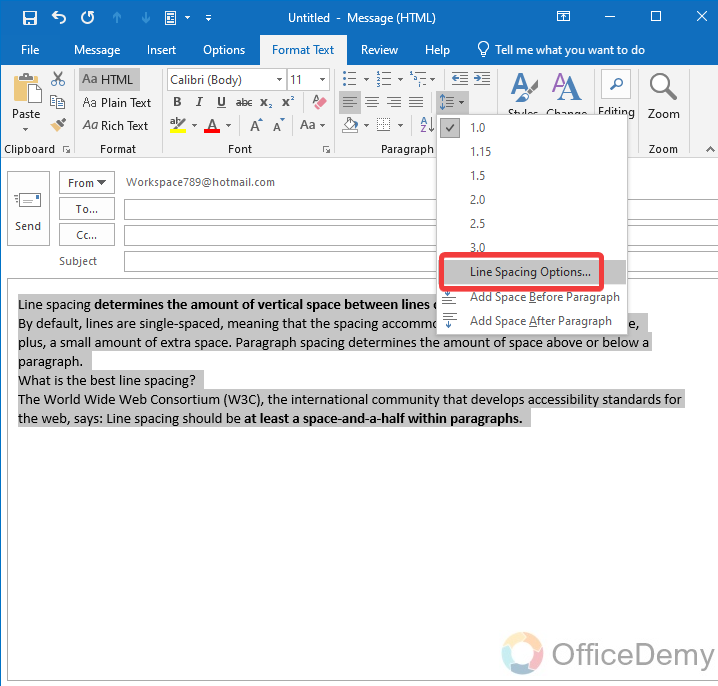
Step 3
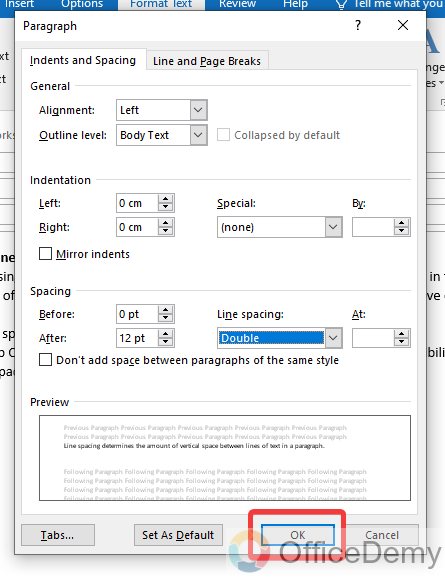
When you click on “Line Spacing Options“, a small new window will appear in front of you where you will see a built-in drop-listed menu in the Spacing section. Click on it to open this drop-listed menu where you will find the “Double spacing” option. Click on it to select it.
Step 4
Once you have made all the customizations for your entire text then click on the “OK” button located at the bottom of the window as highlighted below.
Step 5
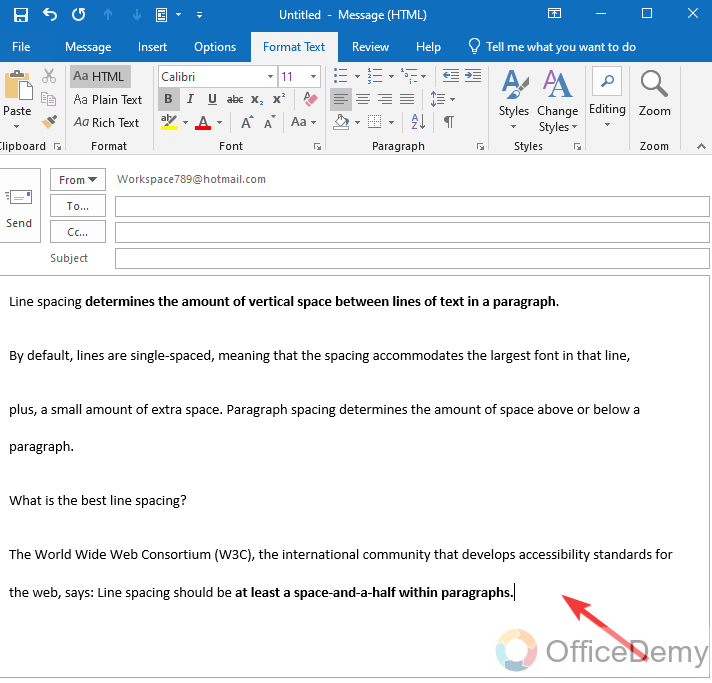
The text with the double paragraph spacing can be seen in the following screenshot as we required.
Conclusion
The above article on how to change paragraph spacing in Outlook has described straightforward procedures to change the paragraph spacing in Outlook mail. I hope it has helped you a lot to beautify your email and make it eye-catching. Don’t forget to share your thoughts in the comment box below and keep connected with the Office Demy.


