
To Change Presence Status in Outlook 365
- Open Outlook.
- Click the “New Item” dropdown.
- Select “Meeting” from the list.
- Add the meeting details.
- From the top ribbon, in the “Options” group, select the dropdown next to “Show as” and pick “any status” from the list.
In this article, we will learn how to change presence status in Outlook 365. In today’s world of side hustle, we all want to manage multiple things at a time, and for that, we need to learn some quick and handy things. Managing your presence status in Outlook 365 is essential for effective communication and collaboration within your organization. Whether you want to convey your availability, inform colleagues about your busy schedule, or indicate that you’re away, adjusting your presence status helps others understand your current availability and responsiveness.
This article provides a comprehensive step-by-step guide on how to change your presence status in Outlook 365, allowing you to optimize your communication experience and enhance productivity. From desktop to web interfaces, we’ll walk you through the process, ensuring you have the knowledge to customize your presence status effortlessly.
Importance of Changing Presence Status in Outlook 365
Managing your presence status in Outlook 365 is essential for effective communication and collaboration within your organization. Whether you want to convey your availability, inform colleagues about your busy schedule, or indicate that you’re away, adjusting your presence status helps others understand your current availability and responsiveness.
This article provides a comprehensive step-by-step guide on how to change your presence status in Outlook 365, allowing you to optimize your communication experience and enhance productivity. From desktop to web interfaces, we’ll walk you through the process, ensuring you have the necessary knowledge to customize your presence status effortlessly. So these are some reasons we need to learn how to change presence status in Outlook 365.
How to Change Presence Status in Outlook 365?
We have a very simple method to enable or disable presence status in Outlook 365 Desktop App, and we have another integrated method for Outlook Web that works in the Microsoft Teams web interface. Microsoft Outlook and Microsoft Teams work as an integrated bunch of tools that can reflect changes to each other, so we will see how to change the presence Status in Teams initiating from Outlook 365 web interface.
Change Presence Status in Outlook 365 – Desktop App
In this section, we will learn how to change presence status in Outlook 365 Desktop app interface. For this, I have Outlook 2019 version, and this method typically works the same in previous versions as well. So let’s see the steps below to learn how this method works.
Step 1
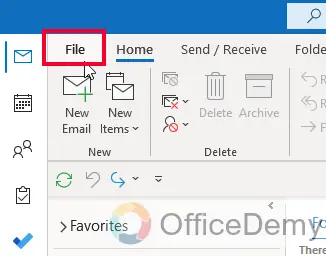
Open the Outlook 365 Desktop app and click on the “File” tab located in the top-left corner of the window.
Step 2
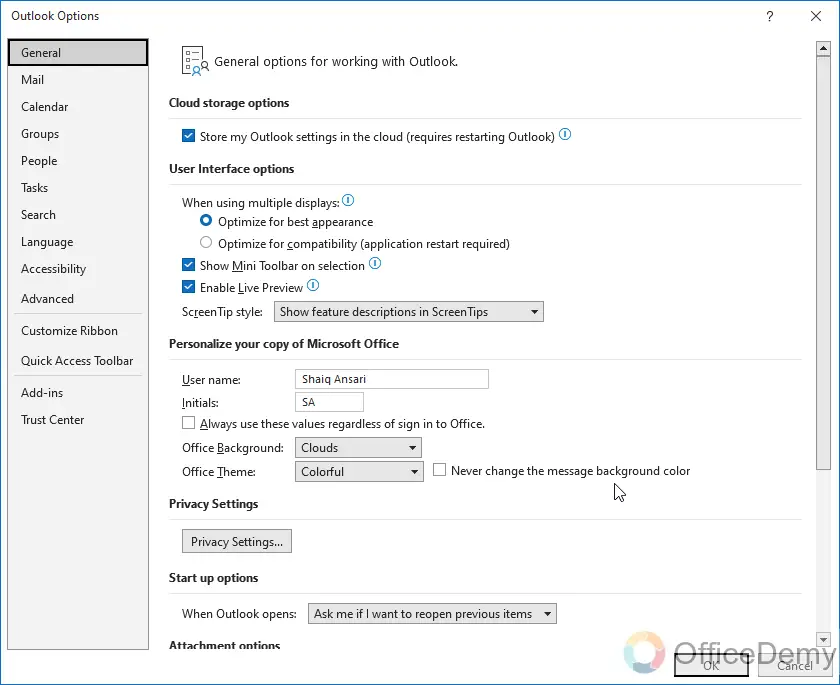
In the File menu, click on “Options” (located at the bottom of the list).

Step 3
A new window titled “Outlook Options” will appear.
Step 4
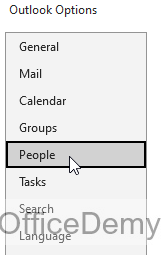
Select the “People” tab from the left-hand sidebar.
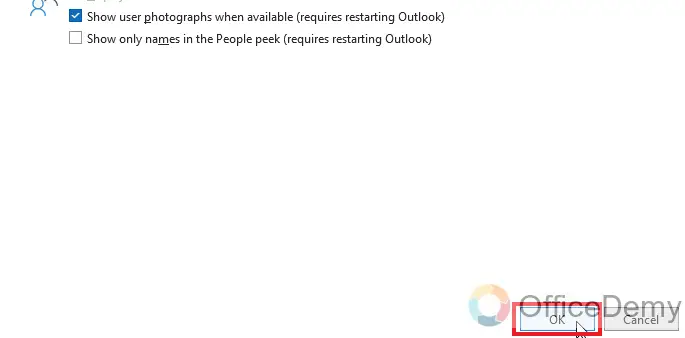
Step 5
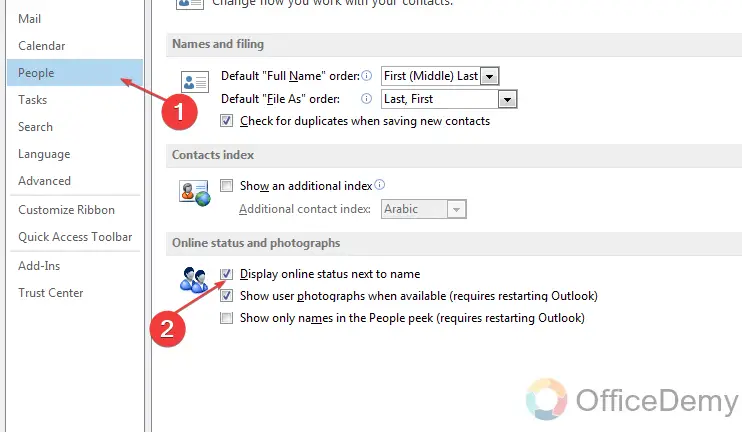
In the “Online status and photographs” section, you will see a checkbox labeled “Display online status next to the name” Check it to show the availability status as “Available” and uncheck it to show the availability status as “Busy”
Step 6
Click on the “Ok” button below the current window to save the changes.
Change Presence Status in Outlook 365 – For a Meeting Invite
In this section, we will learn how to change presence status in Outlook 365 specifically for a meeting invite, so this method is done exclusively for the specific meeting invite you are creating at the time, and no changes reflect other invites or anything within the Outlook application. So, let’s see how it’s done.
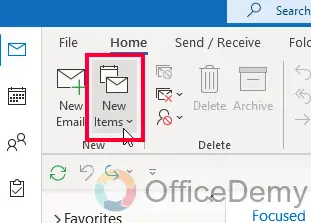
Step 1
Open your Outlook desktop app and click on the “New Item” dropdown in the top left corner.
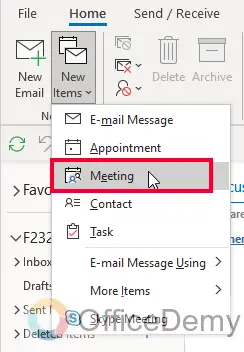
Step 2
Select the meeting from the list
Step 3
In the new meeting invite window, add the meeting details

Step 4
Now, from the top ribbon, in the “Options” group, select the dropdown next to “Show as” and pick “any status” from the list, remember this will only be for this specific meeting invite.

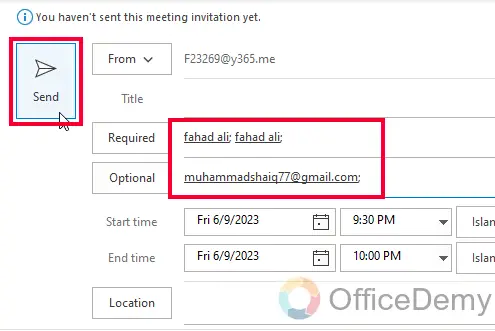
Note: Now if you want to send this invite to others, then add attendees, and send the invite, or else you can keep it simple to yourself by just saving it
Step 5
Click on the send button without adding any recipients, and Outlook will tell you there are no recipients so do you want to save this as your meeting? Tap yes to save.

Step 6
OR
Add recipients, and send the meeting invite, so the recipients will know you are busy currently.
This was a quick but useful method for the topic of how to change the presence status in Outlook 365.
Change Presence Status in Outlook 365 – Using Teams
In this section, we will learn how to change presence Status in Outlook 365 web interface using the Microsoft Teams web variant. This is a very easy and quick method. So, let’s go to the Outlook web and learn how to do this.
Step 1
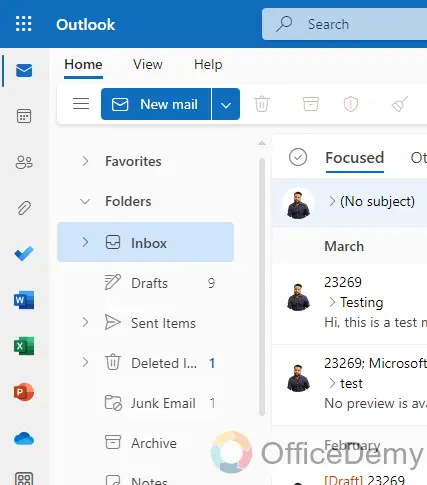
Go to www.outlook.office.com and sign up with your account, and you will get the below home screen
Step 2
At the top right corner, you can see your profile icon, and some more options, look for the “Chat” option and click on it.
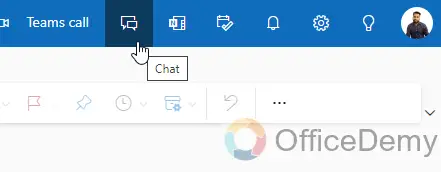
Step 3
It will open your Microsoft Teams web interface in a new tab.
Step 4
On the top right corner, you can see your profile icon, click on it.
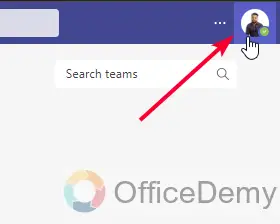
Step 5
You can see your current presence status is highlighted there, mine is “Busy”
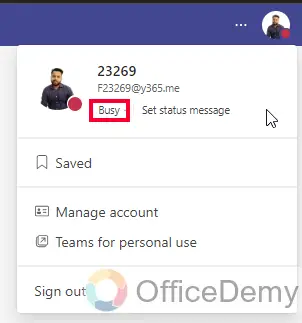
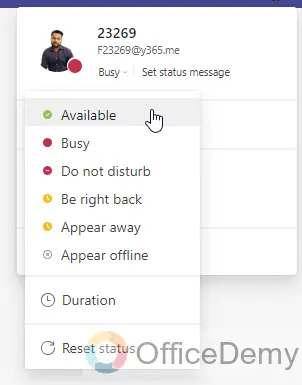
Step 6
Click on it, and you will get a lot of options such as “Available”, “Busy”, “Do not disturb”, “Be right back”, and a few more. Select any availability status you want to set.
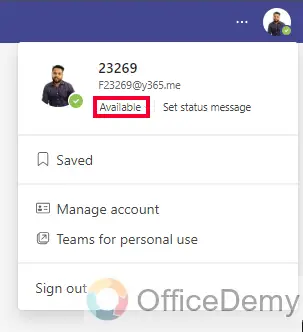
Step 7
You can see the availability status is changed, and now mine is “Available”
Step 8
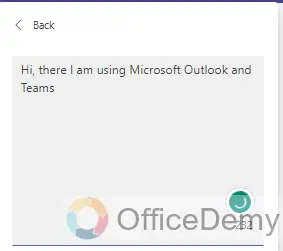
If you don’t like the pre-sets availability statuses, you can click on the “Set status message” button next to the availability status.

Step 9
Here, you can type a personal message (Just like WhatsApp status)
Step 10
Once you typed your message, now you can use the below checkbox “Show when people message me”
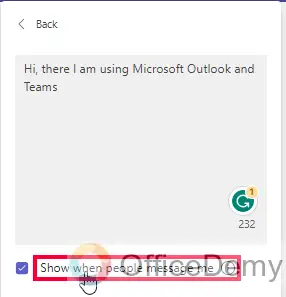
Step 11
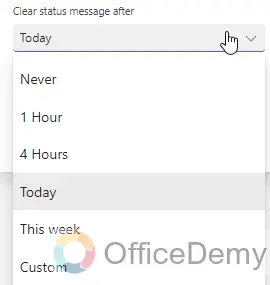
You can also set the time duration for this message status from the below dropdown list.
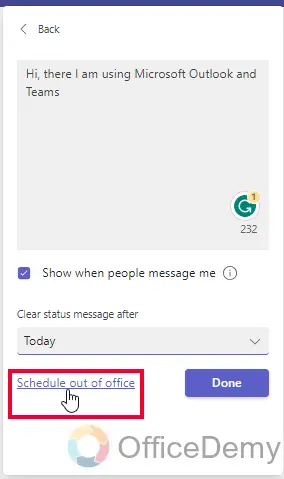
Step 12
You can also use this as per your out-of-office time, click on the “Schedule out of office” for further options.
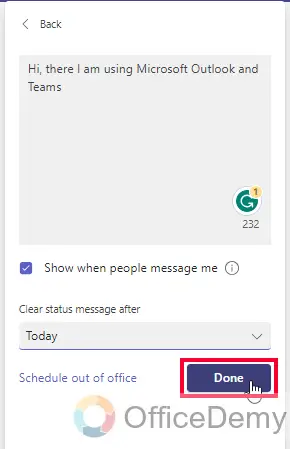
Step 13
Finally, click on the Done button, and you have successfully changed your presence status in Outlook 365 using Microsoft Teams integration.
Things To Remember
- Presence status reflects your availability and helps others know if you’re busy or free.
- Presence status can be changed to Available, Busy, Away, Do Not Disturb, and more.
- Your presence status in Outlook 365 is visible to other users in your organization or contacts.
- Changing presence status can be done through the desktop app, web interface, or mobile app.
- Presence status syncs across Microsoft 365 suite, including Teams and Outlook.
Frequently Asked Qestions
How to change presence status in Outlook 365?
To change your presence status, go to Teams, select the presence status option, and choose from available statuses like Available, Busy, or Away.
Can I change my presence status in the Outlook mobile app?
Yes, you can change your presence status in the Outlook mobile app. Look for the settings or options menu, locate the presence status settings, and select the desired status.
Will my presence status update in Microsoft Teams if I change it in Outlook?
Yes, your presence status syncs across Microsoft 365 suite, including Teams and Outlook. Changing it in Outlook will also update your status in Teams.
Conclusion
Wrapping up how to change presence Status in Outlook. We learned three ways to do it. So, I hope you enjoyed this guide, and you got some useful information from this. If you like our tutorials, please share them with your friends. Thanks for reading and keep learning with Office Demy.


