
To Change Timezone in Outlook
- In the Outlook desktop app, go to “File” > “Options” > “Calendar“.
- Click “Time Zone” > Select desired time zone > Save changes.
OR
- In the Outlook desktop app, open Calendar.
- Edit calendar event.
- Check “Time Zones“.
- Choose a new time zone > Complete event details.
Hello everyone. Today, we will learn how to change Timezone in Outlook. In today’s interconnected world, managing multiple time zones is a common challenge, especially when it comes to scheduling meetings and staying organized. Fortunately, Microsoft Outlook provides a user-friendly solution that allows you to change the timezone settings effortlessly. If you are traveling, working with international colleagues, or simply need to adjust your timezone due to daylight saving time, learning how to change timezone in Outlook is a valuable skill. By mastering this process, you can ensure that your appointments and events accurately reflect the local time, eliminating any confusion and enabling efficient coordination across different time zones.
In this article, we will guide you through the step-by-step process of changing the timezone in Outlook, helping you streamline your scheduling and stay on top of your commitments with ease.
Advantages of Changing Timezone in Outlook
Understanding how to change timezone in Outlook is crucial for effective scheduling and seamless communication. In today’s globalized world, where collaborations span across different time zones, it is essential to ensure that your appointments and events reflect the correct local time. By mastering the process of changing the timezone in Outlook, you can avoid scheduling conflicts, missed meetings, and misunderstandings.
Whether you are a frequent traveler, working with international colleagues, or simply adjusting for daylight saving time, having the ability to change your timezone in Outlook enables you to stay organized and maintain accurate schedules. It allows you to coordinate with others effectively and ensures that everyone involved is on the same page when it comes to meeting times and deadlines. By learning this skill, you can enhance your productivity, prevent time-related mishaps, and streamline your scheduling process in Outlook, ultimately improving your overall efficiency in managing time across different time zones.
How to Change Timezone in Outlook?
There are 2 primary methods to change timezone in Outlook for the desktop app, and one additional method for the web version, so we will learn all the methods, so you dont face any trouble when doing it for the first time. So, first, let’s get started with the Outlook desktop app method.
Change Timezone in Outlook – Using Outlook Options
In this section, we are going through how to change timezone in Outlook using the Outlook options inside the Outlook desktop App. This method is very beginner friendly, and every new user can easily go with it, so let’s see the step-by-step guide below.
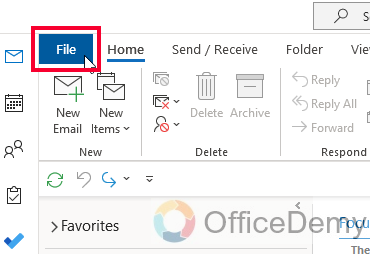
Step 1
Open Microsoft Outlook and go to the “File” tab.
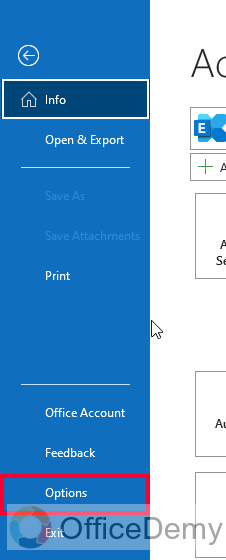
Step 2
Click on “Options” to access the Outlook Options window.
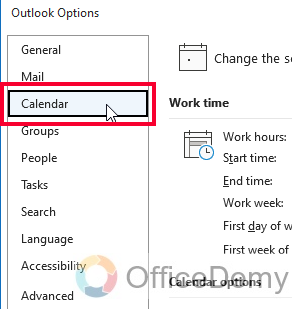
Step 3
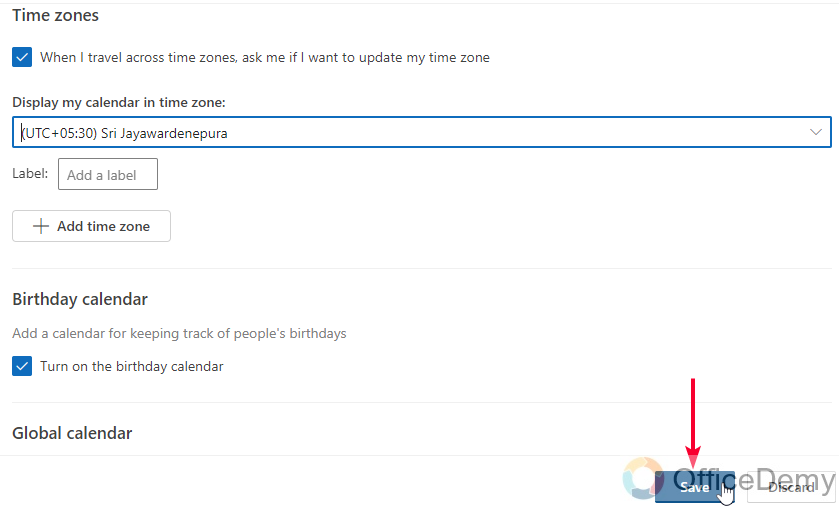
In the Outlook Options window, select “Calendar” or “Calendar Options” from the sidebar.
Step 4
Look for the “Time Zone” section and click on the “Time Zone” button.
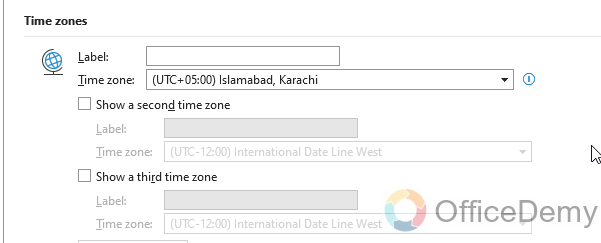
Step 5
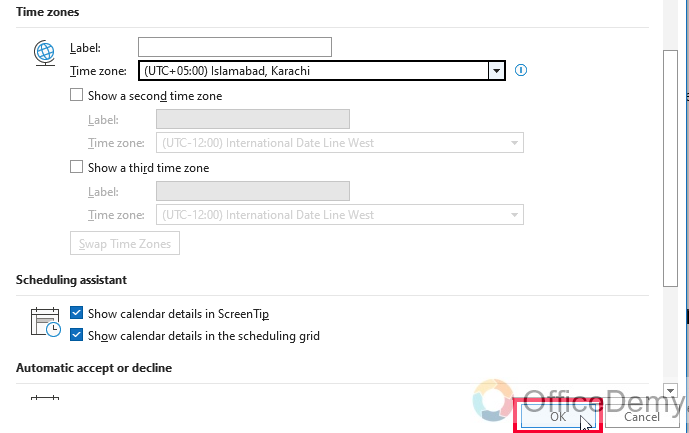
In the Time Zone window, select your desired time zone from the list.
Step 6
Click “OK” or “Apply” to save the changes and update the timezone in Outlook.
Change Timezone in Outlook – For a Specific Meeting or Appointment
In this section, we will learn how to change timezone in Outlook using the Calendar setting, this method is also used very commonly among beginners and mid-level Outlook users. This is helpful when you need to change the timezone only for a specific mail, meeting, or appointment, so this method will not change the root timezone of your Outlook app. It’s easy, let’s see the steps below.
Step 1
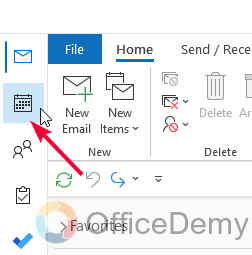
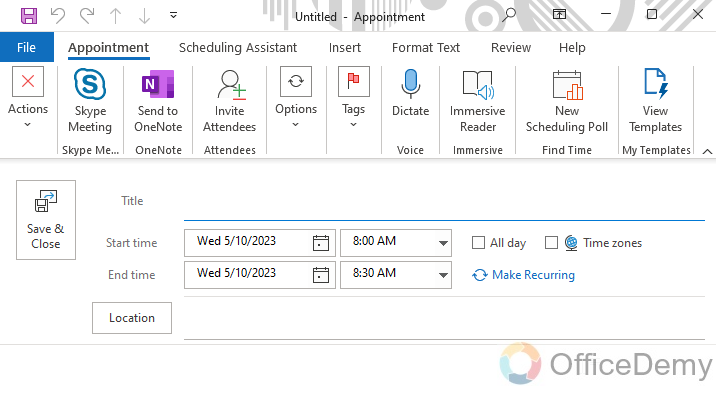
Open the Outlook app and go to the Calendar view.
Step 2
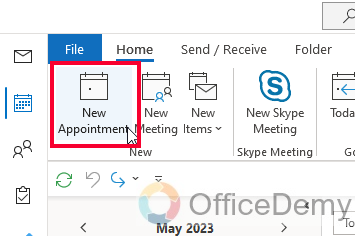
Tap on the calendar event or appointment you want to adjust.
Step 3
Now you have a new mail window opened in a new tab
Step 4
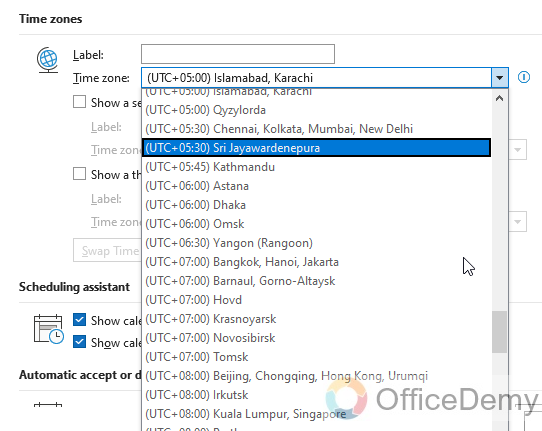
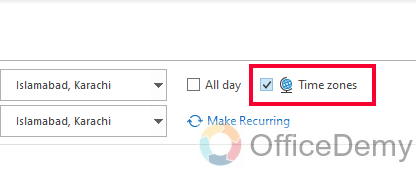
Here you have a checkbox “Time Zones”, check on it
Step 5
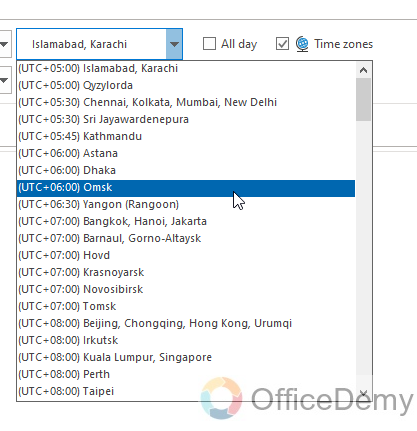
Now you have dropdown menus, from here you can change the time zones and select any from the given list
Now you can complete your appointment/meeting details and send it with a customized time zone selected.
This is how to change time zone in Outlook for a specific mail.
Change Timezone in Outlook – Outlook Web Version
In this section, we will learn how to change timezone in Outlook using the Outlook web version, fewer users use the web version but it’s still equally important to learn it. So, let’s move directly to the steps.
Step 1
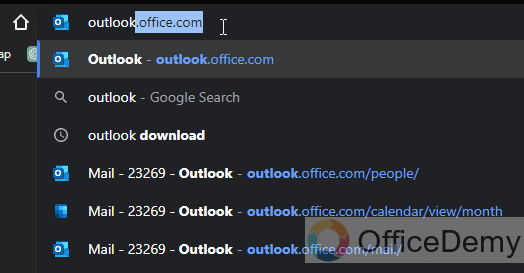
Open your web browser and go to the Outlook website. Sign into your Outlook account using your email address and password.
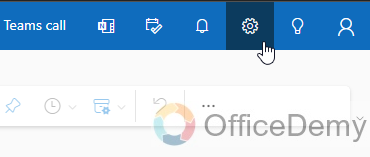
Step 2
Once you are logged in, locate the gear icon in the top-right corner of the Outlook web interface. Click on it to open the Settings menu.
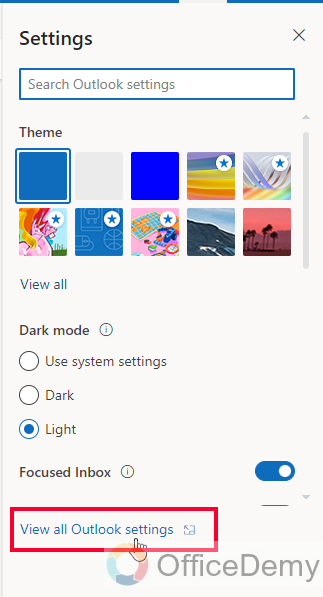
Step 3
In the Settings menu, scroll down and click on the “View all Outlook settings” link at the bottom. This will open the full Settings menu.
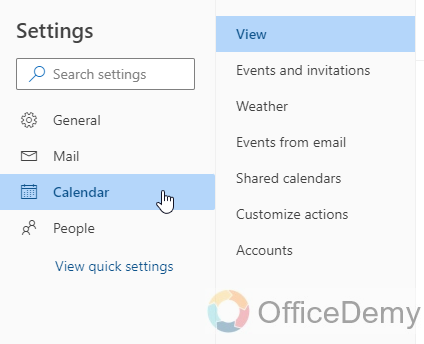
Step 4
In the Settings menu, select the “Calendar” option. This will display the Calendar settings.
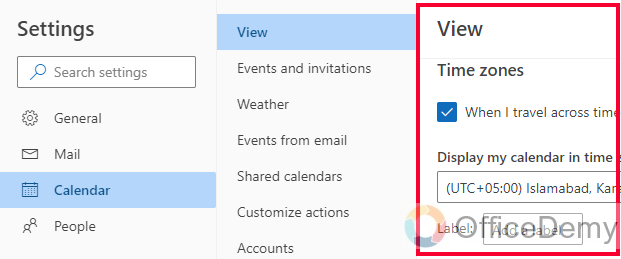
Step 5
Look for the “Time Zone” section within the Calendar settings. You should see an option to change the timezone.
Step 6
Click on the drop-down menu and select your desired timezone from the list.

Step 7
Save the Changes: After selecting the new timezone, click on the “Save” or “Apply” button.
Outlook will update the timezone settings for your account.
This is how to change timezone in Outlook using the Outlook web version.
Things To Remember
- Outlook allows you to change the timezone through the app settings or within individual calendar events.
- It is important to update your timezone settings when traveling or working with colleagues in different locations.
- Double-check your timezone settings to avoid confusion and scheduling conflicts.
- Remember to save your changes after updating the timezone in Outlook.
- Regularly review and adjust your timezone settings as needed, especially during daylight saving time changes.
- Some versions of the Outlook app may have a slightly different interface, so refer to the specific app version or consult the documentation for precise instructions.
- In the Outlook app, you can adjust the timezone for individual calendar events to accommodate different time zones for specific appointments.
- Keep in mind that changing the timezone in Outlook affects the display of time for all events and appointments in your calendar.
- It’s a good practice to cross-reference your timezone settings in Outlook with other scheduling tools or devices to ensure consistency.
Frequently Asked Questions
Q: How often should I update my timezone settings in Outlook?
A: It is recommended to review and update your timezone settings in Outlook whenever there are changes such as traveling to a different timezone, working with colleagues in different locations, or during daylight saving time transitions.
Q: Will changing the timezone in Outlook affect past or future events?
A: Changing the timezone in Outlook will affect the display of time for both past and future events. However, it does not alter the actual timing of past events.
Q: Can I change the timezone for individual events or appointments in Outlook?
A: Yes, you can adjust the timezone for specific events or appointments within Outlook. This allows you to accurately reflect on the local time for those particular activities.
Q: Will changing the timezone in Outlook affect other calendar applications or devices?
A: Changing the timezone in Outlook only affects the display of time within the Outlook application. Other calendar applications or devices may have their separate timezone settings that need to be adjusted independently.
Conclusion
Wrapping up how to change timezone in Outlook. We covered three methods for this topic, and I hope they were easily defined to make you understand everything in detail. I will see you soon with another guide. Thanks, and keep learning with Office Demy.


