
To Clear Cache in Outlook
- Go to “Run”
- Paste this link “%localappdata%\Microsoft\Outlook”
- Open Folder “RoamCache”
- Click “Delete all files”.
OR
- Go to “File” > “Options” > “Mail“
- Scroll down to the “Send Message” section
- and click on “Empty Auto-Complete List” > Tap “Yes” > Click “Ok“
Hello, and welcome to this guide. Today, we will learn how to clear cache in Outlook. First, we need to know what cache is. So, basically, cached is a type of information stored in a temporary storage location on your computer or device which is commonly used for reducing loading time while launching files or also used to recover files.
Similarly, Outlook stores information like email clients, contacts, calendars, etc. If your Outlook is getting slows down, then you can clear large cache files from your device with the help of the following tutorial on how to clear cache in Outlook.
When to Clear Cache in Outlook?
Microsoft Outlook is one of the best email service software. There are hundreds of features for dealing with many emails and managing your calendar events, tasks, contacts, and notes. However, Outlook is not completely bug-free. Sometimes, Outlook gets trouble receiving emails on Windows or can’t open MSG files sometimes.
Outlook clients on Android and Mac also suffer from these occasional glitches. In such cases clearing the Outlook cache is one of the common troubleshooting tricks to fix such problems. It also saves storage and deleted temp files from your Outlook.
So, if you don’t know how to clear cache in Outlook then this blog post is for you.
How to Clear Cache in Outlook?
In this article on how to clear cache in Outlook, we will learn two ways in Outlook to clear Outlook cache.
- Clear cache in Outlook by deleting RoamCache files
- Clear cache in Outlook by Emptying autocomplete list.
Clear Cache in Outlook – By deleting RoamCache files
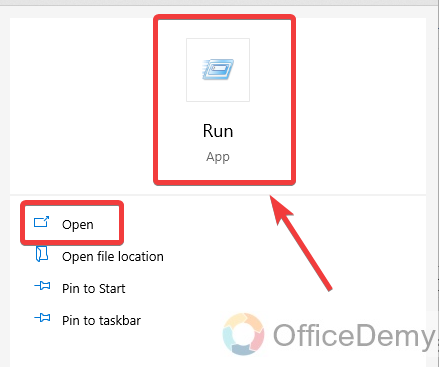
Step 1
To clear cache of Microsoft Outlook, you will have to open the “Run” command. To open the Run command go into the Start menu of your Windows and search for the Run command. As a result below you will find your search, click on the “Open” button to open the “Run” command.
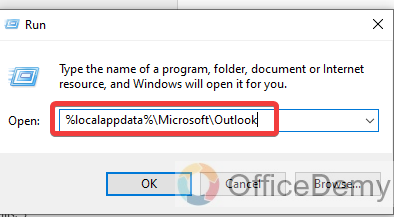
Step 2
When you click on the “Run” command to open it, then a small pop-up window will appear at the left bottom of the window that will ask you to insert the command to open the file. Insert this command “%localappdata%\Microsoft\Outlook” in the following dialogue box as written below.
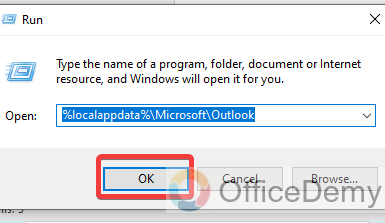
Step 3
Once you have written your command, then simply click on the “OK” button to open this command which will lead you toward all Outlook files on your device.
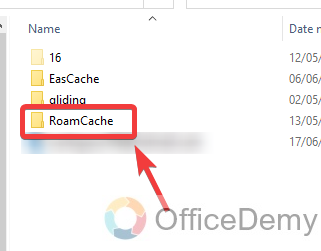
Step 4
As clicking on the OK button, you will see that a new windows explorer will open with the Outlook file’s location. In this Outlook file find the folder namely “RoamCache” in the folder list. Double-click on this folder to open it.
Step 5
When you open this RoamCache folder, you will see several saved files regarding Outlook data. To clear Outlook’s cache select all the following files with the help of a mouse or you can also select these files with the combination of Shift and arrow keys.
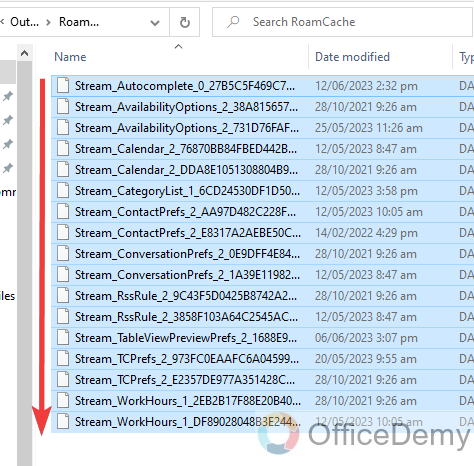
Step 6
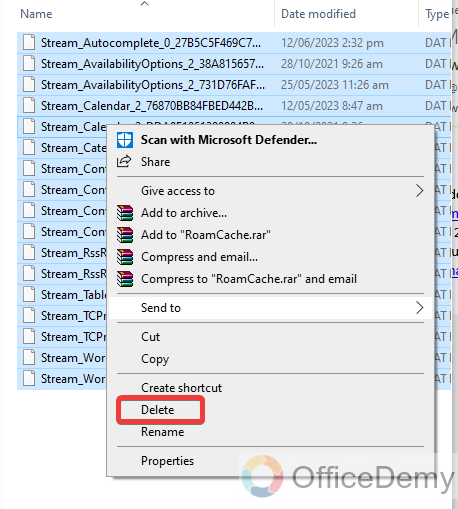
Once you have selected those files then delete these files to clear the cache of Outlook. To delete these files, press the right click of the mouse on it, and a drop-down menu will open where you will find the “Delete” button to delete these files or you can also use the shortcut key to delete these files by clicking Shift + Delete in your keyboard.
If you get a prompt message to confirm the deletion of these files, then click on the “Yes” button to delete these files.
Step 7
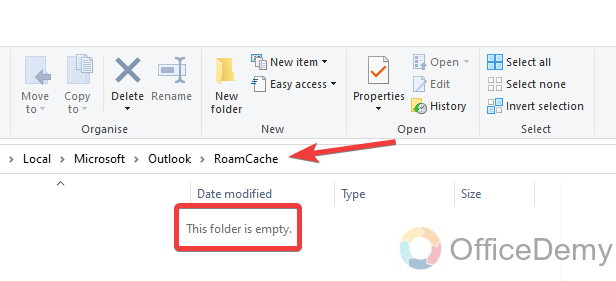
As you can see in the following picture our RoamCache folder of Outlook has been empty now which means Outlook cache has been removed as required.
Clear Cache in Outlook – By Emptying Autocomplete List
Step 1
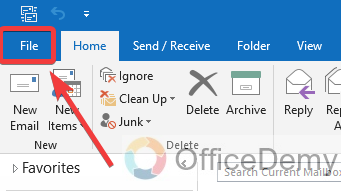
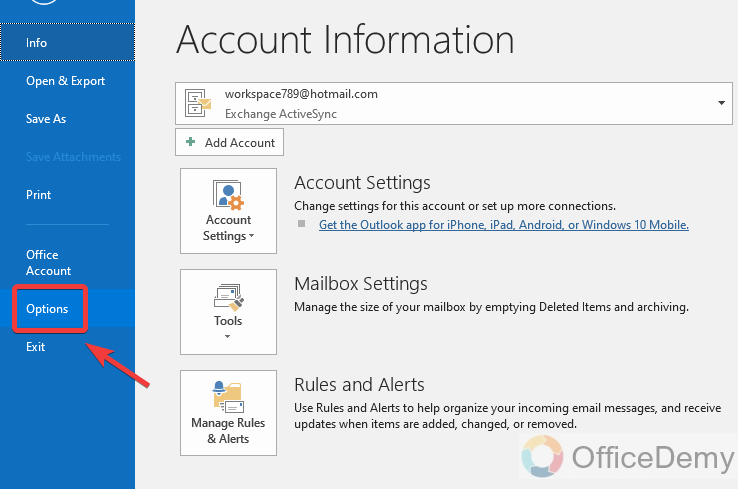
In this method you will have to access Outlook options therefore go into the “File” tab of the menu bar located at the left top corner of the window as highlighted below.
Step 2
When you click on the file tab of the window, your Outlook screen will slide right to the following screen where you will see a blue panel on the left side of the window. On this blue panel, you will find your tab for “Option“. Click on this option tab to open the Outlook options window.
Step 3
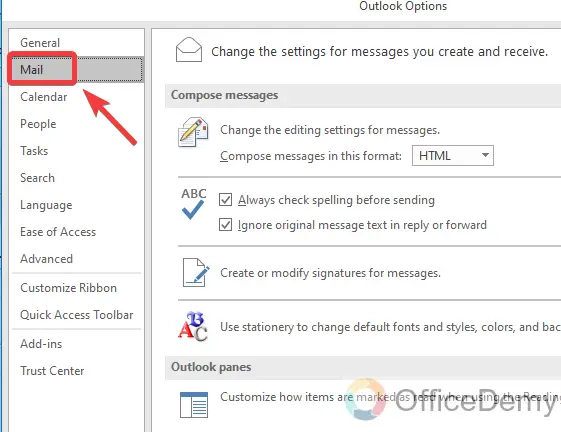
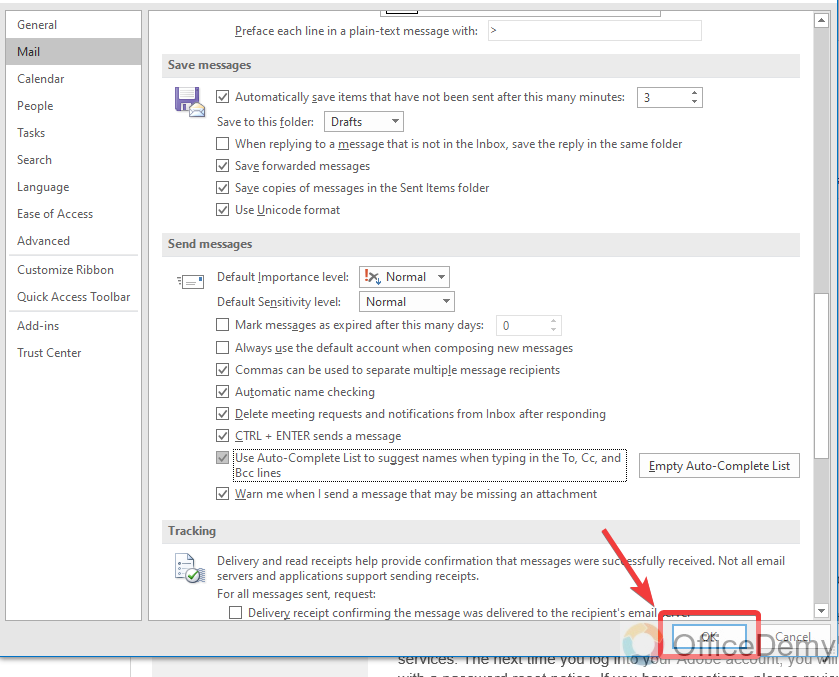
As can be seen in the following screenshot, Outlook’s options have been opened. Containing all options regarding Outlook and emails. If you see this options window, you will find a “Mail” option from the main menu from the left side section.
Step 4
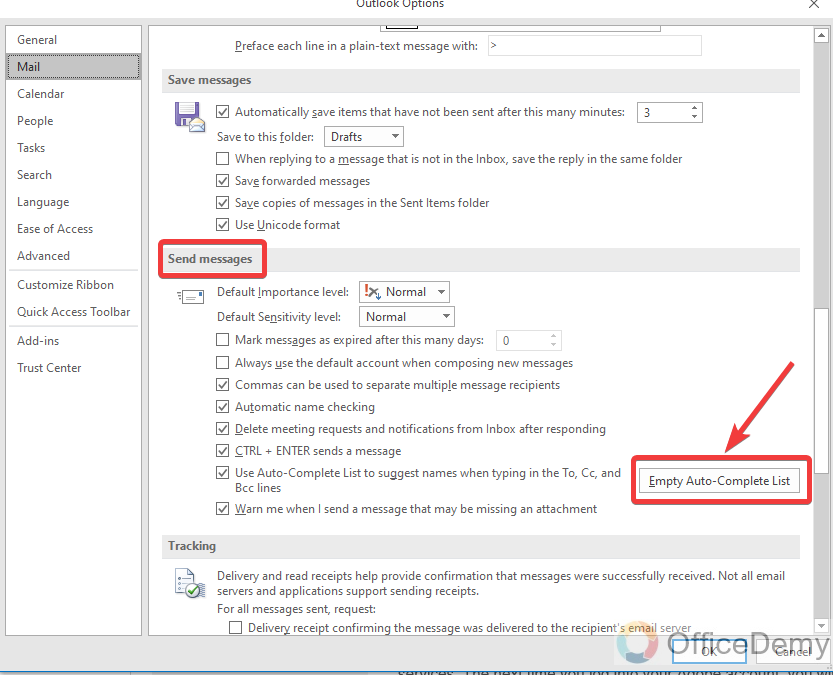
When you click on the mail option, all options regarding emails will appear in the next detailed section of the window. Little scroll down your mouse on this section and find the “Send messages” portion where you will find an “Empty Auto-Complete List” button on this portion. You can also clear the cache of Outlook with the help of this button.
Step 5
Before clicking this button to clear Outlook cache, firstly must read the following check marked options because this Empty auto-complete list button will empty all these checked options. So firstly, check the following options, and if you don’t want to delete anything from the list then uncheck the option then continue the procedure.

Step 6
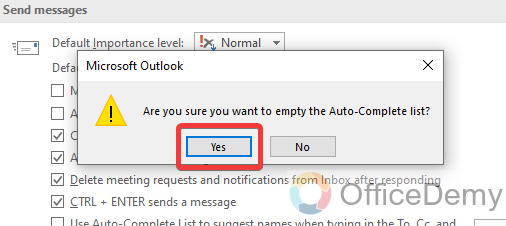
Now you can press the “Empty Auto-complete List” button to clear Outlook’s cache. When you press this “Empty Auto-complete List” button it will promptly ask you to confirm the delete Auto-complete list. Click on the “Yes” button to confirm the empty Auto-complete list. Your Outlook cache will be removed.
Step 7
Now you can close this options window by clicking on just the “OK” button to get back to Outlook’s window.
How to clear Outlook saved addresses?
When you consistently send messages via Outlook to any user, Outlook saves its addresses in its history. If you want to remove these addresses from your Outlook history, then follow the following steps through which you can learn how to clear Outlook saved addresses.
Step 1
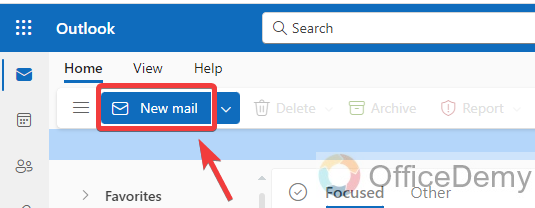
Click on the “New email” button at the left top window as highlighted in the following picture to compose a new email.
Step 2
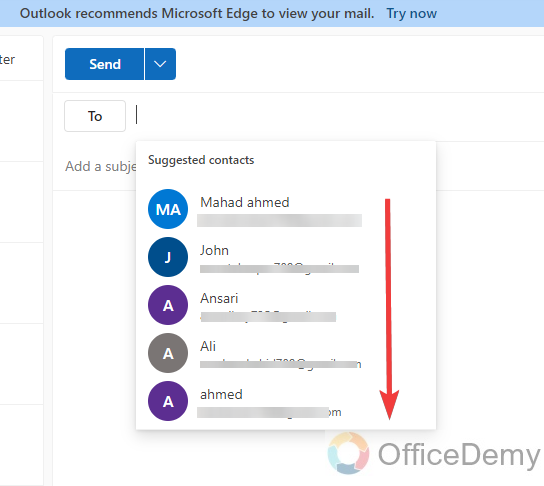
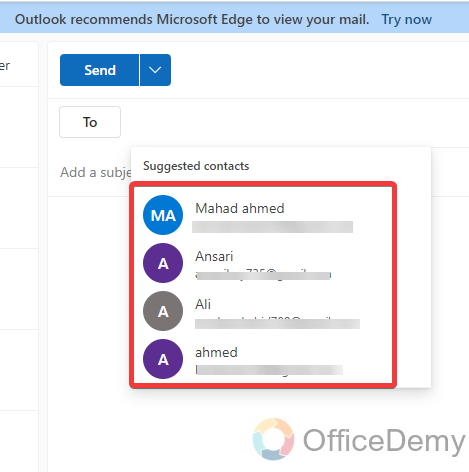
To send an email to anyone you need to write their email in the “To” dialogue box on the email composing window. But when you place your cursor in this “To” dialogue box, Microsoft Outlook suggests some recent usernames with their addresses as can be seen in the following picture. This is because Microsoft Outlook saves these address cookies in its history.
Step 3
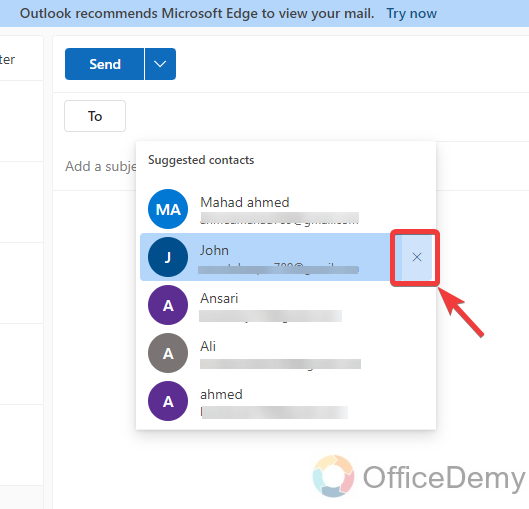
If you want to delete this address’s suggestions from the Outlook history, then hover your mouse cursor on this username or you can also place the selection by clicking the arrow key. When you press the selection on this username, a cross button will appear at the right end of the username as shown in the following screenshot. You can easily remove this username address from the Outlook history by clicking on this cross button.
Step 4
As you can see in the following picture your selected username address has been removed from the list. In the same way, you can remove all the addresses from the Outlook history.
How to permanently delete emails in Outlook?
A: When you delete emails in Microsoft Outlook, Outlook saves them in its deleted items folder. If you don’t want to put your emails in the deleted items box and want to permanently delete directly then follow the following steps which can help you to delete your emails permanently.
Step 1
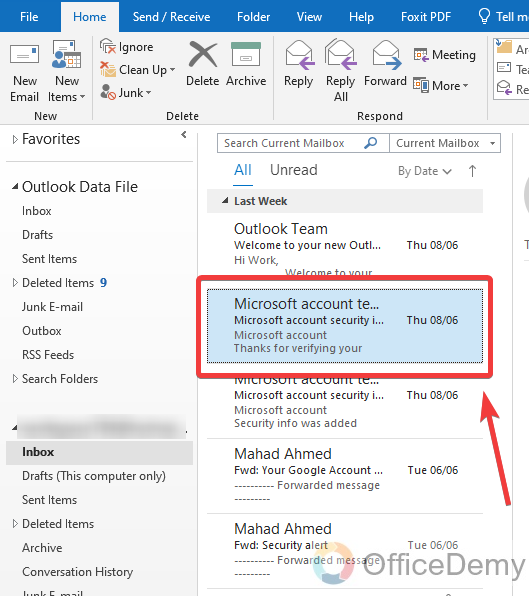
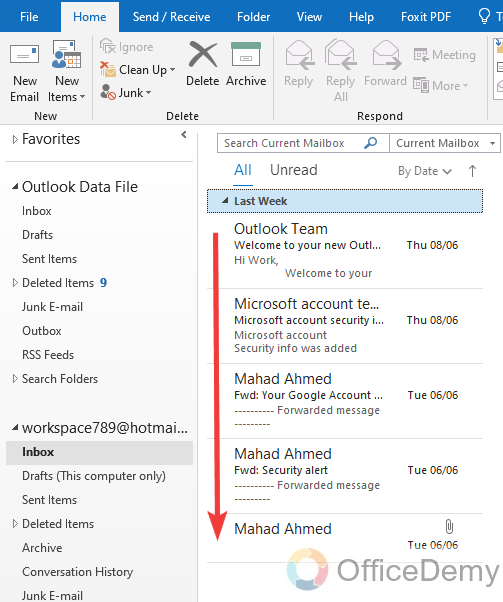
If you want to delete any email or message permanently so first select the message or email that you want to delete permanently as I have made in the following example.
Step 2
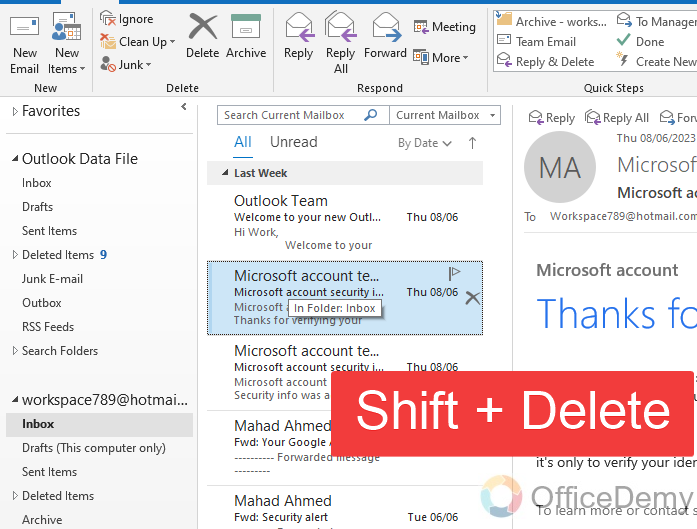
If you press only the delete button, your email will be deleted partially but to delete your email permanently press the “Shift + Delete” button on your keyboard. Your email will be deleted forever.
Step 3
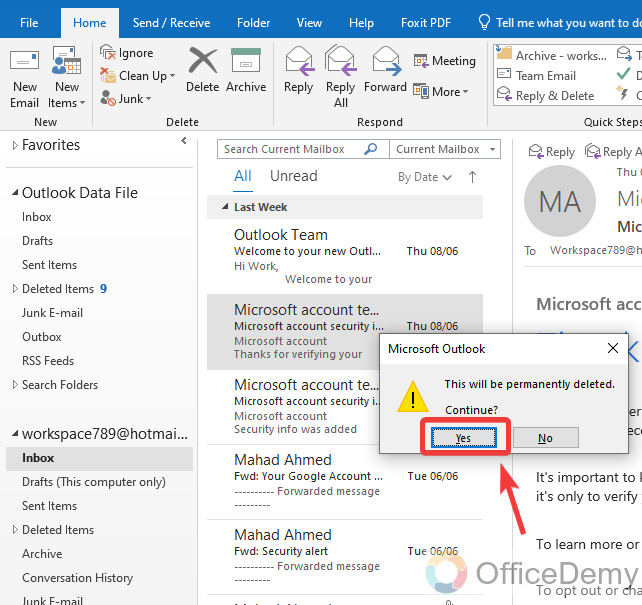
Microsoft Outlook promptly asks you, are you sure to permanently delete your email? Click on the “Yes” button to delete your email permanently.
Step 4
As you can see the result in the following picture your email has been deleted permanently, you can also check your deleted items folder and your email will be no more.
Conclusion
That’s all about how to clear cache in Outlook. I hope the above article on how to clear cache in Outlook will be helpful to speed up your Outlook in a couple of ways. For more similar topics keep visiting our website, Office Demy.


