
To Create a Task in Outlook
- Open Outlook.
- Go to “New Items” in the main menu.
- Select “Task” from the dropdown list.
Welcome back, fellows. Today, I will teach you how to create a task in Outlook. Do you know How Outlook can manage your day-to-day tasks? weekly meetings? and managing your role in projects? A Task is an item, that we create when we want to track it until it is completed. The Outlook task feature is an effective tool for your task management.
In this article, we will learn how to create a task in Outlook. Let’s see why it’s an effective tool in the next section.
When to Create a Task in Outlook?
Tasks are a great way to track what you need to do. You can create a clear plan for the day and week ahead and settle on the best way to allocate your time to accomplish a goal. You can also do this in the form of electronic media with the help of Outlook.
If you want to learn how to create a task in Outlook, then read the following tutorial.
How to Create a Task in Outlook
In this section, we will teach you a complete guide in step-by-step procedure on how to create a task in Outlook.
Step 1
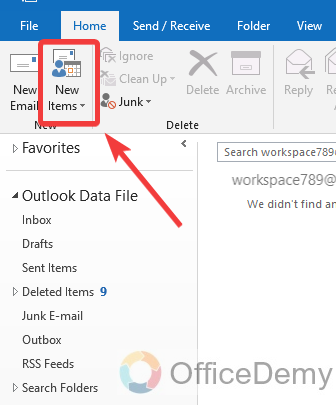
If you are on the “Home” tab of the Outlook window as follows, then you will see an option at the left top corner of the window “New items“. To create a new task in Outlook, click on this option.
Step 2
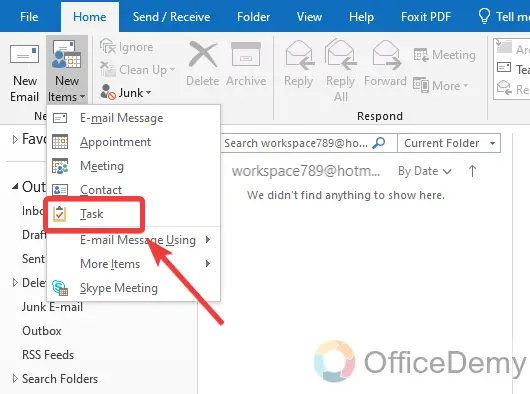
When you click on this “New item” option, a small drop-down menu will drag down where you will find the “Task” option in Outlook. With the help of this task option, you can create a new task in Outlook.
Step 3
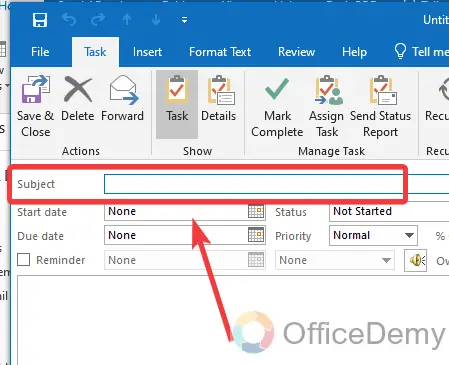
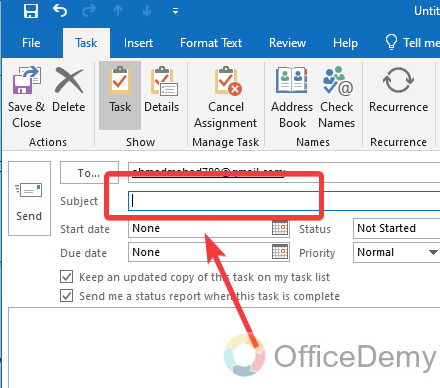
Once you click on this “Task” option from the drop-down menu, a new window will open where you can create your own “Task“. The first thing you will have to do while creating a new task is to write the subject name for your task in the subject dialogue box as highlighted in the following picture.
Step 4
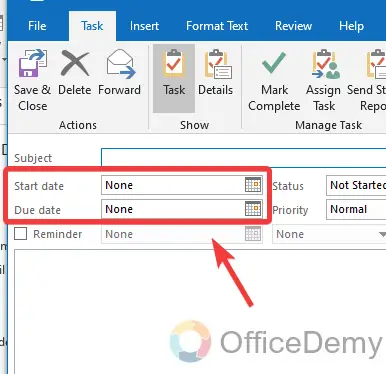
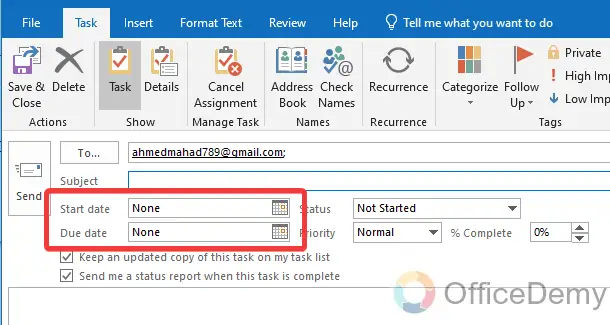
After inserting the subject name for your task, then you will have to select the tenure for your job by selecting the starting and ending date. As you can see in the following example, there are two dialogue boxes, the first for the start date and the second for the due date.
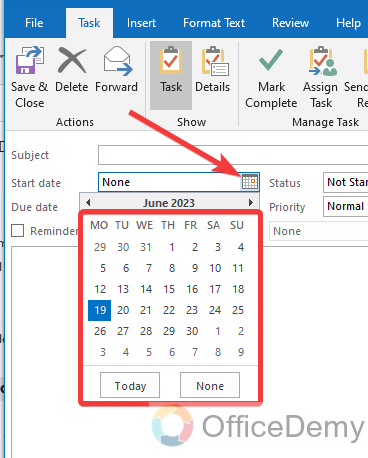
Step 5
To select the dates, click on the small calendar icon as directed in the following screenshot. When you click on this calendar icon, the calendar will drag down through which you can easily select the date. Similarly, you can also select the date for both the start date and also for the due date.
Step 6
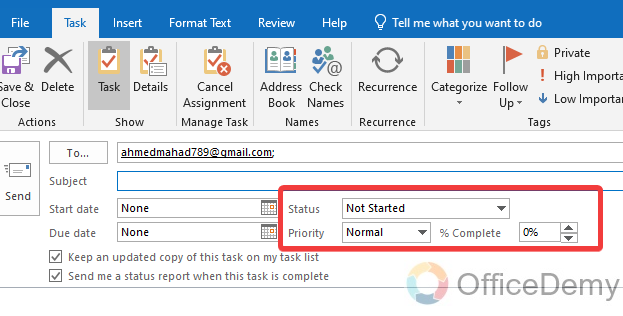
Once you are done with setting up a time for your task then select the status for your task from the following option. If your task is in process then you can set the status “In progress“, if it is completed then select the status “Completed” and so on according to your criteria.

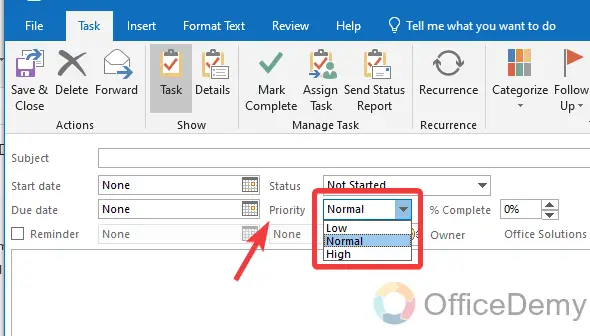
Step 7
Microsoft Outlook also features to characterize your task according to your priority. You can set your task priority from the following highlighted option. Click on this small arrow and then select the priority for your task from the drop-down menu.
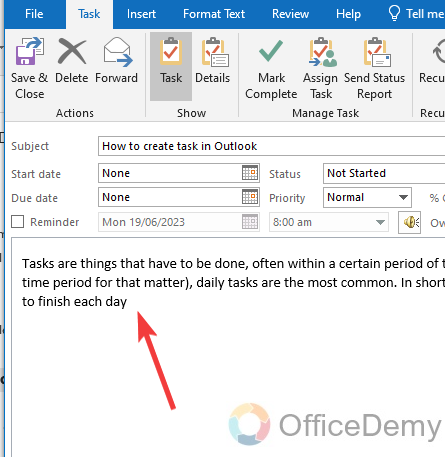
Step 8
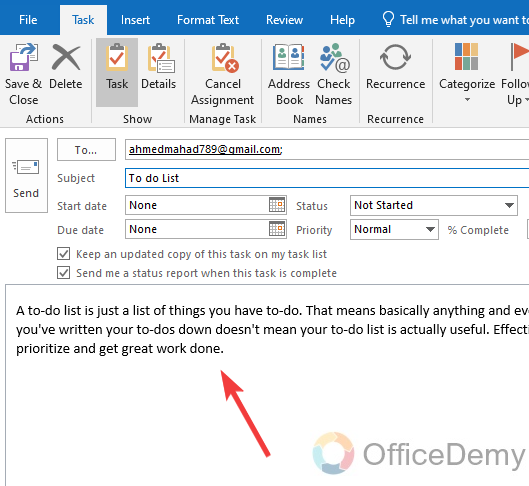
Once you are done witting up all options for creating a task t, write your task description in the description box. In this description, you can describe your task shortly for other Outlook users.
Step 9
All basic things to create a new task in Outlook have been done yet. Now you just need to save your task, your task will be created. Look at the left top corner of the window, you will see a “Save & Close” button. Click on this button to save your task.
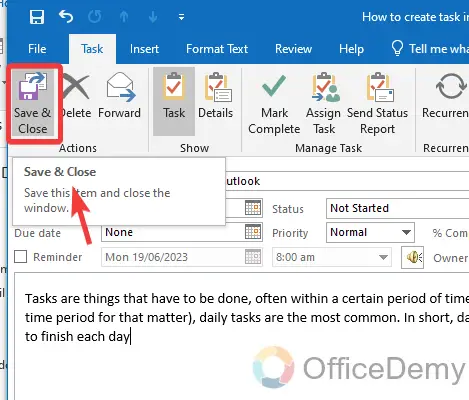
In this way, you can create a new task in your Microsoft Outlook.
Frequently Asked Questions
Q: How to assign tasks to Outlook users?
A: Creating a task in Outlook is mainly used for other users which is done by assigning tasks to anyone. If you also want to assign tasks to your Outlook member, then read the following instructions through which you can assign tasks to an Outlook user.
Step 1
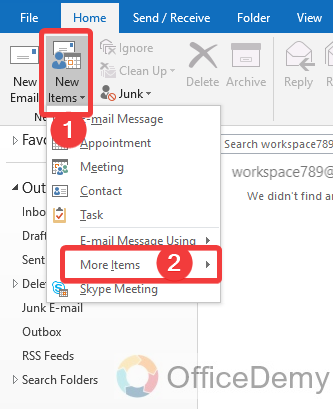
Same as above, to assign the task to an Outlook user, click on the “New items” button at the left top corner of the window where a drop-down menu will open then click on the “More items” option from the drop-down menu.
Step 2
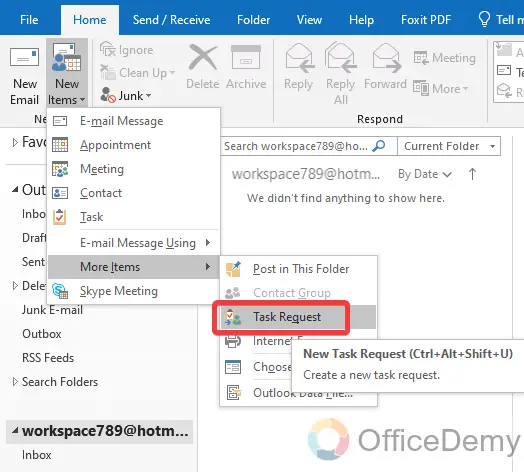
When you click on “More items” in the drop-down menu from “New items“, another expand will open where you will see a “Task Request” option as highlighted in the following picture, You can assign the task to an Outlook user with the help of this option. Click on it to proceed with the procedure.
Step 3
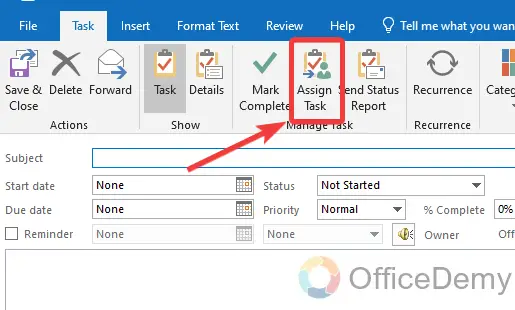
There is another way to assign the task to an Outlook user, when you create a new task in Outlook, the following task window opens in front of you. On this window in the “Task” tab, you will see an “Assign Task” option in the ribbon through which you can assign a task to an Outlook user.
Step 4
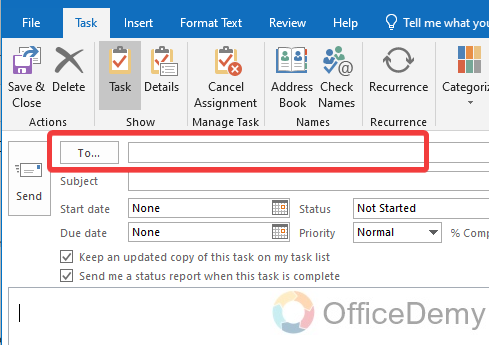
When you click on the “Assign Task” option there will be an additional option that will be included which is highlighted below. In this “To” box, you will have to insert the username or email address to whom you are assigning the task.
Step 5
Then the further procedure is almost the same as above in creating a new task. Write the subject name for your task in Outlook in the subject dialogue box.
Step 6
Then select the tenure for your task by setting up the “Start date” and “Due date“.
Step 7
After setting up the due date, there are some more requirements such as Task status, Task priority, completion percentage, etc. Fill up all those options according to you and your task criteria.
Step 8
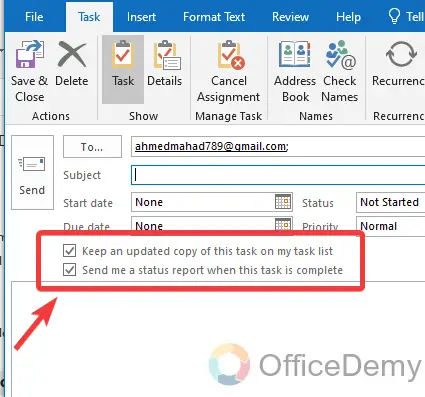
When you assign a task to an Outlook user, there are some additional options highlighted in the following example. With the help of these options, you may get updated about your assigned task and can take a report regarding the completion of the task.
Step 9
In the last, just write the description of your assigned task in the following description box. This description will also be visible to the assigned task user, so he may know what to do in this task.
Q: How to delete or mark a complete task in Outlook?
A: Once your task gets completed then you may need to delete it or mark it as complete in Outlook. The following screenshots will give you directions to delete or mark as complete your task in Outlook.
Step 1
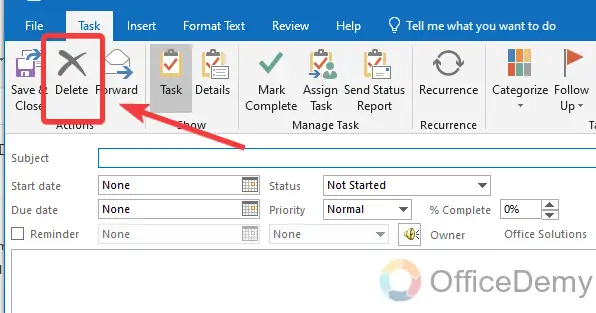
When you open the “Task” window, you will see a “Delete” button in front of you as highlighted below. Just click once on it, and your task will be deleted.
Step 2
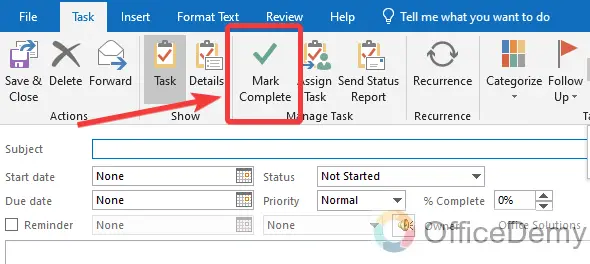
Similarly, If your task has been done or completed then click the following “Mark Complete” button from the ribbon, and your task will be marked as completed.
Can I Use a Doodle Poll in Outlook to Manage My Tasks Effectively?
Yes, it is possible to create a Doodle poll in Outlook to effectively manage tasks. By using the keyword create doodle poll in outlook, individuals can easily schedule meetings and coordinate tasks within the Outlook platform. This feature enables streamlined communication, efficient task management, and better collaboration among team members.
Q: How to apply reminder reminders on tasks in Outlook?
A: If you have created a task for yourself or anyone in Outlook for the upcoming week or month. May be possible that due to the heavy burden, you may forget your task in Outlook. If it happens to you as well then apply a reminder to your task with the following steps.
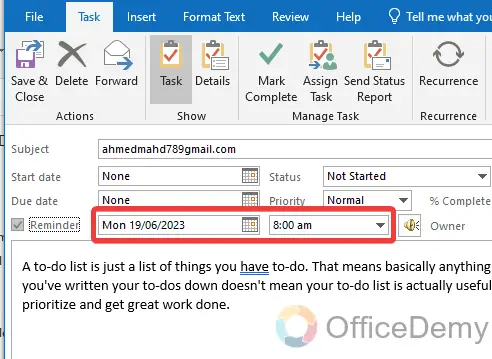
Step 1
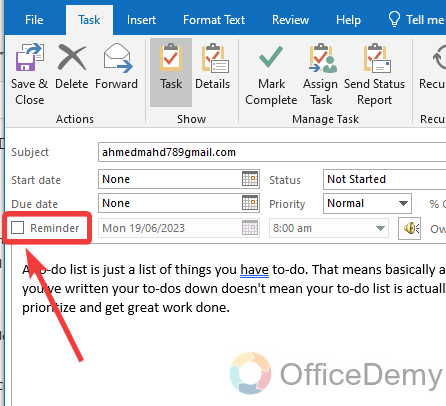
While creating a new task in Outlook, there is a “Reminder” option on this window can be seen in the following picture you can apply Reminder on your task in Outlook. Just check this option.
Step 2
When clicking on the check button, time and date options will appear in front of you, as highlighted below. Select the date & time when you want to get an alert for your task in Outlook.
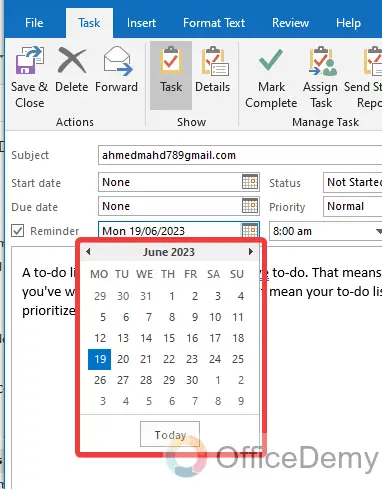
Step 3
Click on the date option, and a small calendar will drag down from where you select the date on which you want to get a reminder.
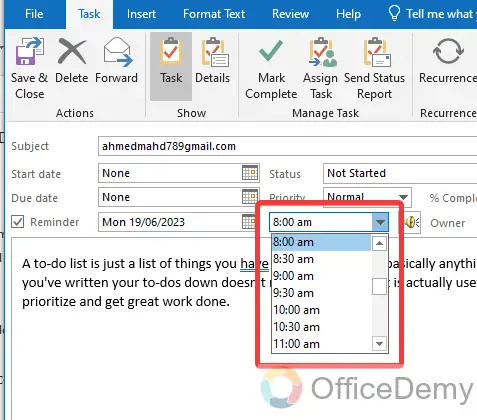
Step 4
In the next section, select the time from the drop-down menu, when you want to get notified of your task in Outlook. Then just click on the “Save & Close” button to save these changes
Conclusion
Wrapping up how to create a task in Outlook. Creating and assigning tasks in Outlook is a simple process. By following the steps outlined in this article, you will be able to easily create a new task in your Outlook. Hope this will be helpful to you.


