
To Curve Text in Google Slides
- Open PowerPoint, and insert a text box.
- And add your text > Select the text.
- Go to “Shape Format” > “Text Effects” > “Transform” > “Circle“.
- Adjust the text box size, font size, and rotation (90°).
- Copy the curved text and paste it into Google Slides.
OR
- Use tools like MockoFUN or TroyGram to create curved text.
- Customize the text and download it as a PNG image.
- Insert the PNG image into Google Slides for curved text.
Your audience may not appreciate the content of your presentation if you are unable to present them in an attractive and unique way. One way to do this is by adding curved text into a circle in Google Slides.
Google Slides is a cloud-based presentation program that lets you create and format presentations and work with other people. It comes pre-installed on most Android devices and is available as a free app download on iPhones and iPads.
It enables you to create slideshows, share your work, collaborate with others in real-time, and present your ideas to the world. As it is a freemium tool, there are some limitations. One of those limitations is that it doesn’t allow curved text or shapes.
However, with the help of PowerPoint or other online tools, you can easily add curved text into Google Slides.
In this article, I will teach you how to add curved text in Google Slides using PowerPoint. But before we begin, let’s talk about what exactly curved text means in Google Slides and its importance in presentation design.
If you are interested to know how to curve text in Google Docs, please read this post below.
How to Curve Text in Google Docs
How to Curve Text in Google Slides
Method 1: Adding curved Text Using PowerPoint
This is the easiest method to add curve text to google slide. Here we will be using PowerPoint to generate curve text and the text will be transferred to Google slide.
How to curve text by PowerPoint
Thankfully PowerPoint has got the feature to curve text with a few simple steps. Let’s learn how to do it.
Step 1:
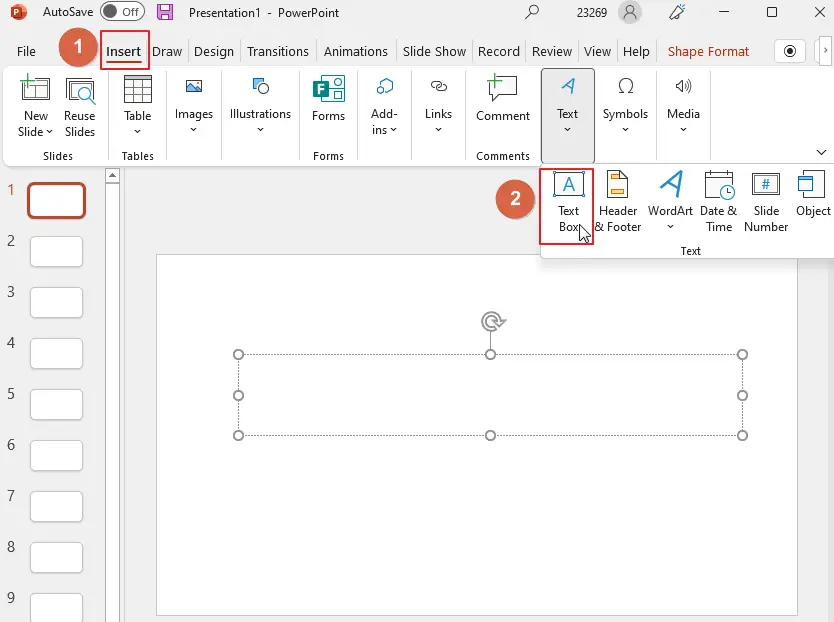
Open the PowerPoint first. Click on insert > Click on Text box. This is how the text box will be added to the slide to write your desired text.
Step 2:
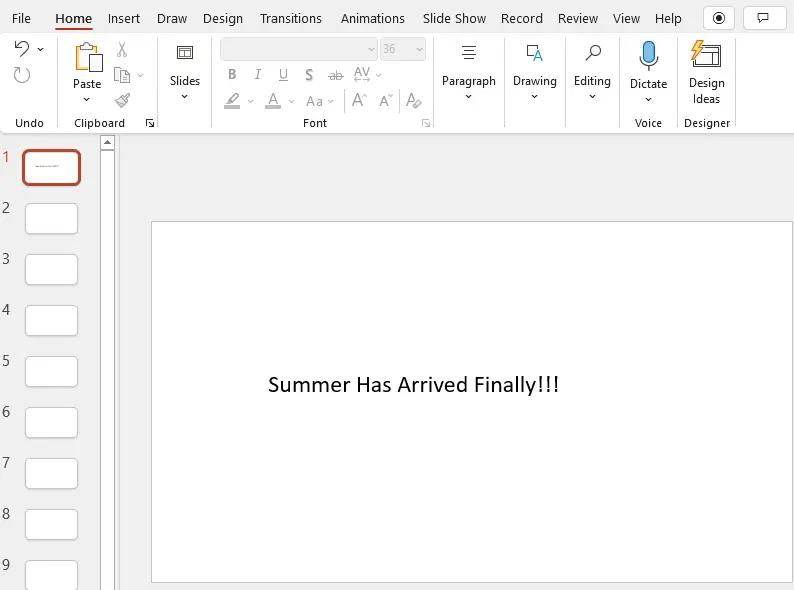
Add your desired text inside the text box which you would like to curve.
Step 3:
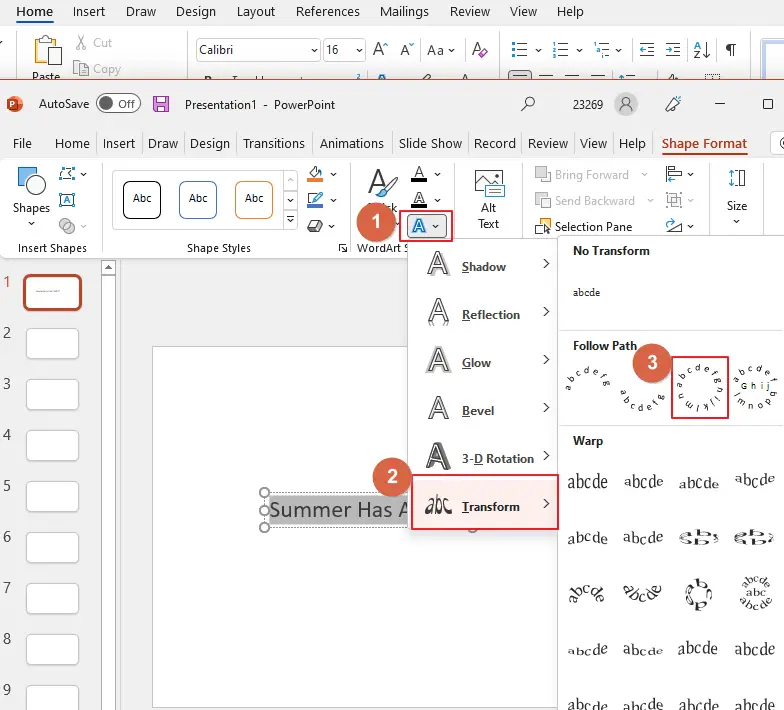
After you have added text in the box, select the entire text so that the Shape Format option will be enabled which is disable by default in the PowerPoint ribbon bar. Now click on Shape Format. Under the Shape format you will find the group WordArt Styles. Click on Text Effects inside the WordArt Styles group. A drop-down menu will appear. Click on Transform. Click on Circle under the Follow path option.
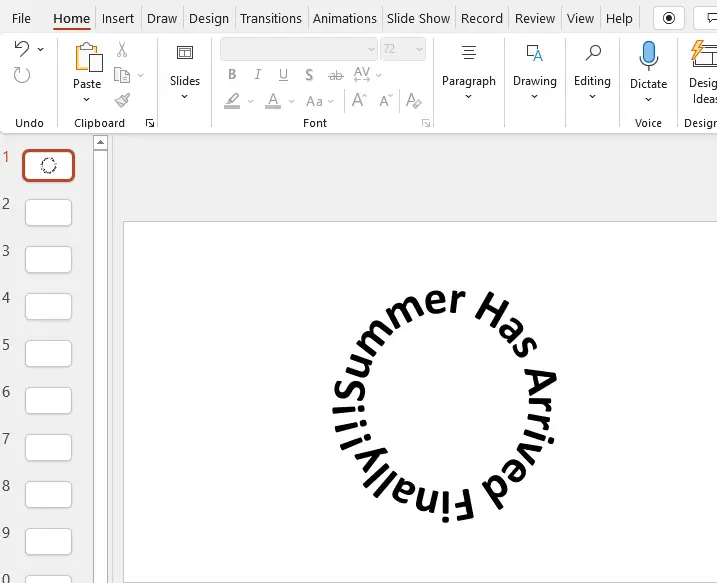
Step 4:
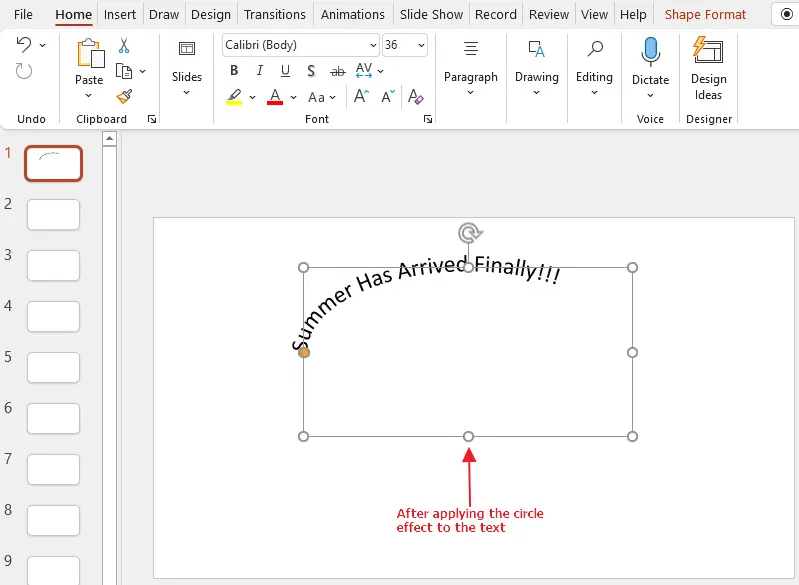
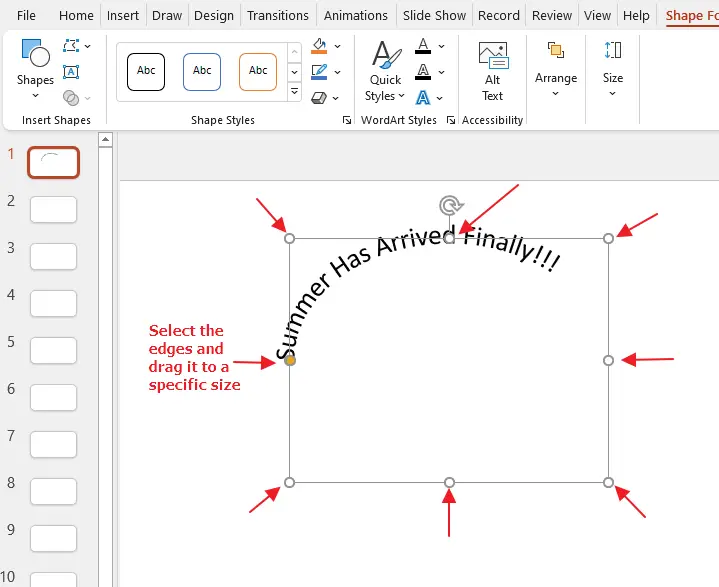
As soon as you click on the circle, the effect will be applied to the text inside the box. Here, notice that the text inside the box doesn’t really look like a circle. This is because the size of the text box needs to be changed.
To change the box size, Select the edges of the box and drag it to a specific size that suits your texts.
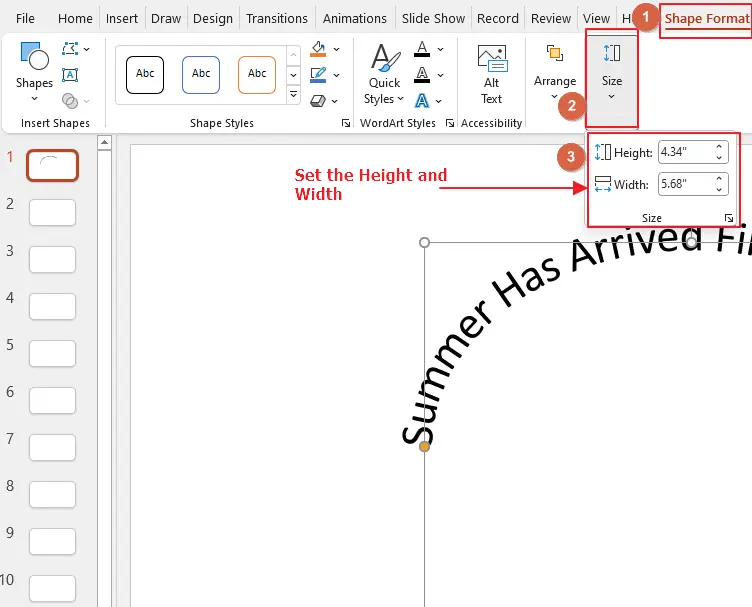
Or another way to do it is, you can change the height and width using the Height and Width option inside the Size group located under the Shape format ribbon bar.
Step 5:
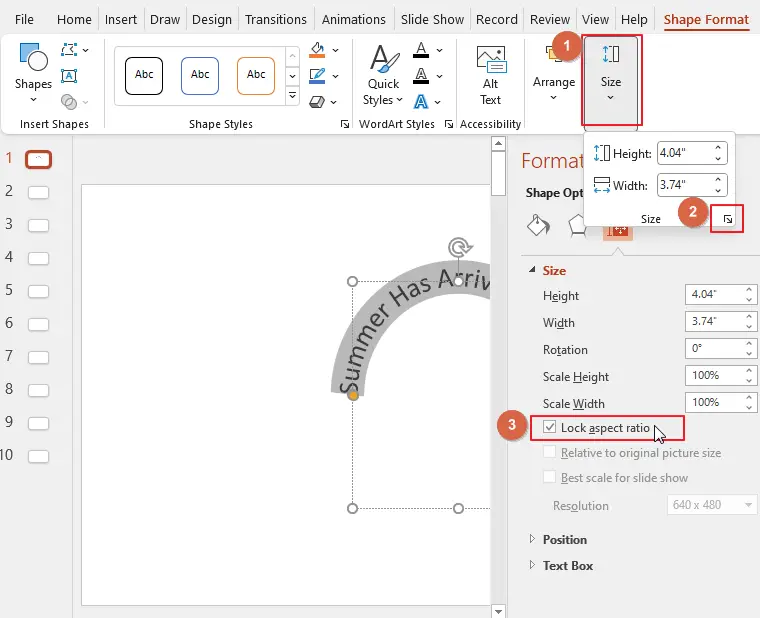
Once your text box height and width ratio are selected, you must lock it using the Lock aspect ratio option. Click on the little arrow located at the bottom of the Size group. Click on Lock aspect ratio.
Step 6:
Despite changing the Height and width, you will notice that the text is still not fully in circular shape. Here what you need to do is to adjust the Font size. You need to increase the font size to make it circular. To change the font size, Select the entire text first, go to the home tab, click on font size, and change it. Select a large size so that the text becomes circular.
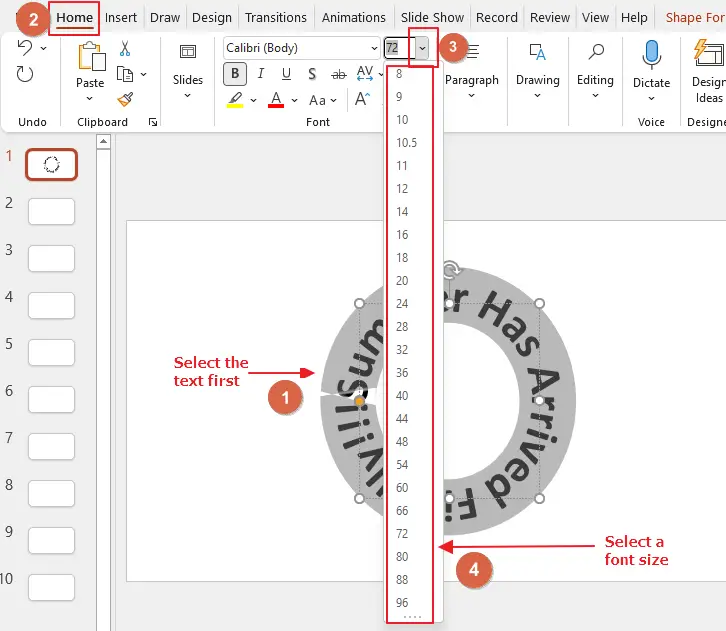
Here I have chosen the size 72. This seems perfect for the texts I have inserted.
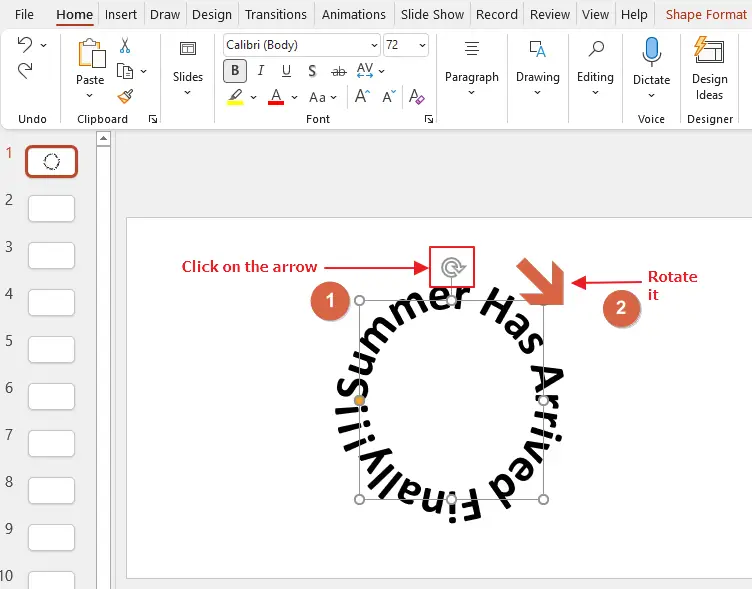
Step 7:
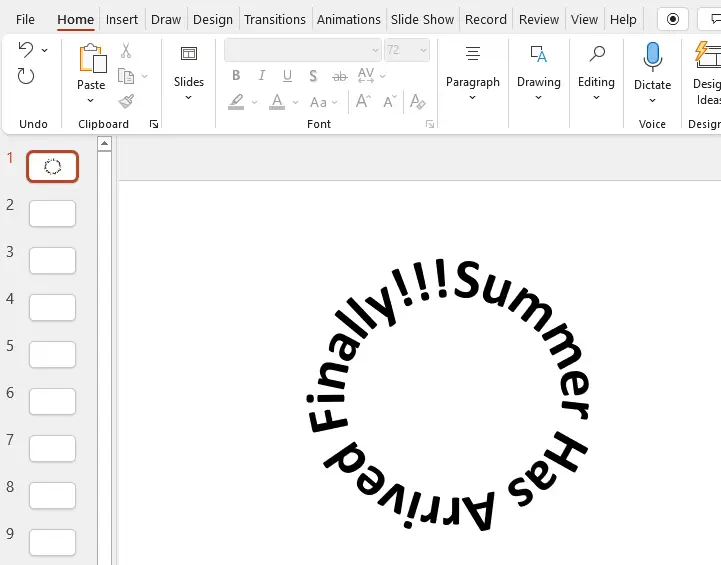
after the font size setup, notice that the sentence starts from the left instead of right at the top. To make the sentence appear right at the top, here the text box must be rotated by 90°. Simply click on the round arrow at the top of the box. And rotate it by 90° towards the right.
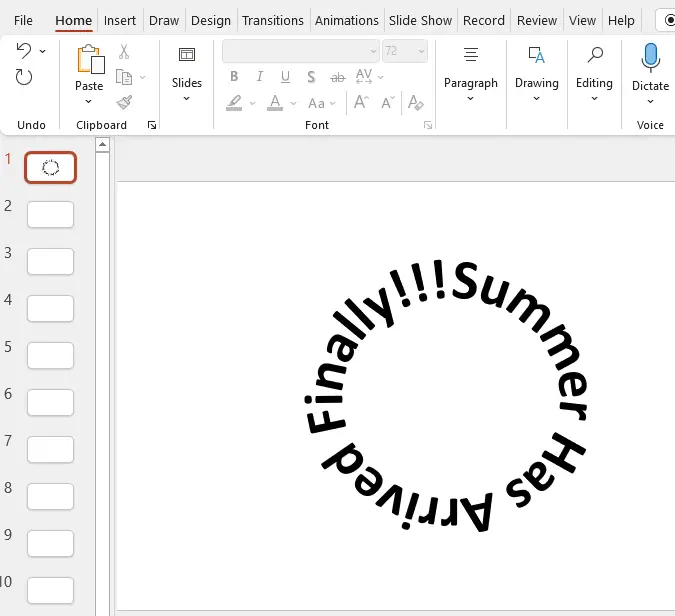
Here is an example image after rotating the text box by 90°
Step 8:
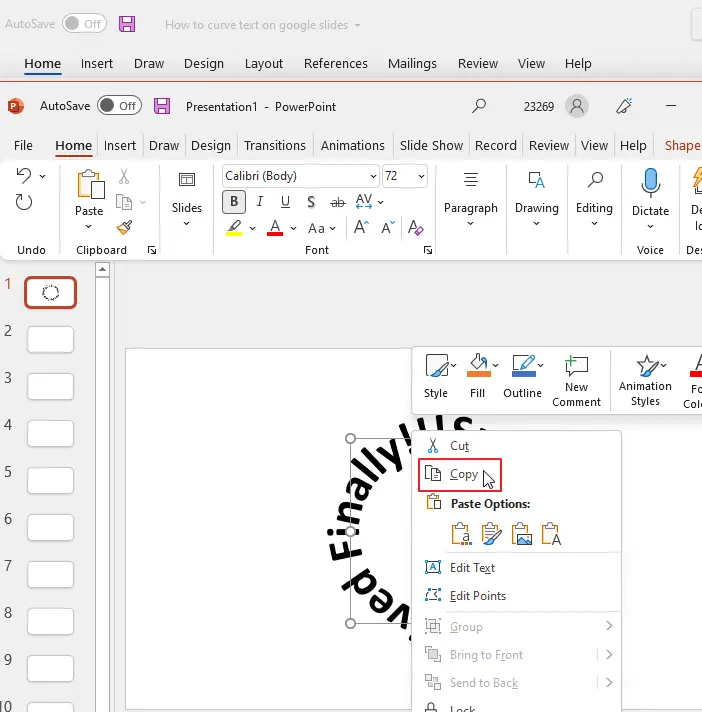
Here our curve text is complete. Now time to transfer it to google slides. To do so, select the text box first, now press right click so that a drop-down menu will appear. Click on Copy.
Or Keyboard shortcut for copy is, CTRL+C.
For Mac, Command+C
Step 9:
The final step is, Paste the copied curved text to google slide presentation.
That is. You are done.
Bonus Tip
You can add some colors too in your curved text. Once you have inserted the text in the text box and finalized its height and width, now you can add some colors to it. Keep in mind that you must do it before pasting it into google slides. Once the text is pasted in google slides, you can’t make any changes to it such as font size change, color adding, effects etc.
How to Add Colors to Curved Text in PowerPoint to use it in Google Slides
So, let’s learn how to add colors to curved text in PowerPoint.
Step 1:
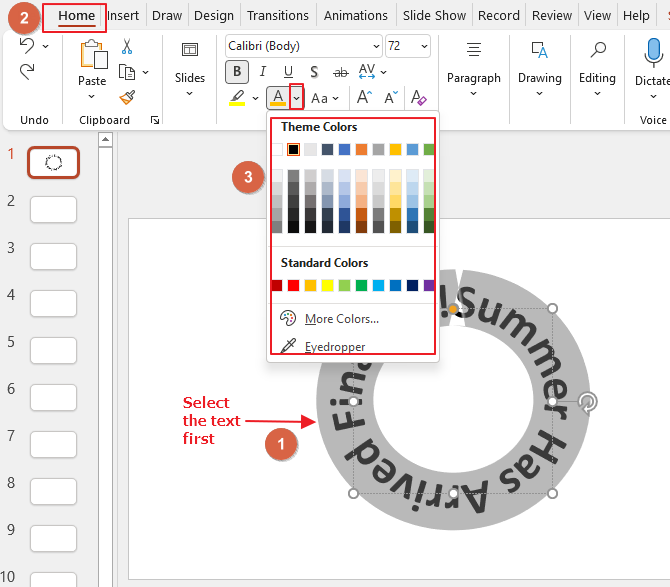
Once your text is curved in the PowerPoint, select the entire text, go to the home tab, click on the downward arrow next to the font color box. So that a list of colors appears on the screen.
Step 2:
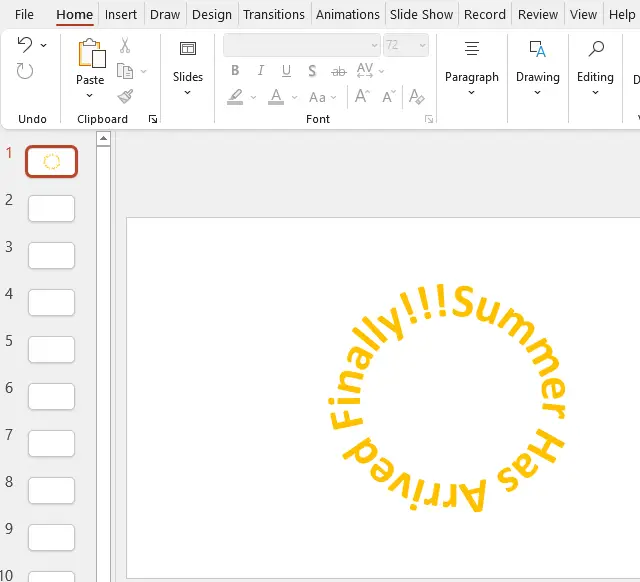
Choose a color according to your desire. Here I have chosen yellow for curved text. Example below,
Step 3:
Now if you copy it and paste it into the google slides, the curved text will appear with its color. Example below,

Step 4:
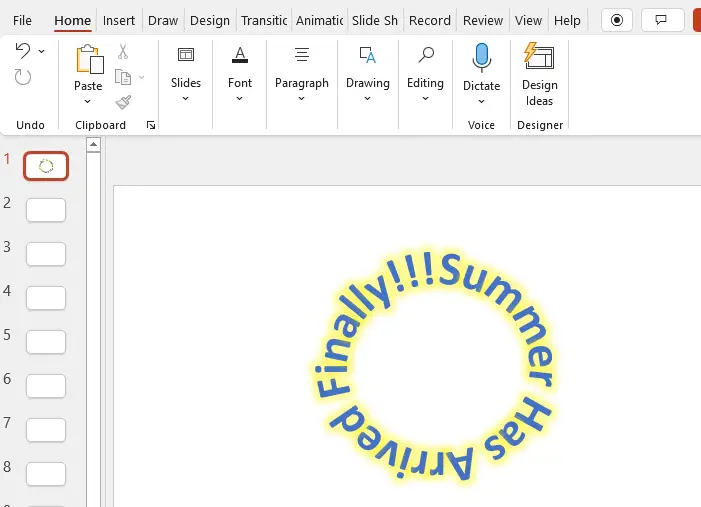
You can also add some effects in your curved text such as glow, shadow etc. example below,
Limitations of using PowerPoint
By following these steps, you can add curved text to Google Slides using PowerPoint. However, there are a few drawbacks in this method as well. Let’s have a detailed look at them below.
- Microsoft PowerPoint is a must have for this method
The main disadvantage of this approach is that you will need to use PowerPoint to edit the presentation. These days most people use google slide because people don’t want to pay for PowerPoint. There may be some other reasons as well to choose google slide over PowerPoint. If you don’t like to work in PowerPoint, then this would be the reason that this method may not work for you.
- PowerPoint file should be kept safe
While it is possible to transfer your curved text from PowerPoint to Google Slides, this method results in an image, meaning you will not be able to edit the curves inside of Google Slides. Therefore, you will need to keep your original Microsoft PowerPoint file if you need the Google Slides presentation.
Method 2: Online Tools to Curve Text in Google Slides
Curved text is part of special effects. In Microsoft PowerPoint there are a few ways to curve text and bend text. Today we have gathered information about some easy-to-use online tools that allow you to curve text into a circle. If you don’t want to use Microsoft PowerPoint, no problem! You can use these online tools to curve text.
These are free and very easy to use. I am going to discuss two best online tools to curve text.
Online tool MockoFun
Google Slides are an amazing way to make your presentations shine. Adding curved text to them, however, used to be a hassle. MockoFUN is a great tool by which you can create curved text in various shapes and different styles and then insert it into your Google Slides.
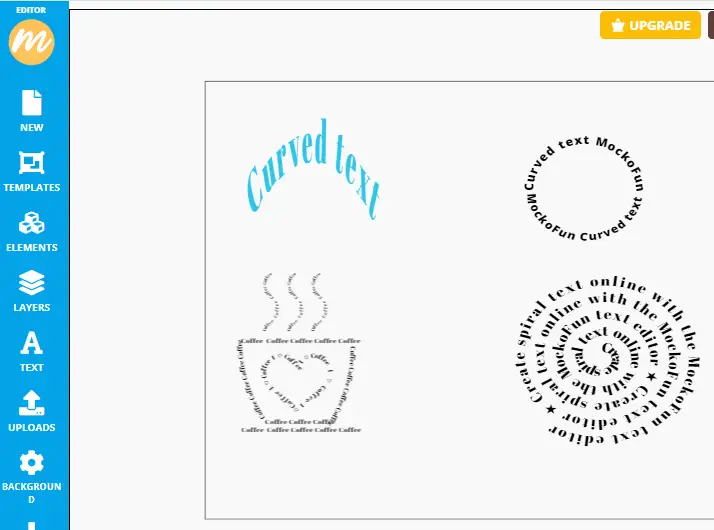
When creating text with MockoFUN, ensure that the Normal Text option is chosen instead of the curve title.
Once you’re done creating in the desired manner and style, right-click on the text and download it and it will download as a PNG file. This PNG file can be imported as an image and copy and paste to your Google Slides. So simple!
It’s important to keep in mind that while the service is free, you will need to create an account with MockoFUN if you want to use all their features. Some of you may not feel comfortable giving out personal information, or even creating an account with a site that won’t be used frequently.
Online tool TroyGram
If you are uncomfortable with the idea of having to give personal information to create an account, then TroyGram is the perfect alternative for you. It does not require any personal details and is just as easy to use as the other popular online graph makers.
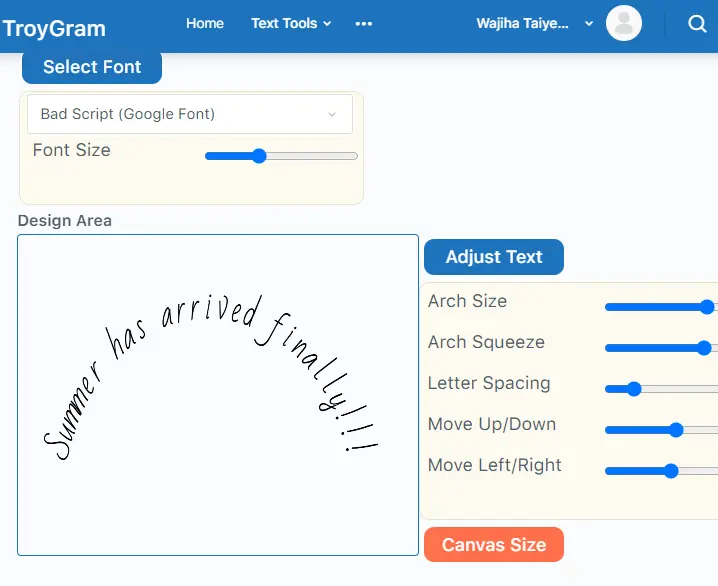
When I found TroyGram and considered trying it out, I thought to myself, “Will it be able to live up to the standard MockoFUN sets?” It turns out that it isn’t supposed to. It’s more of a basic little text editor, which makes it ideal for simple projects like writing a little text on a picture or sharing posts on social media.
TroyGram has a simple and effective curved text generator tool. Instructions on how to use the curved text generator tool are also available on their site but you might miss it if you are in a hurry because everything is in one place.
Overall, I would say I prefer MocoFun to generate curve texts for google slides.
Conclusion
By default, Google Slides doesn’t support adding curved text. There is no built-in option available but there are tools through which we can do it easily. These online tools save time and hardly take a few minutes to add curved text.
You can always take help from PowerPoint to make the text curve and paste it into google slides. Curving text is fun, and it also enhances the presentation and brings out what to focus on. Hope you have enjoyed the article and have learned how to curve text in google slides. If you need some more solutions, please don’t forget to check our other sections here in OfficeDemy.com


