
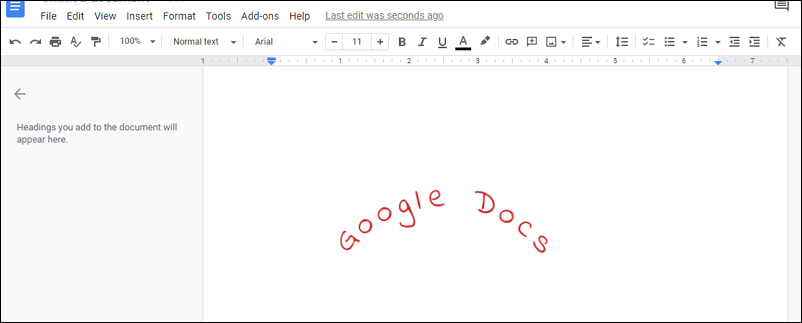
To Curve Text in Google Docs
- Use an online tool like the Free Monogram Maker to create curved text.
- Customize the text and download the image.
- In Google Docs, insert the image.
OR
- Open a Google Docs document.
- Insert a drawing and select “Curve line“.
- Create a curve and add text boxes.
- Enter text, and format, and save the drawing.
What would you do to create a document for any purpose? The answer must be the standard word processors. But think of a cost-effective word processor that enables you to create, edit, and share documents. Then, Google Docs is the solution.
Google Docs is the most alternative appealing web version of Word. With supportive features, it allows collaboration with other word processors. Not just a mere text editor, the enhancive features of Google Docs provides a real-time error-check and grammar check with suggestions. It also offers creative tools to insert an image, chart, tables, and draw. Creating a design attracts the document even more like a curved text in a logo or brochure. A must try for all writers.
What is the advantage of a curved text
Curved text visually appeals to the document an additional focus. It offers uniqueness to the content. There is no in-house tool to curve text in Google docs. But other features allow you to perform the task.
- It highlights the subject line
- It provides a sense of unity
To curve text, create an image in an online tool and insert the same to Google docs. Another way is to draw a curved line and insert text boxes on either side. The second method does not accentuate the design perfectly but that’s a try.
How to Curve Text in Google Docs
Import Curved Text in Google Docs
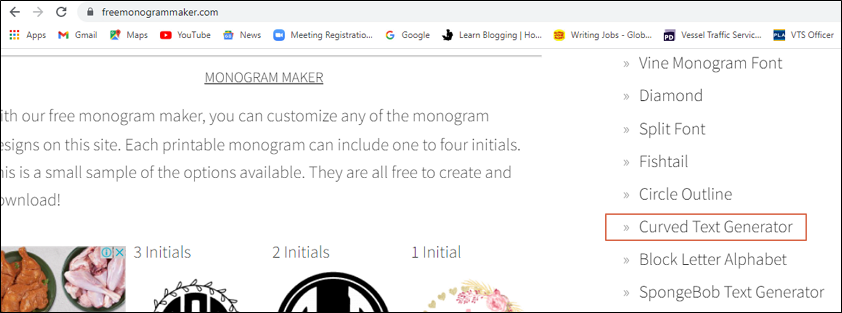
There are n numbers of online tools to create a curved text. Prefer the ones which are always comprehensible. The Free Monogram Maker is an accessible online tool.
- Go to the URL https://www.freemonogrammaker.com/. On the right side of the web page, click the Curved Text Generator link under the Fonts tab.
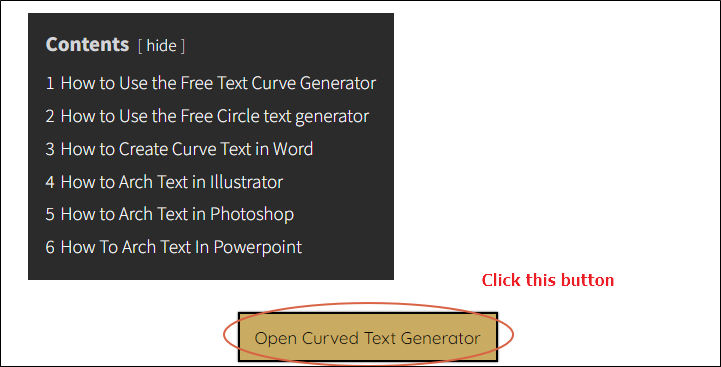
- In the Curved Text Generator page, click the Open Curved Text Generator button.
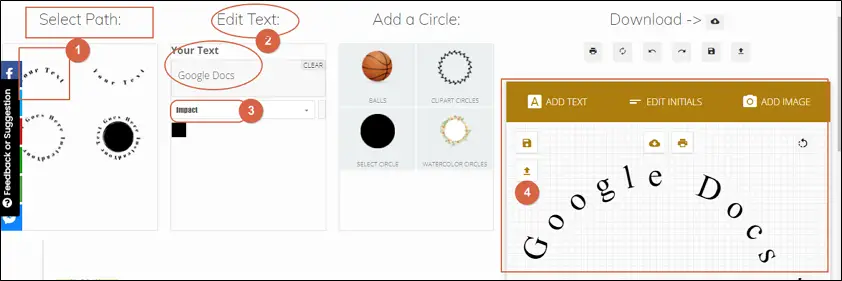
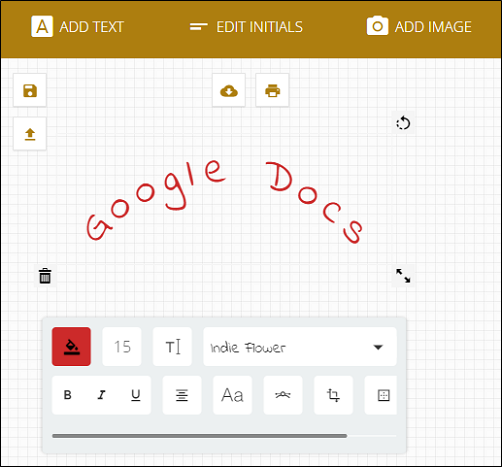
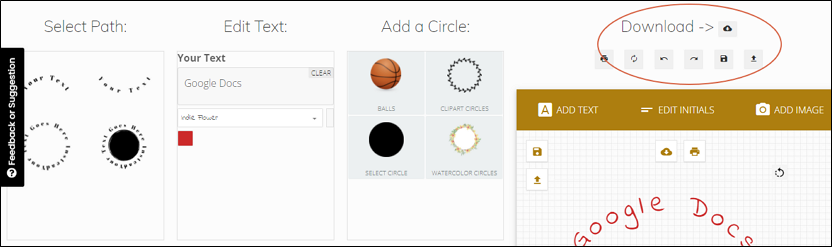
- In the Curved text page, select the path under the Select Path tab. Enter the text in Your Text box under the Edit text tab. Select the type of font from the drop-down below. The design is displayed in the box in the right lane.
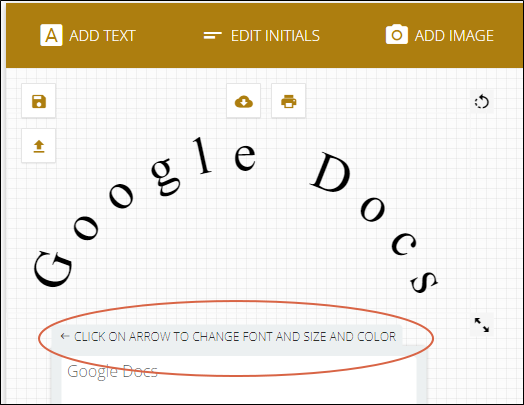
- To edit the font color, size and style, click the image. A pop up window displays. Click the arrow to format the text.
- You can transform the font size, size, position, color, background color, curve position from the formatting box.
- Click the Download icon to download the image (curved text).
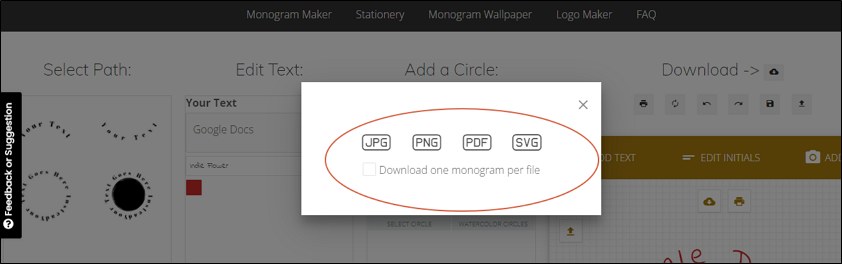
- Select the type of file to save the image.
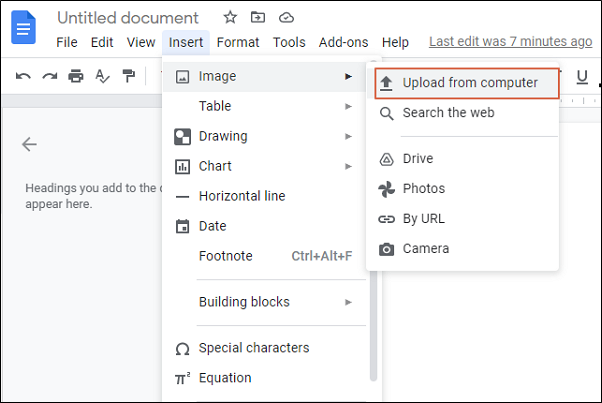
- Open the Google Docs document. Select Insert > Select Image > Upload from Computer.
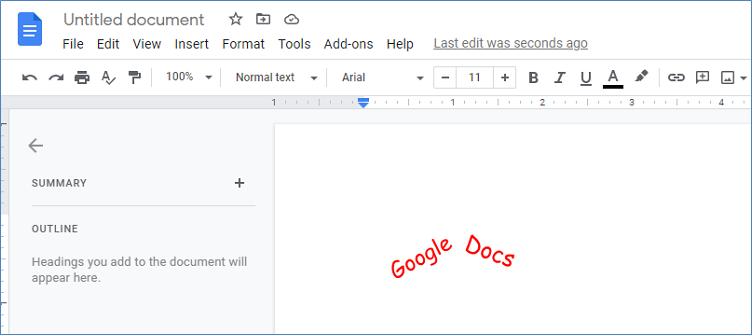
- The curved text image is now in the document. Right click the image and select Crop to crop the image to a smaller size.
Curve Text using Drawing Option in Google Docs
As said earlier, curving text directly in Google Docs does not accentuate the design perfectly. But it still feeds the need.
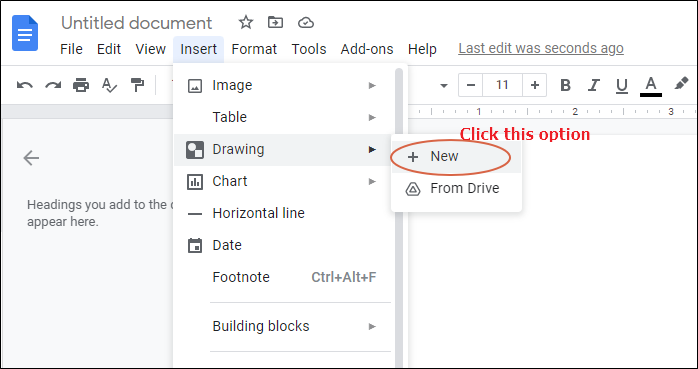
- Open a new Google Docs document. Click Insert > Click Drawing > Click New.
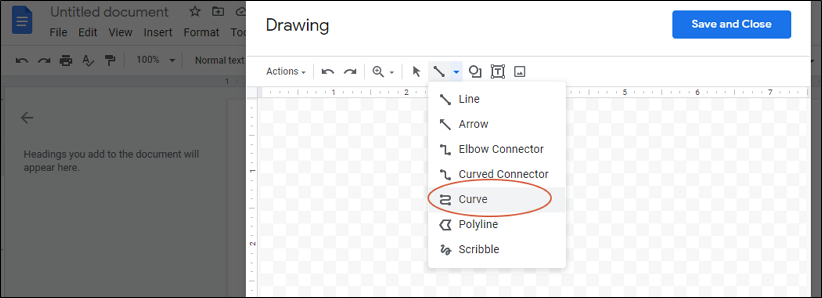
- In the Drawing page, select the Curve line option from the Line drop-down.
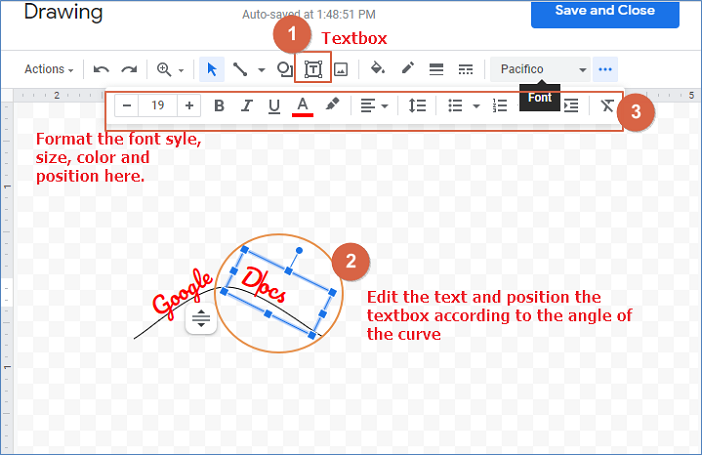
- Draw a curve inside the drawing pane. Insert a textbox on either side of the curve using the Textbox icon. Position the textbox according the angle of the curve. Right-click the text box and click Edit text to enter the text. You can edit the font style, size and color.
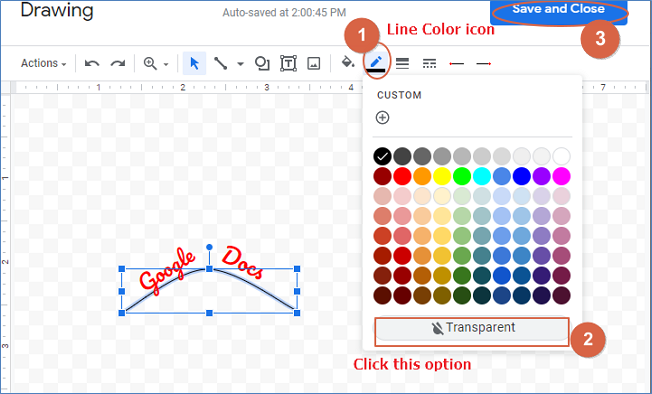
- Click the Line color icon to change the border of the curve line to transparent. Click Save and Close and the image will be added to the document.
- To add more creativity, you can include third-party add-ons and make the design more appealing.
Other online tools can help to curve text like Troygram and Mockofun. But if you are interested in creating the design yourself rather than importing an image, a Drawing tool with other add-ons in Google Docs is a good option.
Notes
- Always prefer to tools that are accessible and editable
- While inserting the picture in Google docs, crop the image before using.
- Drawing tools allows a real-time editing.
- Inserting a curved text image accentuates the design.
Frequently Asked Questions
Can I Use the Same Methods to Curve Text in Google Slides?
Yes, you can easily achieve the effect of creating curved text in google slides. By utilizing the Word Art feature, you can bend, twist, and curve text to your liking. It offers various styles and options, allowing you to customize the appearance of your text effortlessly. The process is simple, enabling you to elevate the visual impact of your presentations.
Conclusion
Well, the creative text always attracts users. So, curving text will increase the visual appeal of the document. The methods discussed above will help curve text in Google Docs. It further offers the need to curve text in a document. This article mainly focuses on the methods of ‘How to curve text in Google Docs’. Either of these methods will guide you to achieve the goal.


