
How to Delegate Access in Outlook
- In Outlook Application: Go to “File” > “Account Settings” > “Delegate Access”
- Select “Add the person“
- Click “Add” and then “Ok“.
OR
- In Outlook web: Right Click on any Folder
- Select “Sharing and Permissions” from the context menu
- Click “+” to add a new person > Click “Add”
- Grant the “Permission type” > Click “Ok“.
Hi, in this article, we will learn how to delegate access in Outlook. In today’s fast-paced work environment, effective collaboration and delegation are key to achieving productivity and efficiency.
Outlook offers a valuable feature called “Delegate Access” that allows users to delegate their email and calendar access to another person, e.g., colleagues, or boss, it helps empower them to manage tasks and appointments on their behalf. Whether you need assistance in managing your inbox or want someone to handle scheduling and meeting coordination, learning how to delegate access in Outlook can greatly streamline your workflow.
In this article, I will explain to you the step-by-step process of delegating access in Outlook, empowering you to optimize your time and productivity through effective delegation.
When we use Delegate Access in Outlook?
In today’s professional landscape, effective delegation plays a crucial role in maximizing productivity and streamlining workflow. Learning how to delegate access in Outlook can bring numerous benefits, including improved task management, enhanced collaboration, and optimized time management.
By delegating access to your email and calendar, you can entrust specific responsibilities to others, enabling them to assist with important tasks, schedule meetings, and stay organized on your behalf. Whether you need assistance in managing your inbox, staying on top of appointments, or coordinating with colleagues, mastering the art of delegating access in Outlook is a valuable skill that can significantly boost your productivity and overall effectiveness in the workplace.
So, these are some common and understandable reasons to learn how to delegate access in Outlook.
How to Delegate Access in Outlook?
In the Outlook desktop app, we have a dedicated delegate button to assign access to people for our mailbox, calendar, etc., and in the Outlook web application, we have this feature inside sharing, we can set permission levels and all that within a few clicks, so let’s earn each of them.
How to Delegate Access in Outlook – Desktop App
In this section, we will learn how to delegate access in Outlook desktop app. This method is very commonly used in organizations, where managers may need to share their mailbox, and calendar with their trusted employees to monitor any events, or important emails that might be missed by the manager himself. So, let’s learn this, and make sure no one ever misses any important mail or calendar event in Outlook.
Step 1
Open Outlook on your computer
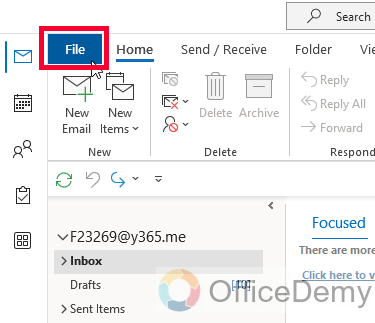
Click on the “File” tab located in the top left corner of the Outlook window.
Step 2
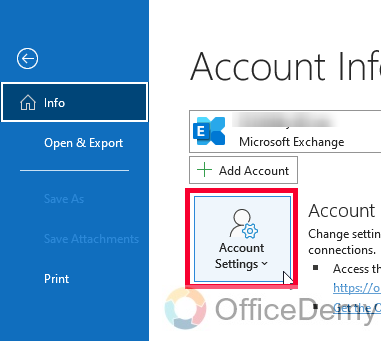
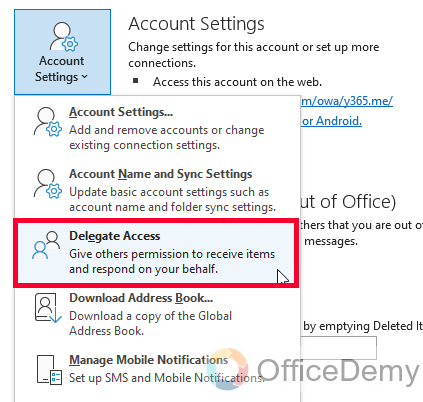
Now, click on the “Account Settings” drop-down button.
Step 3
Look for the “Delegate Access” button in the drop-down items, and click on it
Step 4
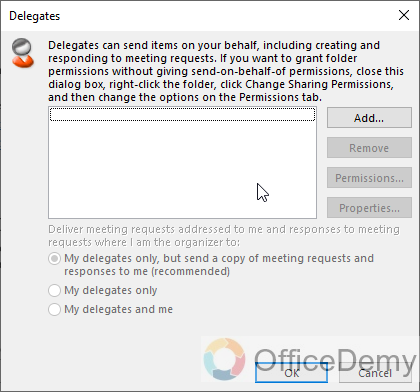
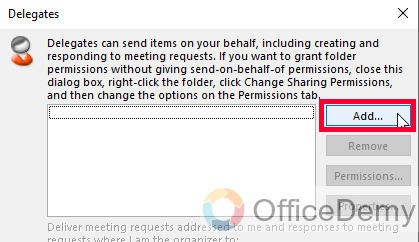
You have a new dialog box opened for “Delegates”
Step 5
Click on the “Add” button to add a new delegate
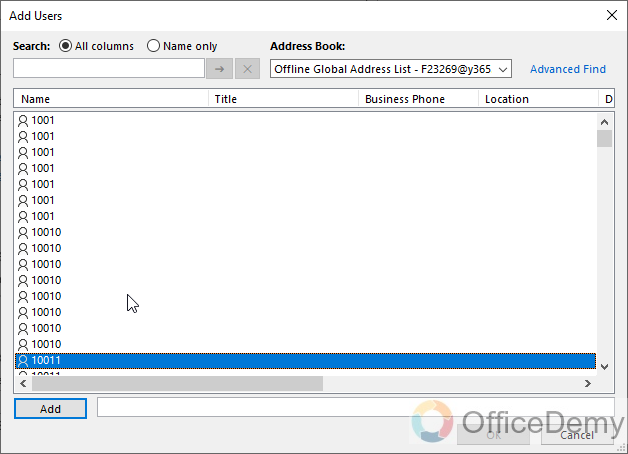
Step 6
You have your list opened for all users, and from here you can look for the user you want to delegate access to.
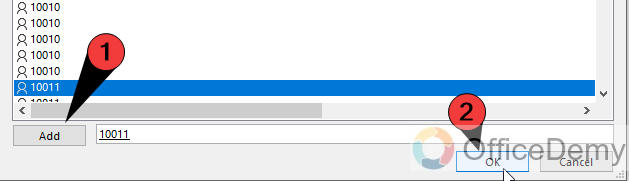
Step 7
After selecting the user to be delegated with the access, click on the Add button below, and then click on the OK button.
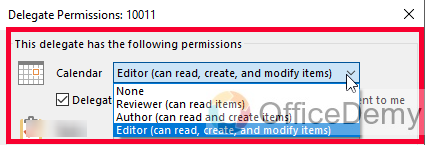
Step 8
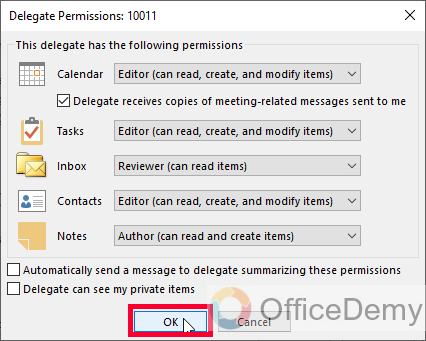
You will get a new “delegate permissions” dialog box opened, from the first “Calendar” dropdown select an option. Here you can define the role of the delegate, from editor, reviewer, or author.
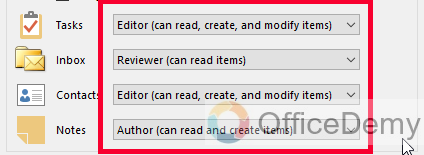
Step 9
Now similar action will be taken for the below 4 dropdowns, for tasks, inbox, contacts, and notes, you can also select “None” (which is also selected by default) to stop giving any type of access to a particular option from the above.
Step 10
After carefully selecting all the options, see the below two checkboxes.
“Automatically send a message to delegate summarizing these permissions”
“Delegate can see my private items”
These checkboxes are unchecked by default, you can set them as per your needs.

Step 11
Finally, click on the Ok button and your delegate will be added as per your settings.
This is how to delegate access in Outlook Desktop app.
How to Delegate Access in Outlook – Web Version
In this section, we will learn how to delegate access in Outlook web application, so the method is a little different. We need to locate the “Sharing and permission” feature for it, but this feature actually works like delegates as we saw in the above Outlook App section. So, let’s get started with the step-by-step guide below.
Step 1
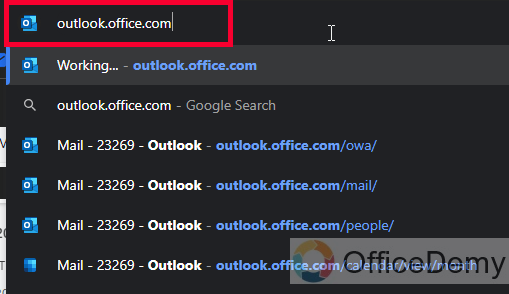
Open your web browser and go to Outlook.office.com
Step 2
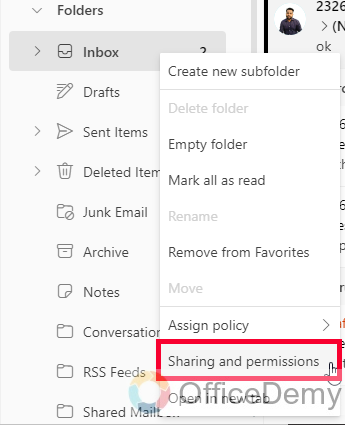
Once you’re logged in, right-click on your Inbox, and look for the option “Sharing and permissions”
Note: Method 3 is only used when you want to delegate access to your mailbox.
Step 3
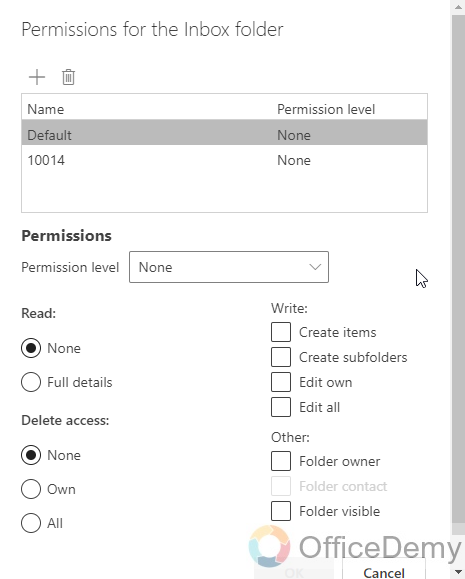
You will see a new pop-up “Permissions for the inbox folder”
Step 4
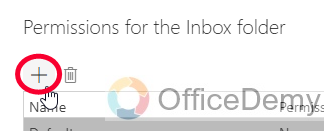
To add a delegate, click on the plus icon “+” on the top left of the pop-up dialog box.
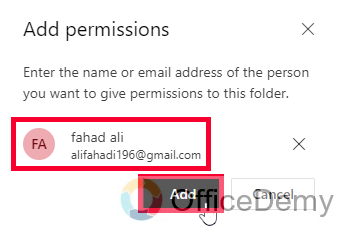
Step 5
Select a user, and click on the Add button to add this user as a delegate.
Step 6
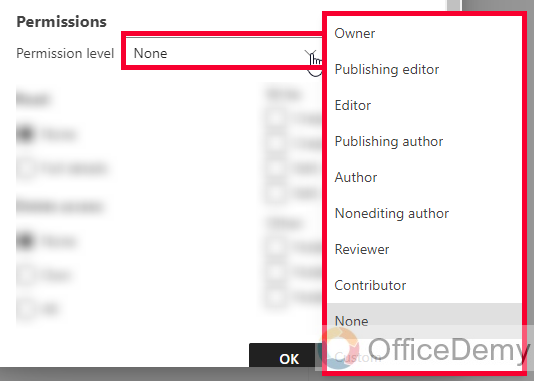
From the below “Permissions” section, click on the “Permission Level” dropdown to pick a role for this delegate.
Select a reviewer, editor, or author to give them authority.
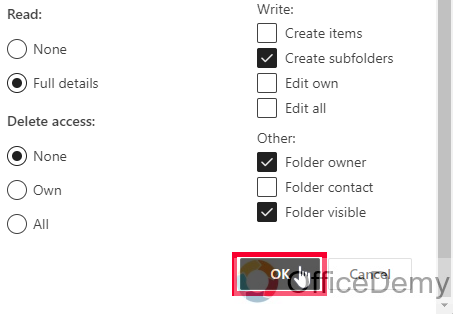
Step 7
Now finally, set the read and write permissions for the delegate, you have several checkboxes and radio buttons, you can select or unselect them to grant the permissions as you like.
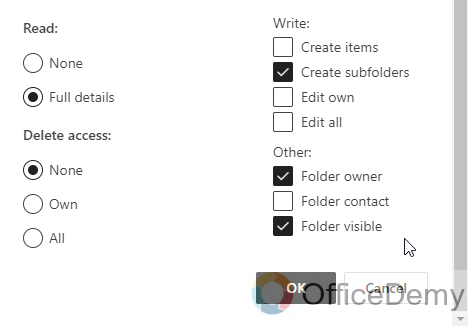
Step 8
Click on the Ok button at the bottom to save the changes.
Step 9
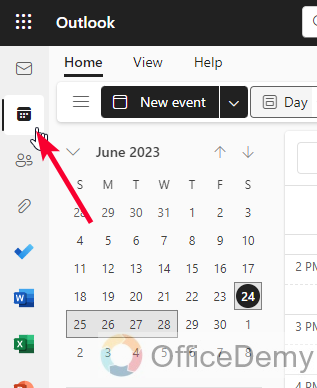
Now if you need delegate access for the calendar only, then you need to open the Calendar view first, and click on the Calendar button on the left sidebar of the main Outlook screen.
Step 10
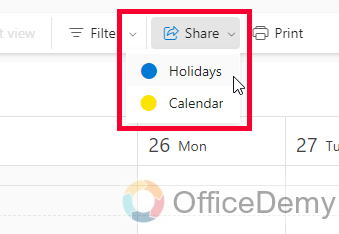
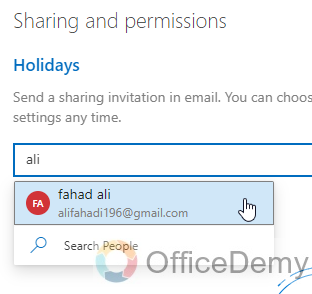
After the calendar is opened, click on the share button, and then select calendar or holidays from the list.
Step 11
In the first field, add the name of the user you want to add as a delegate.
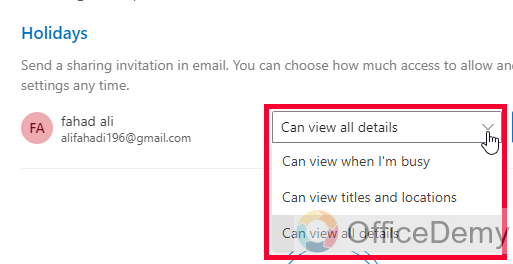
Step 12
Set permissions from the dropdowns for people inside your organization, and outside your organization (same organization means, same custom email domain)
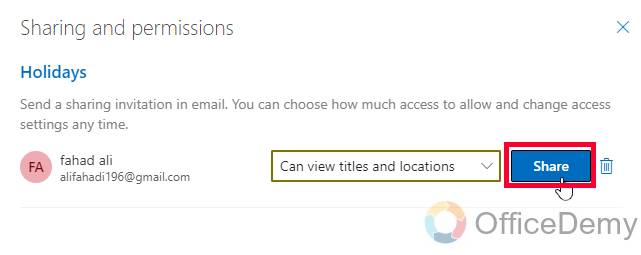
Step 13
Once done, click on the Share button to close this window, and the changes will be saved automatically.
This is how to delegate access in the Outlook web application for Outlook mailbox and calendar.
Things To Remember
- Delegating access in Outlook allows you to grant someone else permission to manage your mailbox or calendar.
- Ensure that you have the necessary permissions to delegate access in Outlook.
- Choose the appropriate level of access (e.g., Editor, Author, Reviewer) when delegating access to folders.
- Consider enabling the option for the delegate to receive copies of meeting-related messages sent to you if needed.
- Regularly review and manage your delegated access to maintain control over your mailbox and calendar.
- Communicate and coordinate with the delegate to establish clear guidelines and expectations for their responsibilities.
- Be cautious when delegating access to sensitive or confidential information.
- Keep track of any changes or actions performed by the delegate to ensure accountability and security.
Frequently Asked Questions
How to delegate access to my mailbox in Outlook?
Open Outlook and go to File > Account Settings > Delegate Access. Click Add to select the person and set the desired permissions.
How to grant someone access to my calendar in Outlook?
Navigate to File > Options > Calendar > Delegate Access. Add the person and specify the appropriate calendar permissions.
How to revoke delegated access in Outlook?
To remove delegation, go to File > Options > Calendar > Delegate Access. Select the person and click Remove.
How to view the delegated folders in Outlook?
In Outlook, go to the Folder pane, expand the mailbox, and look for the delegated folders under the delegate’s name.
How to update the permissions for a delegate in Outlook?
Access the Delegate Access settings through File > Account Settings > Delegate Access. Select the delegate, modify the permissions, and save the changes.
How to delegate access to specific folders in Outlook?
While setting up delegation, choose the option to specify folder-level permissions. Select the desired folder and assign the appropriate access rights.
Conclusion
Wrapping up how to delegate Access in Outlook. I hope you find the above guide helpful. Thanks, and keep learning with Office Demy.


